Tuesday, August 26, 2014

Blenders Hop Day 1: Burlap Hoop Art


Welcome to Day 1 of our Blenders Blog Hop here at Sew in Love with Fabric! Today Christina from Sometimes Crafter is here, sharing how she used the Burlap fabrics to create some simple hoop frame art. You can try her designs or use the idea and choose your own pictorial art. We know you'll enjoy Christina's tutorial! After you've read it through, be sure to head over to her blog to find out how you can enter to win a fat quarter bundle of Burlap for yourself.

Here's Christina:


Summer always finds me spending more time outdoors than in. August especially keeps me on my toes.  The blackberry vines and various weeds make it impossible to take even a day off from yard work.  Perhaps that is why I look forward to fall before summer is even over.  Summertime crafting is all about quick and satisfying projects, and hoop art is the perfect craft to fill my need to create.


Blender fabrics, like the Burlap line I'll be working with in this tutorial, are perfect to use on any themed project, any time of year. The color and creativity of blender fabrics takes the pressure out of pairing prints. The Burlap collection has great texture and colors and works for so many projects, as you'll see in this post.


For today's project i’ll be walking you through the steps of making this pictorial scene. You could easily make any scene you want, and are limited only by your imagination. I kept it simple, and did not complicate the scene with too many details. Simplicity is the key to this project. This is meant to be an "organic" project, so work with it as you go without rigid expectations.


For this project you will need some very simple supplies - fabric (a larger piece for your background and smaller sizes for your scene), scissors (small embroidery scissors help with smaller detail cuts), embroidery hoop (any size you like), embroidery floss and a needle with a large enough eye for the floss, and a darning (or free motion quilting) foot for your sewing machine.  I showed the Heat & Bond fusible interfacing, but this is actually optional.  For this project I did not use it, but in a later project I share, I did. You will need to make the determination as to whether you feel more comfortable using it, or would like to try it without. Other items needed, and not shown, are a sewing machine and steam iron.


Begin by placing your background fabric into your hoop.  I used a fat quarter for this,​ as well as a 7” hoop. Begin by laying the inside piece of your embroidery hoop under the fabric, being sure to leave yourself fabric on all sides. You do not want to line this up on the very edge of your fabric, as you will need the excess to finish off the piece at the end. Place the outer section of your hoop over the inner ring, on the top side of the fabric and press around the inner hoop until they are seated together. Twist the hoop screw to tighten the two pieces together. Use your scissors to cut the excess fabric from the two sides of the hoop, as shown, being sure to leave extra. Leaving about 2-3” should do the trick.  More is always better.


Next, cut out pieces from the fabrics you will be using for your scene.  Just rough cuts are needed here.  The pieces need to be easy to work with when creating your final shapes.

Note: If you will be using the Heat & Bond fusible interfacing, now would be the time to iron that onto the back of your fabric pieces.


Cut your fabric pieces from the last step into shapes for your scene.  From my green rectangle I cut a gentle curve along the top to act as a grassy hill. From the rectangles for the houses I cut smaller sizes and gave them simple triangle roofs and even got a little more detailed on the grey house, giving it an overhanging roof line. Put something interesting in the sky, a cloud or sun or even a bird or airplane. I cut all of my shapes freehand with the scissors, but you could easily draw on the back of the fabrics with a water soluble marker before cutting (or the Heat & Bond paper if you are using that). The back of the burlap blender fabric is white and easy to draw on. 
As you cut your pieces, lay them onto your hoop to make sure the scale works well with the hoop size. After everything is in place, I suggest taking a photo so you remember where everything was placed in your scene, as the pieces will be moved for sewing down in the following steps. Keep things simple at this point, don't worry about smaller details, those can be added later as you get a feel for your piece.


Set aside your fabric for the scene you are creating, and remove your hoop from the background fabric. You will notice your fabric has a crease where the hoop was tightened around it. This will aid in the placement of your fabric from the scene you just created, so don’t iron it out.


Working at your sewing machine, begin sewing down your pieces using your darning/free motion quilting foot if you have one, being sure to drop down your feed dogs on your machine. Start by stitching down the grass. Stay close to the upper edge and go from side to side. Take it slow and don't worry about evenly spaced stitches. This is not a precise stitch, and you will cringe as you sew, but you'll never notice how off it can become in spots. With practice you will become much happier with your stitching. I choose to use white thread 1) because it blends, and 2) because I was too lazy to change the thread on my machine. Using black can be a great way to outline each of the pieces, so use whatever color you are most comfortable with.​


After stitching down the grass, I began sewing down the houses, one at a time. First I sewed down the light grey house, then I slightly overlapped the dark grey on to that and stitched around all the edges and finally I added the purple house, overlapping it with the dark grey. After the houses were all sewn down, I added the cloud into the sky.

Since I was not using the fusible interfacing, I had to be sure to go slow when stitching around everything so as not to get ripples in my fabric as I sewed. No matter how hard you try, the fabric will still bubble up a little in the middle, but that will be fixed with a hot iron and a few blasts of steam later.
When I finished stitching down the grass, houses and clouds, it was still missing something, so I added a red chimney to the purple house and a tan door to the light grey house.  Now it was perfect.  Take it to your ironing board and give it a good press with lots of steam.  Be sure to press down, and not iron.


Once again, place the piece into your hoop, doing your best to line it up where it was before, leaving the same amount of excess fabric hanging out all around the piece.  After the piece is in the tightened hoop, give it a gentle tug all around the edges to really pull it tight into the hoop, and then try turning the screw just a few more times.


Now that it’s back in the hoop, we are going to finish off the piece, gathering the back side for a finished​ look, as well as a piece that will lay flat on the wall. Cut around the excess fabric, rounding off any square corners. Be sure you still have a few inches left around the piece. You only want to round off any square corners.


Cut a long piece of embroidery floss, enough that it will go all the way around your hoop plus a few inches.  Thread your needle with the floss (I used all the strands) and place a knot at one end.  Working from the backside of your hoop, insert your needle into the fabric so the knot will be facing you, but hidden inside the hoop when done.


Stitch all around the piece with a long basting stitch​ until you are back at the beginning.  Create one or two stitches more beyond the starting knot.


Pull your thread tight until the piece gathers in on itself.  Keep it as tight as you can and secure it with another knot. I generally find it easiest to just make a few securing stitches in the fabric and then I knot it for extra security, making sure the knot is on the inside of the gathering so it’s not seen from the back of the piece. Clip away your excess thread.​


Flipping the piece over,​ so the front is facing up, gently push the outer hoop down a bit so the fabric piece is raised slightly above.  Not only does it give the piece a nice, finished look, it pulls it just a little tighter within the hoop, and it helps it to lay flat against the wall when hung as it recesses the gathered fabric inside of that outer hoop just a bit.  


And that’s it!  Pretty simple, right?  I made this and several more hoop projects in one day.  They go together quickly and satisfy my need for a little creativity with not much time.  They are great for decorating a space, as well as giving as gifts.  Especially with the holidays just around the corner, there are so many projects you could make with hoops,​ in just this fashion​,​ to compliment your holiday decor.  


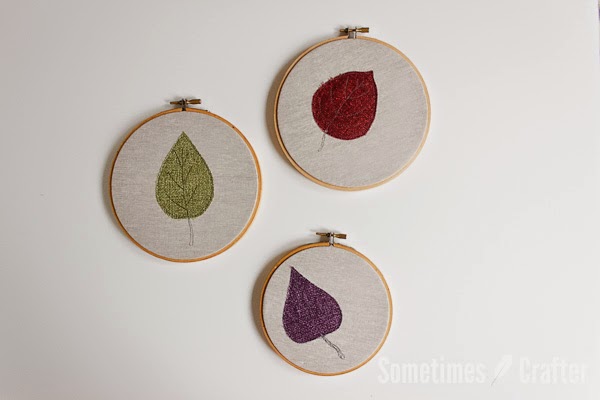
With fall on the way, I made a nice grouping of leaves to hang on the walls in my living room.  I love to decorate for fall and Halloween, and especially love to incorporate handmade items.  I cut these leaves from a rectangle folded in half, starting with a large curve at the bottom and working up to a point at the top.  Once unfolded I had unique leaves from each of the fabrics.  


For these I didn't want the thread to blend, so I switched out to a darker color and stitched around the leaves as well as gave them veins and stems.  I kept them pretty simple, but they would be equally as nice with a little swirlie wind stitched in there, or a beautiful fall saying.  

For awhile I've had the idea of a little potted cactus appliqued in a hoop, and decided this was a perfect time to make it.  The burlap blender fabrics were perfect for such a tiny piece.  This hoop measures 4”, so as you can imagine those pieces are very tiny.  For this project I went ahead and used the Heat & Bond.  I could not have stitched over these without them moving had I not adhered them in place first.  Not only did I outline stitch around each of the cacti, but I also gave them little pokie spikes, just like you'd see on a real 
cactus.  

I had a great time working with the Burlap blender fabrics.  The Burlap collection not only offers a great textural element to my projects, but they are so soft to the touch.  There are so many projects i'm looking forward to making with them!

Thanks Christina!

Be sure to head over to Christina's blog to find out how you can enter to win a fat quarter bundle of Burlap prints. And stop back here every day this week for a new tutorial featuring our Blenders fabrics!

Blenders Blog Hop:
Tuesday 8/26: Christina from Sometimes Crafter featuring Burlap
Wednesday 8/27Caila from Caila Made featuring Burlap
Thursday 8/28: Benartex Blog Design Team featuring Blush
Friday 8/29: Nikki from The Girl Who Quilts featuring Fleurish

Love It? Share It! Facebook Twitter Google Pinterest Email

Monday, August 25, 2014

Blender Blog Hop!


Welcome to our Blender Blog Hop Week!


We've got four fantastic tutorials lined up showcasing a few of our blender collections--tonals with rich texture in a huge variety of colors. We'll be showing you projects made just with these lines, but they're also ideal for mixing and matching with any of our fabric collections; with so many colors to choose from, you're sure to find just the right hue for your next project!

First, here's a sneak peek at the three blender fabric collections you'll see featured this week:


Blush
A hint of texture creates depth and interest not found in traditional solids
See all the colors (55!) from the Blush collection here.


Burlap
The look of actual woven burlap, but with a soft, cottony feel
See all the colors from the Burlap collection here.


Fleurish
Painterly streaks create a striped look in bold colors
See all the colors from Kanvas' Fleurish collection here.
And here's the schedule for the week:
Tuesday 8/26: Christina from Sometimes Crafter featuring Burlap
Wednesday 8/27: Caila from Caila Made featuring Burlap
Thursday 8/28: Benartex Blog Design Team featuring Blush
Friday 8/29: Nikki from The Girl Who Quilts featuring Fleurish

Be sure to by the blog every day this week to see a new tutorial and have a chance to win a blender bundle of your own!


Love It? Share It! Facebook Twitter Google Pinterest Email

Friday, August 22, 2014

Smudgy Cat and the Road to 1 Million

Hello, and welcome to one of many stops on American Patchwork & Quilting's 1 Million Pillowcase Challenge Blog Hop. As a sponsor of the Challenge, we're thrilled to be sharing a pillowcase made from Kanvas' Smudgy Cat collection, which we'll be donating to The Ronald McDonald House New York. We love the 1 Million Pillowcase concept--they're quick, easy and fun to make, and such a simple way to make a difference in someone's life. We're happy to help AP&Q in its quest to hit 1 million--will you help too?


We used three prints from the Smudgy Cat line along with the Rickrack Band pattern, #21 out of the 43 (!) free pillowcase patterns available on the All People Quilt website. We loved the overall cat print for the main pillow, and the two paw print fabrics provided great contrast for a wavy edge cuff. We think these friendly kitties will warm the heart of whoever receives the pillowcase--who couldn't help but smile at these cuties?!

Here's our pillowcase with a coordinating throw print made from the collection's panel--equally cozy and welcoming, we think!


And a quick peek at a few other fabrics in the collection (see them all here, and they also come in flannel!):
(psst...you'll also find a free quilt pattern using these fun felines!)
Plus the pink colorway:

Be sure to check out the other pillowcases in this hop made using Benartex fabric:

And then keep hopping! Visit all of the blogs below to see the various pillowcases that were stitched just for this blog hop, helping in the push to donate 1,000,000 cases.


·    Alison Glass (http://alisonglass.com/blog)
·    American Patchwork & Quilting (www.allpeoplequilt.com/blog)
·    Barb and Mary of Me and My Sister Designs (http://www.meandmysisterdesigns.com/blog/)
·    The Benartex Design Team: Sew in Love with Fabric (http://www.sewinlovewithfabric.blogspot.com) (YOU'RE HERE!)
·    Edyta Sitar of Laundry Basket Quilts (http://www.laundrybasketquilts.net/blog/)
·    Heidi Pridemore (http://heidipridemore.blogspot.com)
·    How To Sew (www.howtosew.com)
·    Jennifer Paganelli of Sis Boom (http://www.sisboom.com/blog/)
·    Joanna Figueroa of Fig Tree Quilts (http://figtreequilts.typepad.com/my_weblog/)
·    Karrie Winters of Freckled Whimsy (http://www.freckledwhimsy.com/)
·    Kelle Boyd of Ann Kelle (http://www.annkelle.com/category/blog/)
·    Linda Carlson (www.lindacarlsonquilts.com)
·    Modern Quilt Studio (http://craftnectar.com/)
·    Nicole Daksiewicz of Modern Handcraft (http://modernhandcraft.com/)
·    Northcott: Patti’s Patchwork (www.pattispatchwork.com)
·    Shannon Fabrics: My Cuddle Corner (http://shannonfabrics.com/blog/index/)
·    Tammy Silvers (http://www.tamarinis.typepad.com)
·    Timeless Treasures: Sew Timeless (http://www.ttfabrics.com/blog/)
·    Valori Wells (http://www.valoriwells.com/blog/)
·    Verna Mosquera of The Vintage Spool (http://freespiritfabric.blogspot.com/)
·    Wendy Sheppard of Ivory Spring (http://ivoryspring.wordpress.com/)


Have you made a pillowcase for the Challenge yet? You can find more details and patterns here, as well as information about the 24-Hour Sew-a-thon, scheduled for September 19th and 20th, 2014. Imagine how many pillowcases can be made in 24 hours?! 


Love It? Share It! Facebook Twitter Google Pinterest Email

Wednesday, August 20, 2014

Spinning yarns

You sometimes hear quilters refer to panels as "cheater cloth" because it creates the look of patchwork without all the work--the details are simply printed! Do knitters and crocheters have a yarn version of cheater cloth? If so, we like to think it looks something like this cool print:


If you were a fan of our Knitty Kitty collection, you'll be thrilled to know that 
In Stitches from Kanvas is now available.

The look of knitting, perfect for sewing fits for needleworks of all types, without all those directions...purl one, purl two... Ideal for those of us who prefer to do their fiber work with sewing machine and thread rather than knitting needles. 

Make sure to check out Debby Kratovil's Technique Tuesday post featuring Knitty Kitty--you'll love her creative ideas for some fun projects using a yarn-themed collection!

Get a better look at the In Stitches collection from Kanvas here.

Love It? Share It! Facebook Twitter Google Pinterest Email

Tuesday, August 19, 2014

Back to School!

Parents all over are celebrating...it's back to school time for kids! Get in the spirit for the new school year with Kanvas' Head of the Class collection. 


Here are a few of our favorites:

 A different take on text prints!


School supplies--great for borders or bags!

Whether it's to make a fun pencil tote or lunch bag for a school age child, a welcome-back-to-school gift for a new teacher, or to get an impressive head start on teacher gifts for the end of the year (yes, buying the fabric counts as a head start--then you still have 9 more months to actually get sewing!), you'll love the fun prints from Head of the Class!

Get a closer look at the Head of the Class collection here.
Love It? Share It! Facebook Twitter Google Pinterest Email

Thursday, August 14, 2014

Home dec at its best: Burlap and Lace

So many of the soothing, zen-centering rooms you see in home decorating magazines these days feature a muted palette--creams, beiges, chocolate browns, and a little soft French blue thrown in for good measure, or maybe a more monochromatic cream paired with charcoal and deep black. It's like the interior designers read our minds (or maybe we read theirs?!). 

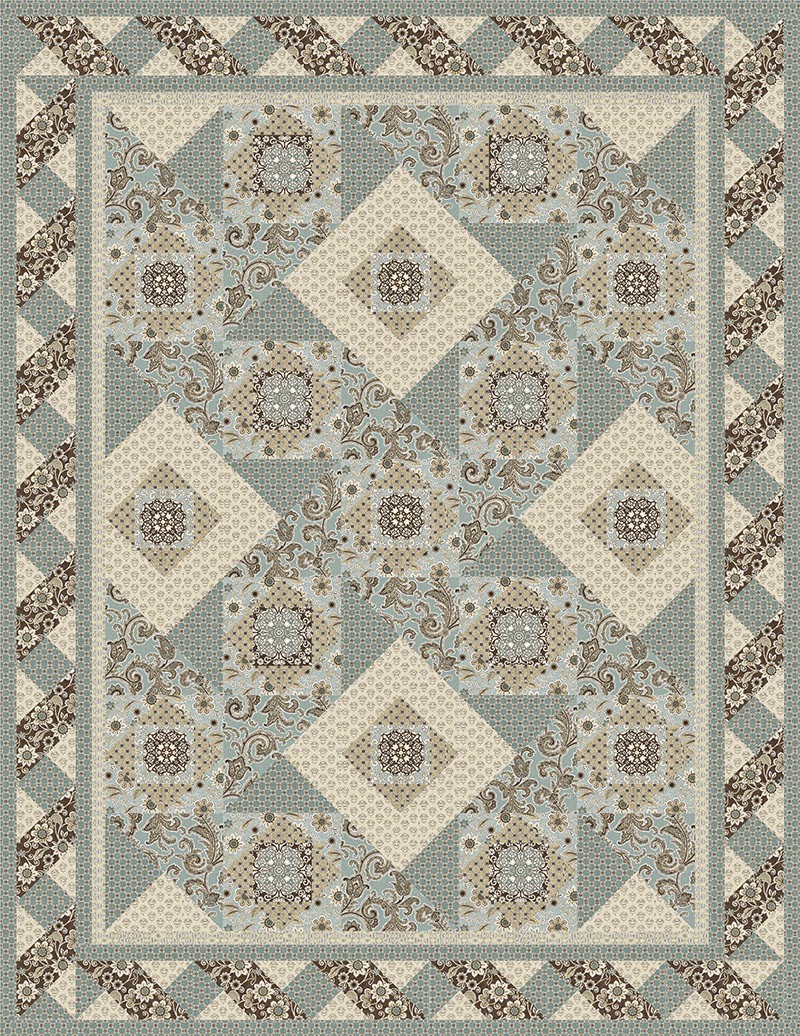
Our new Burlap and Lace collection is based on just such a palette--subtle hues rich with texture and pattern. Perfect for creating a haven in your home. What makes these prints truly extra special (and you'll likely have to click on them to enlarge to appreciate it, at least until you see them in person at your local quilt shop), is these have the apparent texture of burlap without the scratchiness--these are our usual soft cottons! This added layer of texture enhances the richness of the prints, which are then layered with lace, flower motifs, and other interesting patterns. 


The collection also includes incredibly detailed pre-printed blocks in both colorways:

And a stripe that combines the best parts of the coordinating prints!

Where to start? As always, we've got you covered. 
First, head to our website and see larger versions of all of these swatches. 
Then, click here to find Tailormade by Design's Laced Up quilt pattern, available as a free download. 

What will you make with Burlap and Lace? Let us know!

Love It? Share It! Facebook Twitter Google Pinterest Email

Tuesday, August 12, 2014

Technique Tuesday with Debby Kratovil (and Wild West Saloon!)

It's Tuesday and that means it's time to learn a new technique. OK, maybe not to all of you, but Debby Kratovil is our guest today and she shares some tried and true methods for raw edge applique using our new collection called Wild West Saloon by Maria Kalinowski for Kanvas.

Wild West Saloon Fabrics

Q: Debby, tell us why you chose this collection?
A: Well, I'm married to a Texan. Is that enough of an answer? While he isn't into guns or poker (well, sometimes he can be enticed to play with the guys), he loves those boots. Hey, where is the picture of the boots?
These boots were made for walking . . .
When I showed the collection to Phil, it was a no brainer. He said, "OK. Where's my quilt?"

Q: What did you decide to make?
A: I recalled two applique blocks I had designed for a pattern several years ago and realized that this fabric would be perfect to replicate them. I even have them available for our visitors to the Sew in Love with Fabric blog. Keep reading (but first, look at the pictures!)

Q: Show us the blocks, please!
A: First I pulled up my Cactus Block. (Note: this is not the true size for the applique; that comes later.)
Keep your distance! I've got pricklies!
Then I pulled up my Boot Block.
No spurs on this one!
Now it's time to show you the steps!

Cactus template
Step 1. Transfer template markings to the paper side of freezer paper. No need to reverse because I always place my freezer paper templates to the right side of the fabric and NOT the fusible web side.

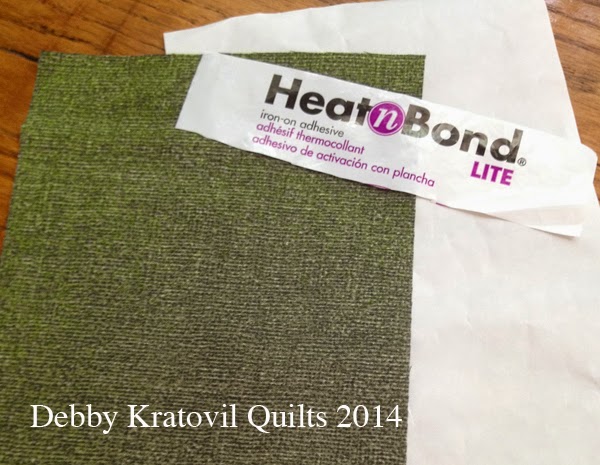
Step 2. Rough cut a rectangle of fabric (I used the green from the Burlap Collection) and iron a rectangle of Heat 'n Bond Lite to the wrong side of the fabric. Now there are 3 layers.


Here are four colors from the Burlap Collection (the color "Leaf" green is at the bottom). (I was also auditioning background fabrics and this dotted one is from an earlier Benartex fabric line called Normandy.)


Step 3. Cut out the cactus!

Now I can reuse the Cactus template of freezer paper (on the right here)
Step 4. Center the Cactus over a 12-1/2" background square and fuse in place with an iron.


Step 5. Time to stitch. It's hard to see the stitching from the front, that's why I am showing the wrong side. Notice the tiny zig zag machine stitches.


Step 6. Now for the boot. I used the Burlap "Nutmeg" color for that. Drew the boot, rough cut the freezer paper and then ironed it onto the fabric with Heat 'n Bond Lite on the wrong side. Notice I've included the placement for the extra patches. More on that later.

Boot template
Step 7. Cut out the boot details.

Using the "Clay" colored fabric from the Burlap Collection
Step 8. How do I align those detailed patches to the boot shape? Well, check this out!
Turn the freezer paper template over and use the placement lines to line up the shapes. You may have to hold this up to the light. Gently lower the freezer paper template and shape down onto the boot and do a little sneaky-peeky to check and see if it's "close enough for government work" and then hit it with an iron. Repeat for remaining Patch B.


Step 9. Cut out the black boot details and fuse in place. Now we're ready for applique! But first I had to dig through my mounds of thread to find something that would work. I was in luck!

Auditioning thread
Here is the boot already appliqued. I found a beige background print, again from an earlier Benartex Collection (Winter Traditions).

Appliqued boot
Step 10. Make some alternate blocks. I used the Burlap Blenders again and selected two main prints: Poker and Boots, a good combo for a cowboy.

Boots are AWESOME
Centers are cut 8-1/2" squares. The side strips are 2-1/2" x 8-1/2" and the top/bottom strips are cut 2-1/2" x 12-1/2". Easy.

Sure to be a winning hand!
Q: So, what does it look like all together?

A: I only have 6 blocks finished and my husband's armadillo insisted on getting in the photo!

6 blocks + an armadillo

 I have an assembly diagram for the larger quilt that I'm aiming for, along with the full size templates that our visitors can have. Yardages are on your own. Bookmark this page for the Alternate Blocks information.


But here is a digital layout of how my pattern goes together. It is contained in the 3 page pdf (link below). 

Best of the West pattern made with the Wild West Saloon Collection is HERE: Western Saloon Pattern.


Thanks, Debby, for walking us through your applique techniques! 
And don't forget to check out the entire Wild West Saloon collection here--perfect for any cowpokes (or wannabee cowpokes) in your life!

Love It? Share It! Facebook Twitter Google Pinterest Email