Showing posts with label Fleurish. Show all posts

Monday, September 25, 2017

A new issue of Modern by the Yard!

Hello, modern quilters (and all quilt lovers)! Today we're proud to introduce the latest issue of our modern e-zine, Modern by the Yard.

How does it work? 
Easy! Just click on the button below, and you'll be taken to the e-zine. Once there, you can use your mouse to "turn" the pages and read the entire magazine. You can also save the pdf to your computer and print pages for future reference. We hope you enjoy the issue!


Here's a little sneak peek to entice you: 

The cover

Projects: 
by Sandra Walker; featuring the Bree collection by Nancy Halvorsen
by Sarah Goer; featuring the Fleurish collection from Kanvas

by Amy Friend; featuring her Improv collection


by Lisa Swenson Ruble; featuring the All's Wool that Ends Wool collection


Debby Kratovil's Modern with a Twist column:

The issue also includes a profile on modern designer Amy Friend, a fabric gallery, a free project gallery, and more! Check it out!
Love It? Share It! Facebook Twitter Google Pinterest Email

Wednesday, November 18, 2015

Sew Easy...to love these fabrics!

As quilters, how often do you see the phrase "Sew Easy"? It's an appealing promise when it refers to a project--we all like an easy quilt once in a while, right?! Maria Kalinowski's Sew Easy fabric collection is simple to love. Buttons, pins, thread and needle, spools...everything a quilter could ever want! The black and white and bright palette adds to the fun of these prints, perfect for a sewing room project!


Pair the Sew Easy prints with bold Fleurish colors for this sewing-themed lap quilt, "In Stitches" by Stephanie Sheridan and Linda Leathersich of Stitched Together Studios.
Click here to download the free quilt pattern. 

Click here to see the Sew Easy collection.

Click here to find the free quilt pattern. 
Love It? Share It! Facebook Twitter Google Pinterest Email

Tuesday, September 15, 2015

Forever Butterflies

Forever Butterflies by Maria Kalinowski for Kanvas...
These realistic-looking beauties catch your eye, no matter what color background you like. And the metallic gold touches add just the right amount of glittering detail to create a truly special collection. 
Don't forget the bookbinder prints--their marble-like appearance add texture and depth next to the butterfly prints.

 Pair Forever Butterflies with some of our basics to create a fabric bundle with both graphic punch and resting places for the eyes. Our suggestions: 

Some neutral coordinates from Maria's Fleurish collection:


 And some brighter tonal coordinates from Contempo's Color Weave collection:


Click here to see the entire Forever Butterflies collection.
Click here to see the entire Fleurish collection.
Click here to see the entire Color Weave collection.
Love It? Share It! Facebook Twitter Google Pinterest Email

Wednesday, October 1, 2014

Feels Like Fall Blog Hop: Day 1

Hello, October! We're in an autumn state of mind here today as we begin the Feels Like Fall blog hop! Today Kelly from My Quilt Infatuation is sharing her leaf quilt, glowing with maple leaves in warm hues. Kelly paired prints from the Harvest Song collection with Fleurish stripes to make this quilt. Enjoy her tutorial and then find out at the bottom of the post how you can win a bundle of Harvest Song prints!


Hey there!  I'm Kelly, and I blog regularly at My Quilt Infatuation.  If you're anything like me, you can't wait for the hot, muggy days of summer to give way to the crisp, cool weather of autumn.  Fall is my very favorite season.  I love fall weather, the sweaters and boots I get to wear, goodies made with apples and pumpkins, and most of all, the gorgeous colors found everywhere in nature.

Those beautiful colors served as the inspiration for this table topper (or wall hanging) made with scattered maple leaf blocks.


For this project, I used a mix of the Fleurish and Harvest Song fabric lines from Benartex.  They have a beautifully textured look that are just perfect for these leaves.  I really like the warm colors of both lines, but I absolutely adore the streaked look of the Fleurish fabrics.  It gives the leaves so much depth.


This project made from a mix of 12 inch maple leaf blocks, 6 inch maple leaf blocks, and 6 inch "blank" blocks, which help create the random, scattered look.

Fabric Requirements-

6 assorted fat quarters or quarter yards:
     from Fleurish- Marigold, Orange, Red, Yellow
     from Harvest Song- Weathered Wood Russet, Weathered Wood Green

3/4 yard background fabric:
     I used Weathered Wood Natural from the Harvest Song line

1 1/4 yard backing fabric, or a pieced backing measuring 40 inches square

1/3 yard binding fabricor use scraps from your six prints for a fun, scrappy binding! (you'll have plenty)

You will be making one 12 inch (finished) maple leaf block, and one six inch (finished) maple leaf block from each print.  

So, from each print cut-
(4) 4.5" squares
(1) 7" square
(4) 2.5" square
(1) 4" square

From your background fabric, cut-
(6) 6.5" squares (set these aside- these are the "blank" blocks)
(6) 7" squares
(18) 4" squares
(6) 4.5" squares
(6) 2.5" squares
(12) 2" squares
*(1) 2.5" x 25" strip, if you choose to make a scrappy binding

Begin by making all of the HST's for your 12 inch maple leaf blocks using the four at a time method.  I find that making all of the HST's for the blocks is much faster than doing them one block at a time, and I'm all for anything that saves time!

Pair a 7" background square with a 7" print square.  Sew 1/4 inch seam all the way around the block-yes, sew it closed!  Cut diagonally in each direction to reveal four half square triangles!  Press carefully and trim to 4.5" if necessary.  Repeat this process with the remaining 7" print squares to make all of your HST's. (Note: These HST's have bias edges so be aware of stretching!)


Once you get these HST's finished, next we need to make the stem pieces for each maple leaf.   To make these, we will be sewing corner to corner.  I know there are other ways to make these, but to me this is the easiest and most accurate way.

Align one 4" background square with the corner of one 4.5" print square and sew corner to corner.  You may choose to draw a diagonal line as a guide, or just use a piece of painter's tape on your machine/table to keep everything straight.


Trim away the excess to 1/4" and repeat by aligning another 4" background square with the opposite corner.  Trim again, open it up, and voila!  A cute little maple leaf stem!  I always press mine when I finish all of them, so don't mind the un-pressed photo!


Now that you have all of the components for the 12" blocks made, it's time to assemble the blocks!  Just arrange them into the maple leaf shape and sew together as you would a regular nine patch.


Repeat to make all six of your 12" maple leaf blocks.  Then it's time to move onto the six inch blocks!  The process is exactly the same of course, but the pieces are just smaller!  To make the HST's pair the remaining 4" background squares with the remaining 4 inch print squares.  Sew around, cut diagonally, press open, and trim your HST's to 2.5 inches if necessary.

To make the small stem pieces, align 2" background squares with the corner of one 2.5" print square. Sew corner to corner with the same method above.  Assemble the six inch blocks in the same manner as the 12 inch blocks.

You should have one six inch, and one 12 inch block from each of your prints.


Now onto the fun part- laying out the blocks!  There are tons of different ways to arrange these blocks, and it's so much fun playing with the direction of the leaves and color layout.  There is no wrong way!  Don't forget your "blanks."  You'll need those to fill your quilt out, and to create some great negative space between those leaves.

The really neat part about this quilt, is that there aren't regular rows of leaves, and you can have fun arranging the direction of the leaves to create different looks!


Just lay your blocks and "blanks" out however you choose and sew them together in sections.  My quilt is put together in five different sections.  Sew the sections together, and you've got an awesomely modern Scattered Maple Leaves quilt!


For the backing, I chose to piece some wide stripes of some of the fabrics from the Harvest Song line, including these two cute leaf prints, and of course I can't resist a scrappy binding!


Scattered Maple Leaves measures 36" square, so it's the perfect size to spruce up a fall table, or to hang on the wall!


Here in Tennessee it isn't quite feeling like fall yet, but this project is certainly making me do some wishful thinking!  I hope you enjoyed this tutorial as much as I enjoyed creating it!  I hope you'll pop on over and visit me at my blog home, My Quilt Infatuation to check out some of my other quilty projects!


Thanks Kelly! Gorgeous quilt! Head over to Kelly's blog and enter to win a fat quarter bundle of Harvest Song so you can get in the fall spirit! 

Be sure to check out the tutorials and enter the giveaways each day!
Day 1: Kelly from My Quilt Infatuation featuring the Harvest Song collection
Day 2Christina from Sometimes Crafter featuring the Spooktacular collection
Day 3: Melissa from My Fabric Relish featuring the Daily Zen collection
Day 4: Benartex blog design team featuring the Fall Festival collection
Day 5: Debby from Debby Kratovil Quilts featuring the Spooktacular collection
Day 6: Erin from Why Not Sew featuring the Indian Summer

Love It? Share It! Facebook Twitter Google Pinterest Email

Friday, August 29, 2014

Blenders Blog Hop Day 4: Fleurish Subway Tile Pillow

Welcome back to the last day of our Blenders Blog Hop. We hope you've enjoyed seeing our blender lines--Burlap, Blush, and Fleurish, specifically--showcased in fun and easy tutorials! These blenders work beautifully on their own, as you've seen this week, and they also coordinate nicely with your favorite prints. Today, Nikki from The Girl Who Quilts is sharing her subway tile design pillow using the Fleurish collection from Kanvas. After scrolling through her tutorial, head over to her blog to see how you can enter for a chance to win a fat quarter bundle of Fleurish for yourself.

Hi! I'm Nikki from The Girl Who Quilts! I have a fun tutorial using the Fleurish blenders to create a pillow based on subway tile. The blocks could also be sewn up to create a great quilt! So, let's get started!

Tile Pillow Tutorial for Benartex

Supplies:
1/8 yd of 5 different fabrics
1 fat quarter for pillow back
14" zipper
16" pillow form*

Optional:
2 - 18" square batting pieces
1/2 yard lining

*This tutorial actually makes a 14 1/2" x 14 1/2" finished pillow. I used an older 16" pillow form that had lost its shape. The pillow form no longer filled a 16" x 16" cover, but works great for this project! Another option is to buy a less expensive pillow form, they typically aren't as full as the higher priced ones.

Cutting instructions:
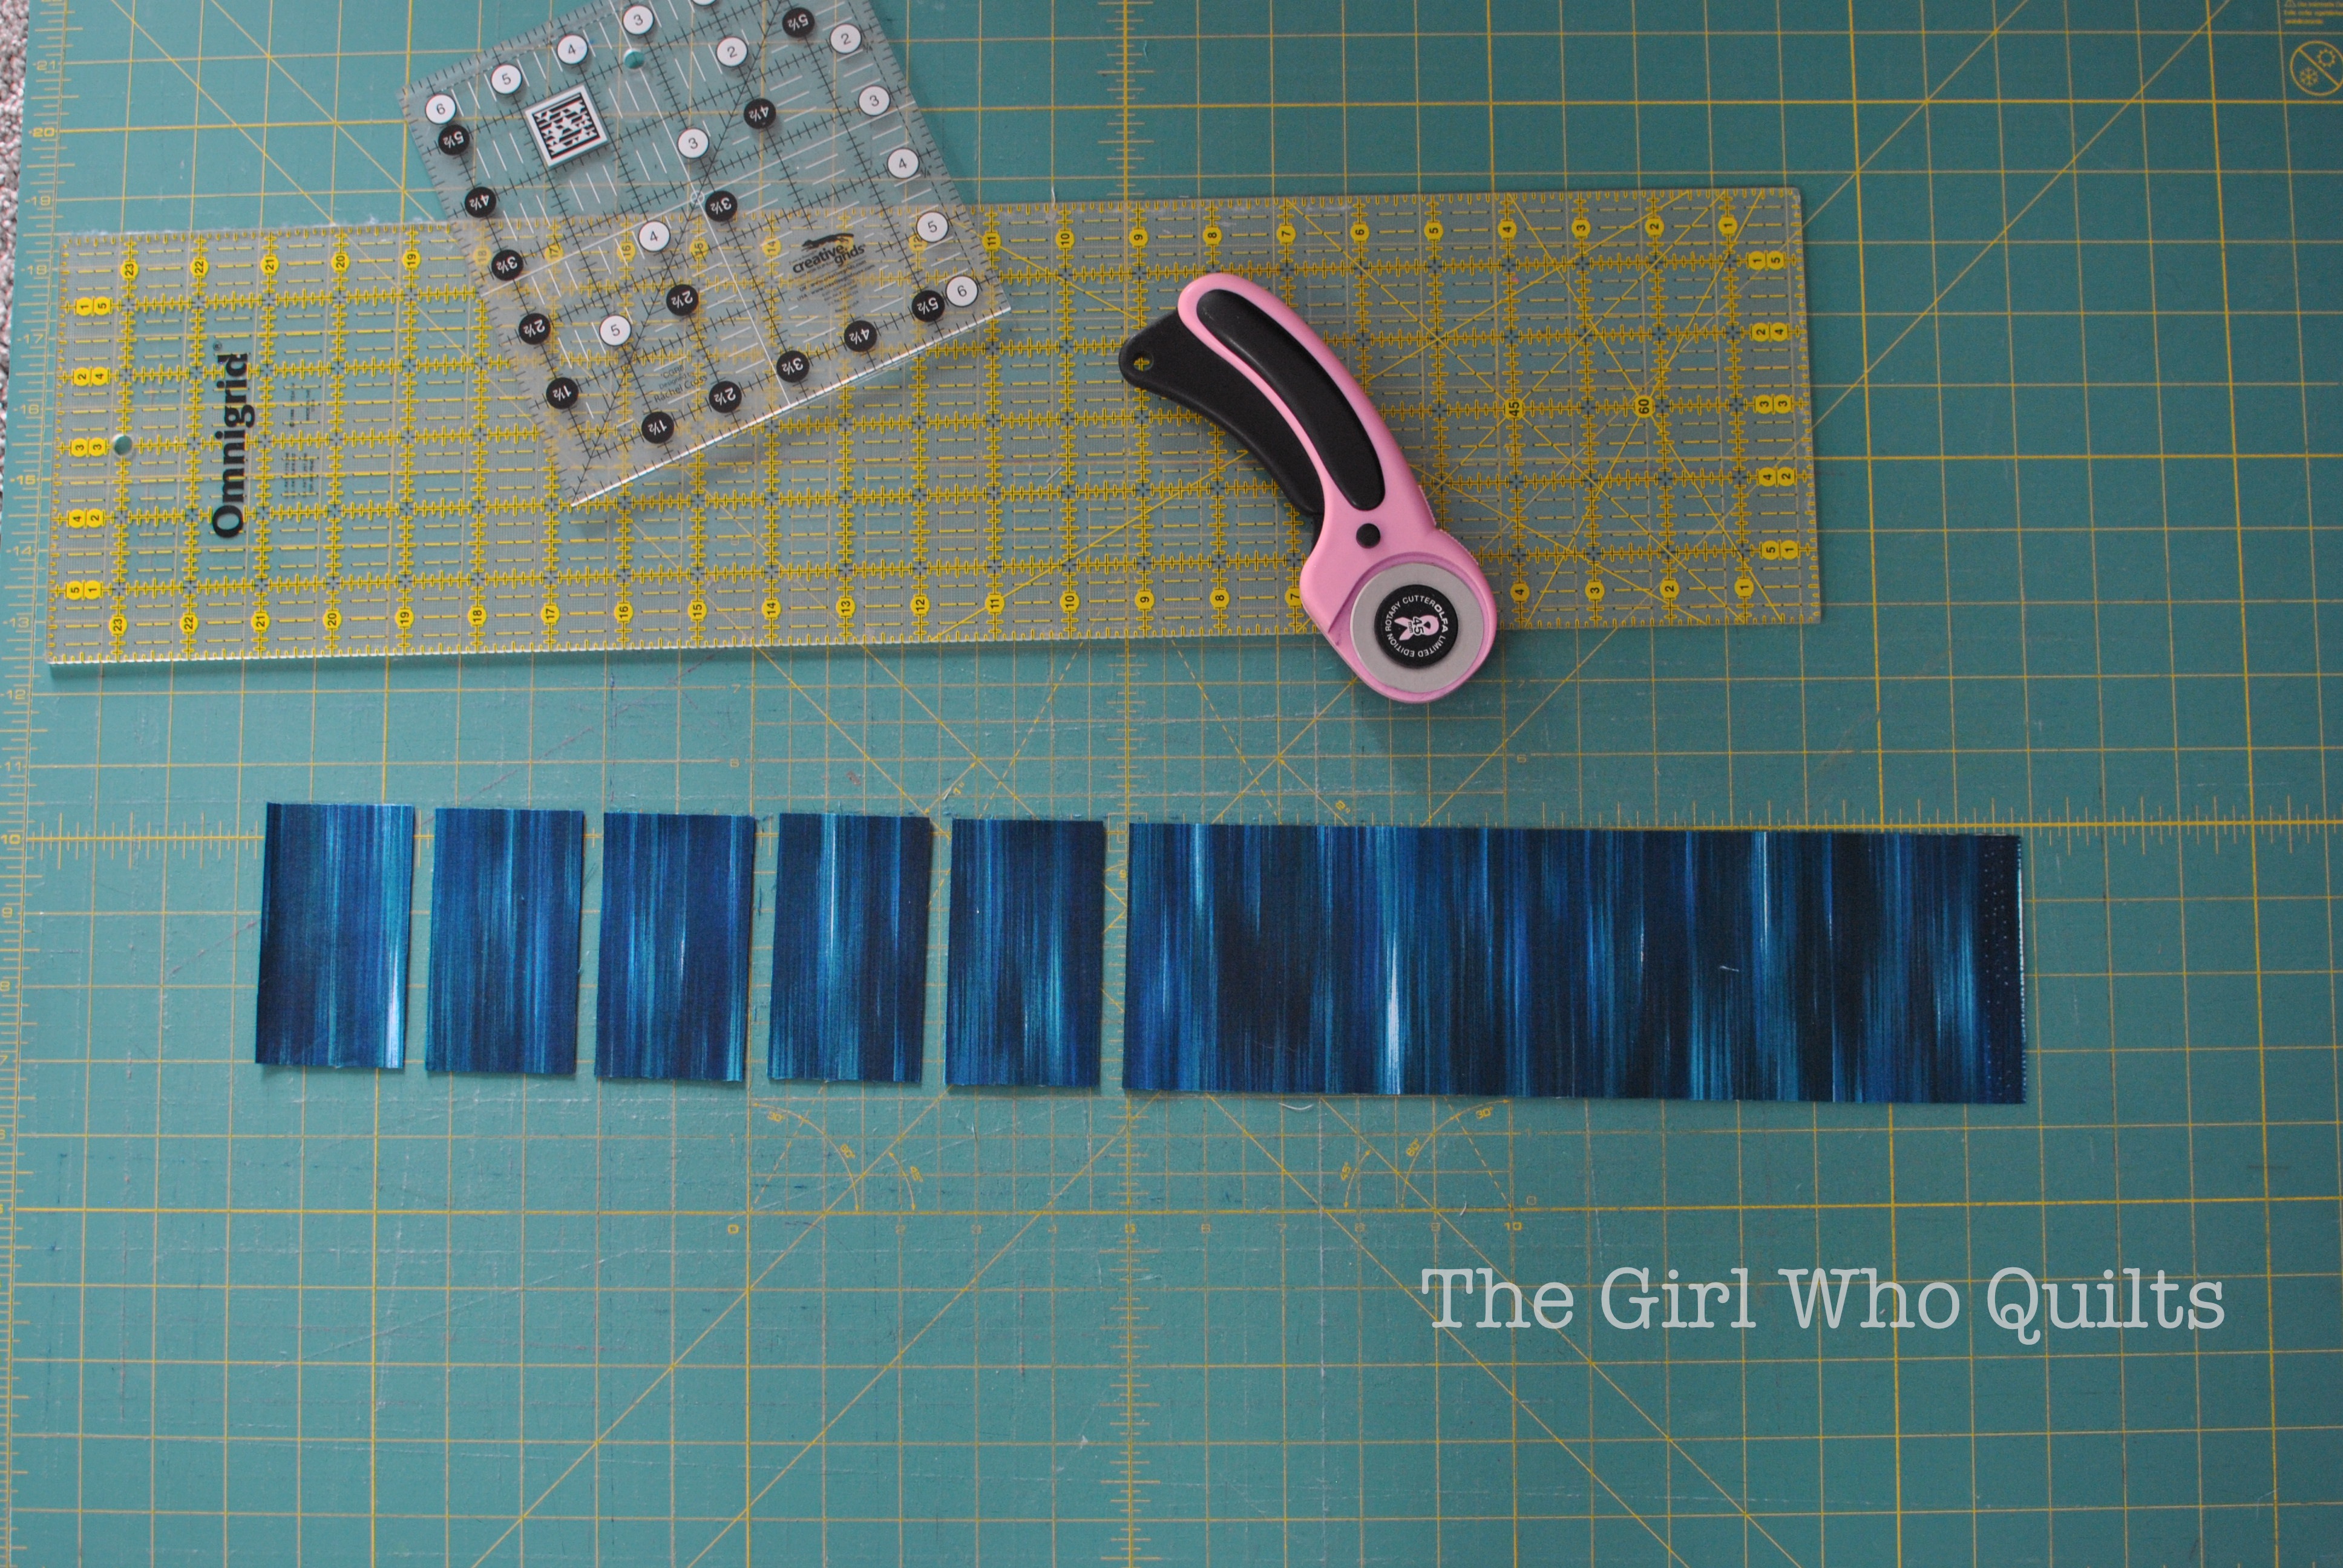
Cut a 3 1/2" x WOF strip of each 1/8 yd cut.
Cut the fat quarter for the pillow back  to 18" x 18".
Cut the 1/2 yard of lining into 2 - 18" x 18" squares.

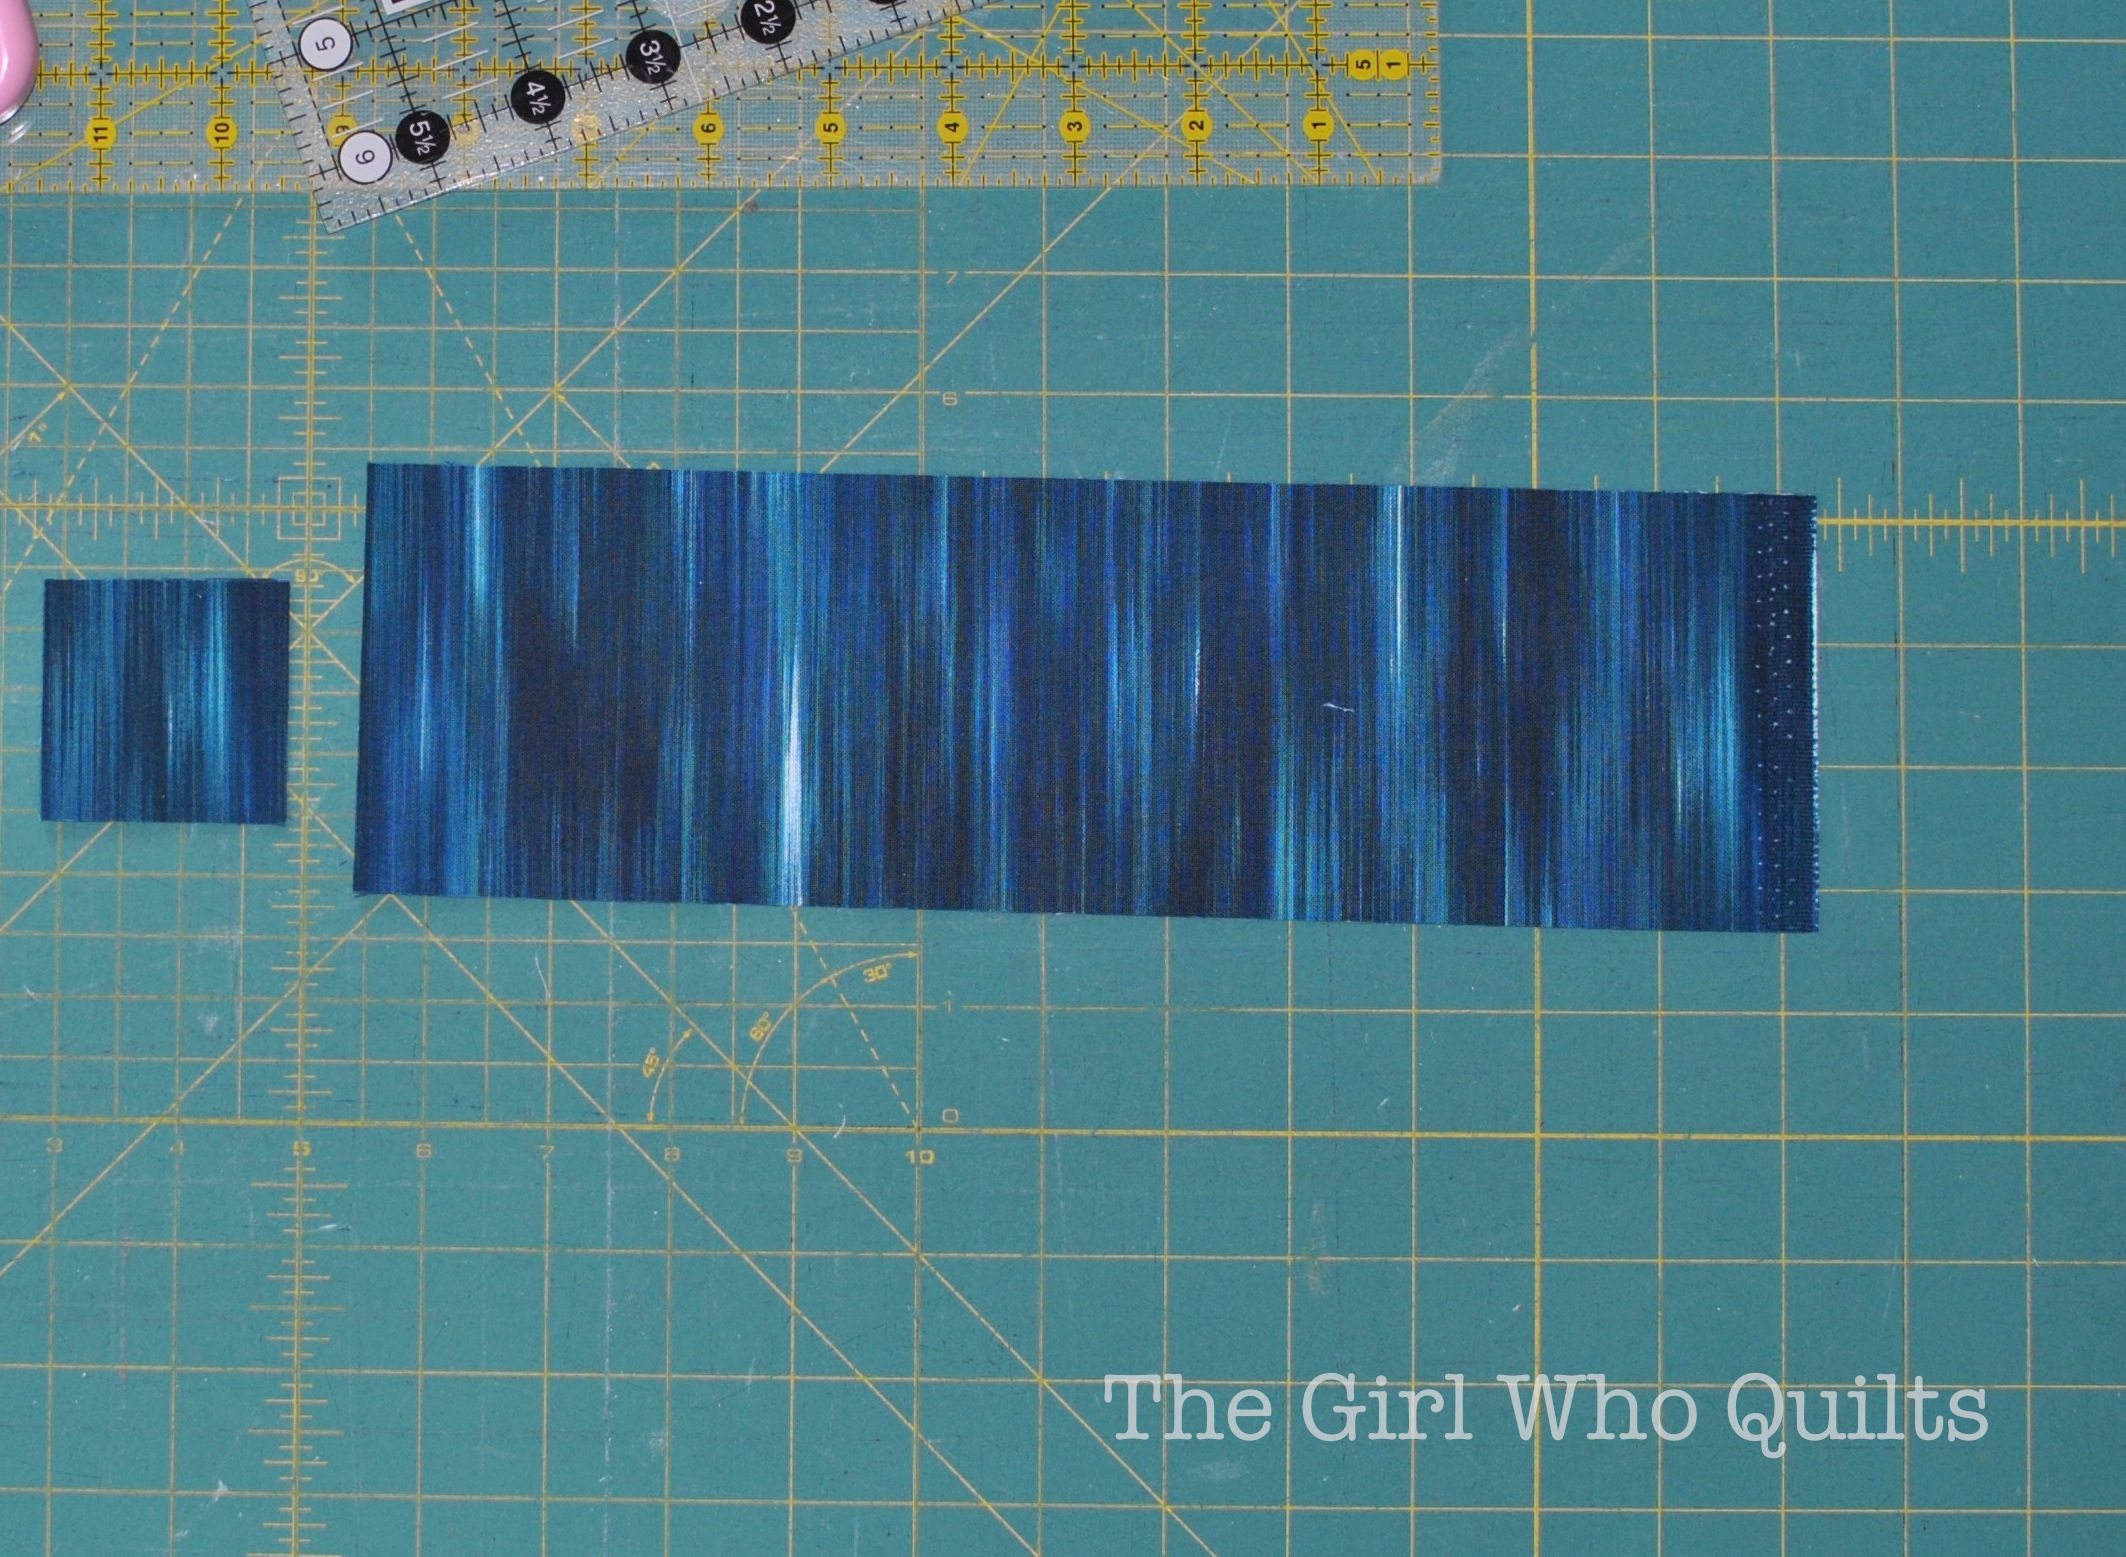
From the strip cut 9 pieces measuring 3 1/2" x 2". (Strip is shown folded over to cut 2 pieces at a time.)
Tile Pillow Tutorial for Benartex

Cut 2 pieces measuring 2" x 2".
Tile Pillow Tutorial for Benartex

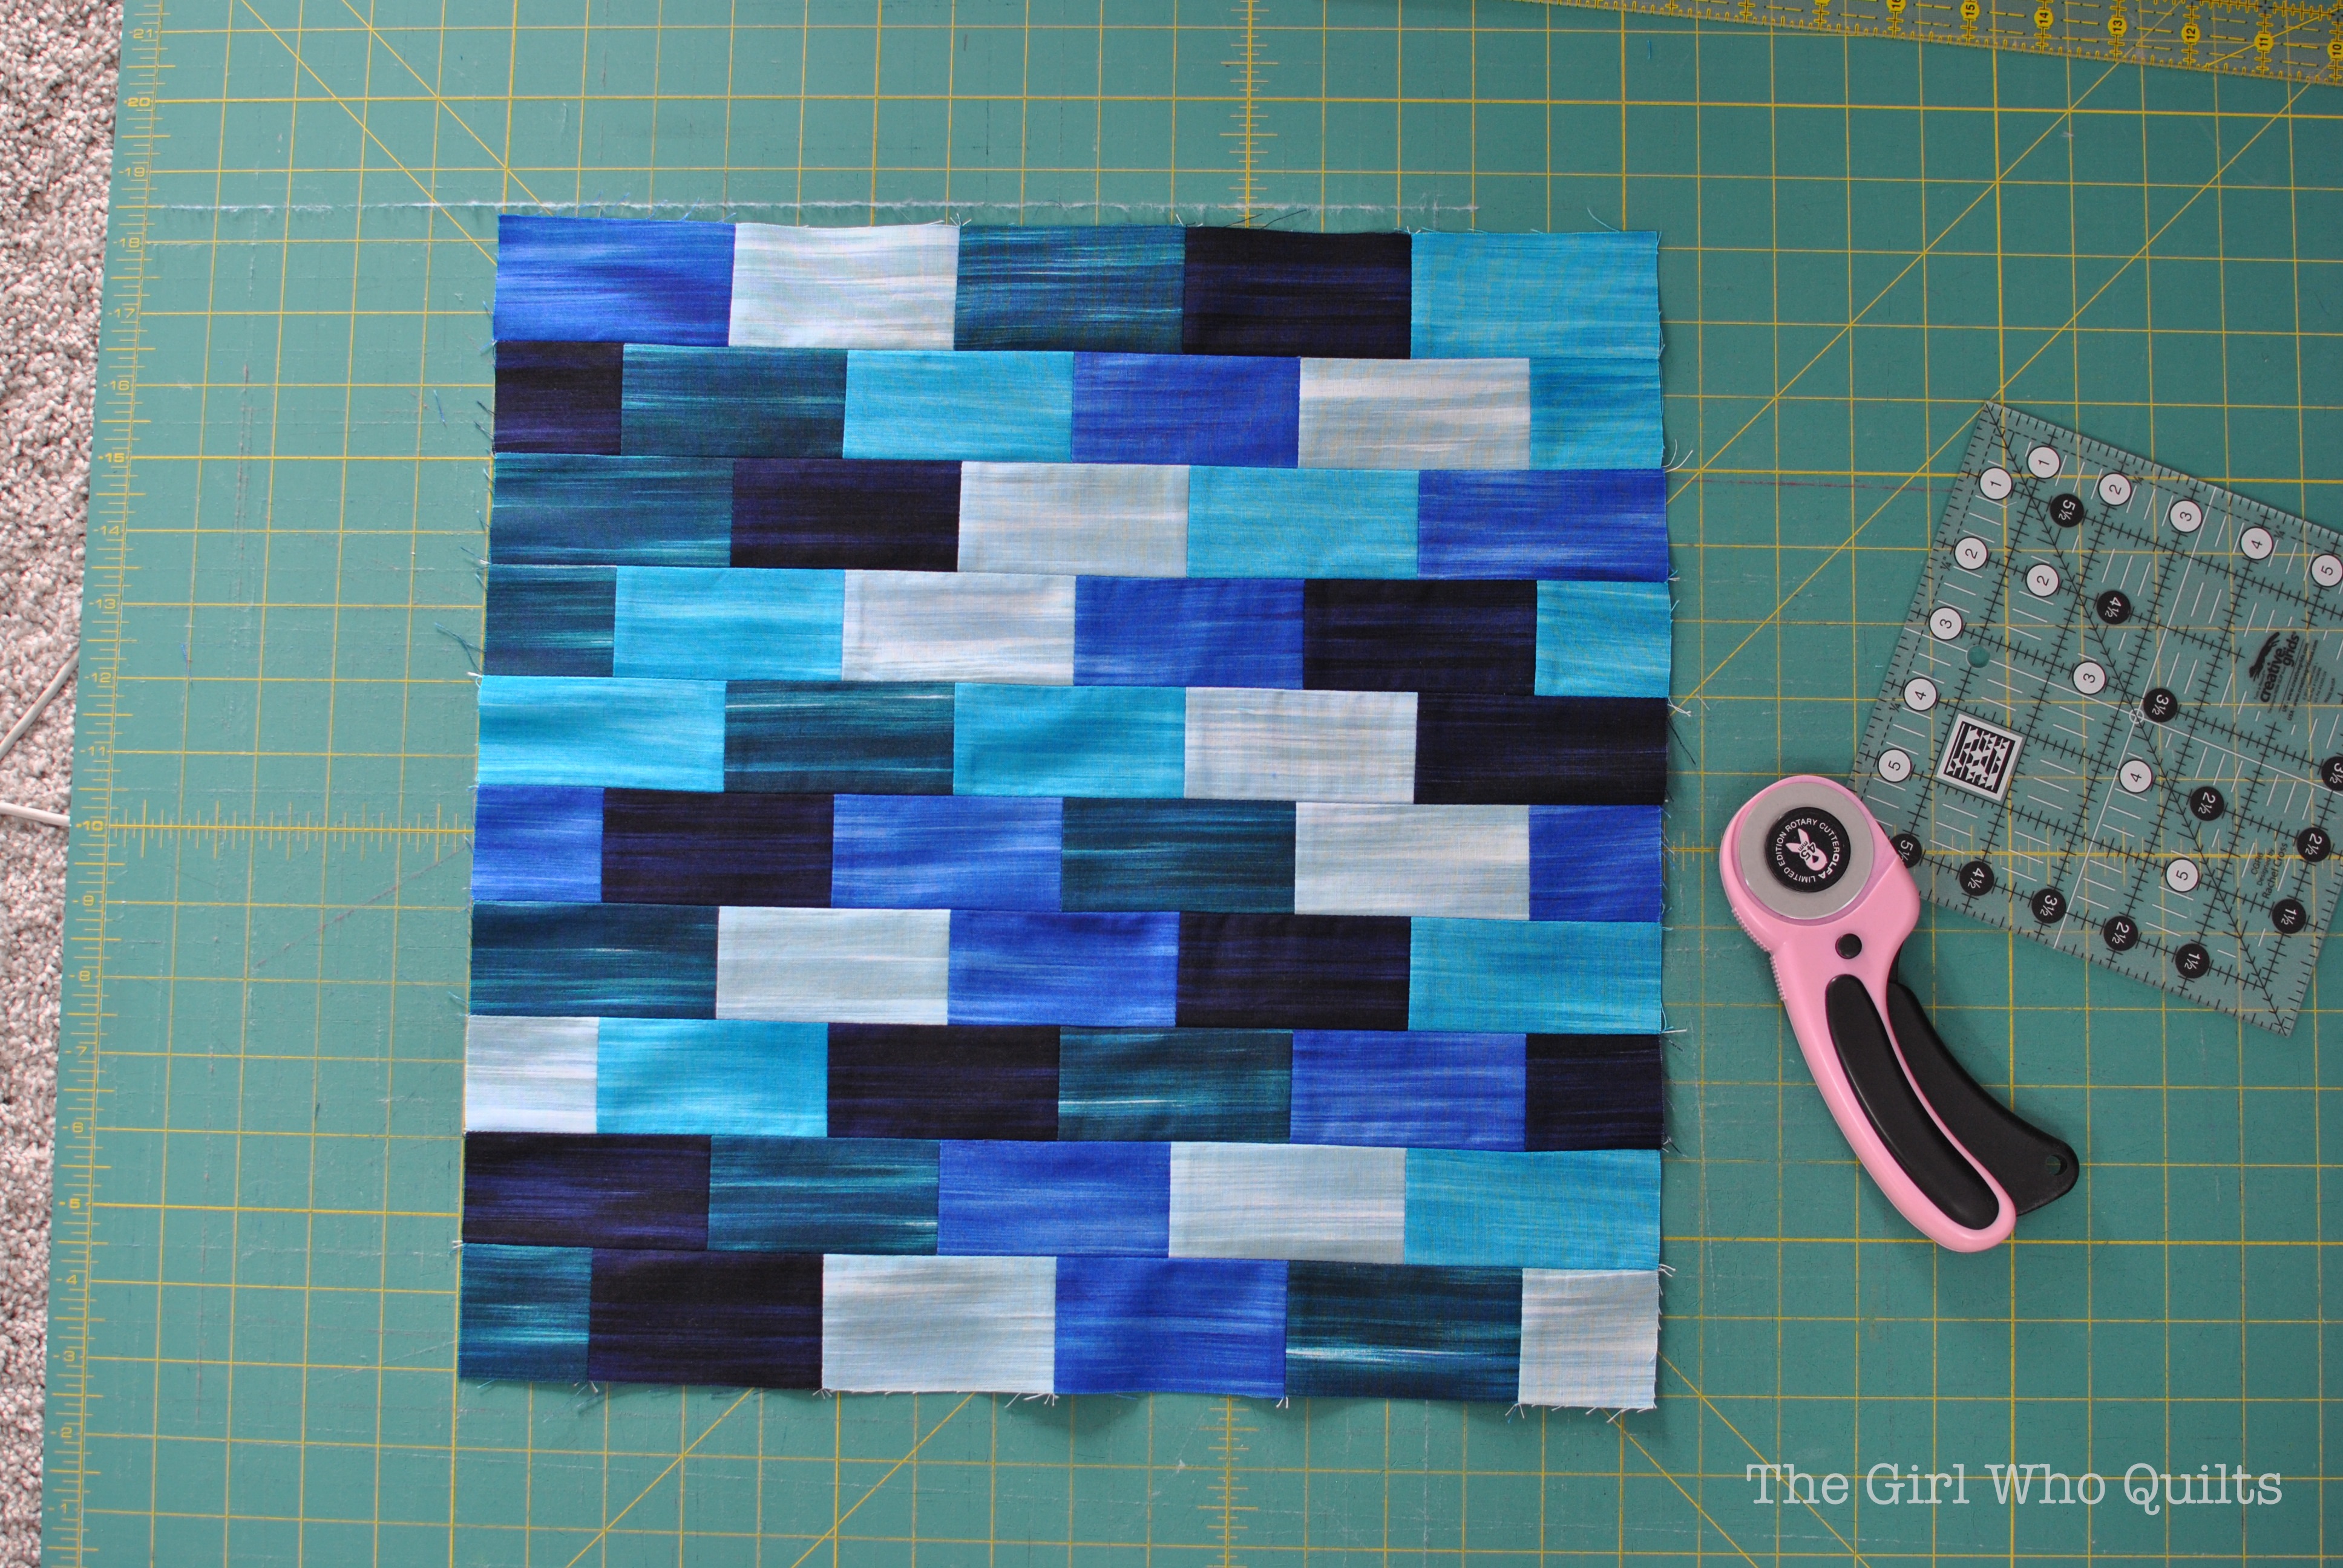
Piece the rectangles and squares as follows:
Row A (top row in photo): Piece 4 of the 3 1/2" x 2" pieces together. Sew a 2" x 2" piece to each end of the strip to create a 15 1/2" x 2" strip.
Piece 5 of row A.

Row B (bottom row in photo): Piece 5 of the 3 1/2" x 2" pieces to create a 15 1/2" x 2" strip.
Piece 5 of row B.
Tile Pillow Tutorial for Benartex

Sew the 10 strips together, alternating rows A and B to create a 15 1/2" x 15 1/2" pillow front.
Tile Pillow Tutorial for Benartex

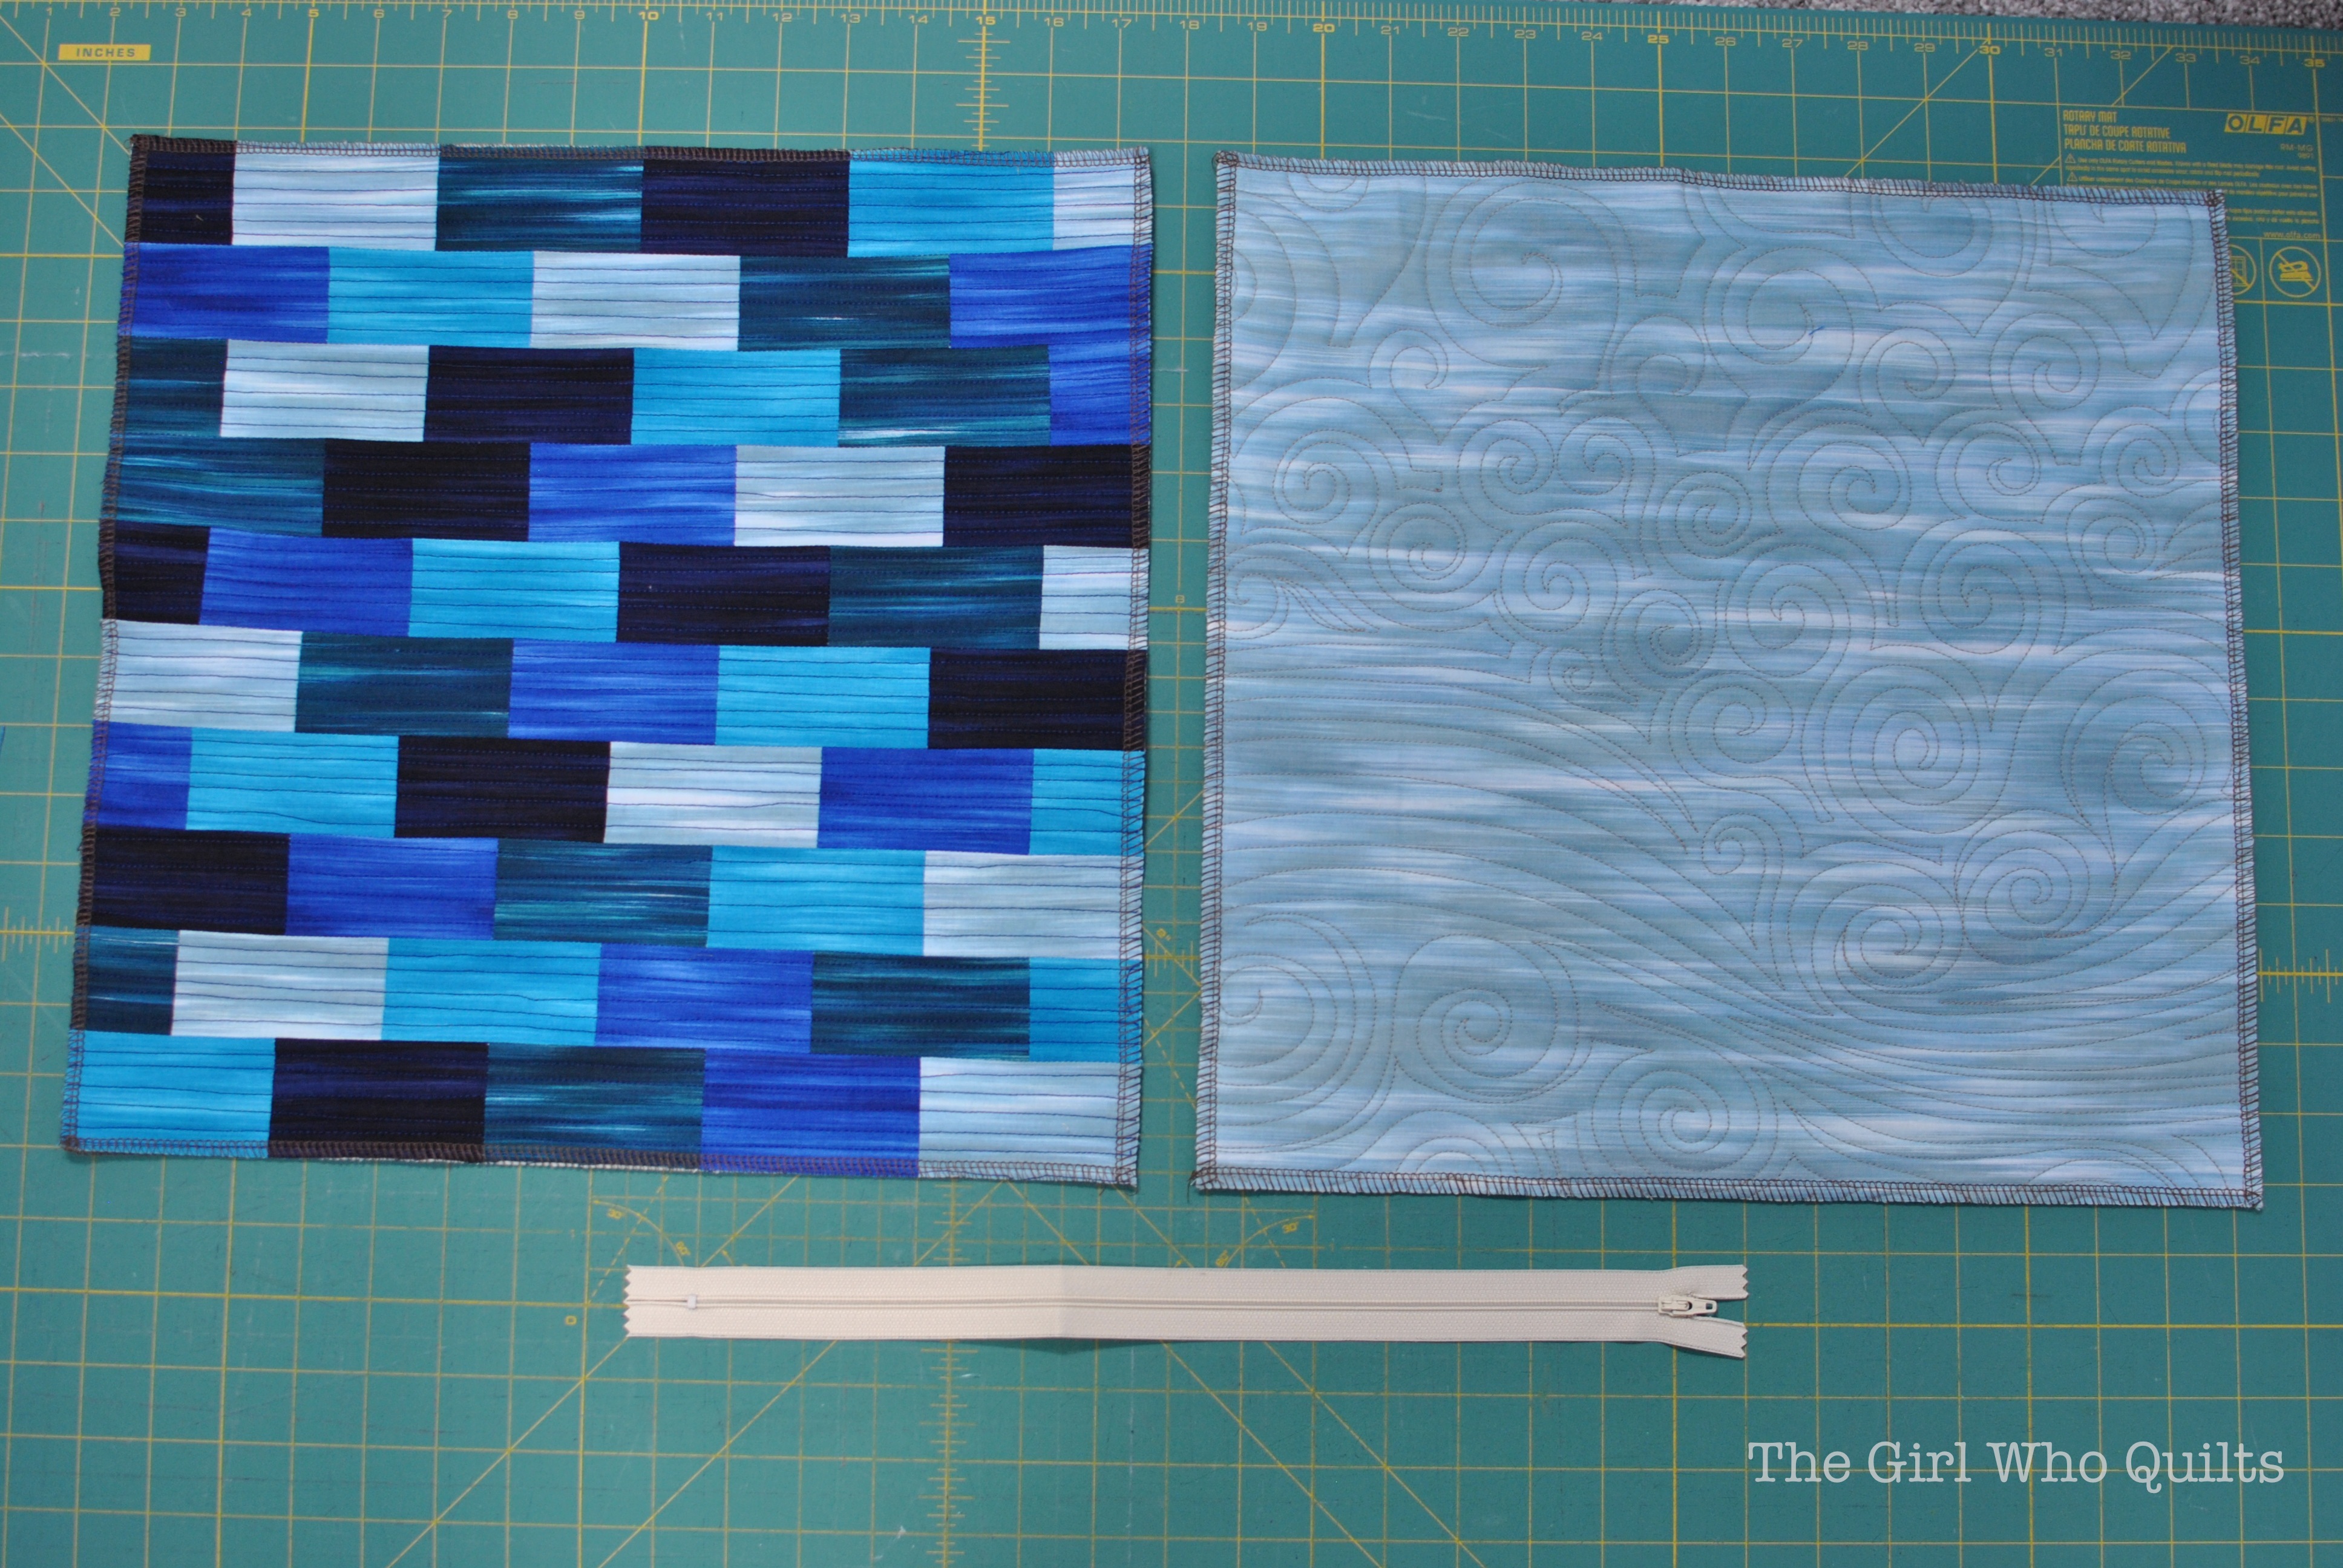
If you'd like to quilt the pillow front and back:
Layer the pillow front with a 18" x 18" piece of batting and lining.
Repeat for the pillow back.

Quilt as desired and square the pieces to 15" x 15".
At this point I like to serge or zig zag the raw edges of the pillow front and back.
Tile Pillow Tutorial for Benartex 

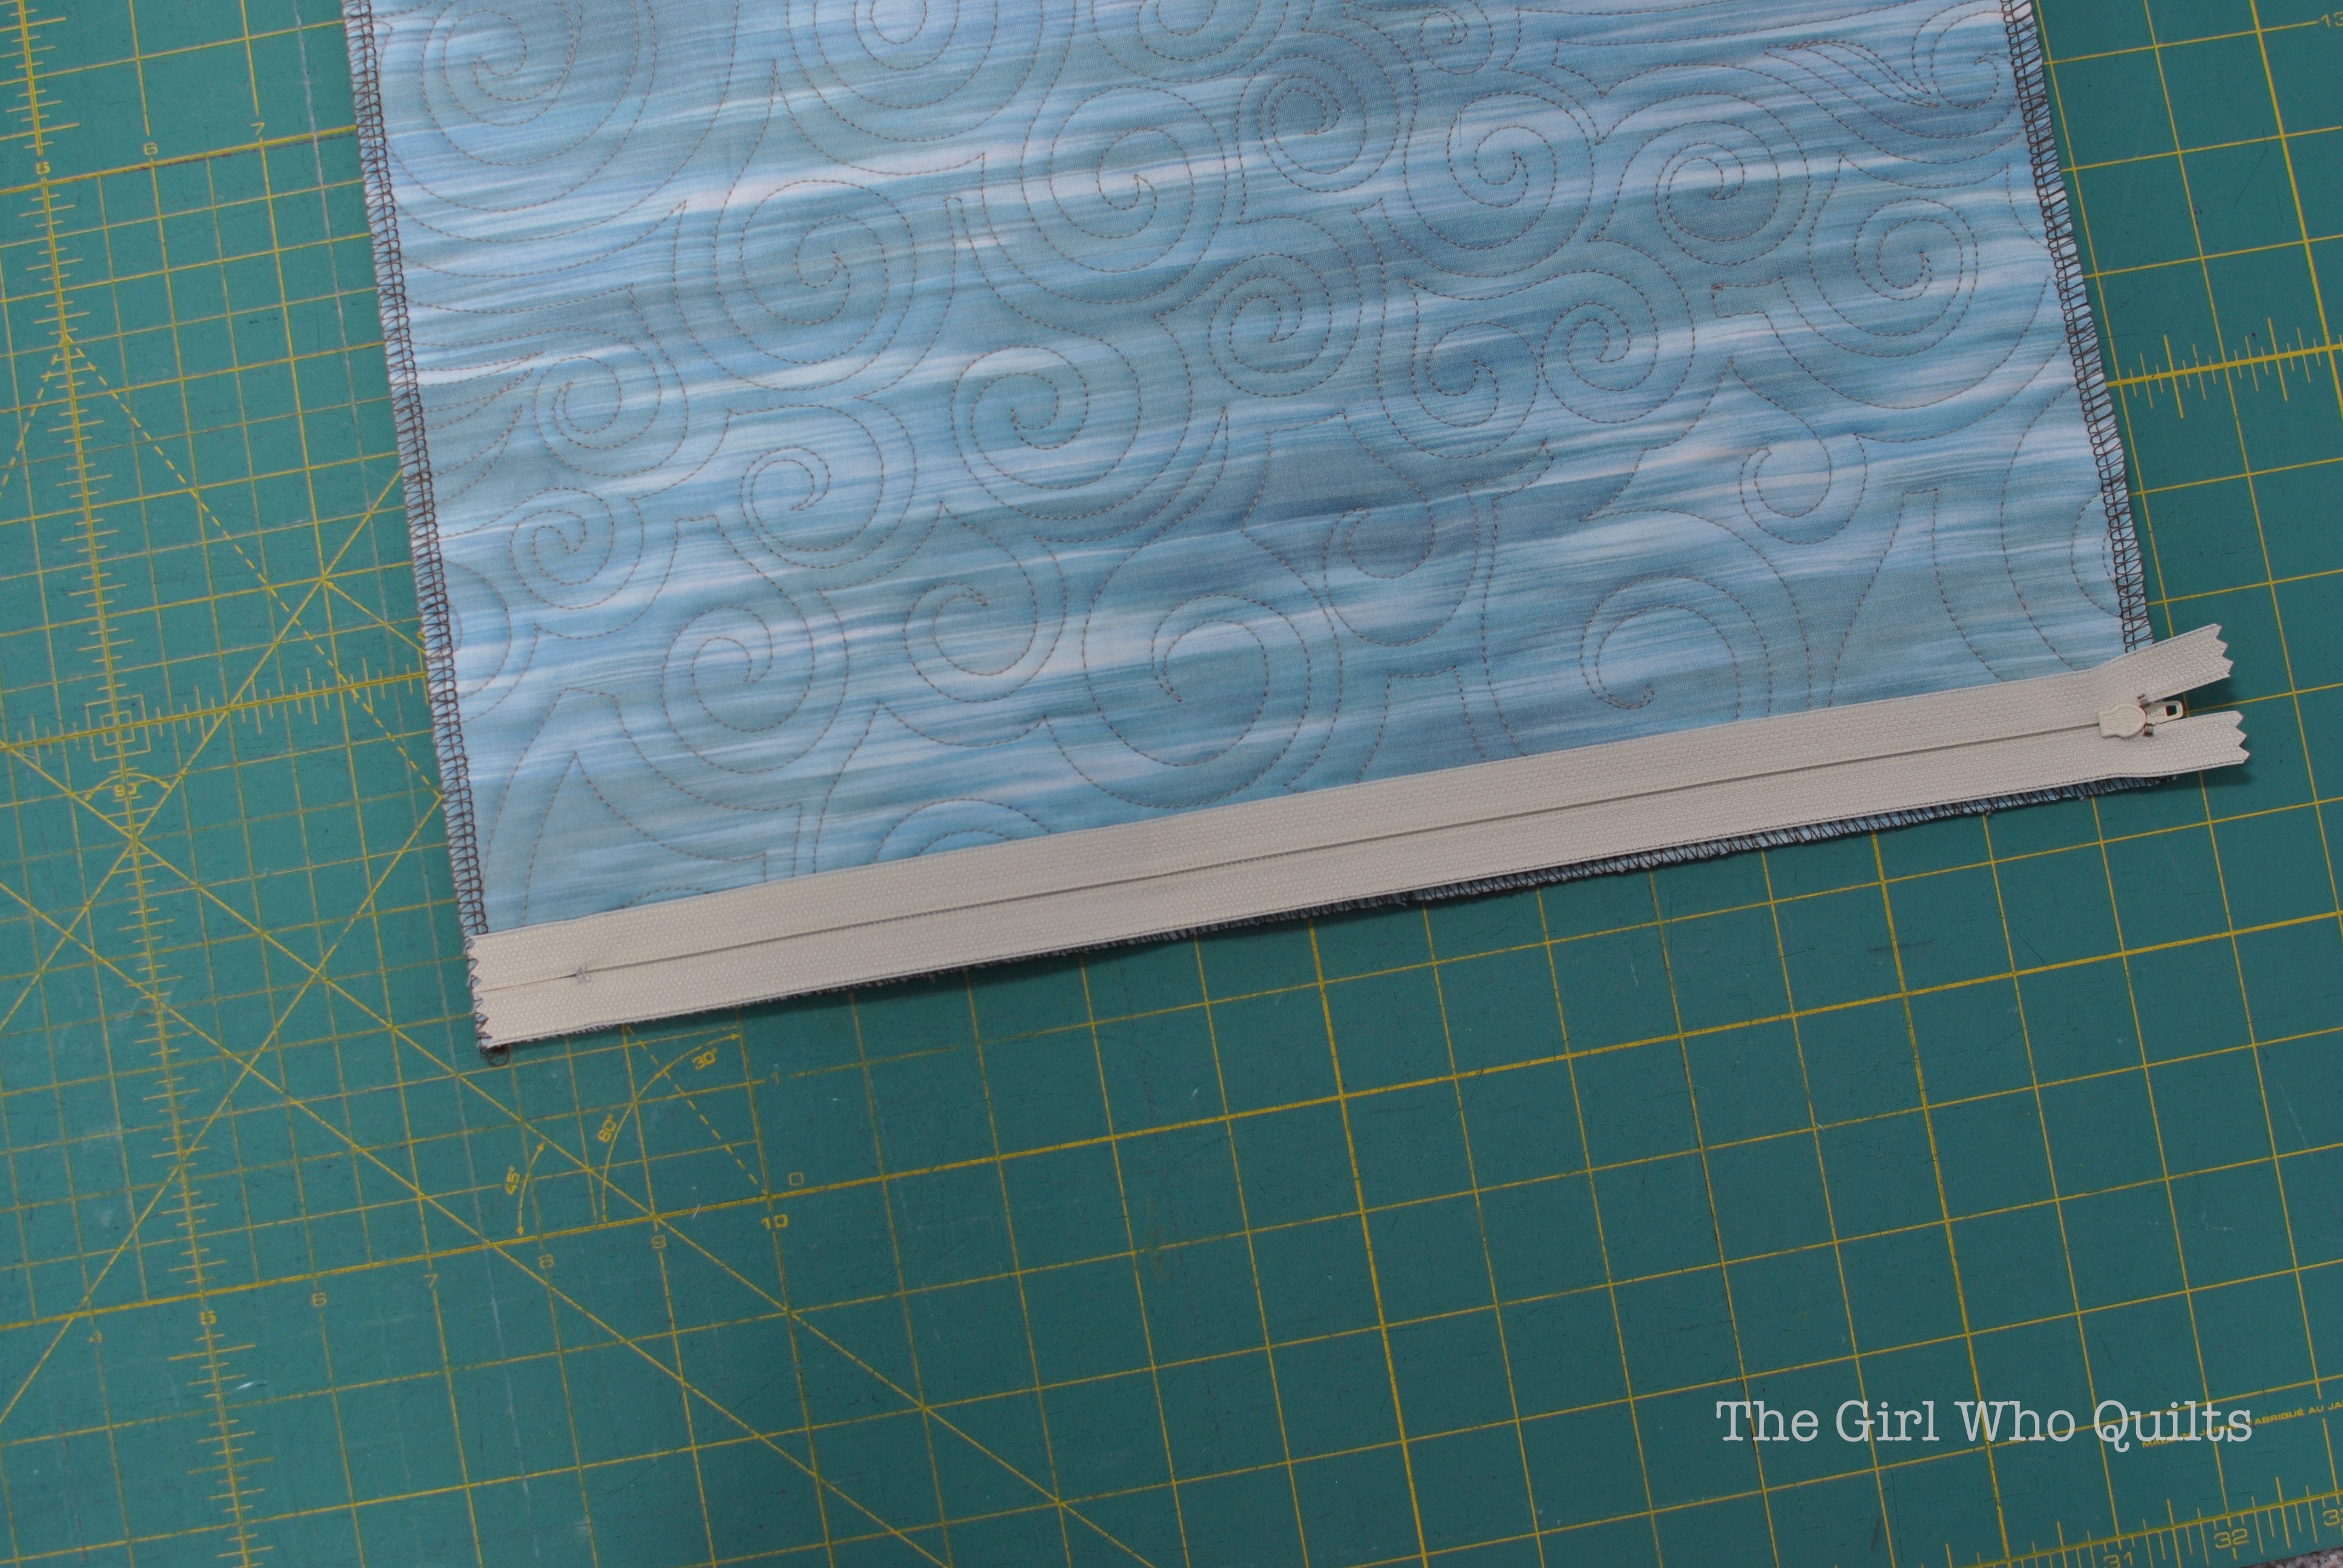
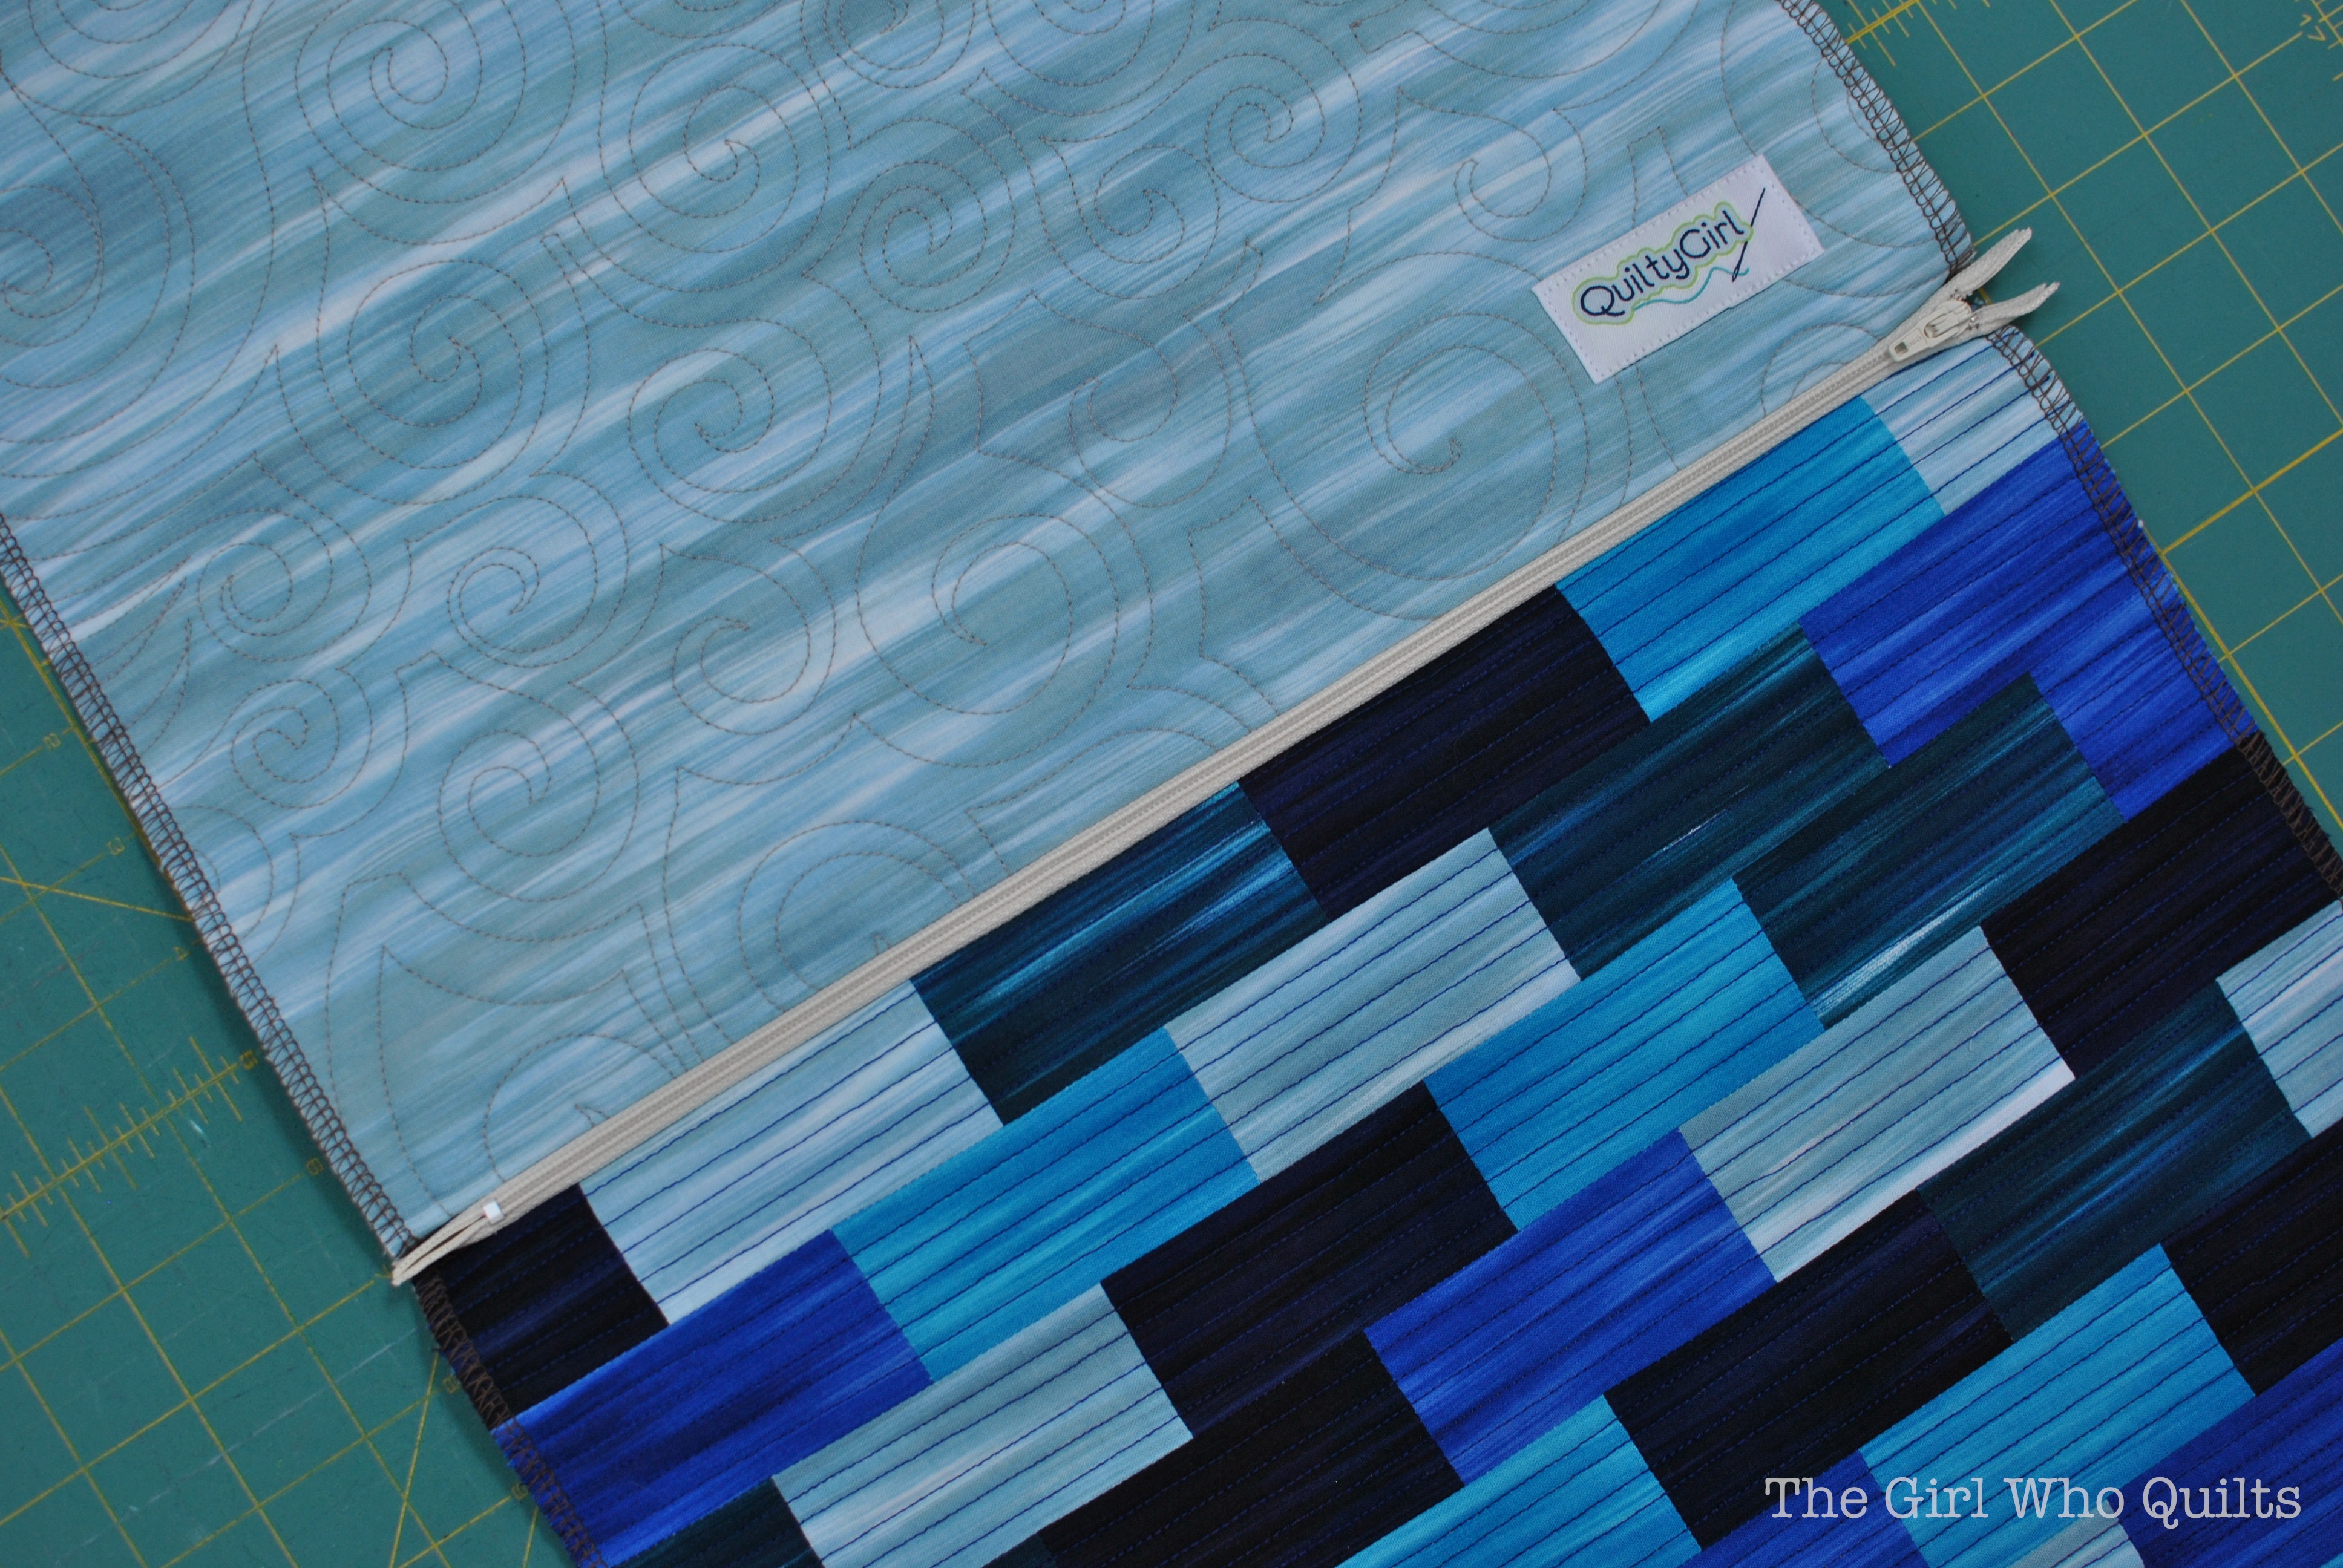
Lay the zipper on the bottom edge of the pillow back, with one end of the zipper tape at the pillow corner.
Tile Pillow Tutorial for Benartex
Pin the zipper in place and sew using a 1/4" seam.
I like to start my stitching at the metal zipper stop, and sew towards the zipper pull. I sew down as close as my presser foot will allow me to get to the zipper pull.
Tile Pillow Tutorial for Benartex 

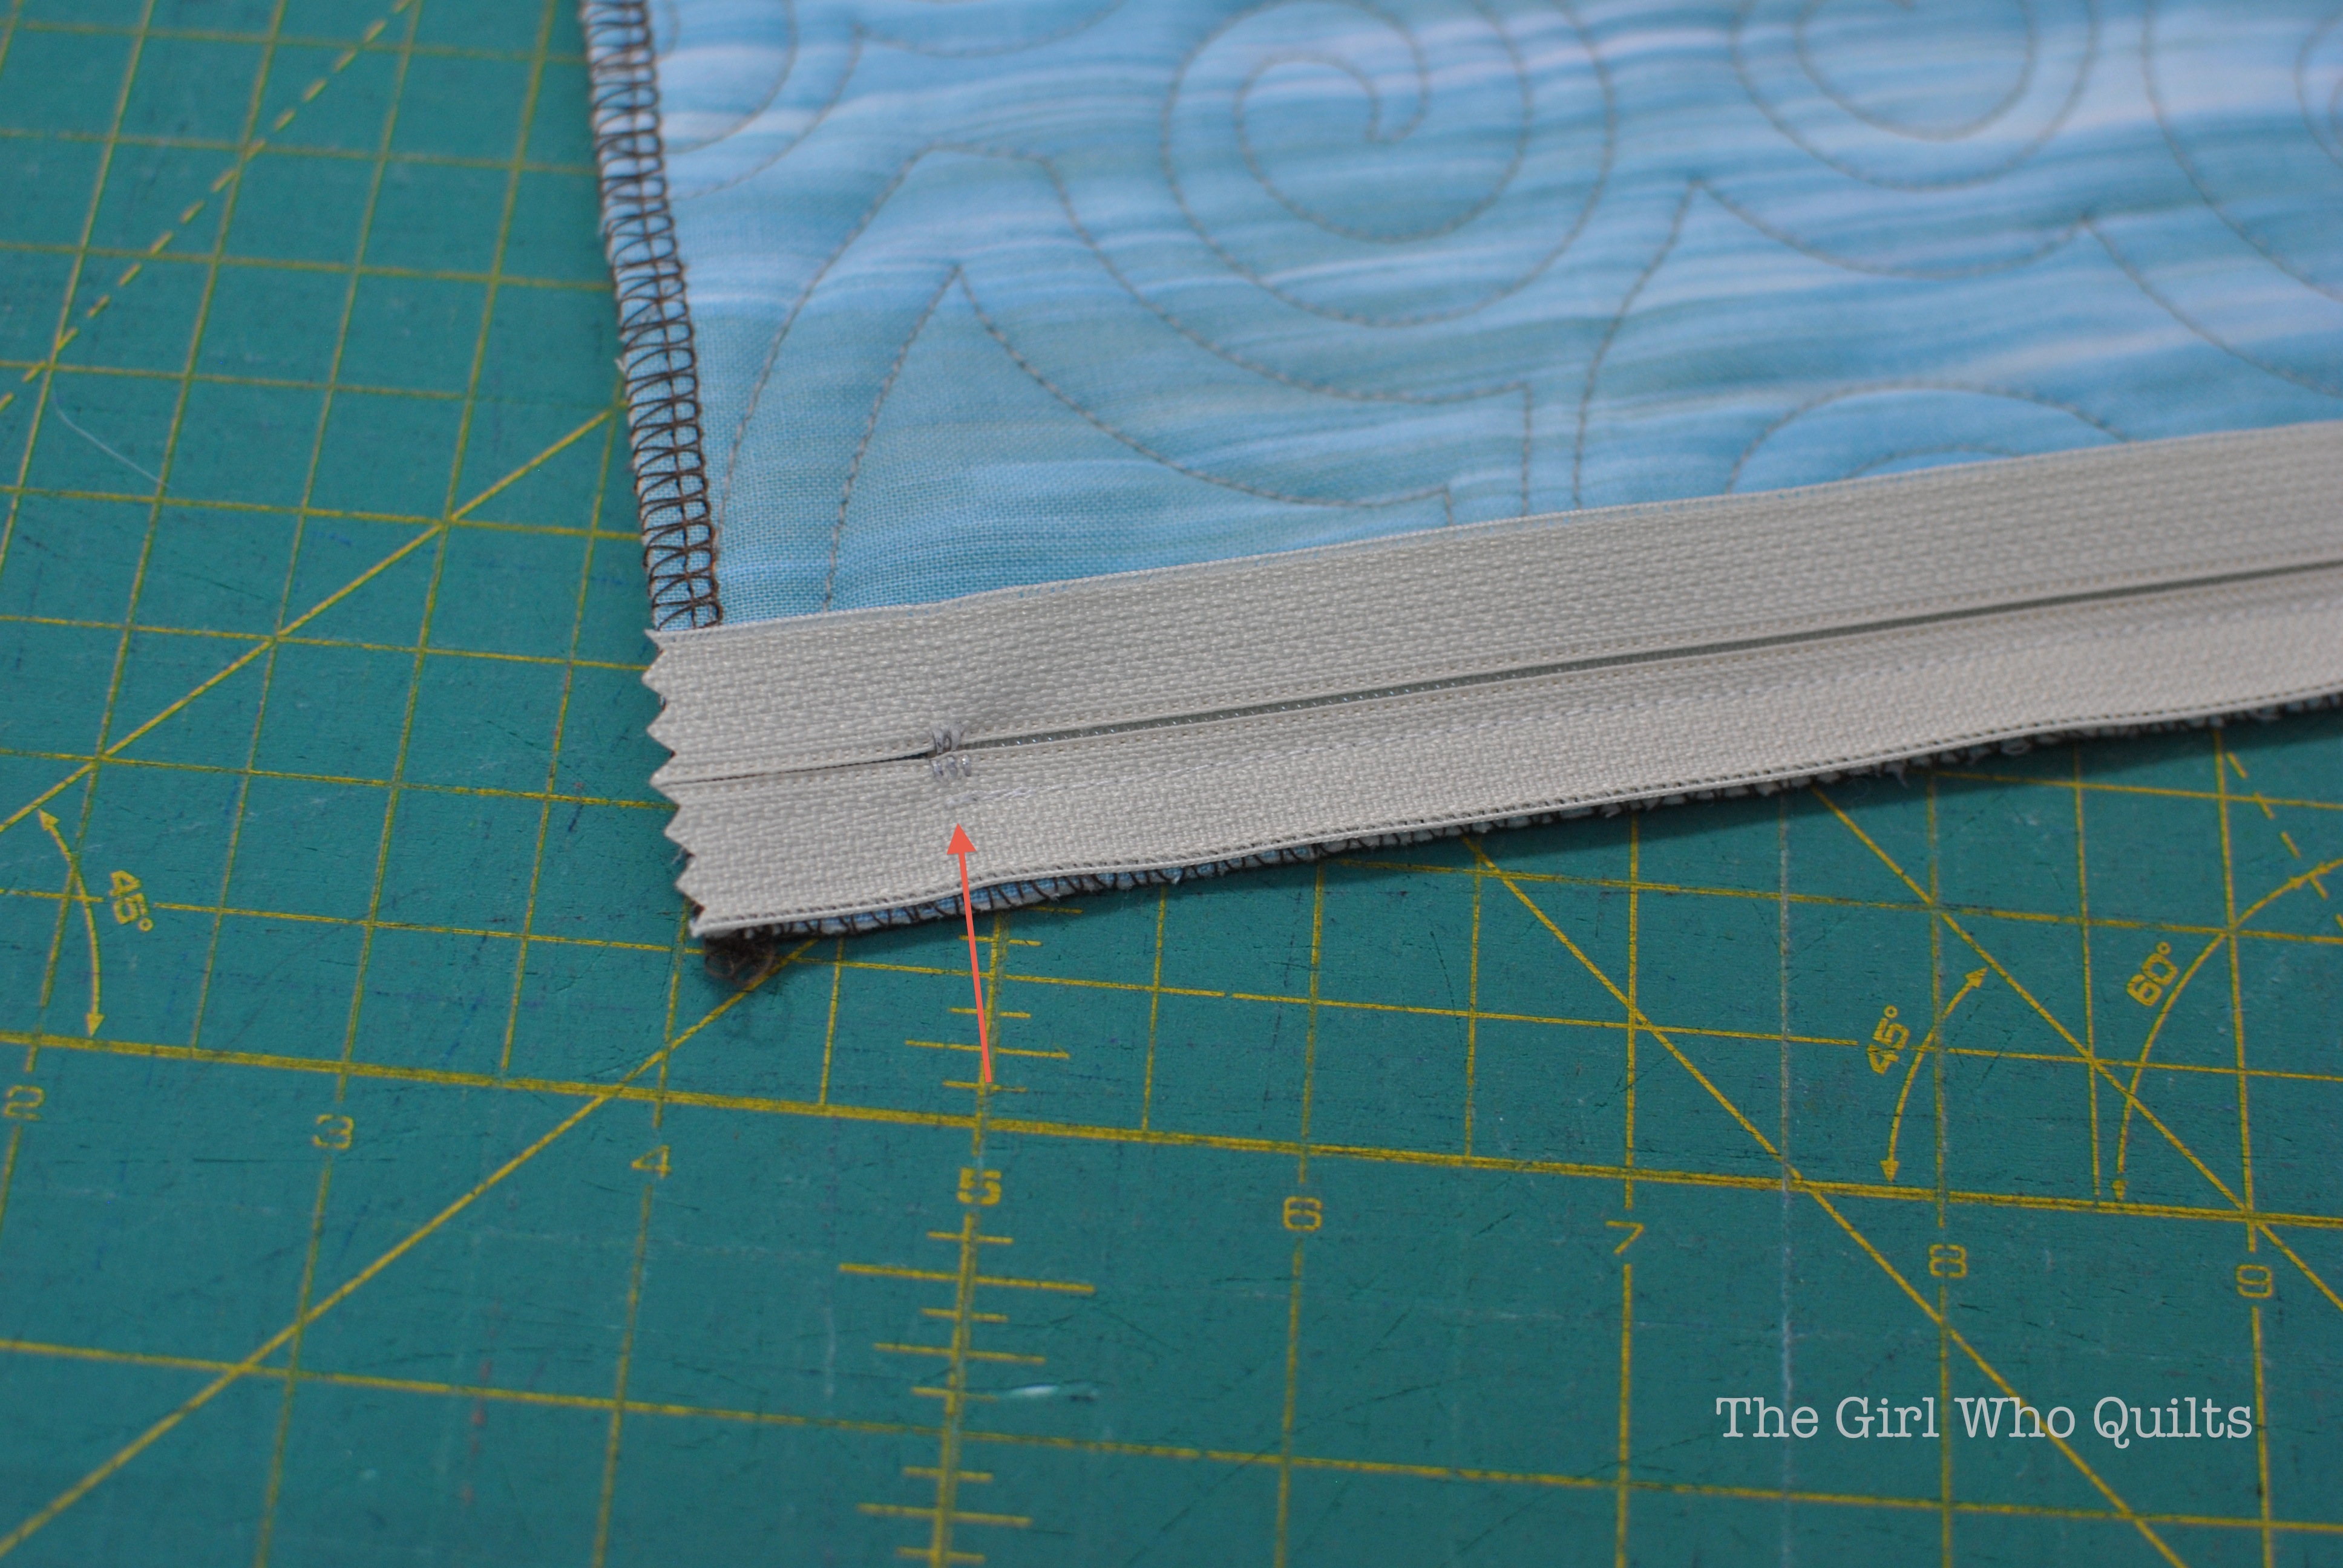
Lay the other end of the zipper tape along the bottom edge of the pillow front. Again align one end of the zipper tape at the pillow corner.
Tile Pillow Tutorial for Benartex 

Pin the zipper in place and sew using a 1/4" seam. You may wish to open the zipper before sewing.
Tile Pillow Tutorial for Benartex

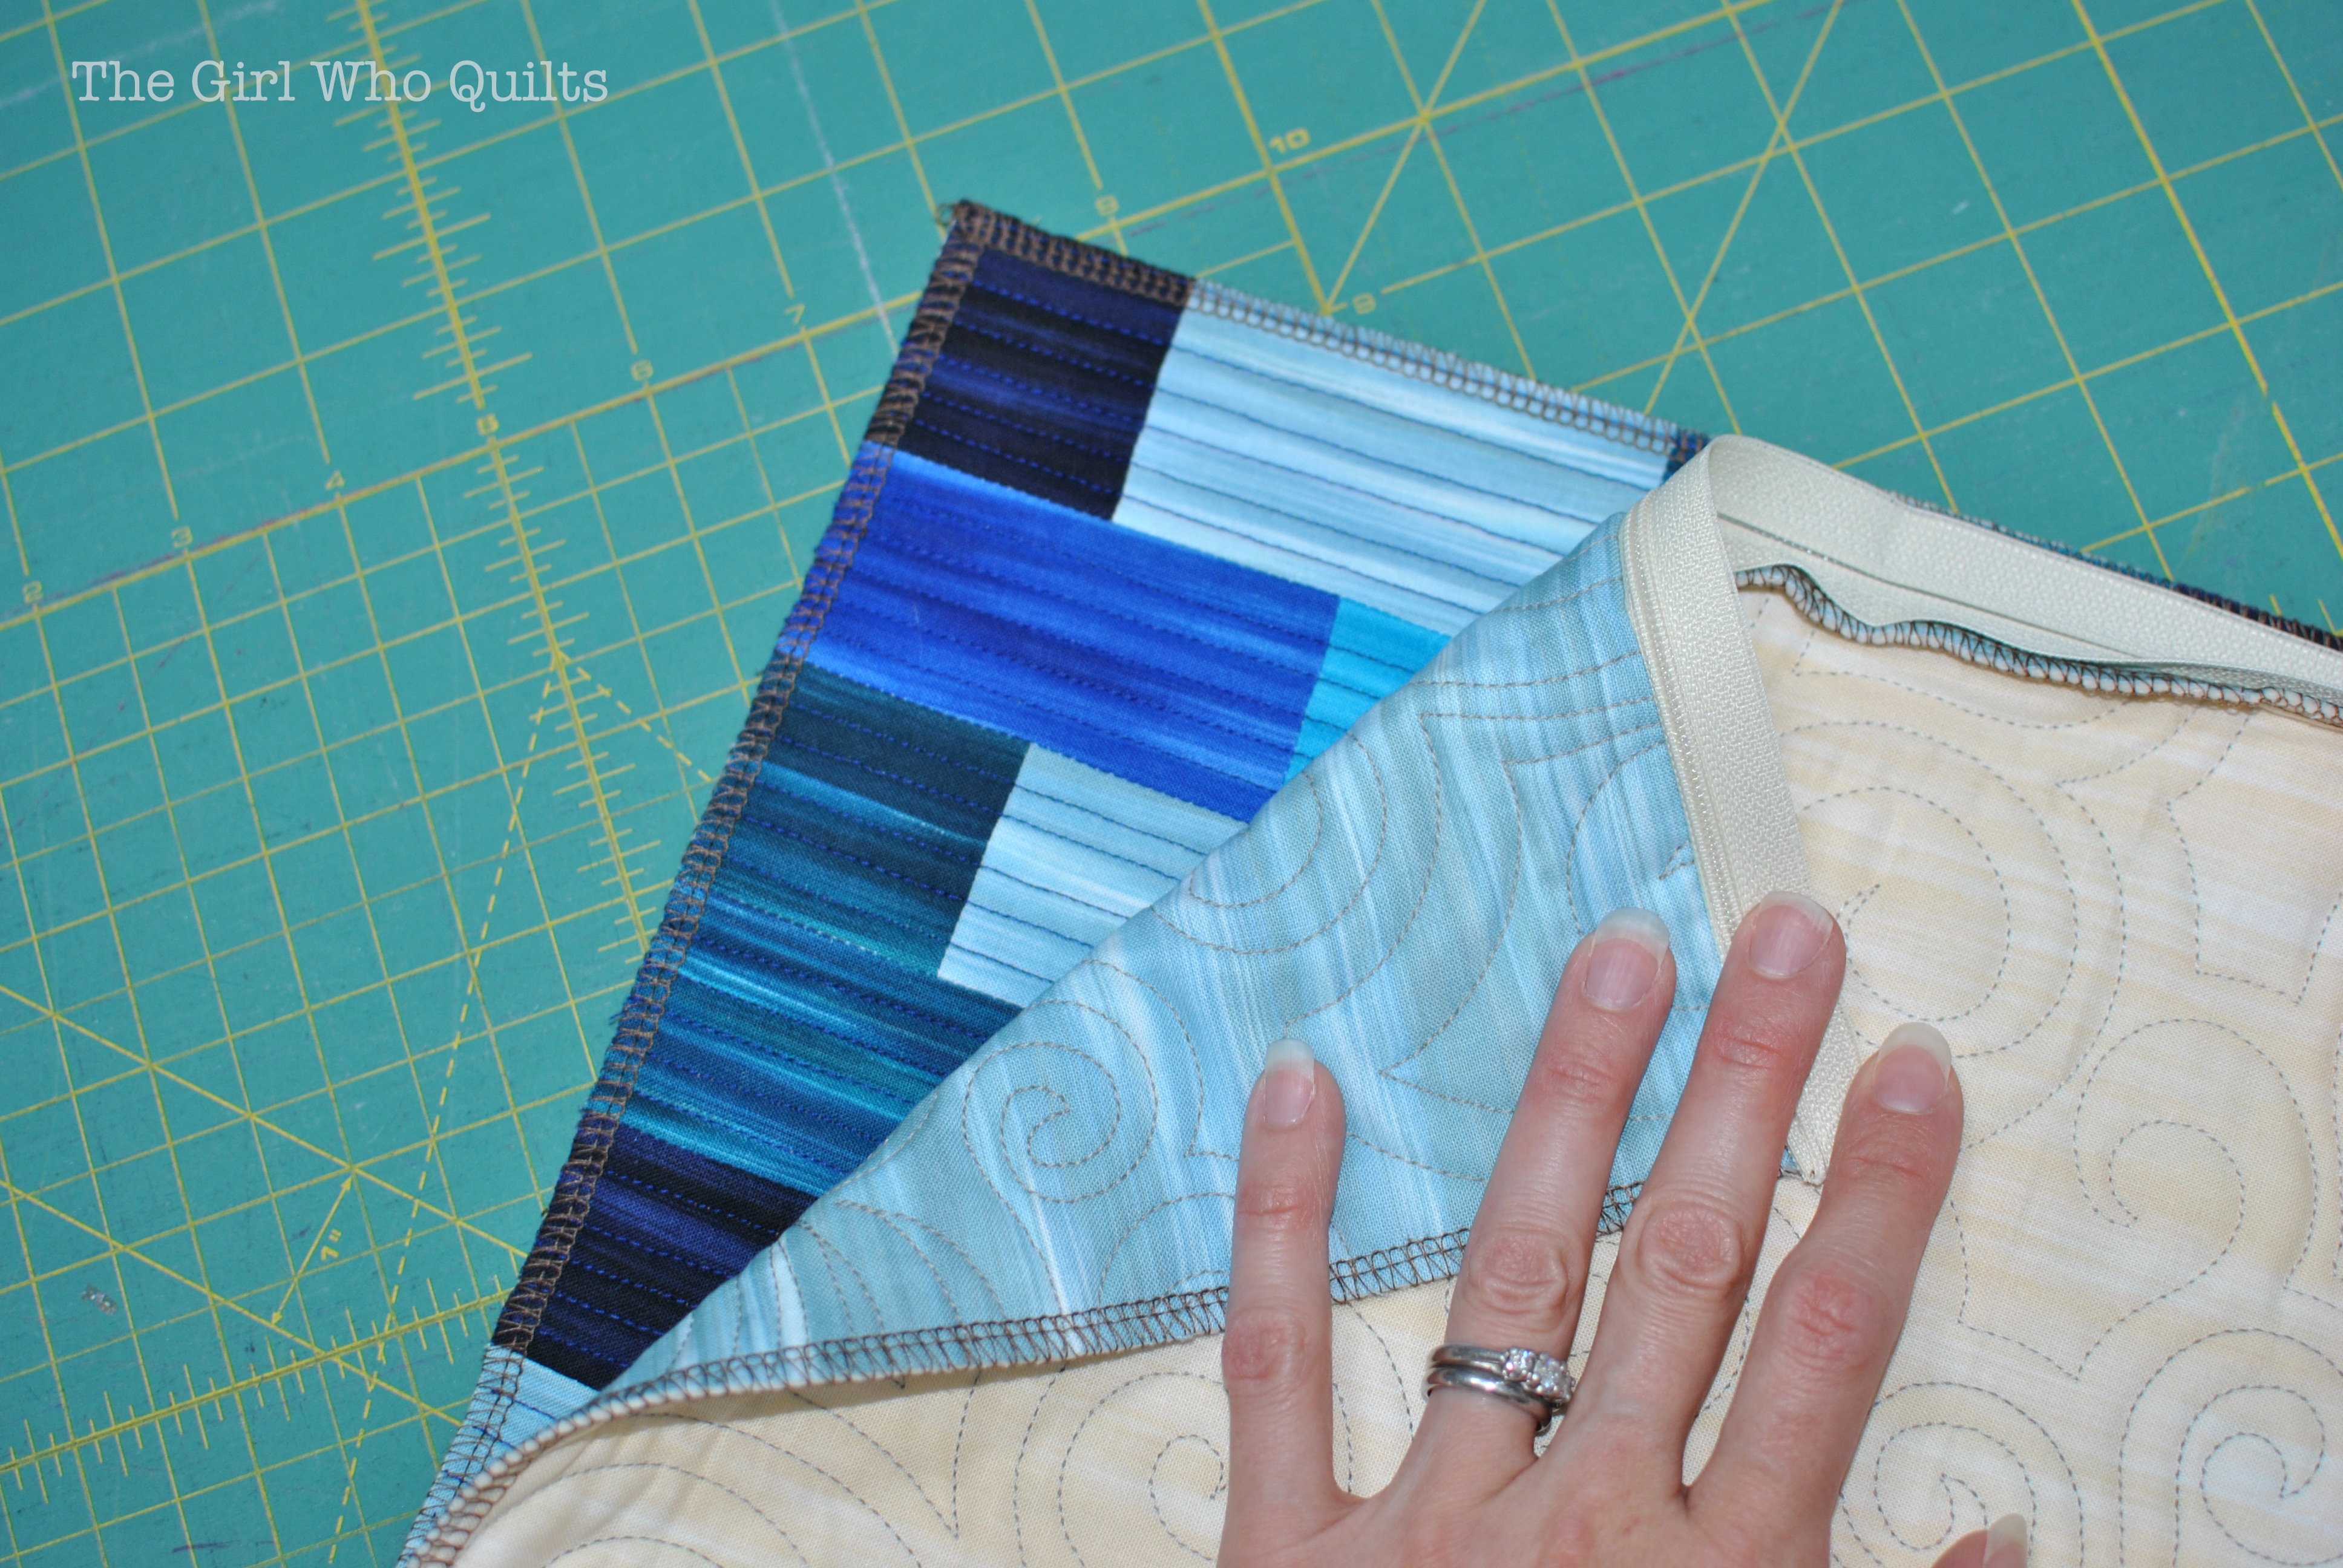
This is how the pillow should now look:
Tile Pillow Tutorial for Benartex

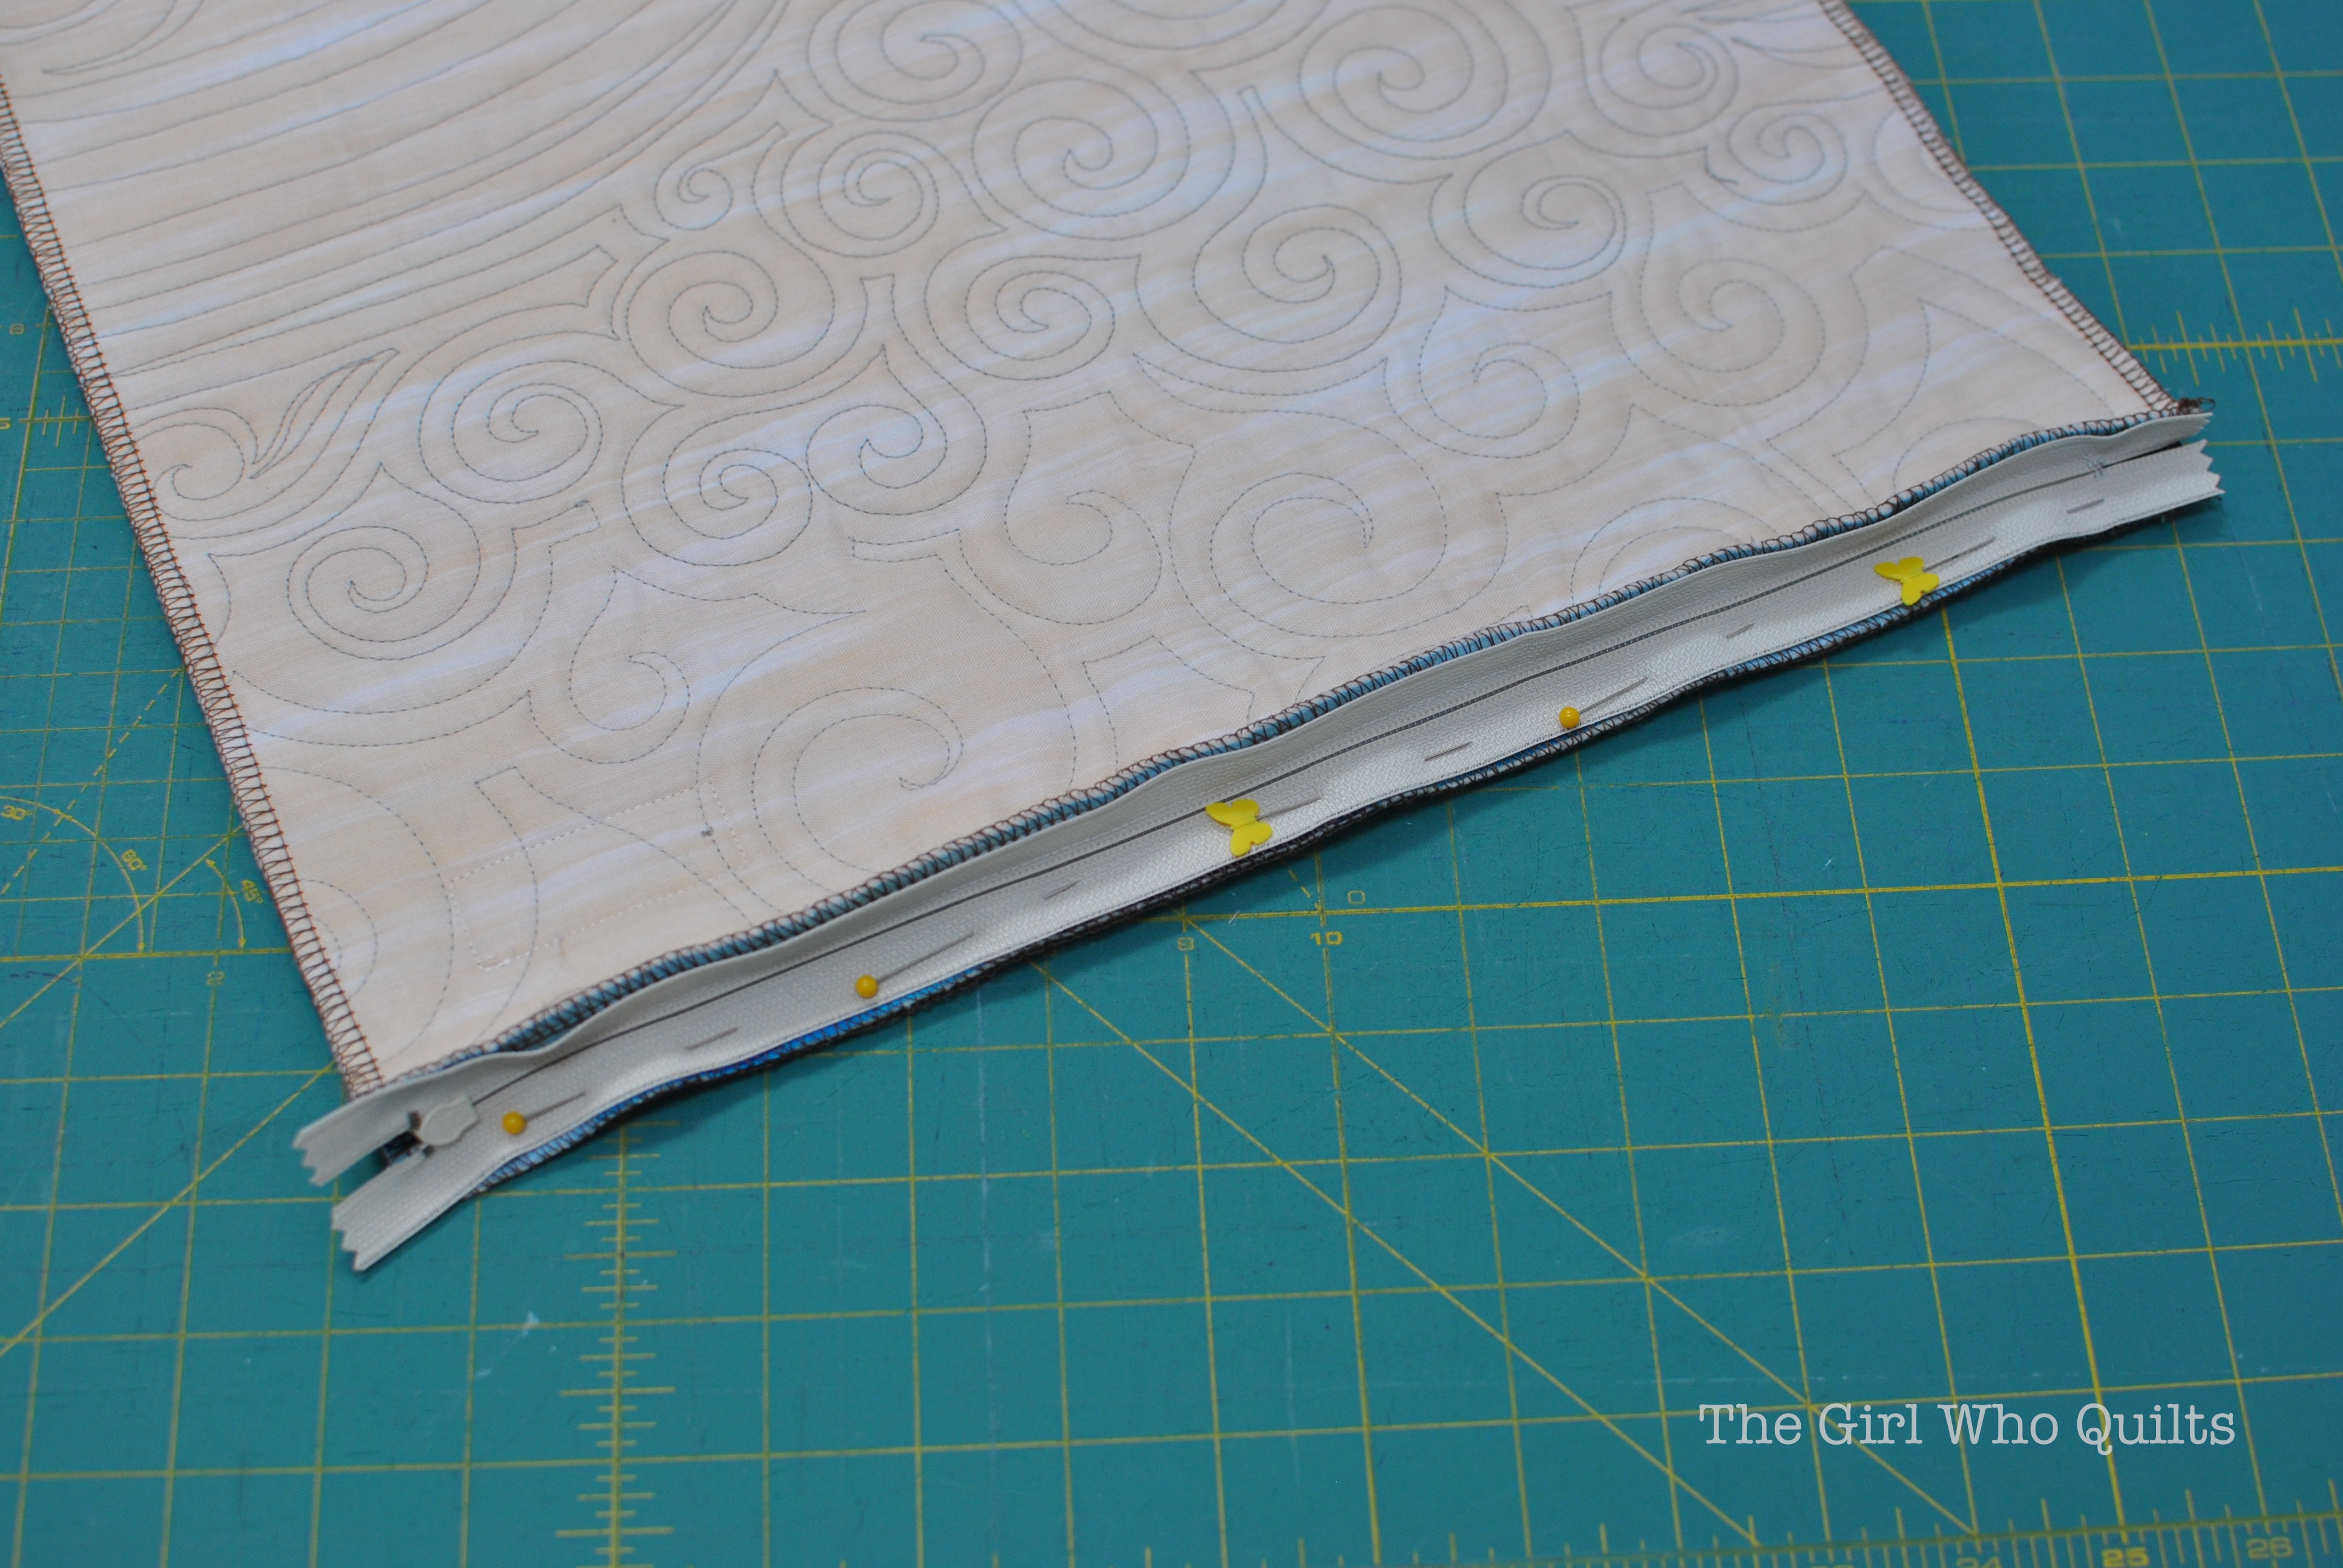
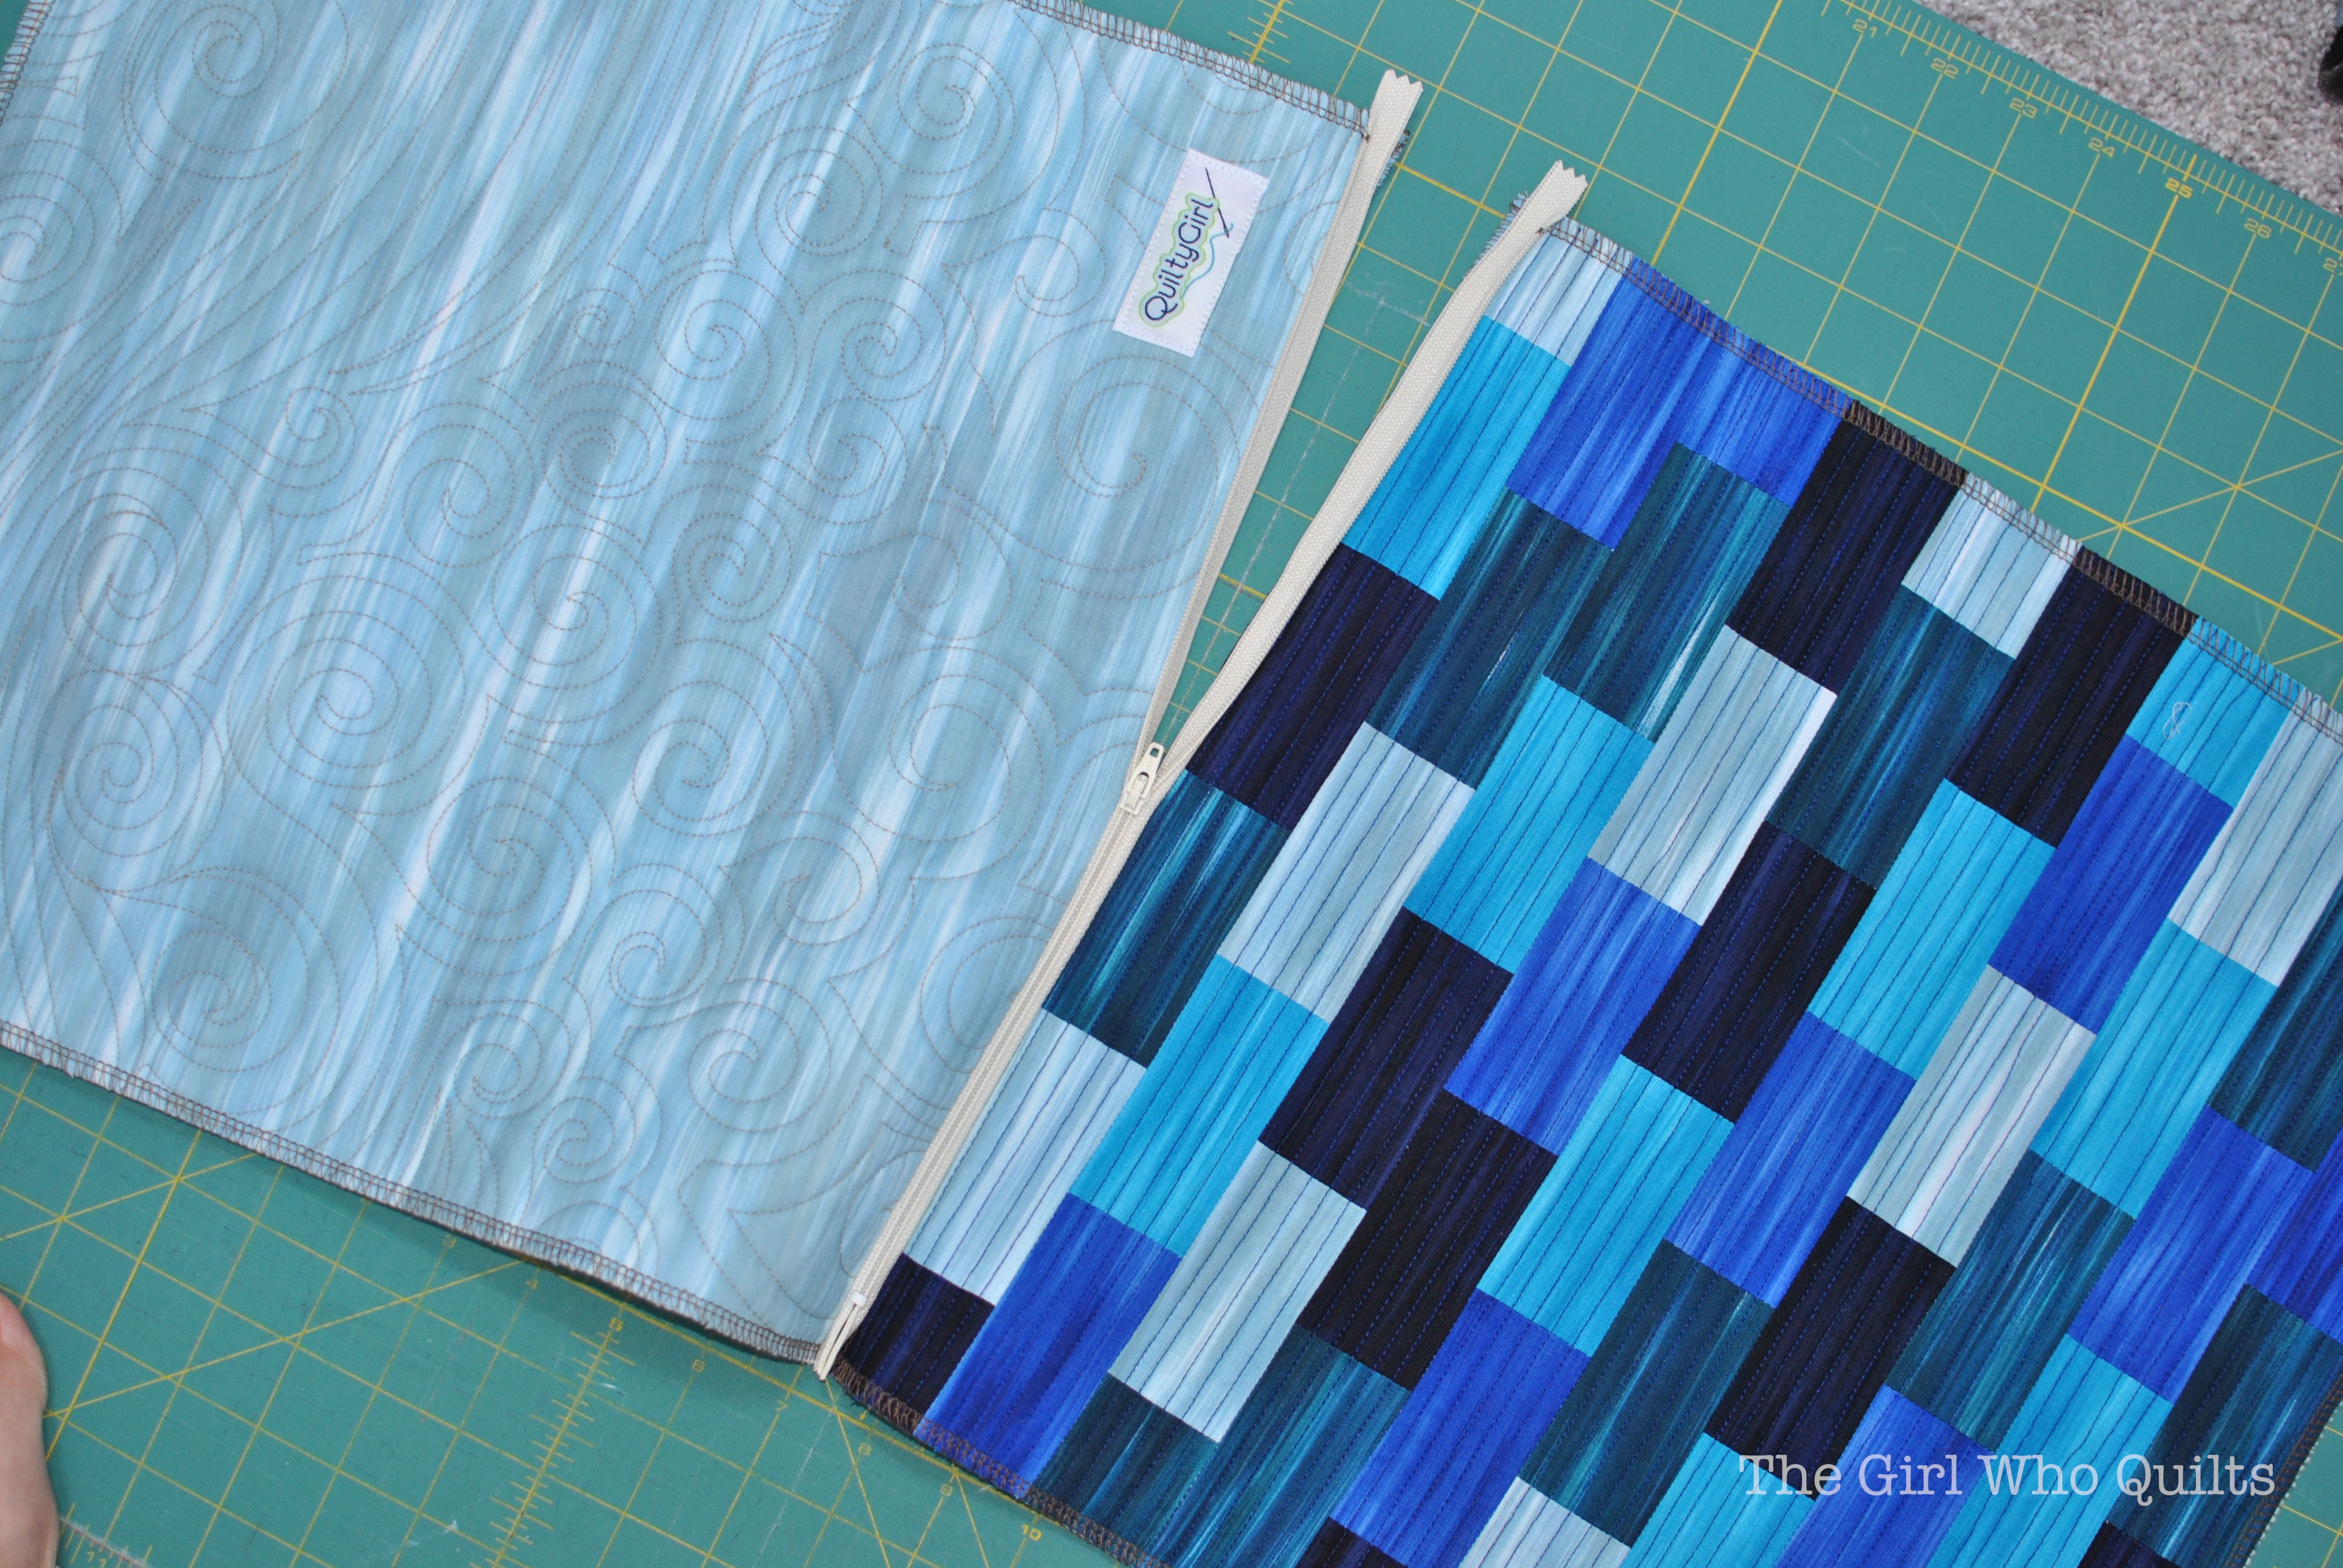
Open the zipper at least half way.
Tile Pillow Tutorial for Benartex

Fold the pillow so right sides are together. Pin around the sides and top of the pillow.
Tile Pillow Tutorial for Benartex

At the bottom corners, pull the zipper ends out of the way.
Tile Pillow Tutorial for Benartex

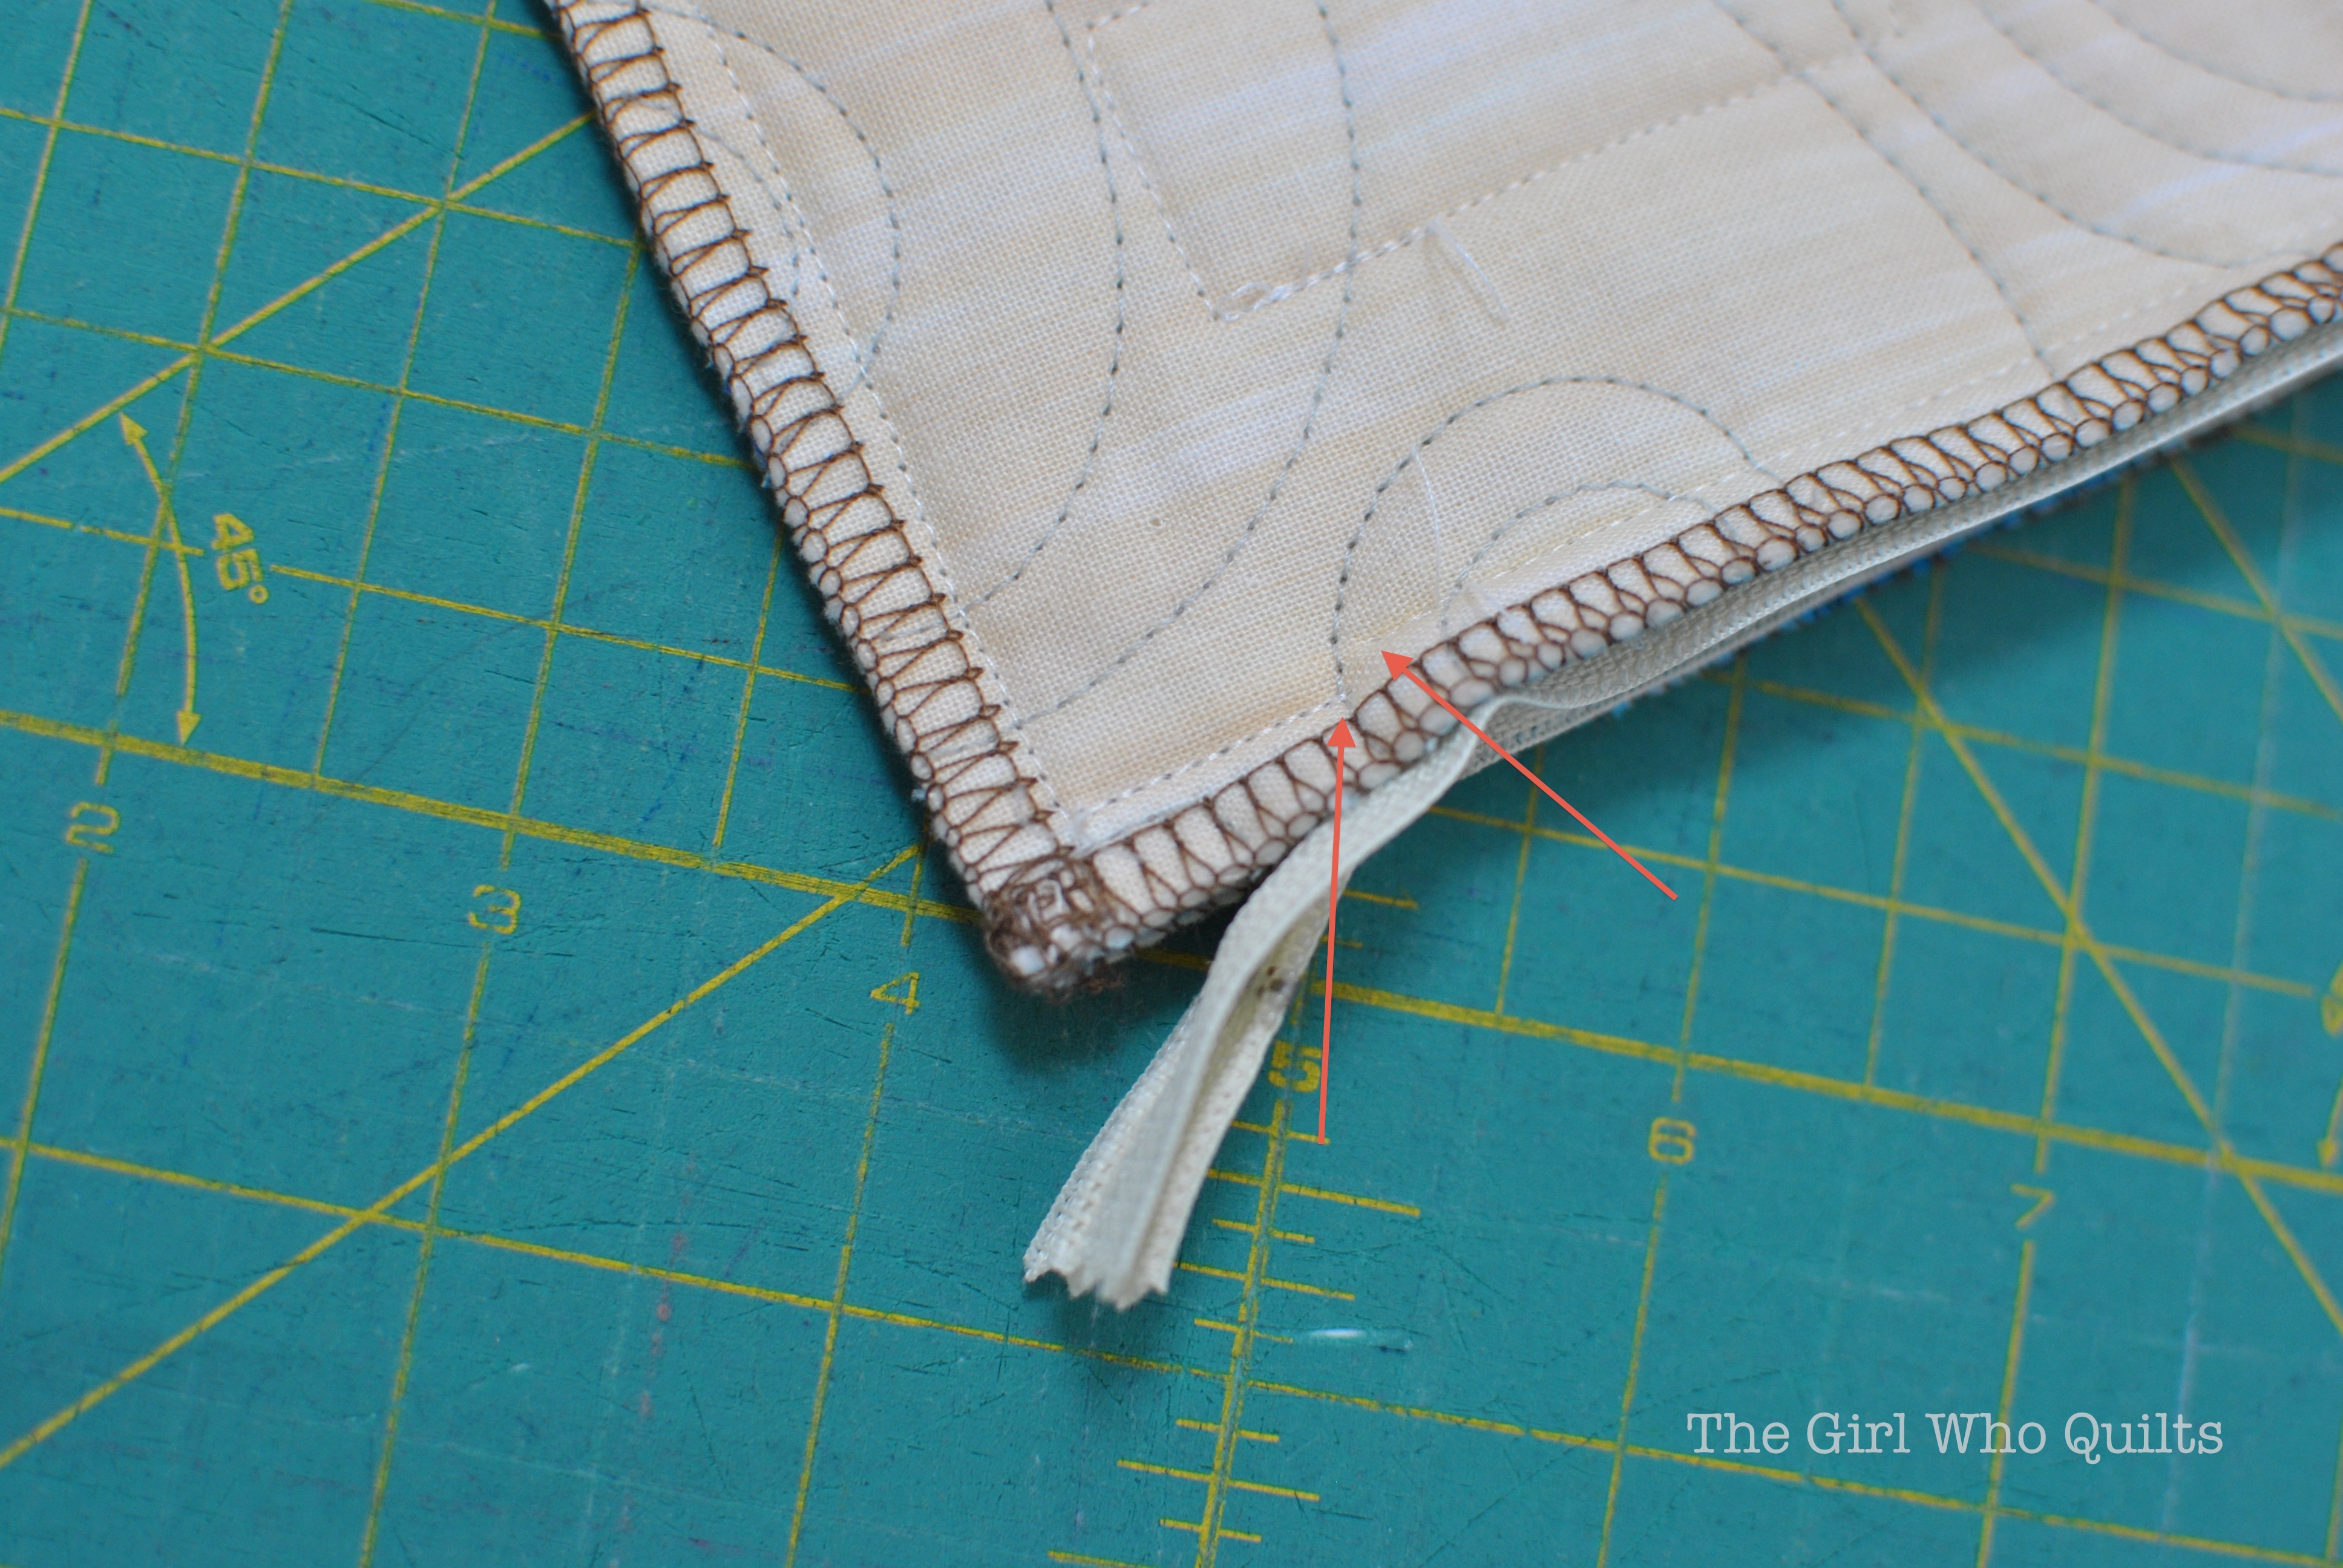
Sew around the sides and top of the pillow. On the bottom edge, stitch from the corner towards the zipper. Don't worry about getting too close to the zipper, just get as close as your presser foot will allow.
The red arrows show the gap in stitching.
Tile Pillow Tutorial for Benartex

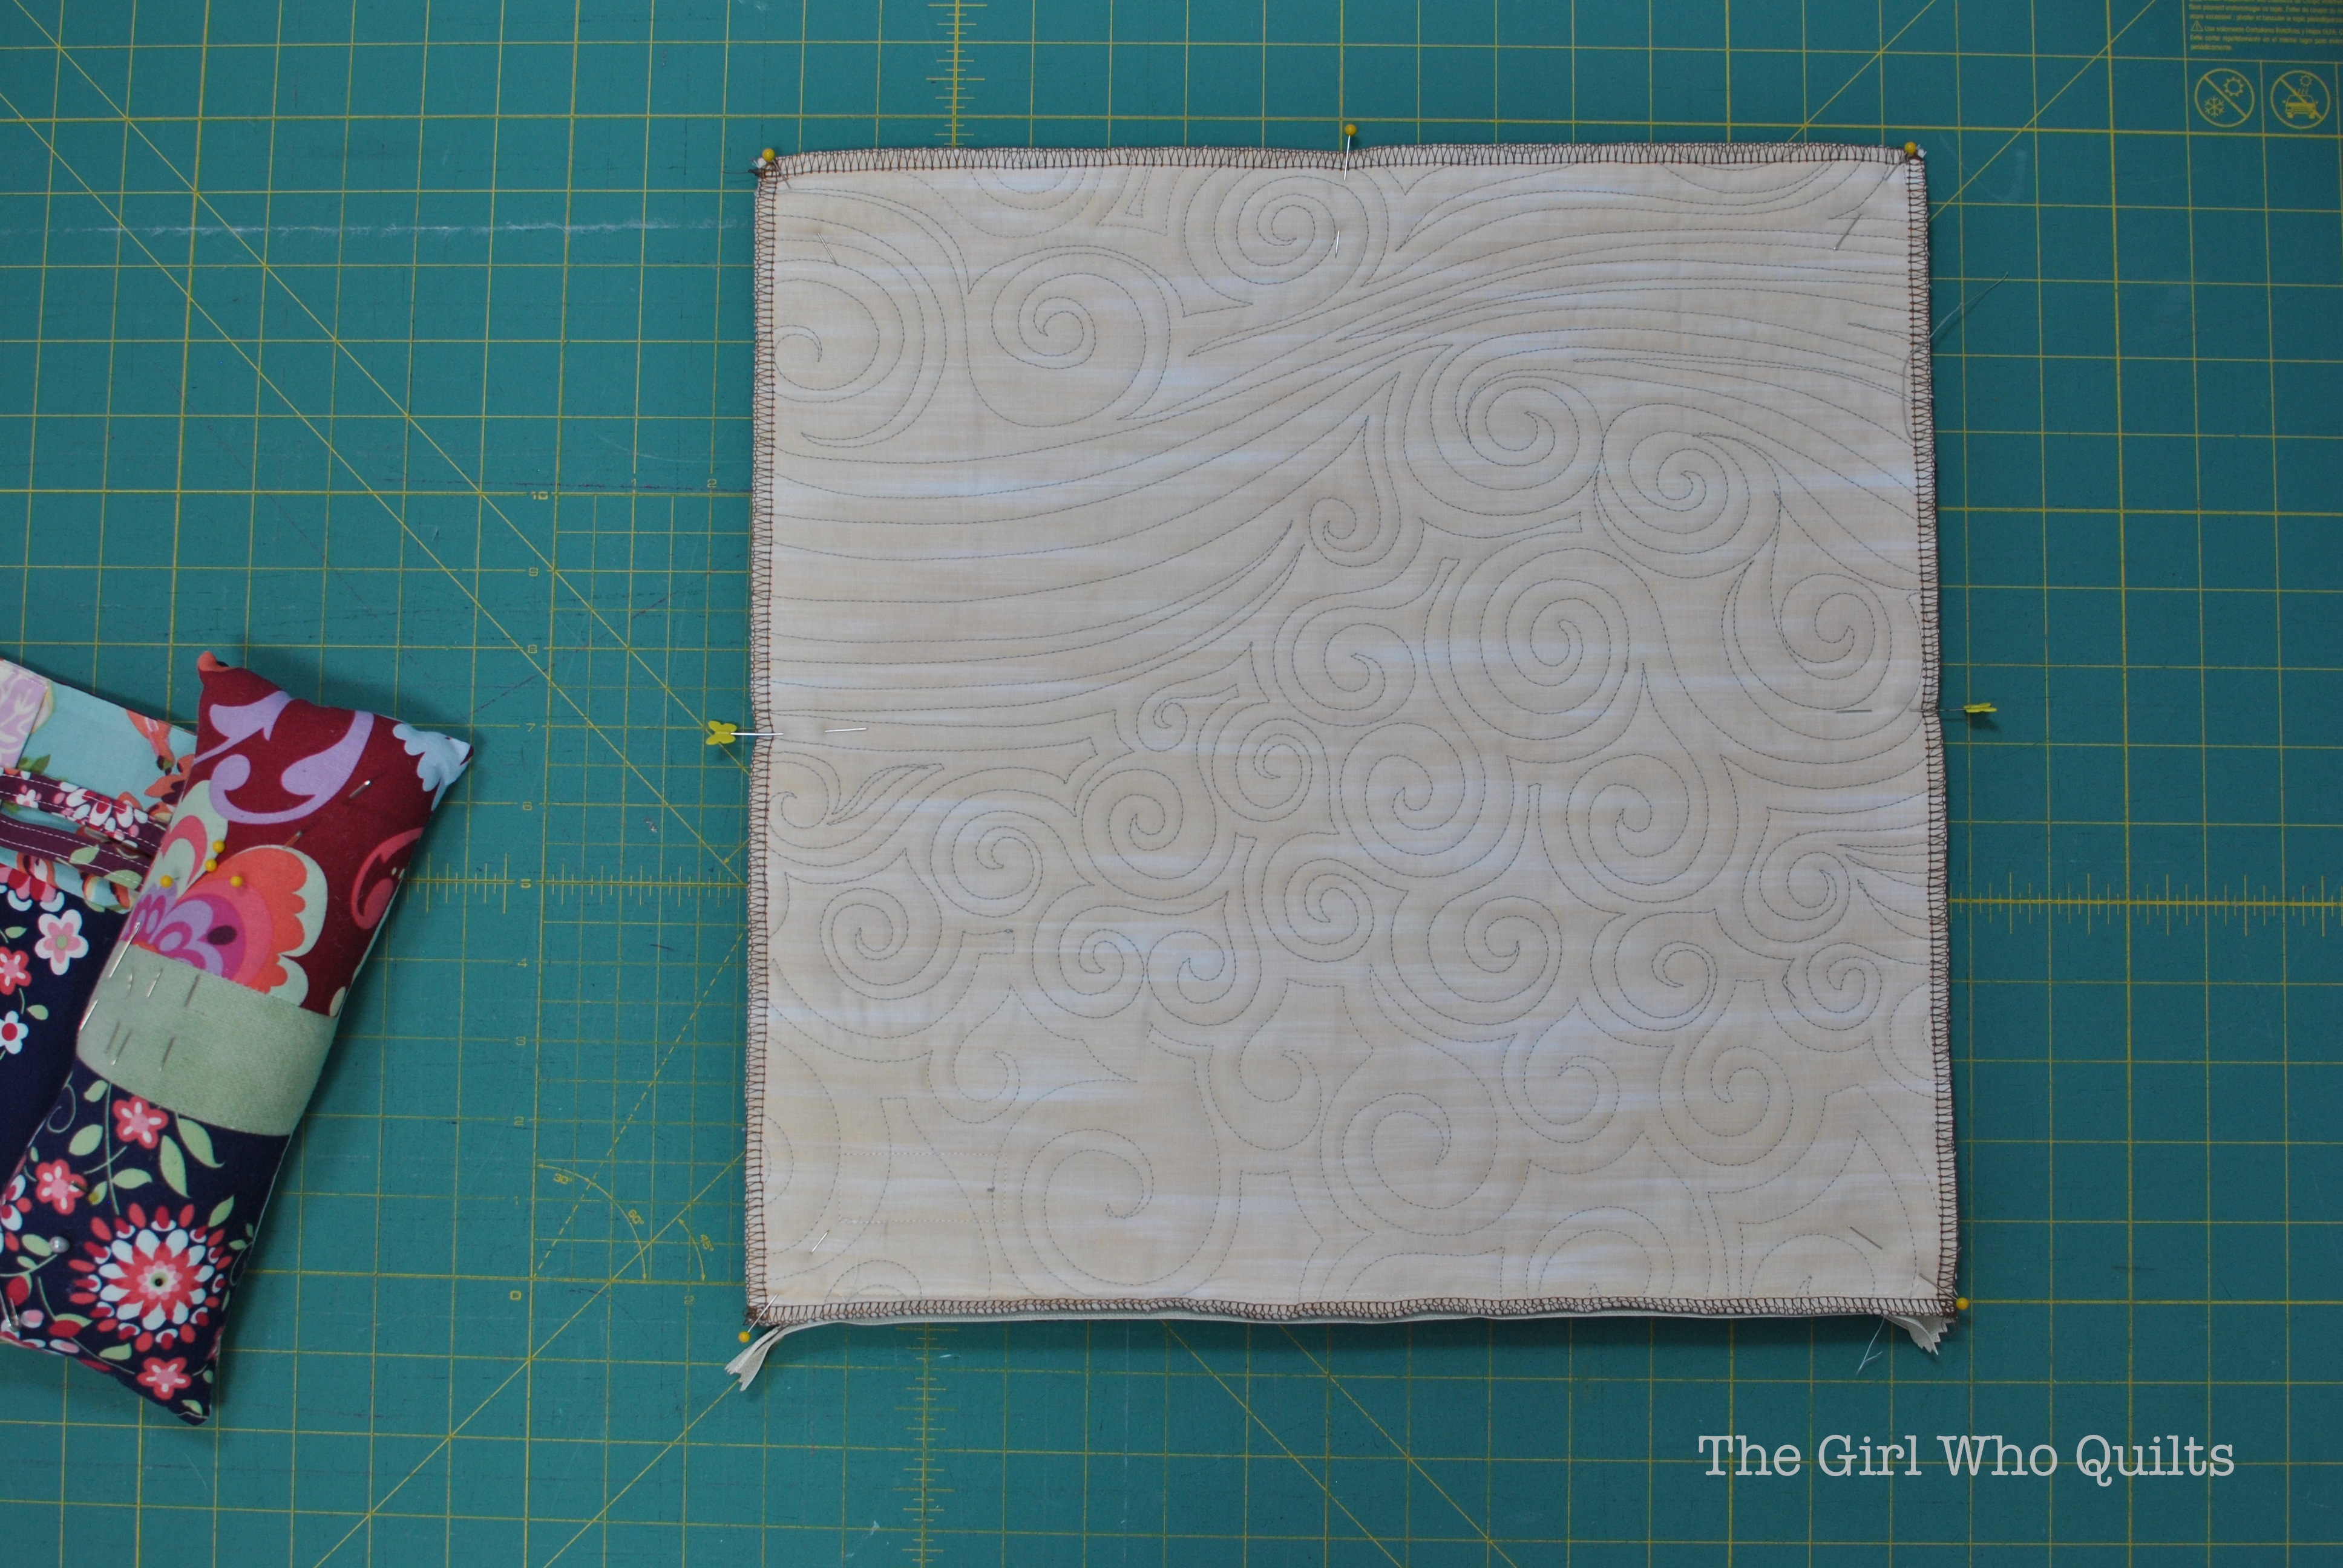
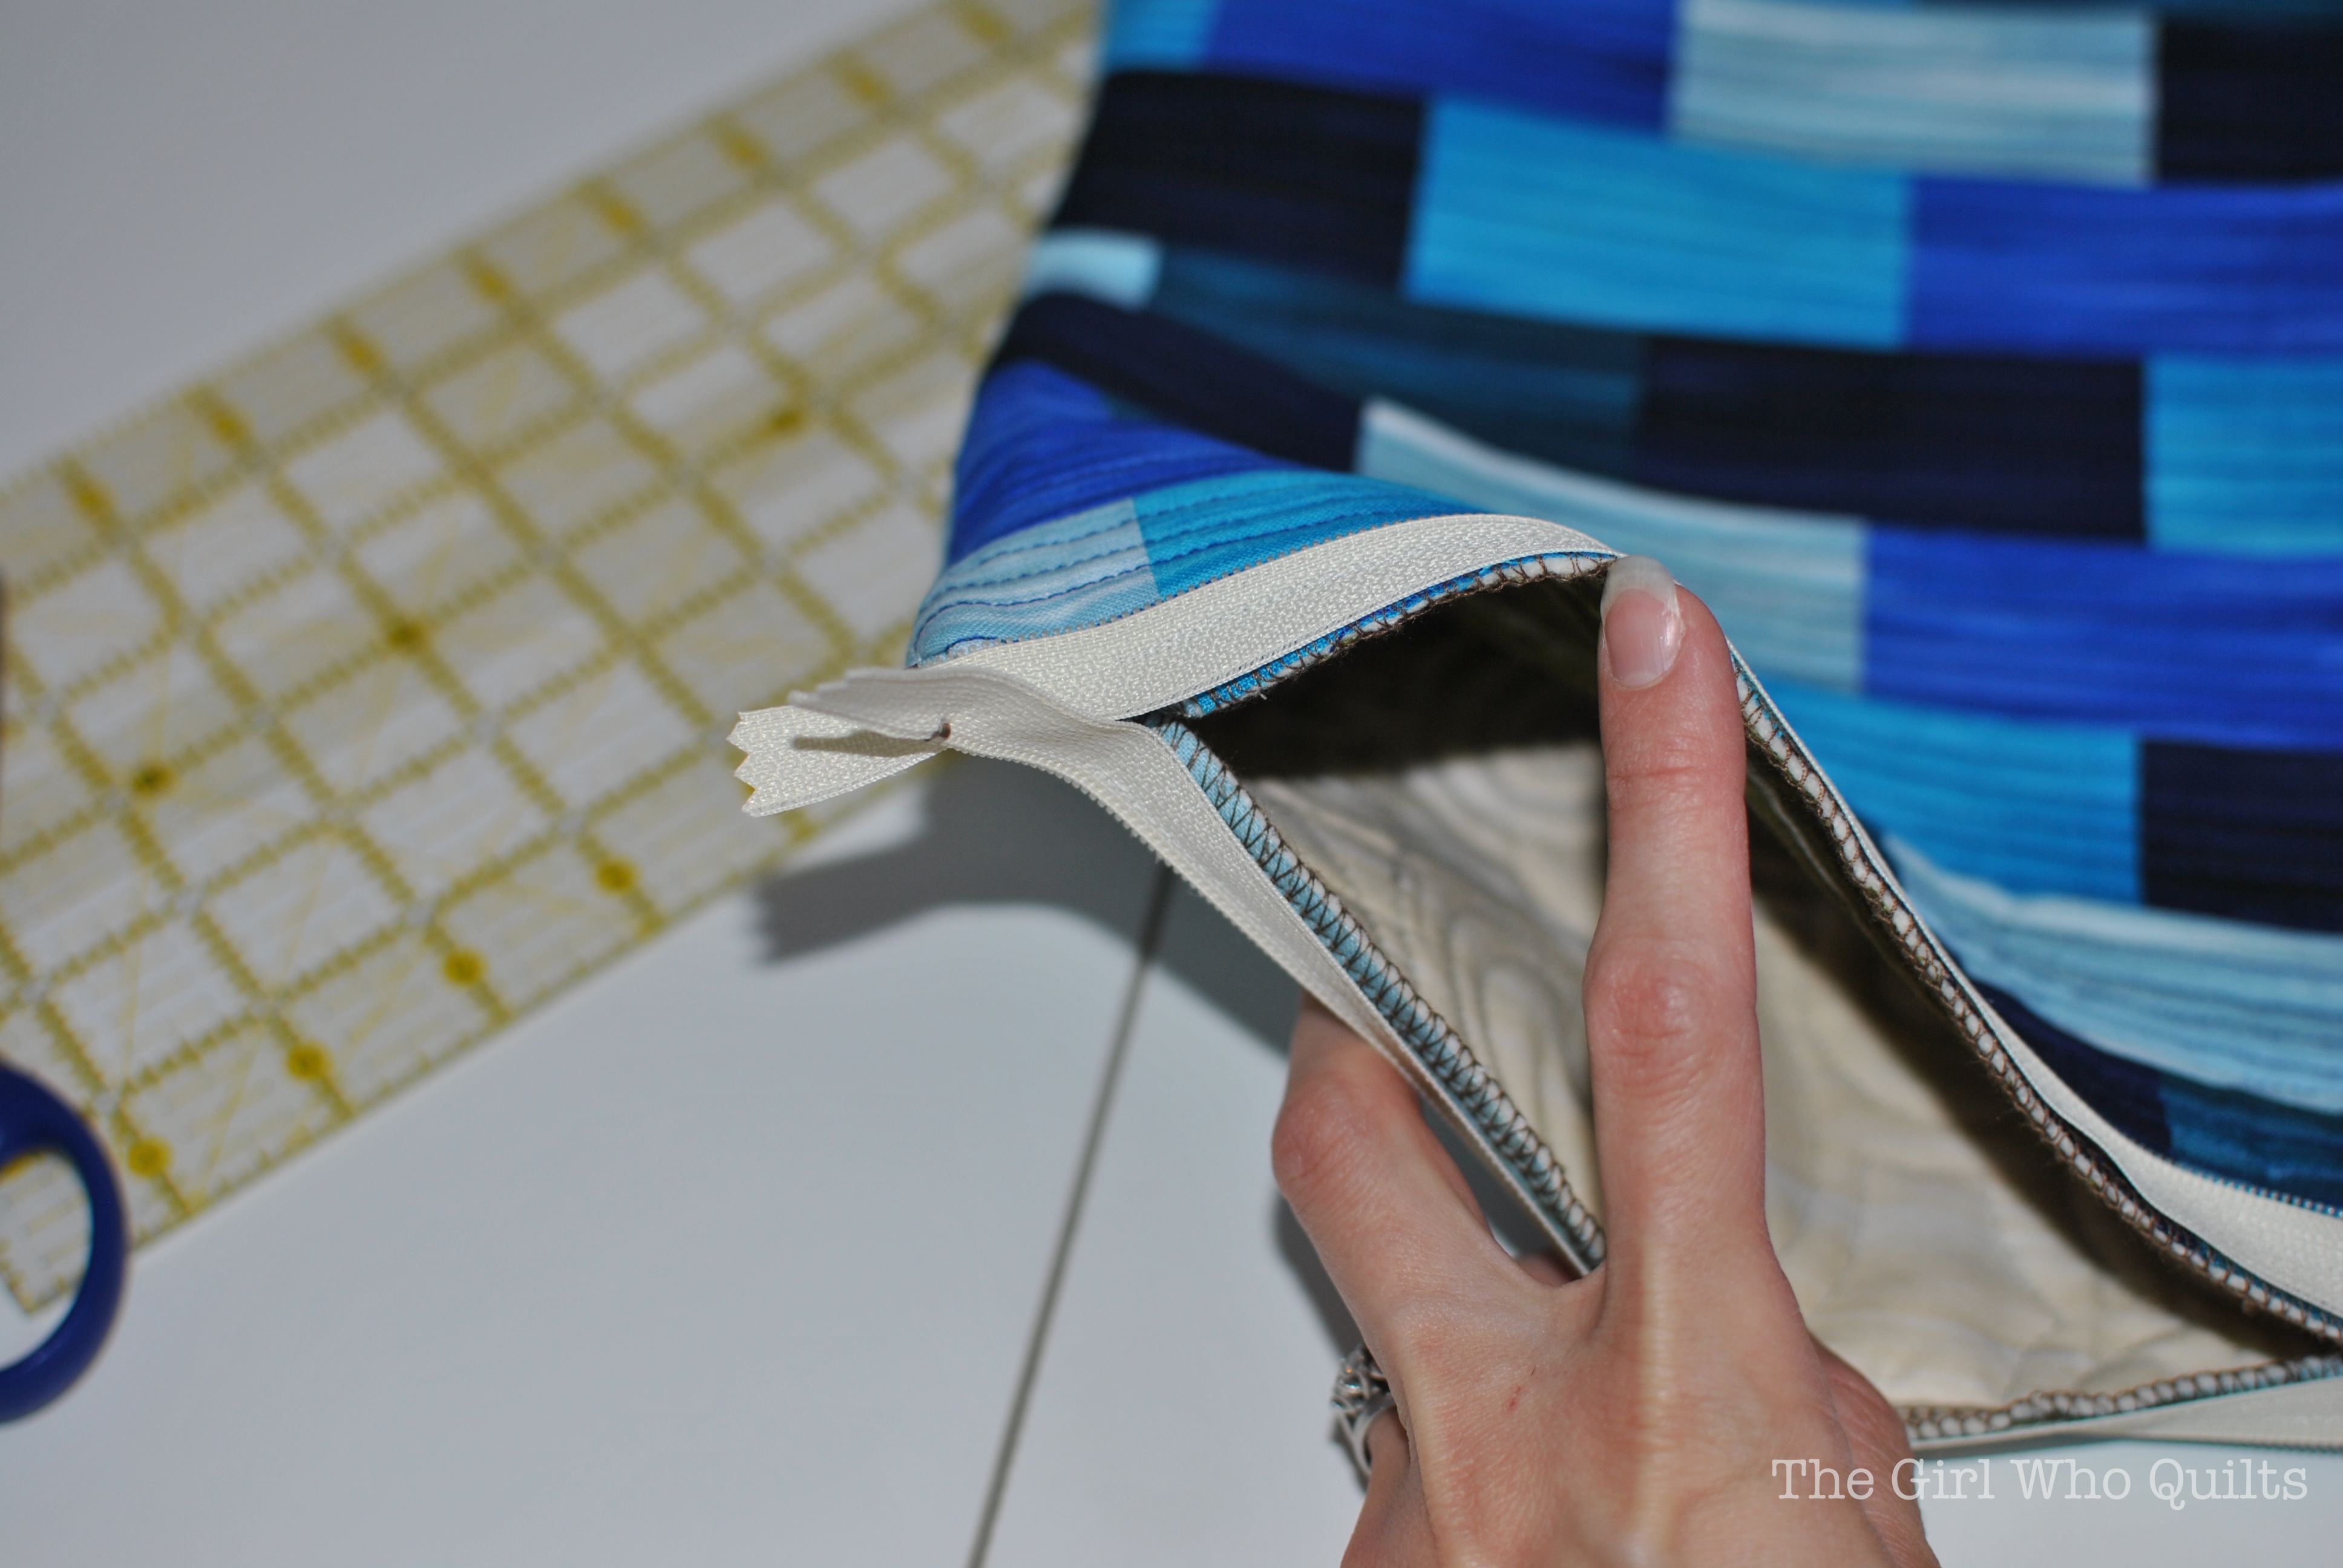
Turn the pillow right side out and gently push out the corners.
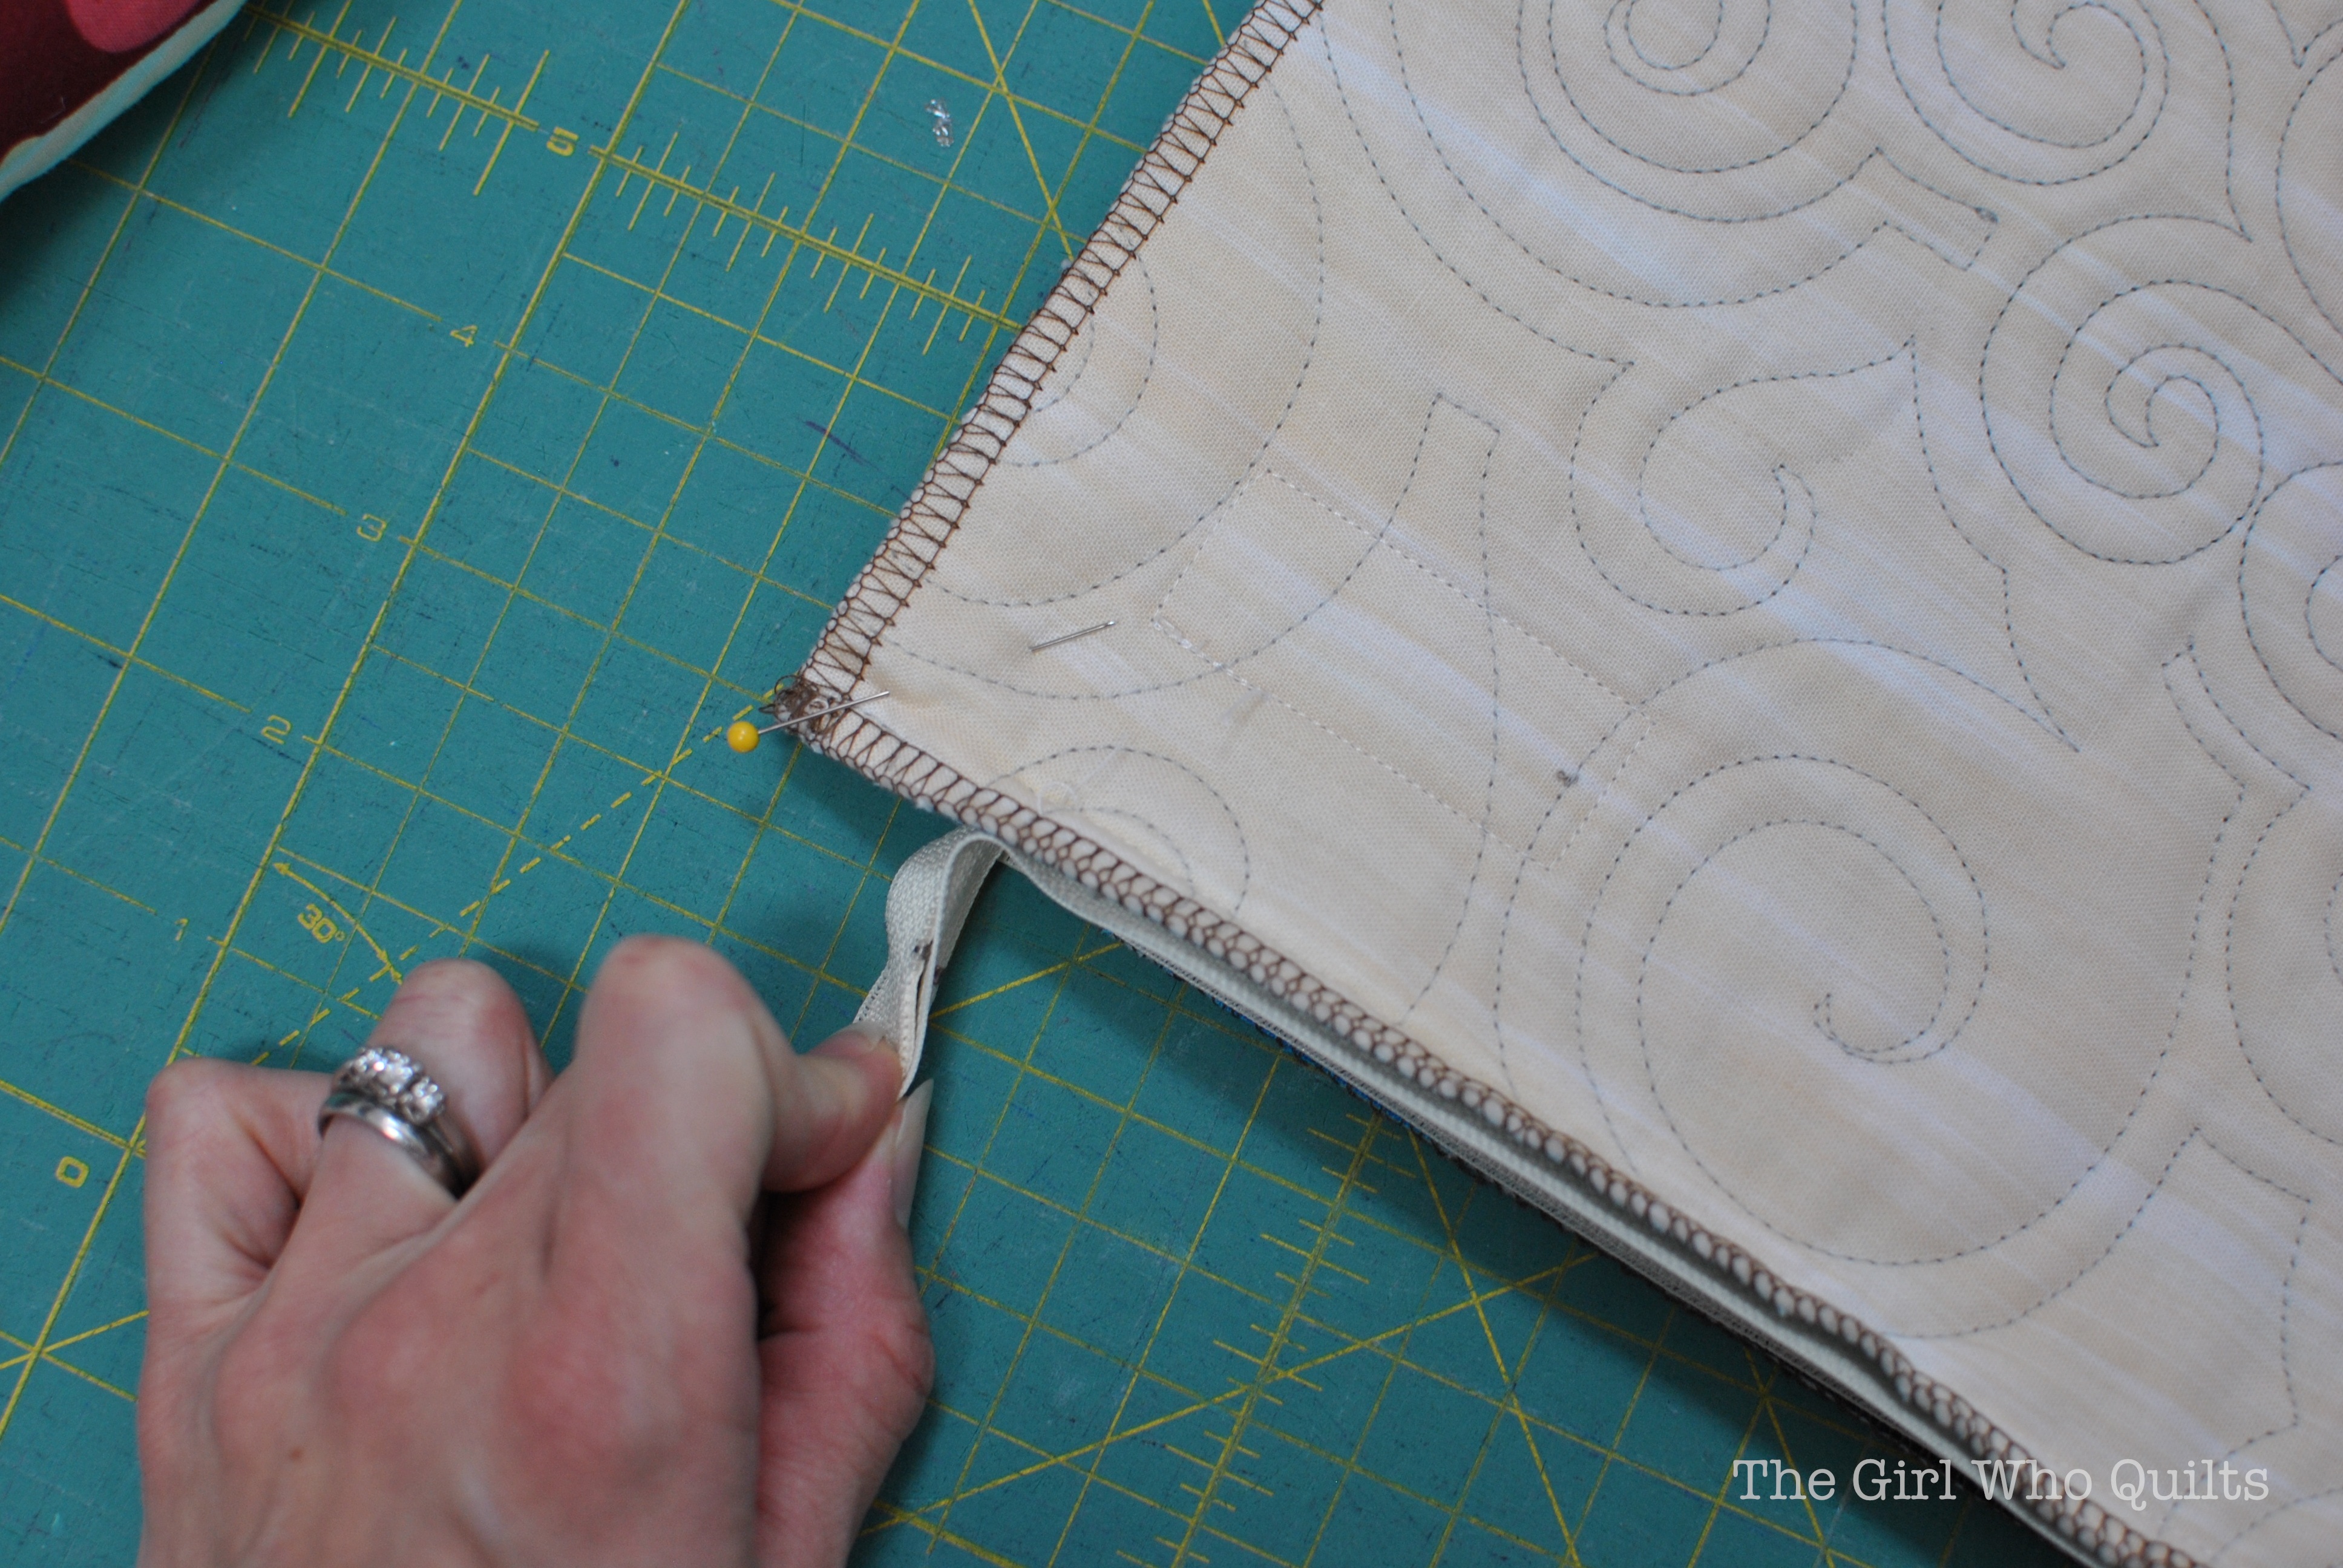
The zipper tape may be sticking out right now.
Tile Pillow Tutorial for Benartex

Just tuck the ends into the pillow before zipping it closed!
Tile Pillow Tutorial for Benartex

Tile Pillow Tutorial for Benartex

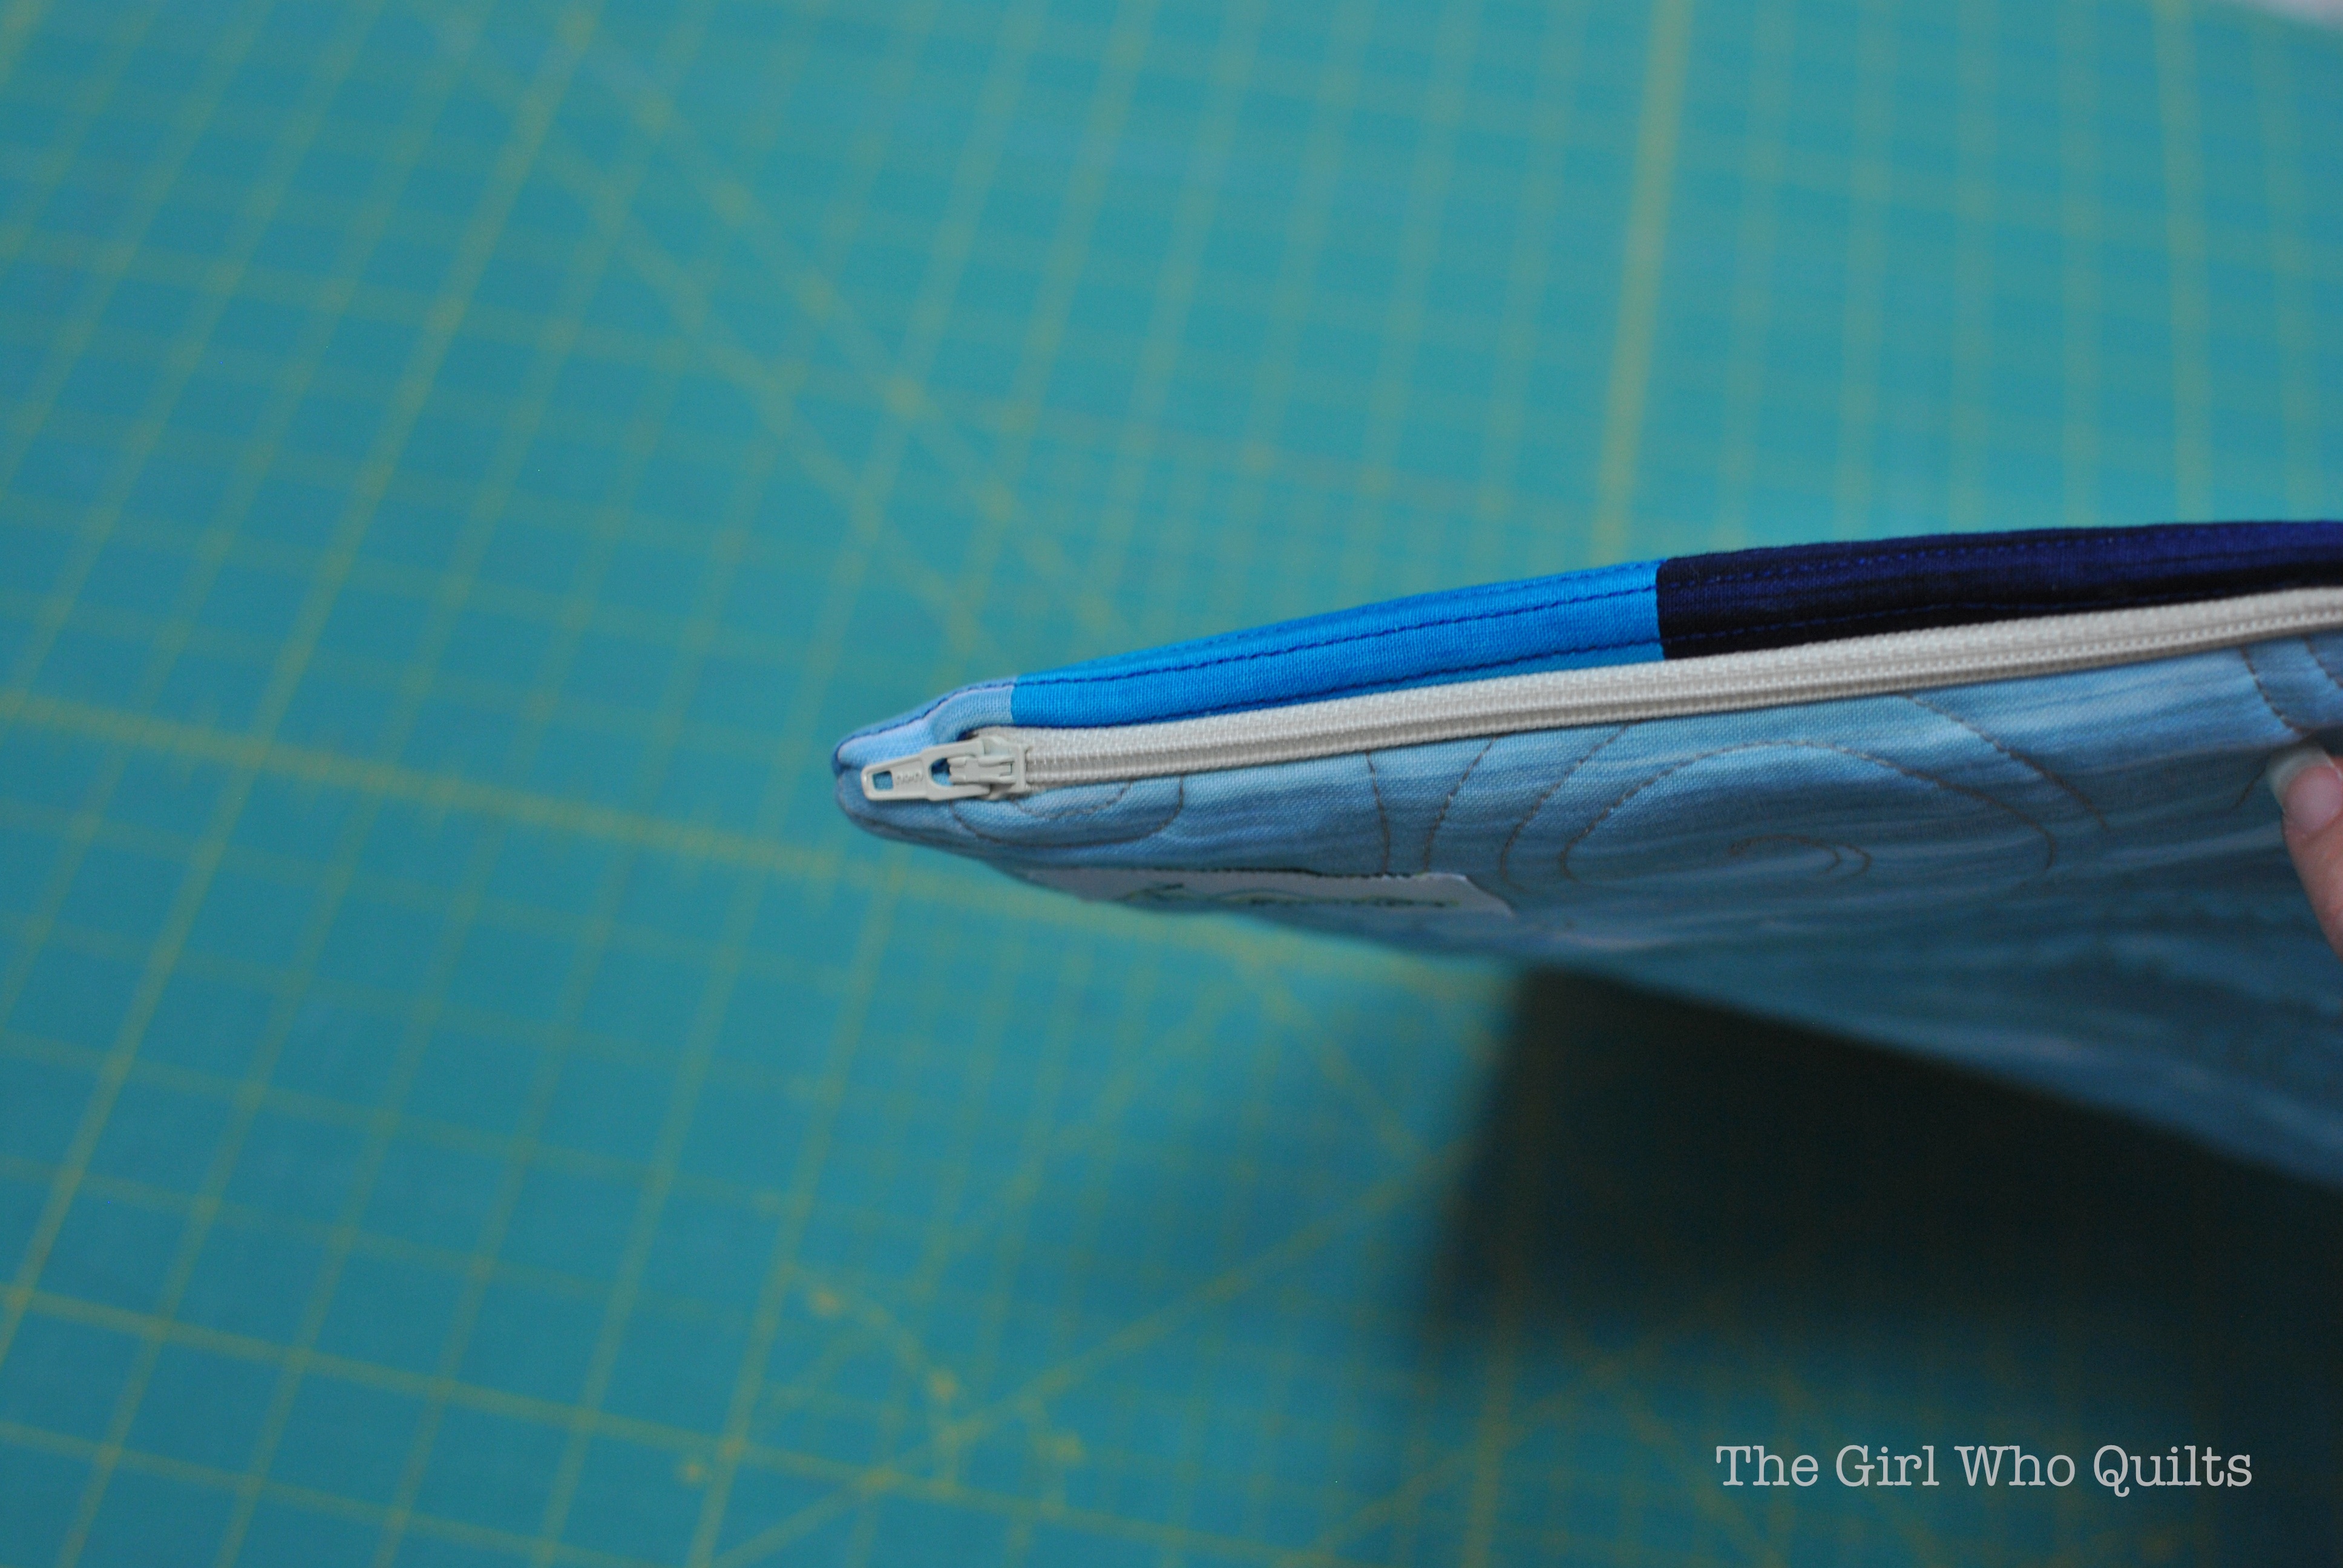
Stuff the pillow form into the case, and you're done!
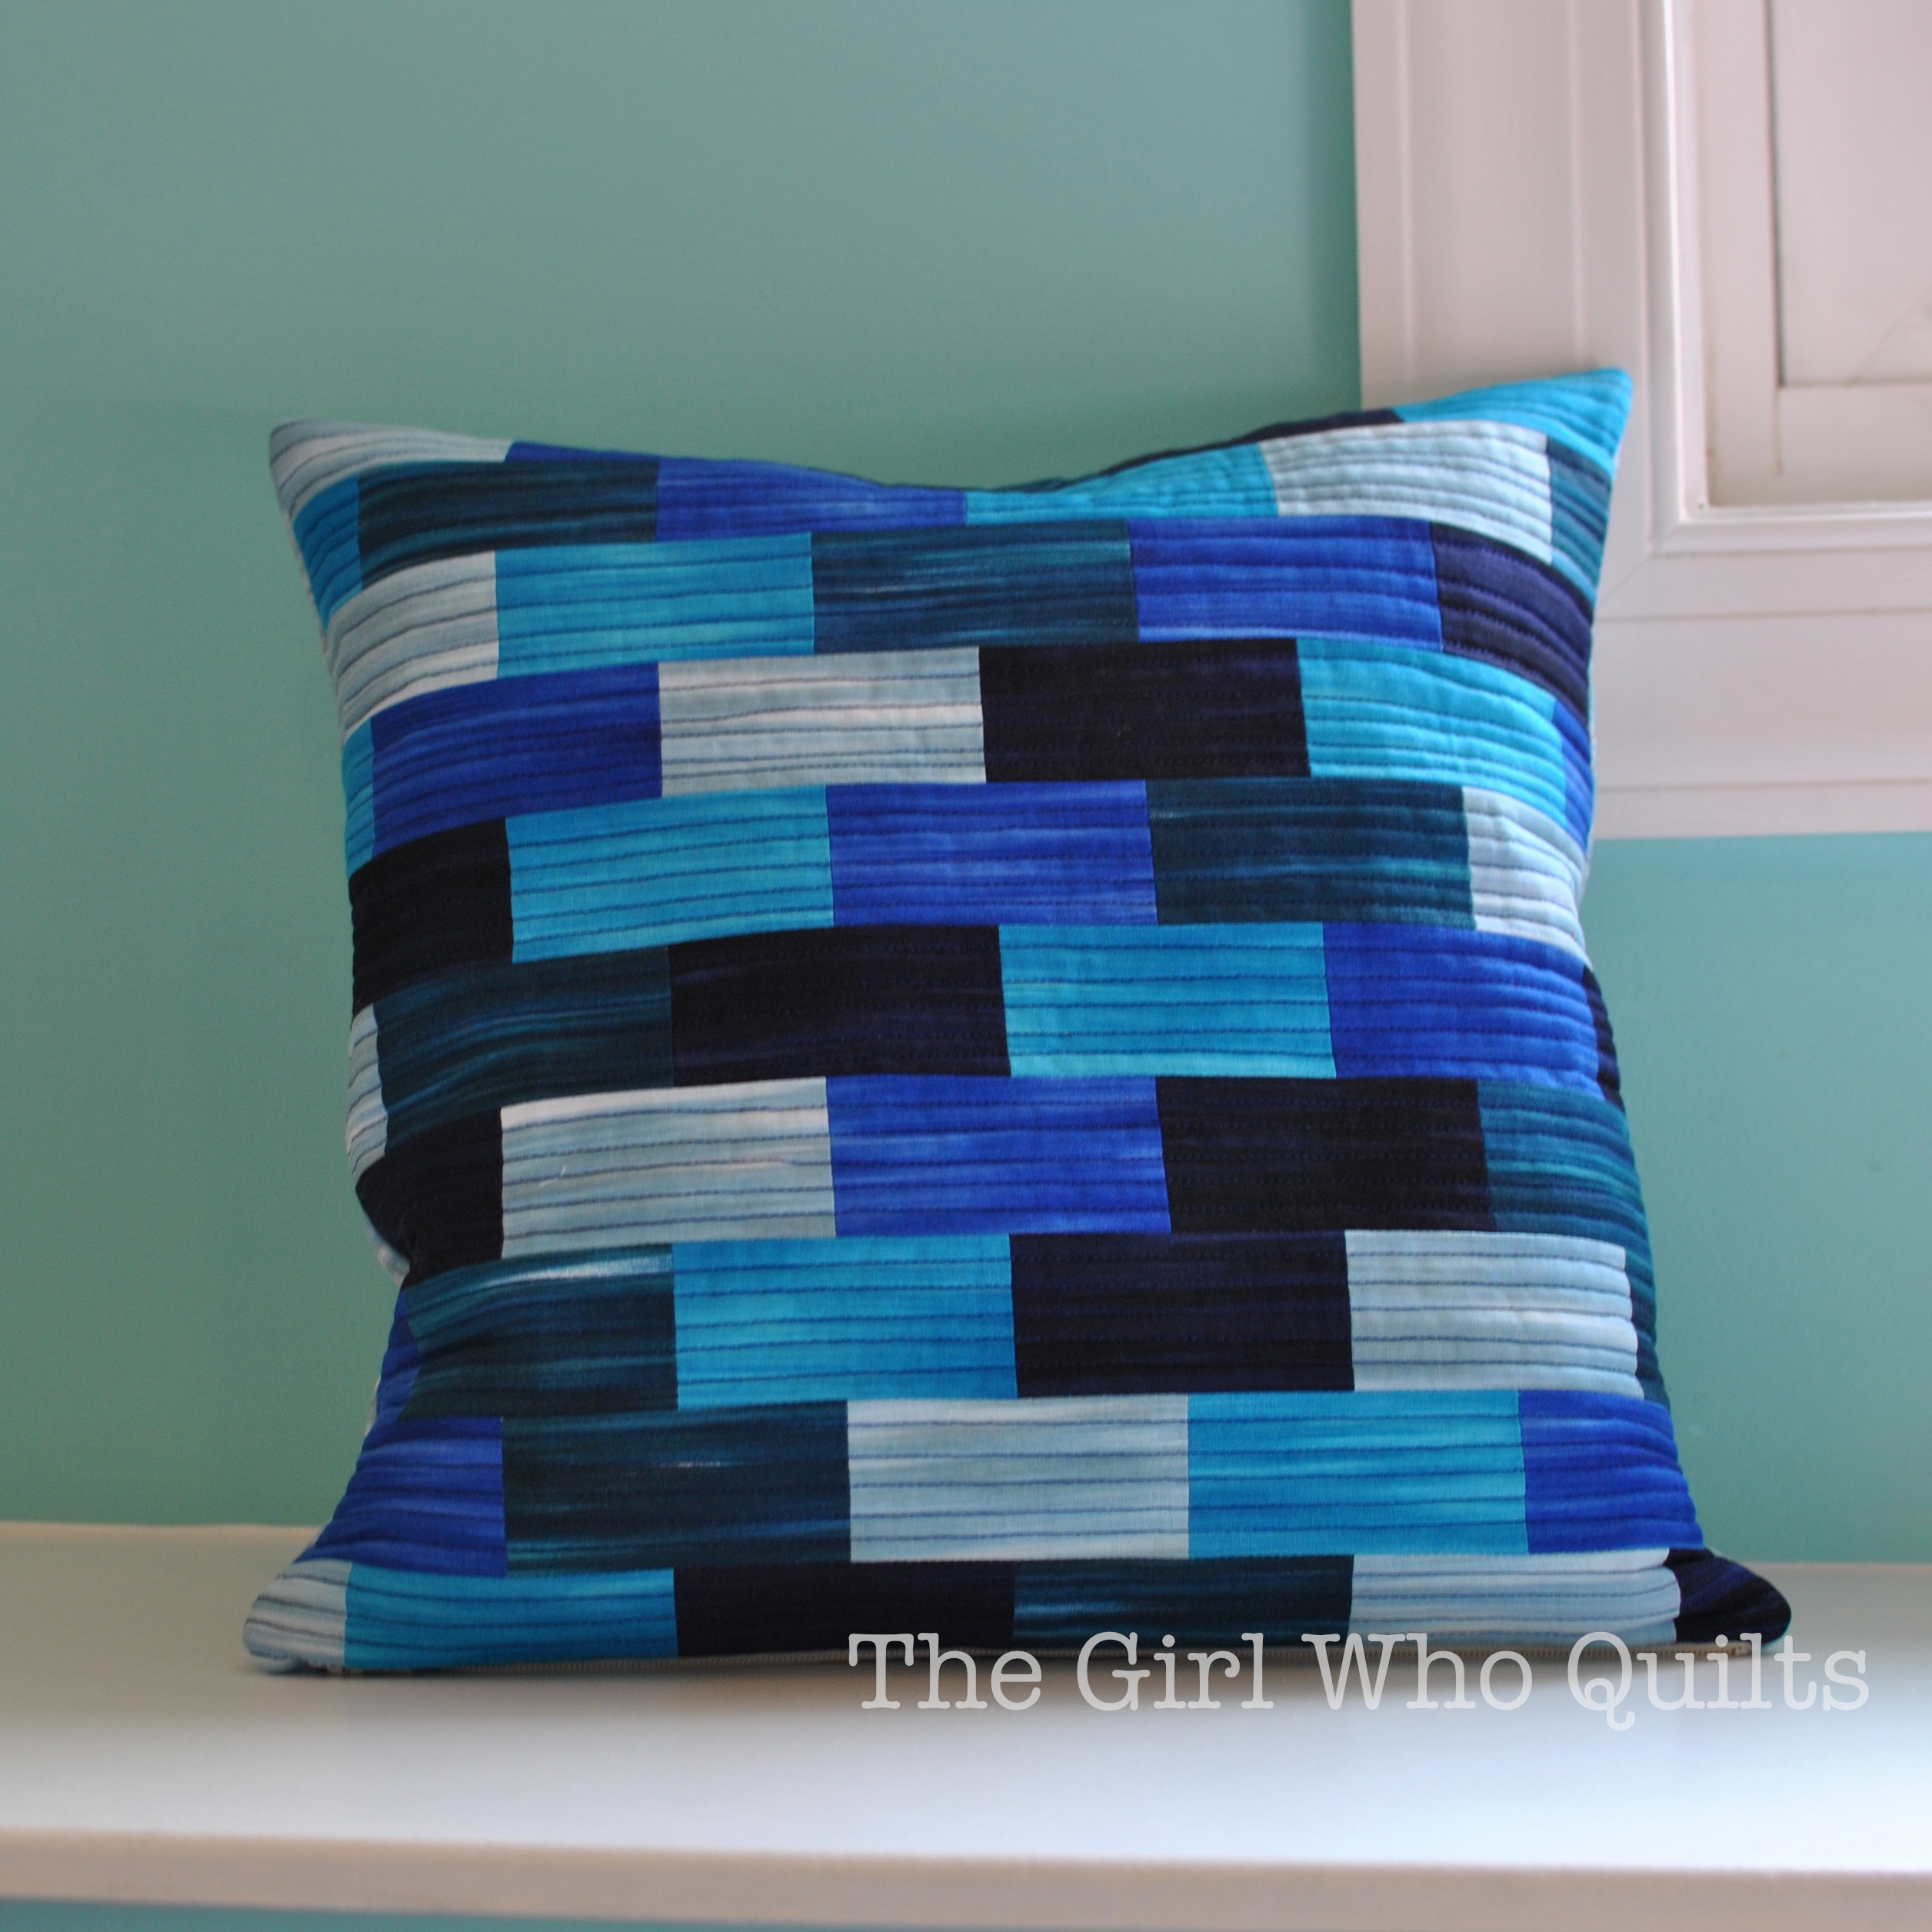
Tile Pillow Tutorial for Benartex

Thanks, Nikki! 
Leave a comment below or on Nikki's blog for a chance to win a fat quarter bundle of Fleurish! Simply sign up to follow the Benartex blog  (use the email or Bloglovin' buttons in the right hand side bar and leave a comment letting us know that you do). For a second chance to win, follow Benartex's Sew Interesting page on Facebook and leave a comment here letting us know you do. The giveaway is open through Tuesday, September 2 at 11:59 pm EST and the winner's name will be randomly selected and announced next week. 

Be sure to check out the other tutorials we've featured all week long!

Blenders Blog Hop:
Tuesday 8/26: Christina from Sometimes Crafter featuring Burlap
Wednesday 8/27Caila from Caila Made featuring Burlap
Thursday 8/28: Benartex Blog Design Team featuring Blush
Friday 8/29: Nikki from The Girl Who Quilts featuring Fleurish
Love It? Share It! Facebook Twitter Google Pinterest Email