Welcome back to the last day of our Blenders Blog Hop. We hope you've enjoyed seeing our blender lines--Burlap, Blush, and Fleurish, specifically--showcased in fun and easy tutorials! These blenders work beautifully on their own, as you've seen this week, and they also coordinate nicely with your favorite prints. Today, Nikki from The Girl Who Quilts is sharing her subway tile design pillow using the Fleurish collection from Kanvas. After scrolling through her tutorial, head over to her blog to see how you can enter for a chance to win a fat quarter bundle of Fleurish for yourself.
Hi! I'm Nikki from The Girl Who Quilts! I have a fun tutorial using the Fleurish blenders to create a pillow based on subway tile. The blocks could also be sewn up to create a great quilt! So, let's get started!
Hi! I'm Nikki from The Girl Who Quilts! I have a fun tutorial using the Fleurish blenders to create a pillow based on subway tile. The blocks could also be sewn up to create a great quilt! So, let's get started!
Supplies:
1/8 yd of 5 different fabrics
1 fat quarter for pillow back
14" zipper
16" pillow form*
Optional:
2 - 18" square batting pieces
1/2 yard lining
*This tutorial actually makes a 14 1/2" x 14 1/2" finished pillow. I used an older 16" pillow form that had lost its shape. The pillow form no longer filled a 16" x 16" cover, but works great for this project! Another option is to buy a less expensive pillow form, they typically aren't as full as the higher priced ones.
Cutting instructions:
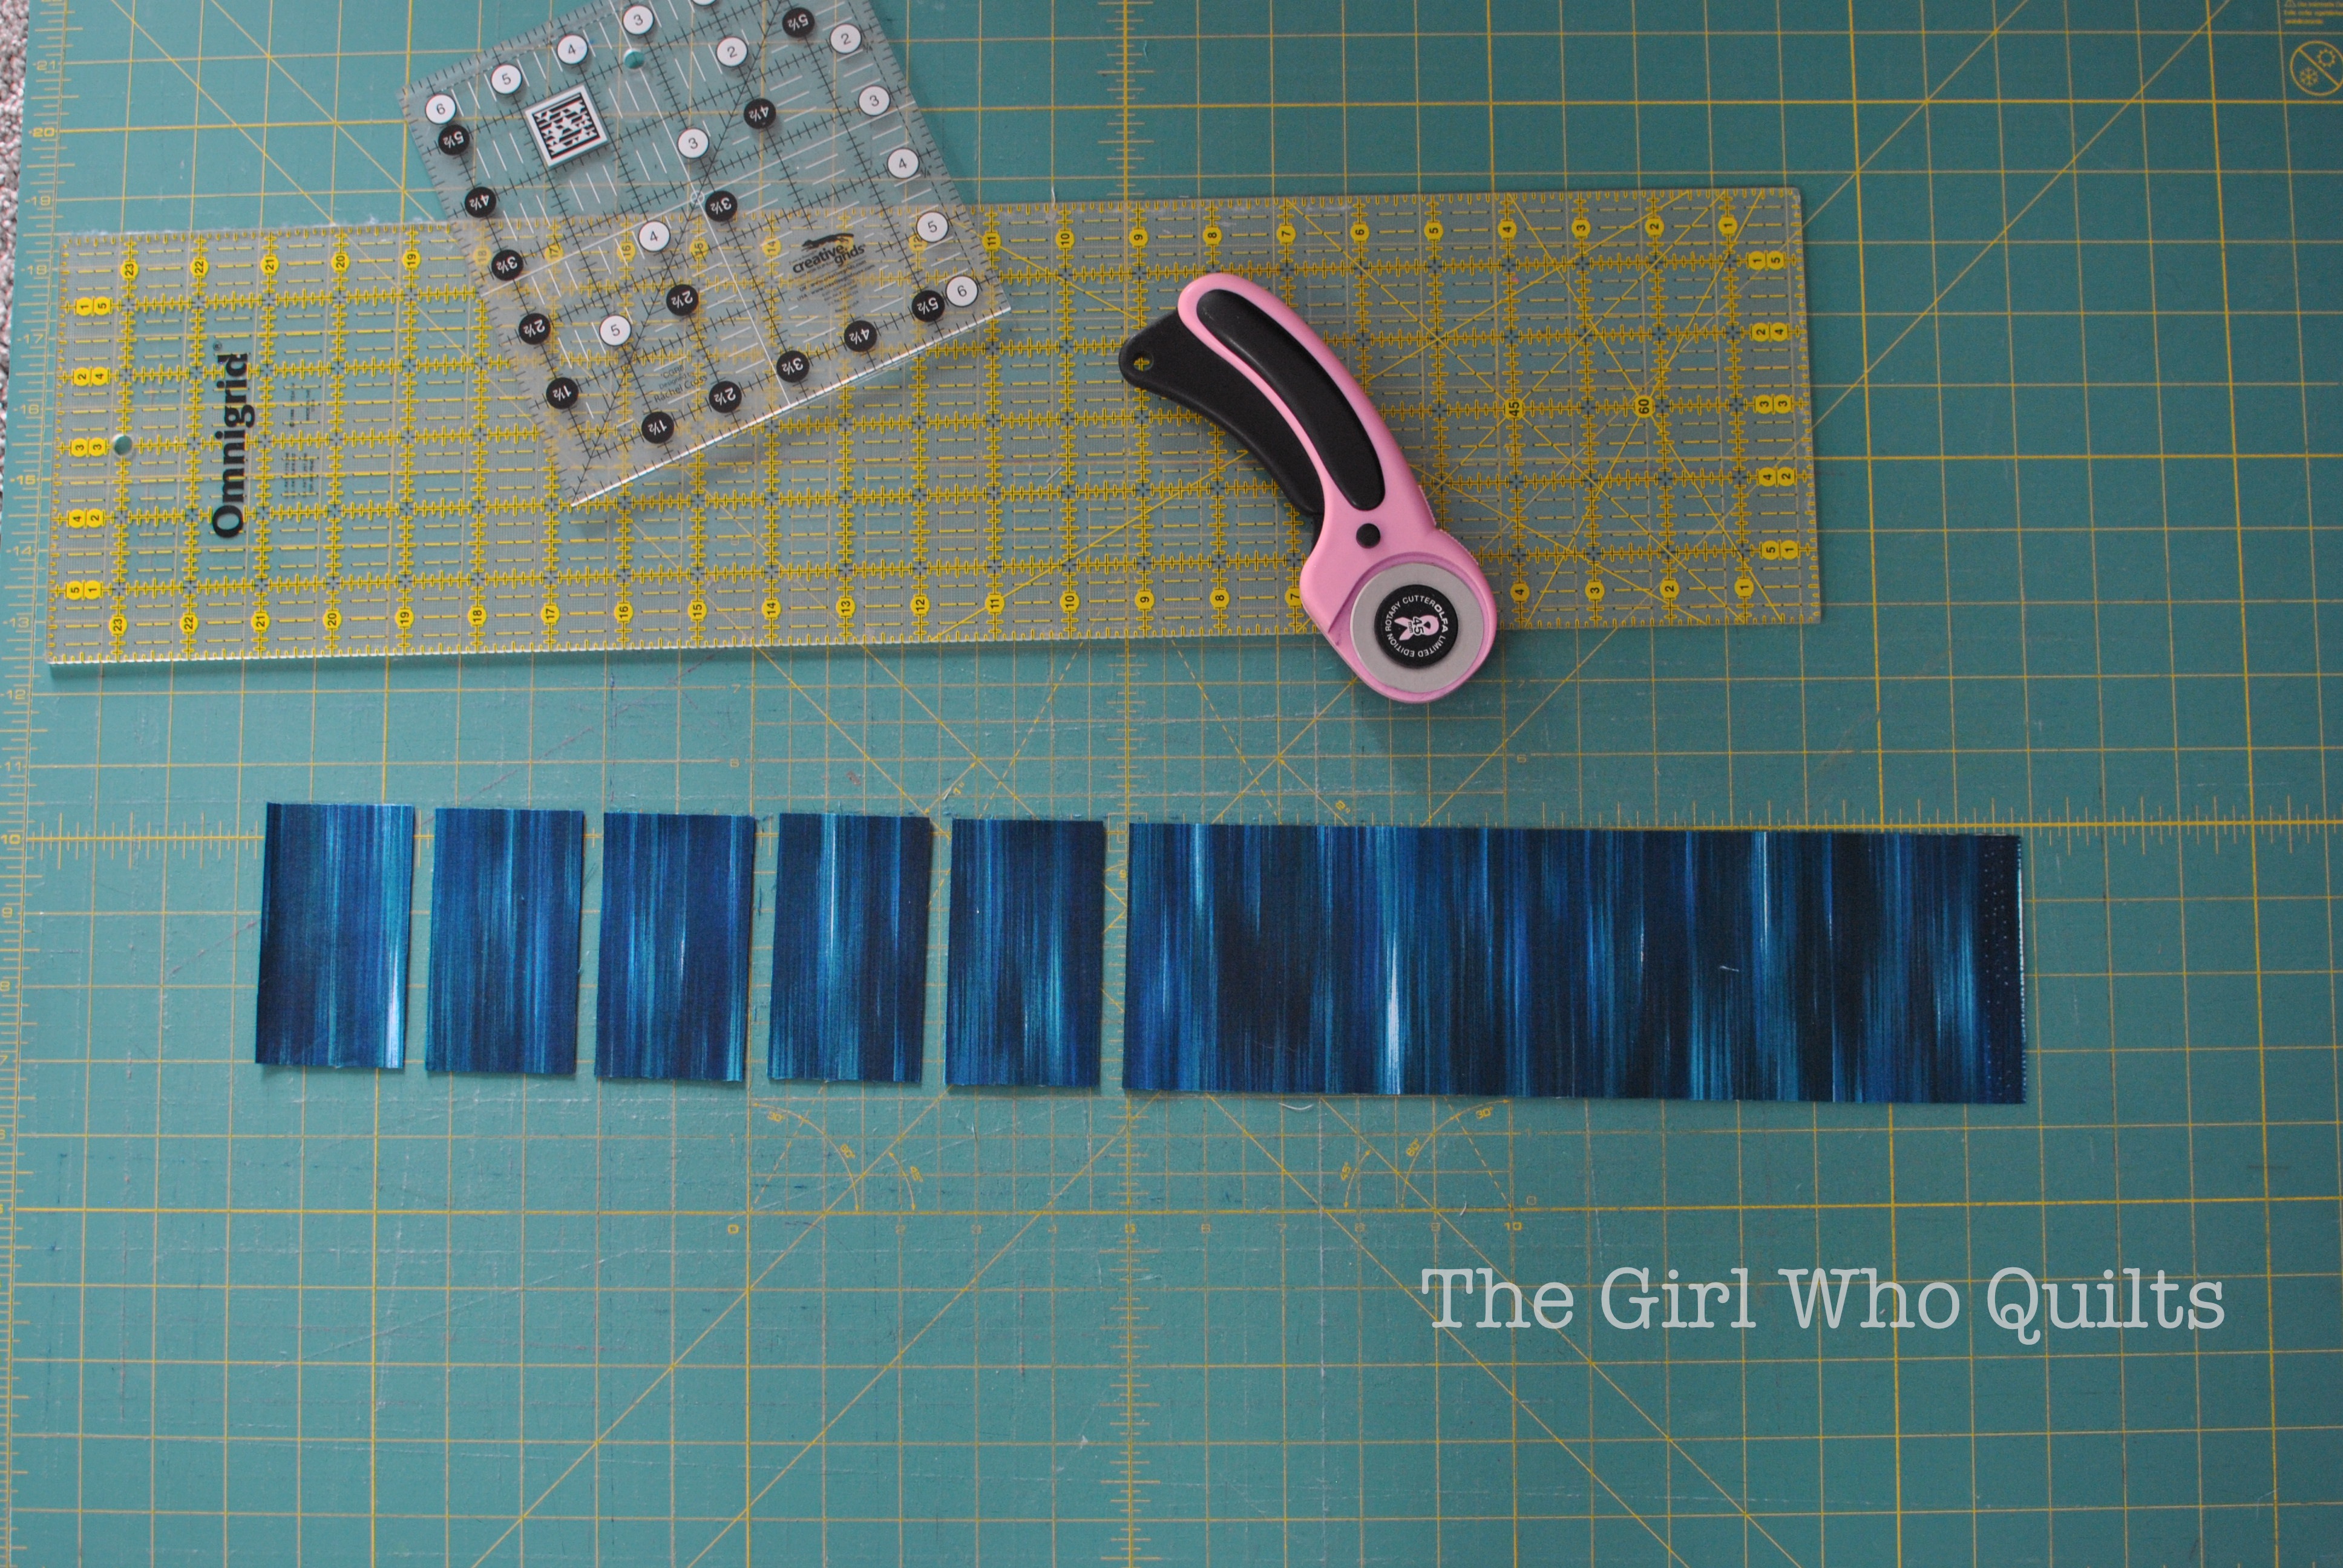
Cut a 3 1/2" x WOF strip of each 1/8 yd cut.
Cut the fat quarter for the pillow back to 18" x 18".
Cut the 1/2 yard of lining into 2 - 18" x 18" squares.
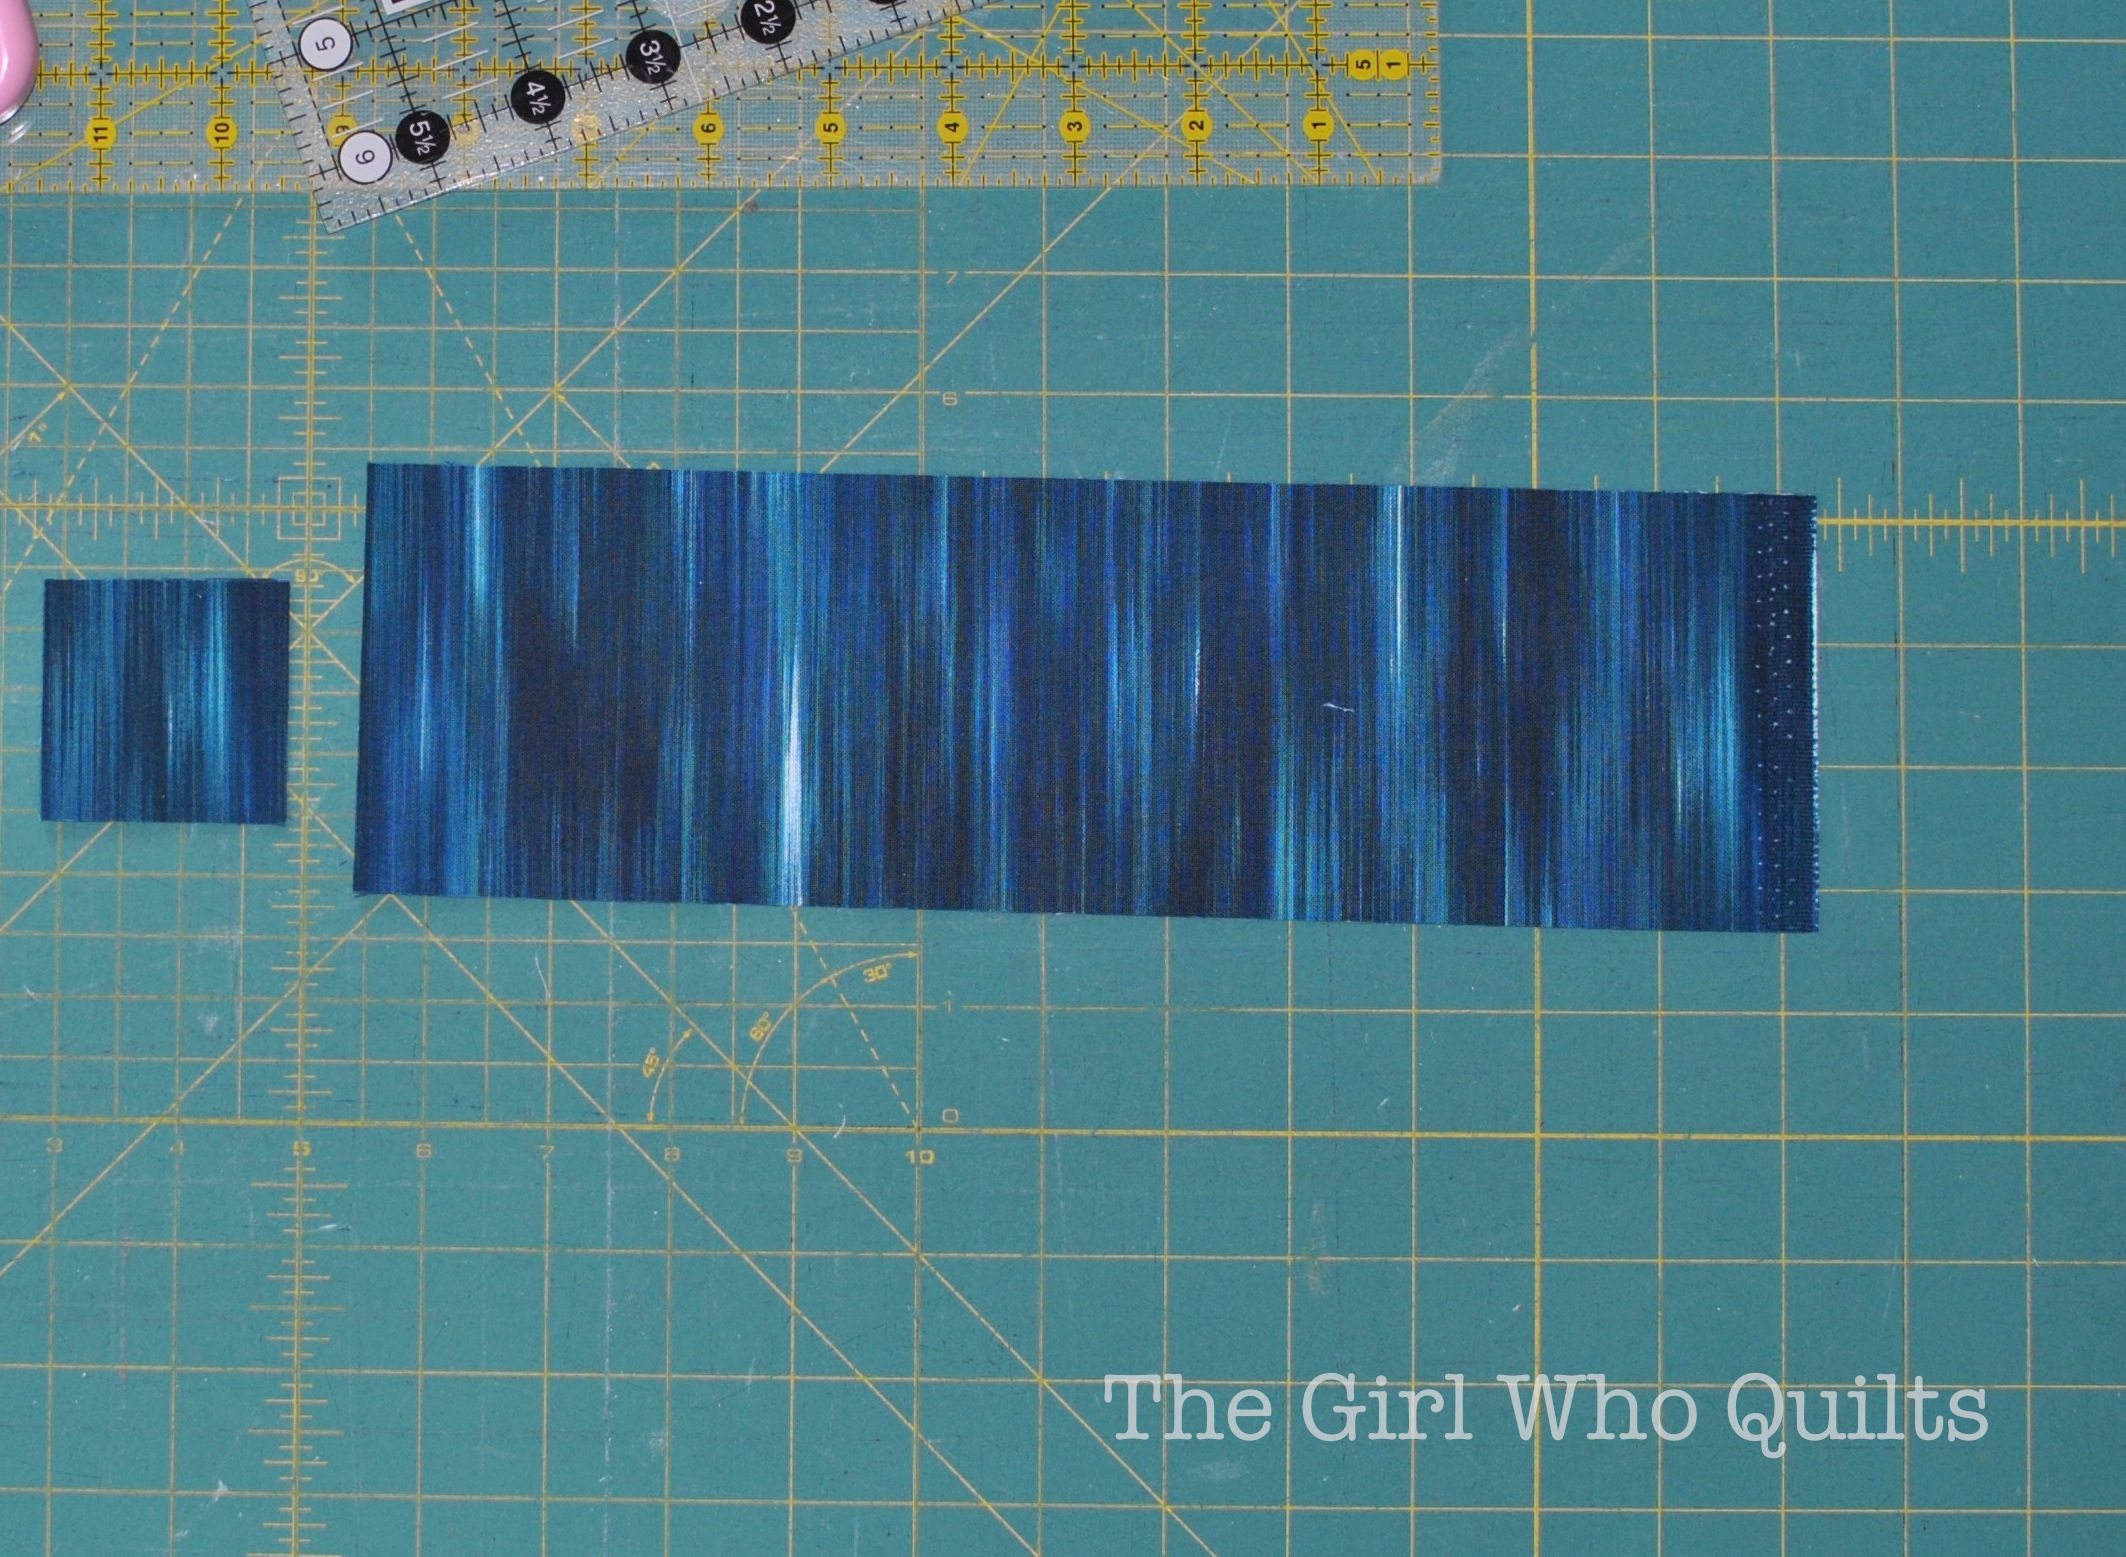
From the strip cut 9 pieces measuring 3 1/2" x 2". (Strip is shown folded over to cut 2 pieces at a time.)
Cut 2 pieces measuring 2" x 2".
Piece the rectangles and squares as follows:
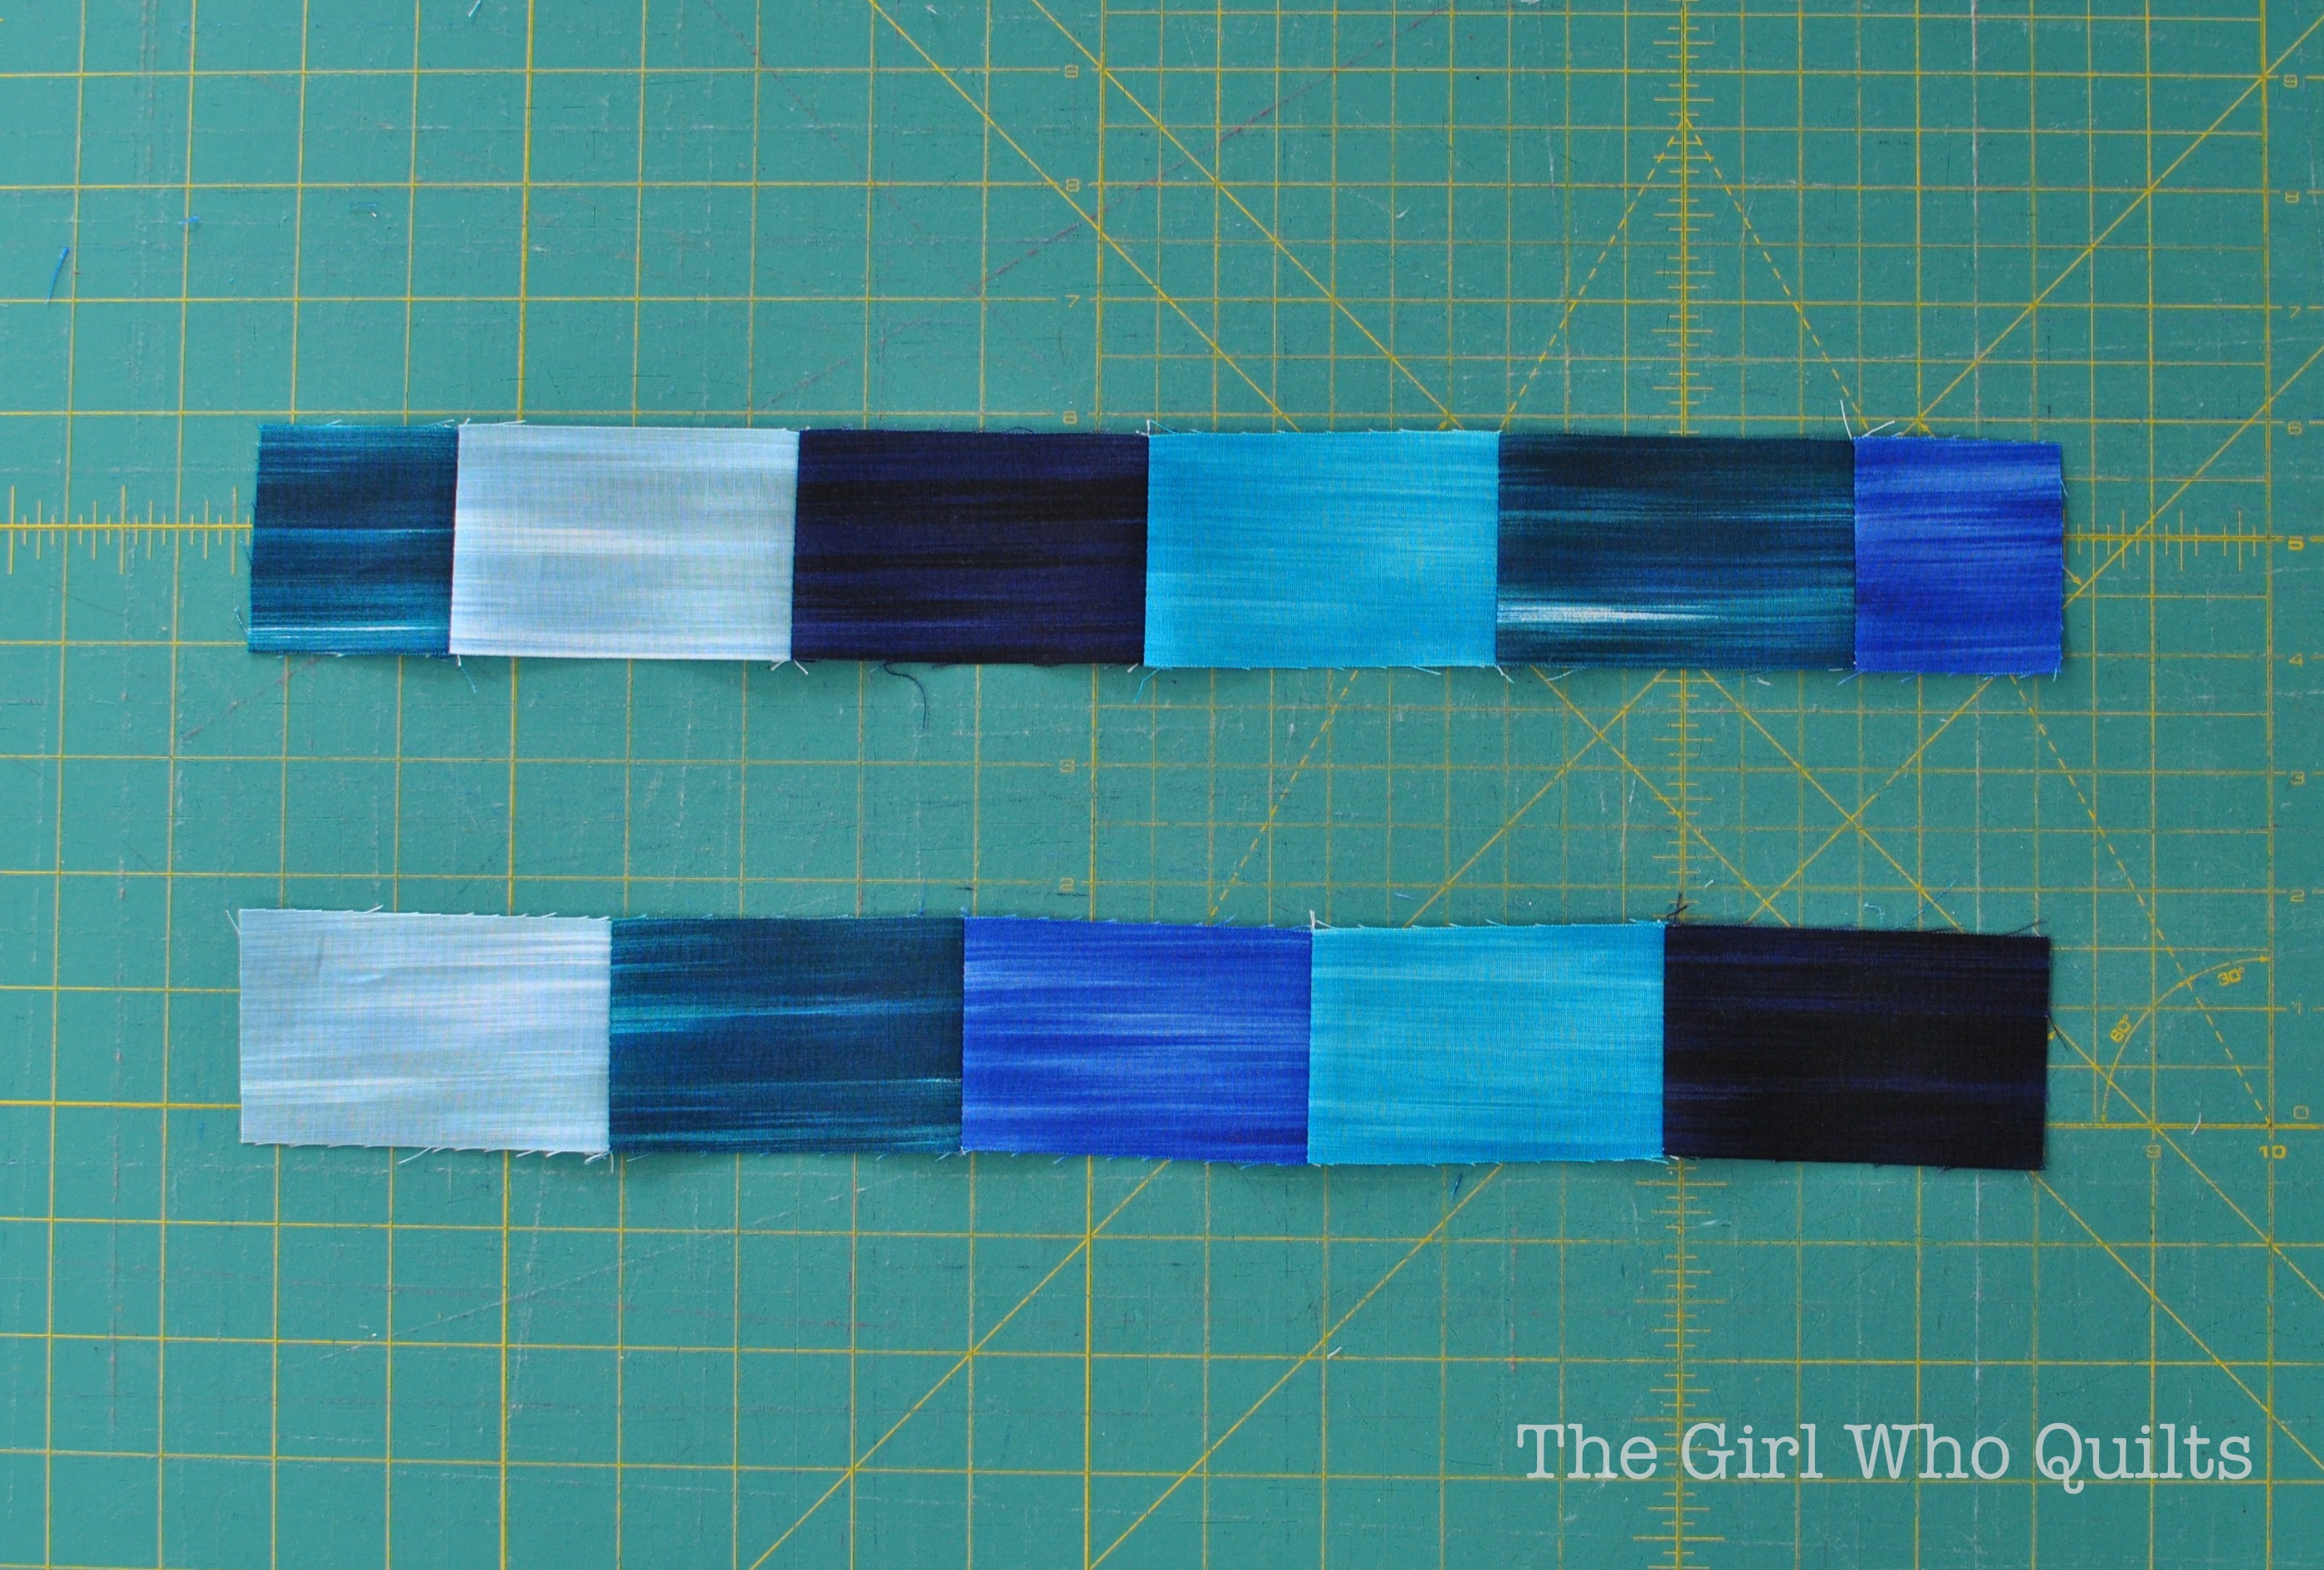
Row A (top row in photo): Piece 4 of the 3 1/2" x 2" pieces together. Sew a 2" x 2" piece to each end of the strip to create a 15 1/2" x 2" strip.
Piece 5 of row A.
Row B (bottom row in photo): Piece 5 of the 3 1/2" x 2" pieces to create a 15 1/2" x 2" strip.
Piece 5 of row B.
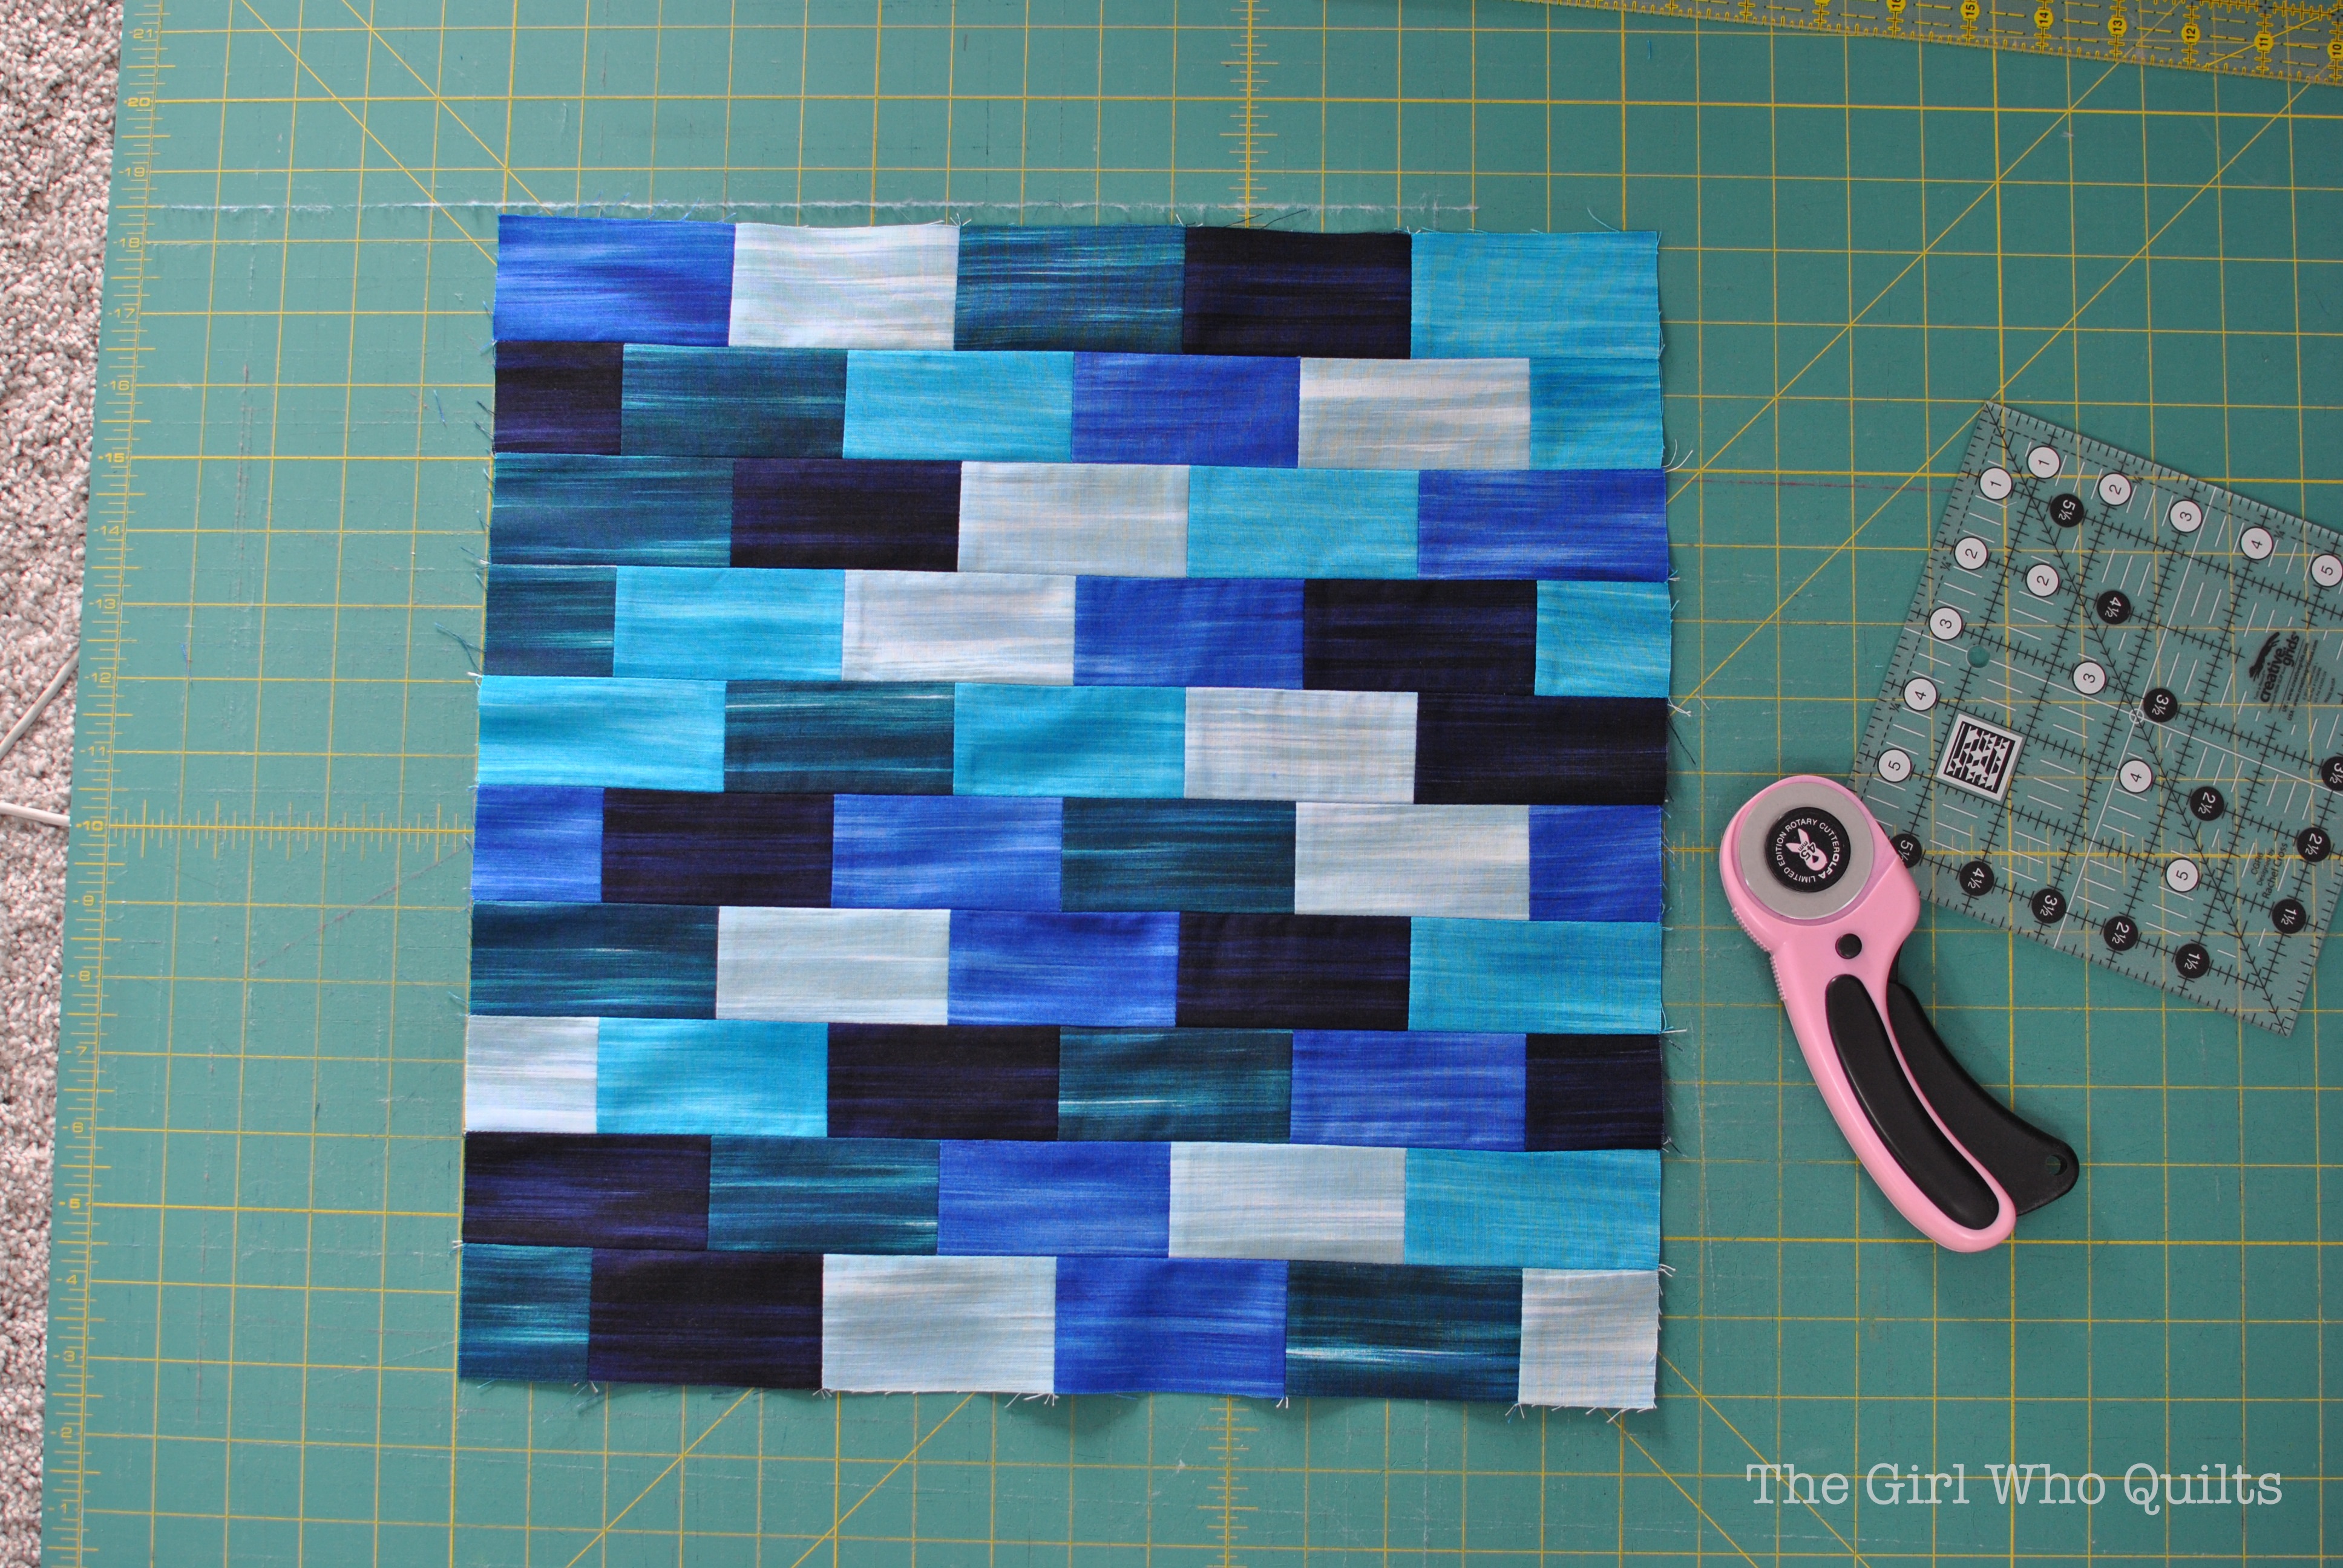
Sew the 10 strips together, alternating rows A and B to create a 15 1/2" x 15 1/2" pillow front.
If you'd like to quilt the pillow front and back:
Layer the pillow front with a 18" x 18" piece of batting and lining.
Repeat for the pillow back.
Quilt as desired and square the pieces to 15" x 15".
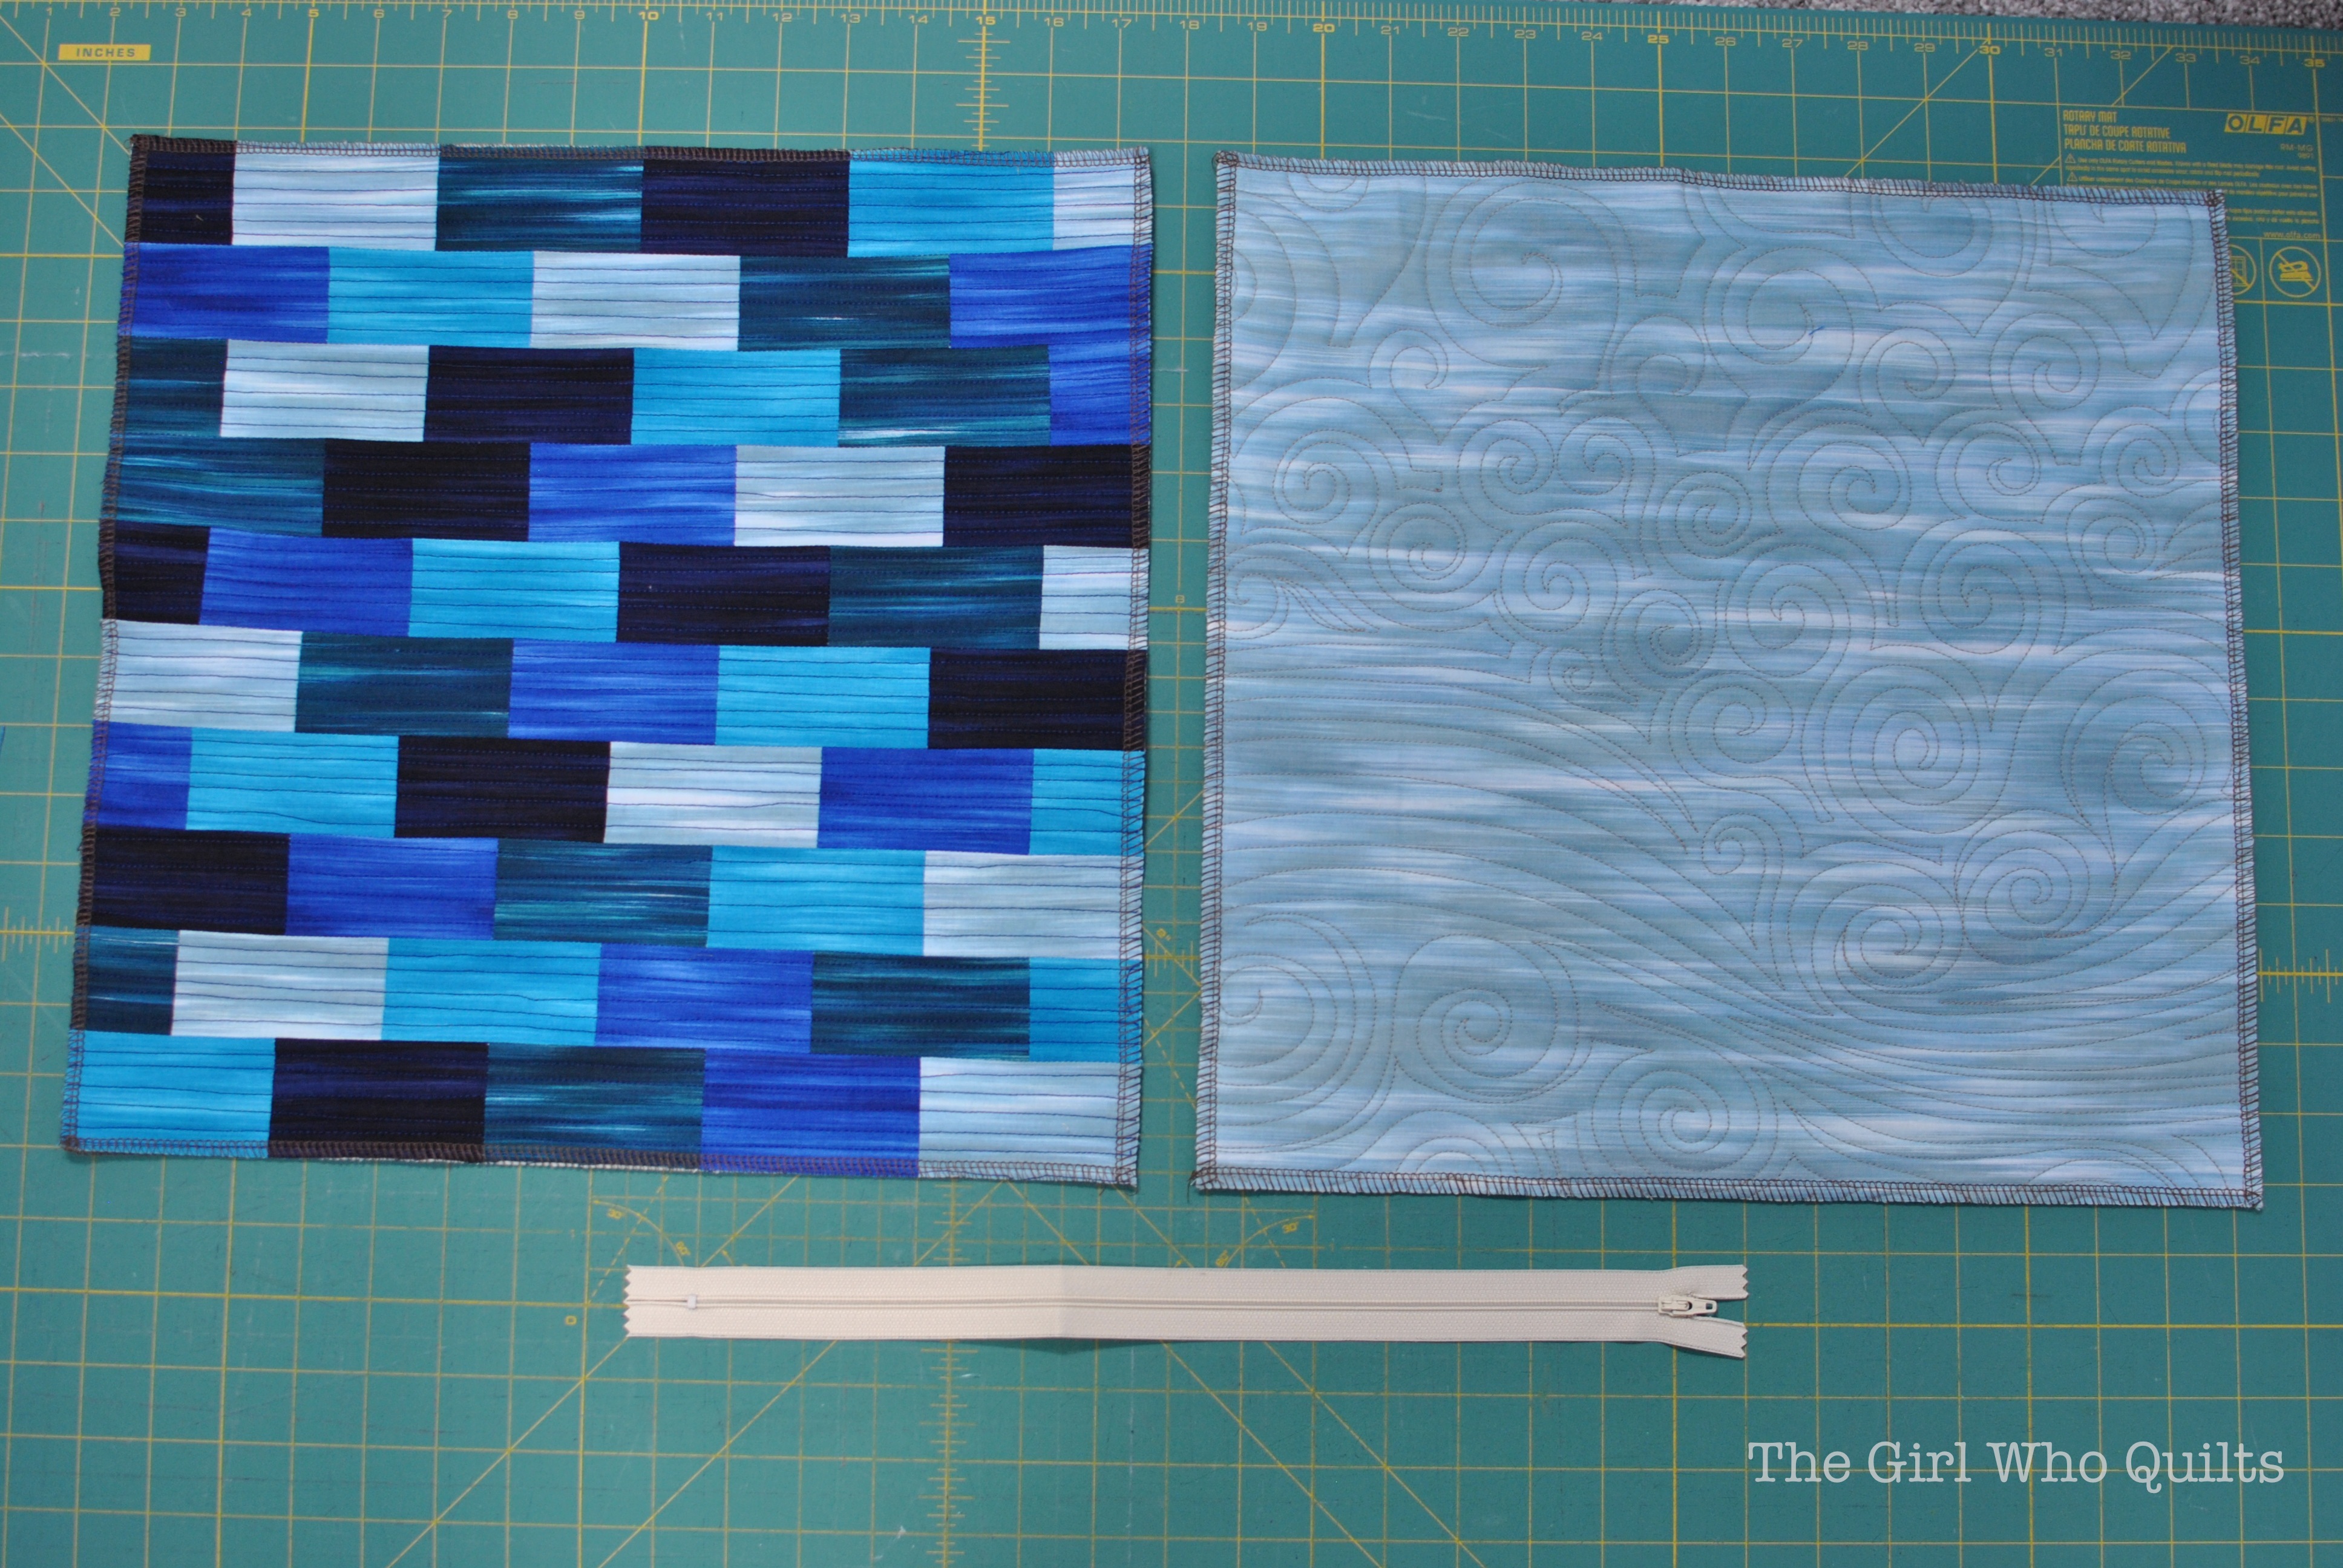
At this point I like to serge or zig zag the raw edges of the pillow front and back.
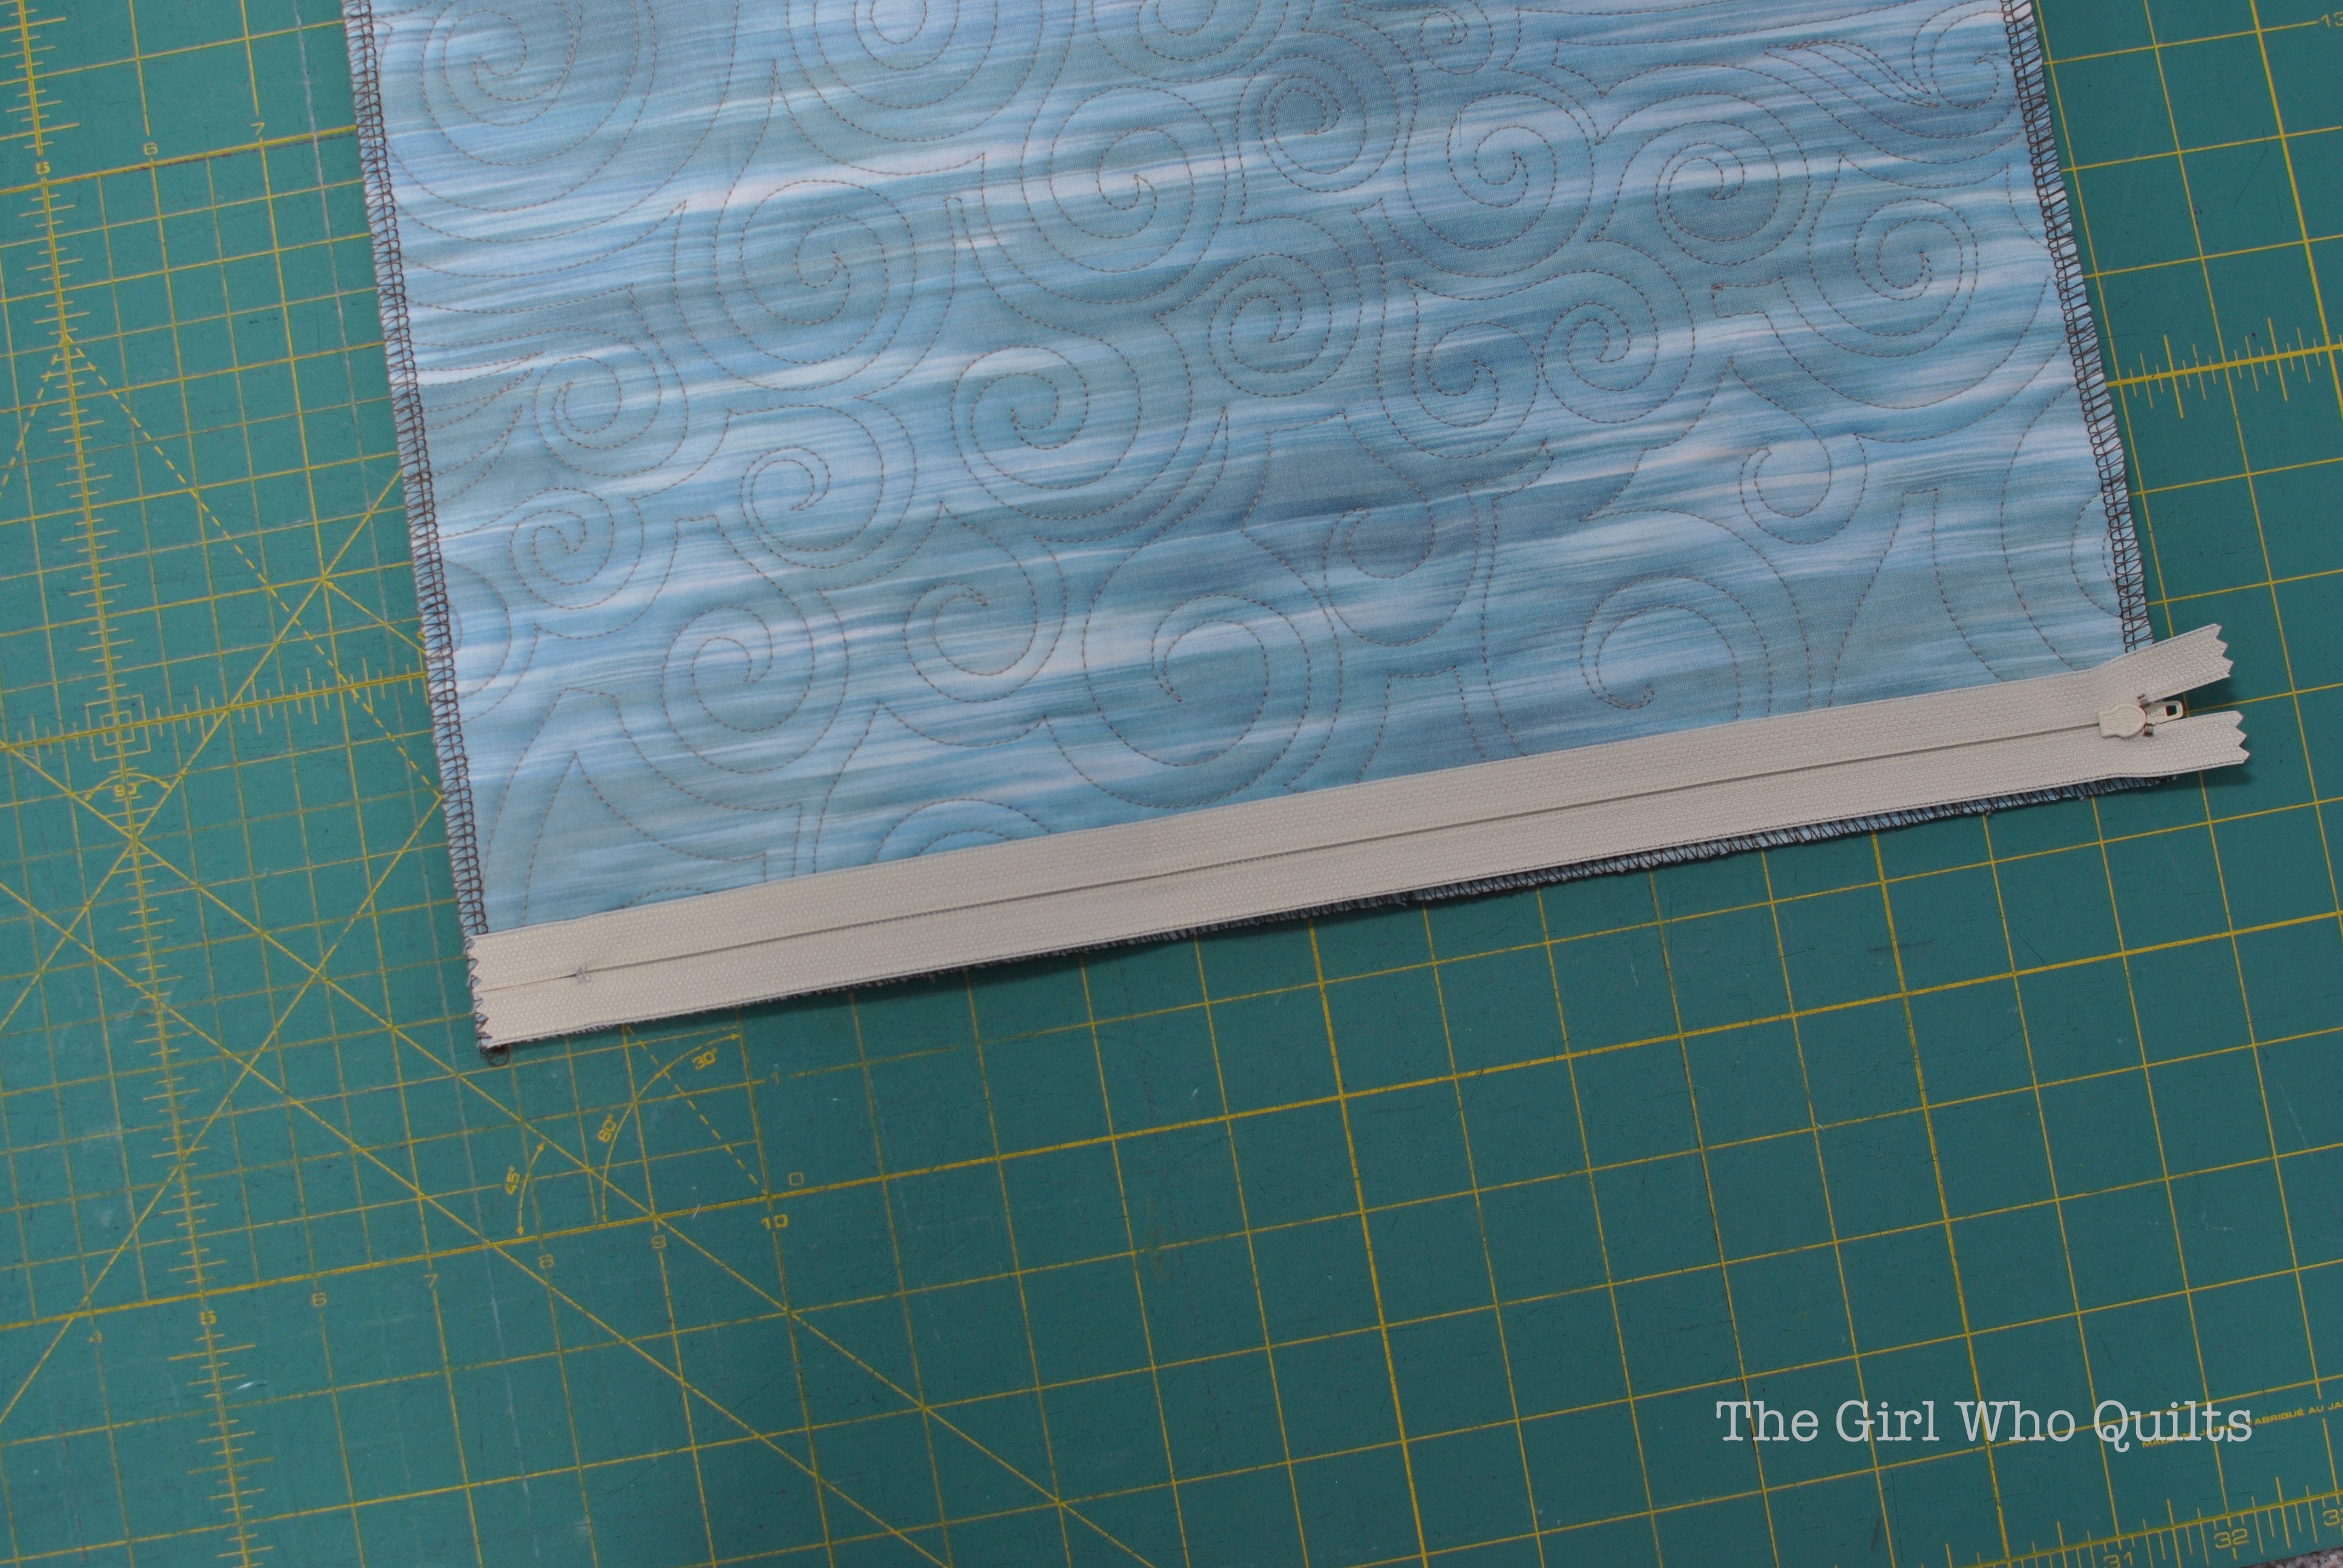
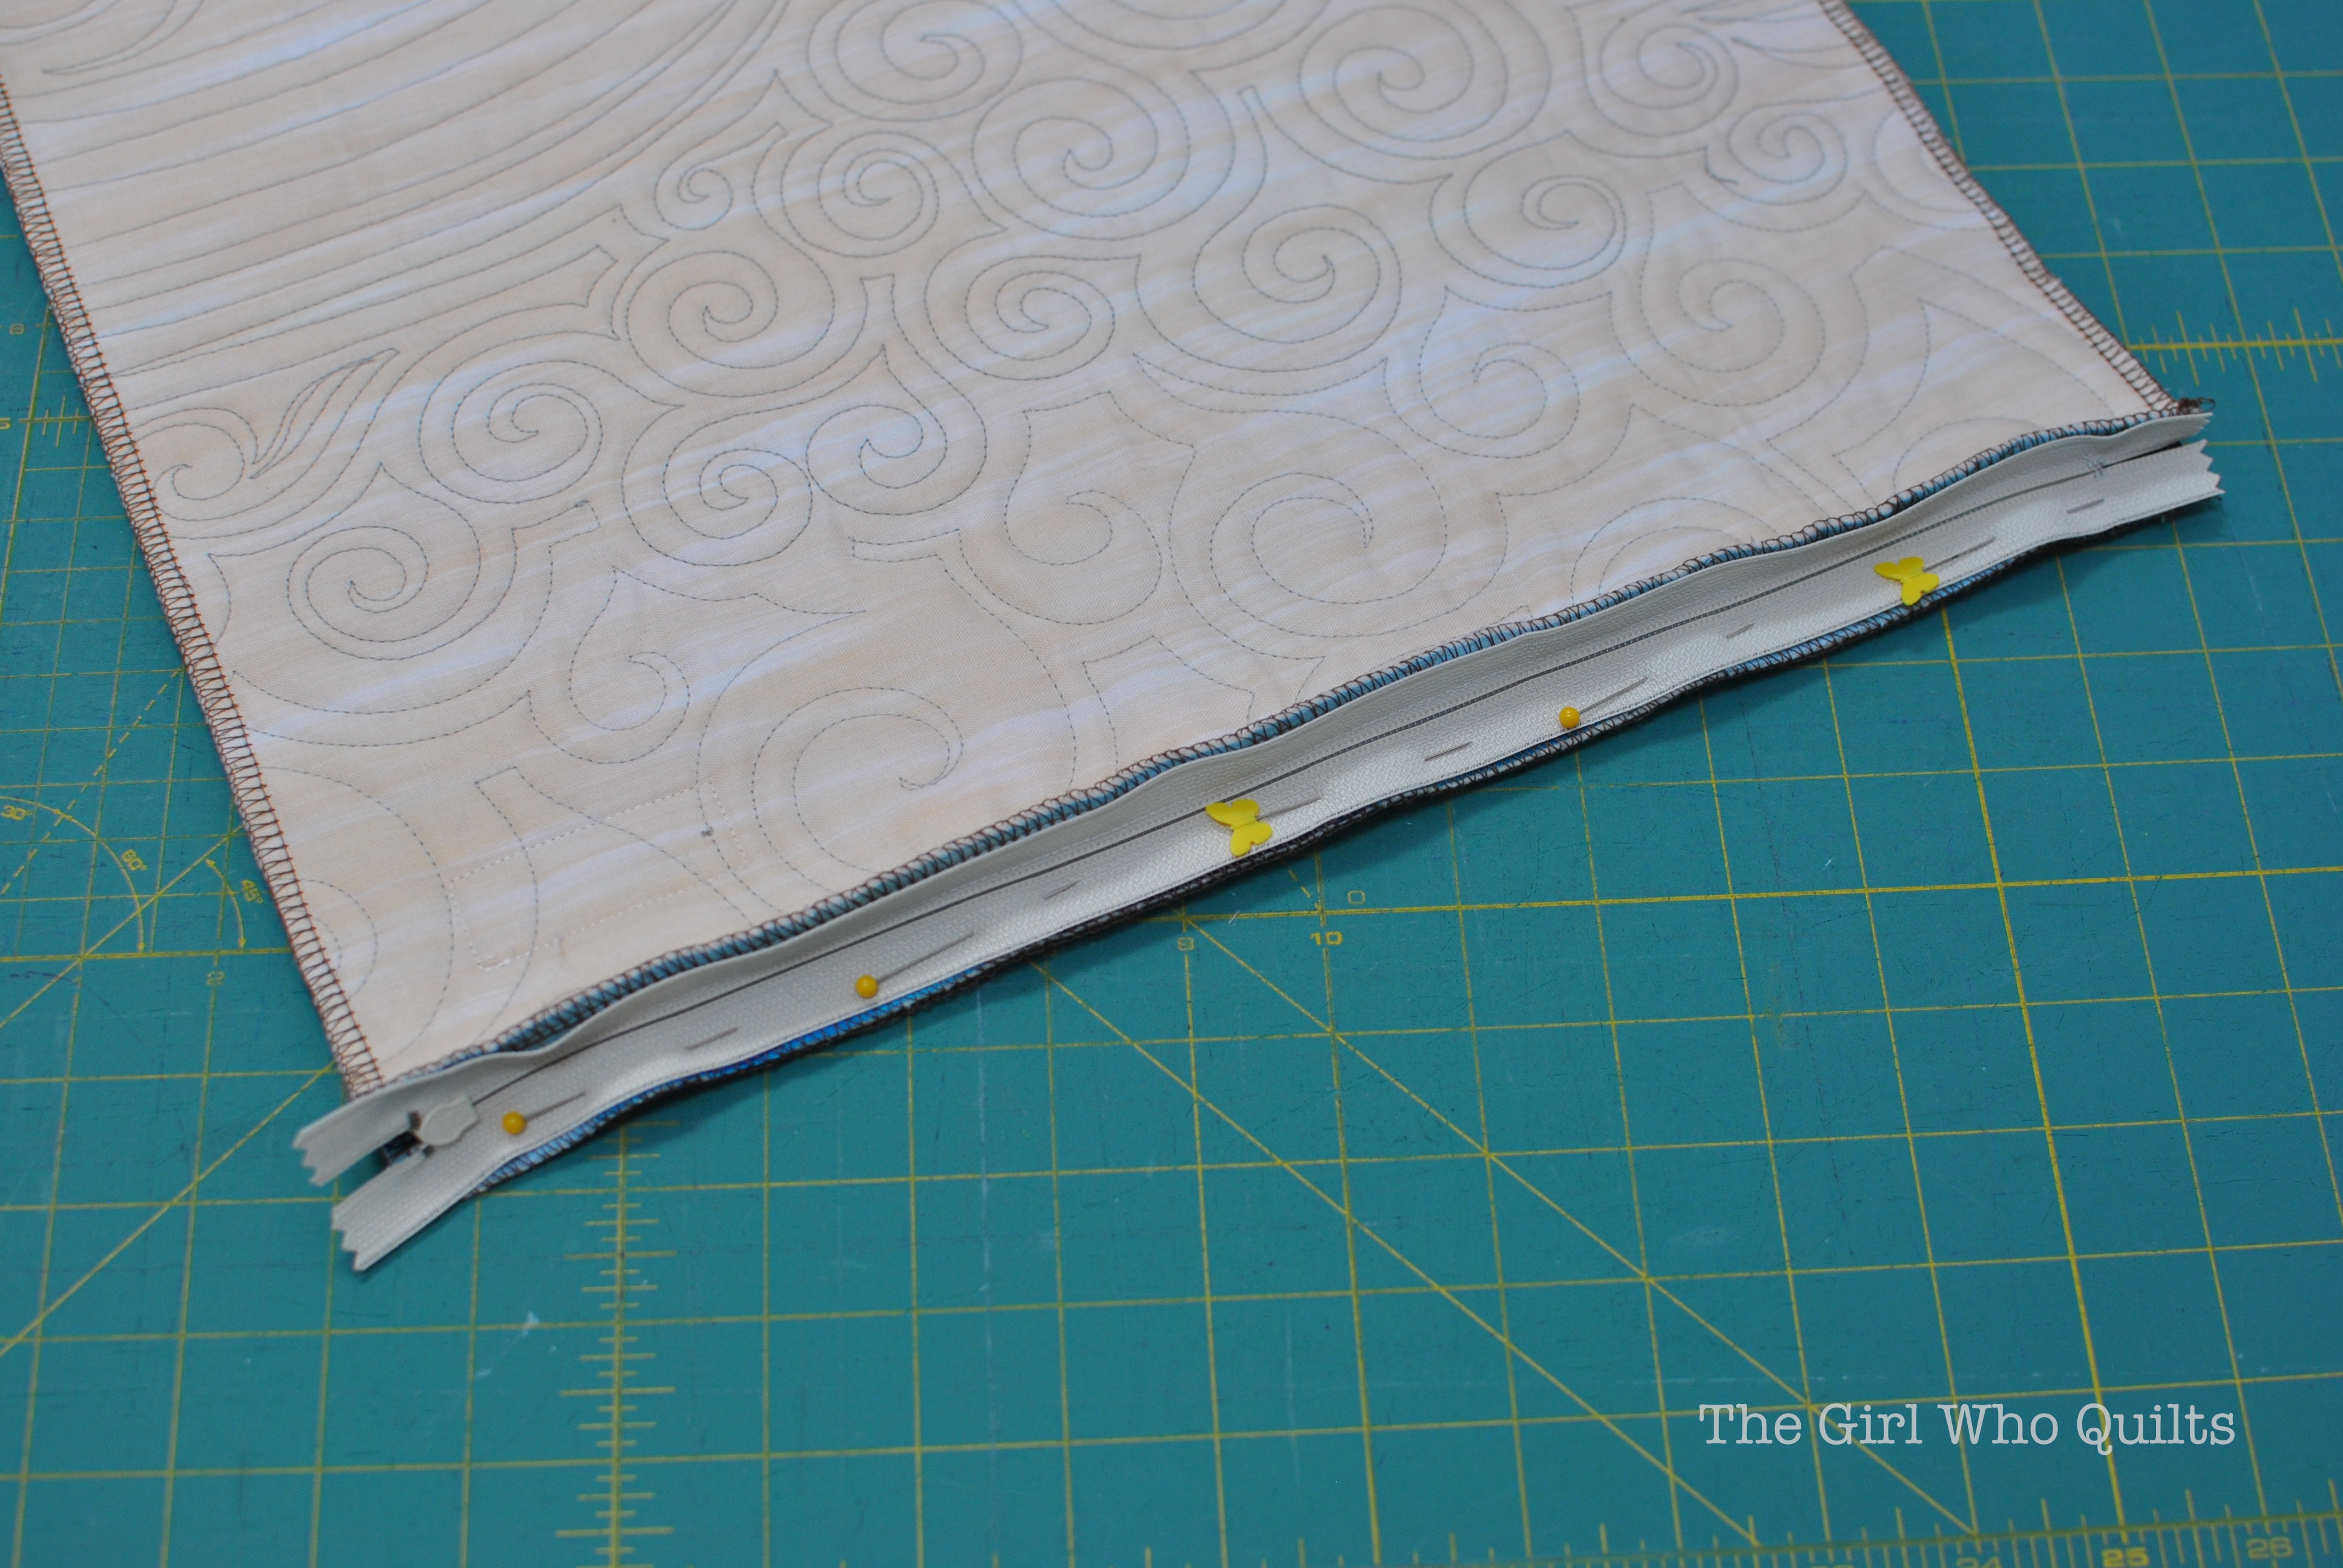
Lay the zipper on the bottom edge of the pillow back, with one end of the zipper tape at the pillow corner.
Pin the zipper in place and sew using a 1/4" seam.
I like to start my stitching at the metal zipper stop, and sew towards the zipper pull. I sew down as close as my presser foot will allow me to get to the zipper pull.
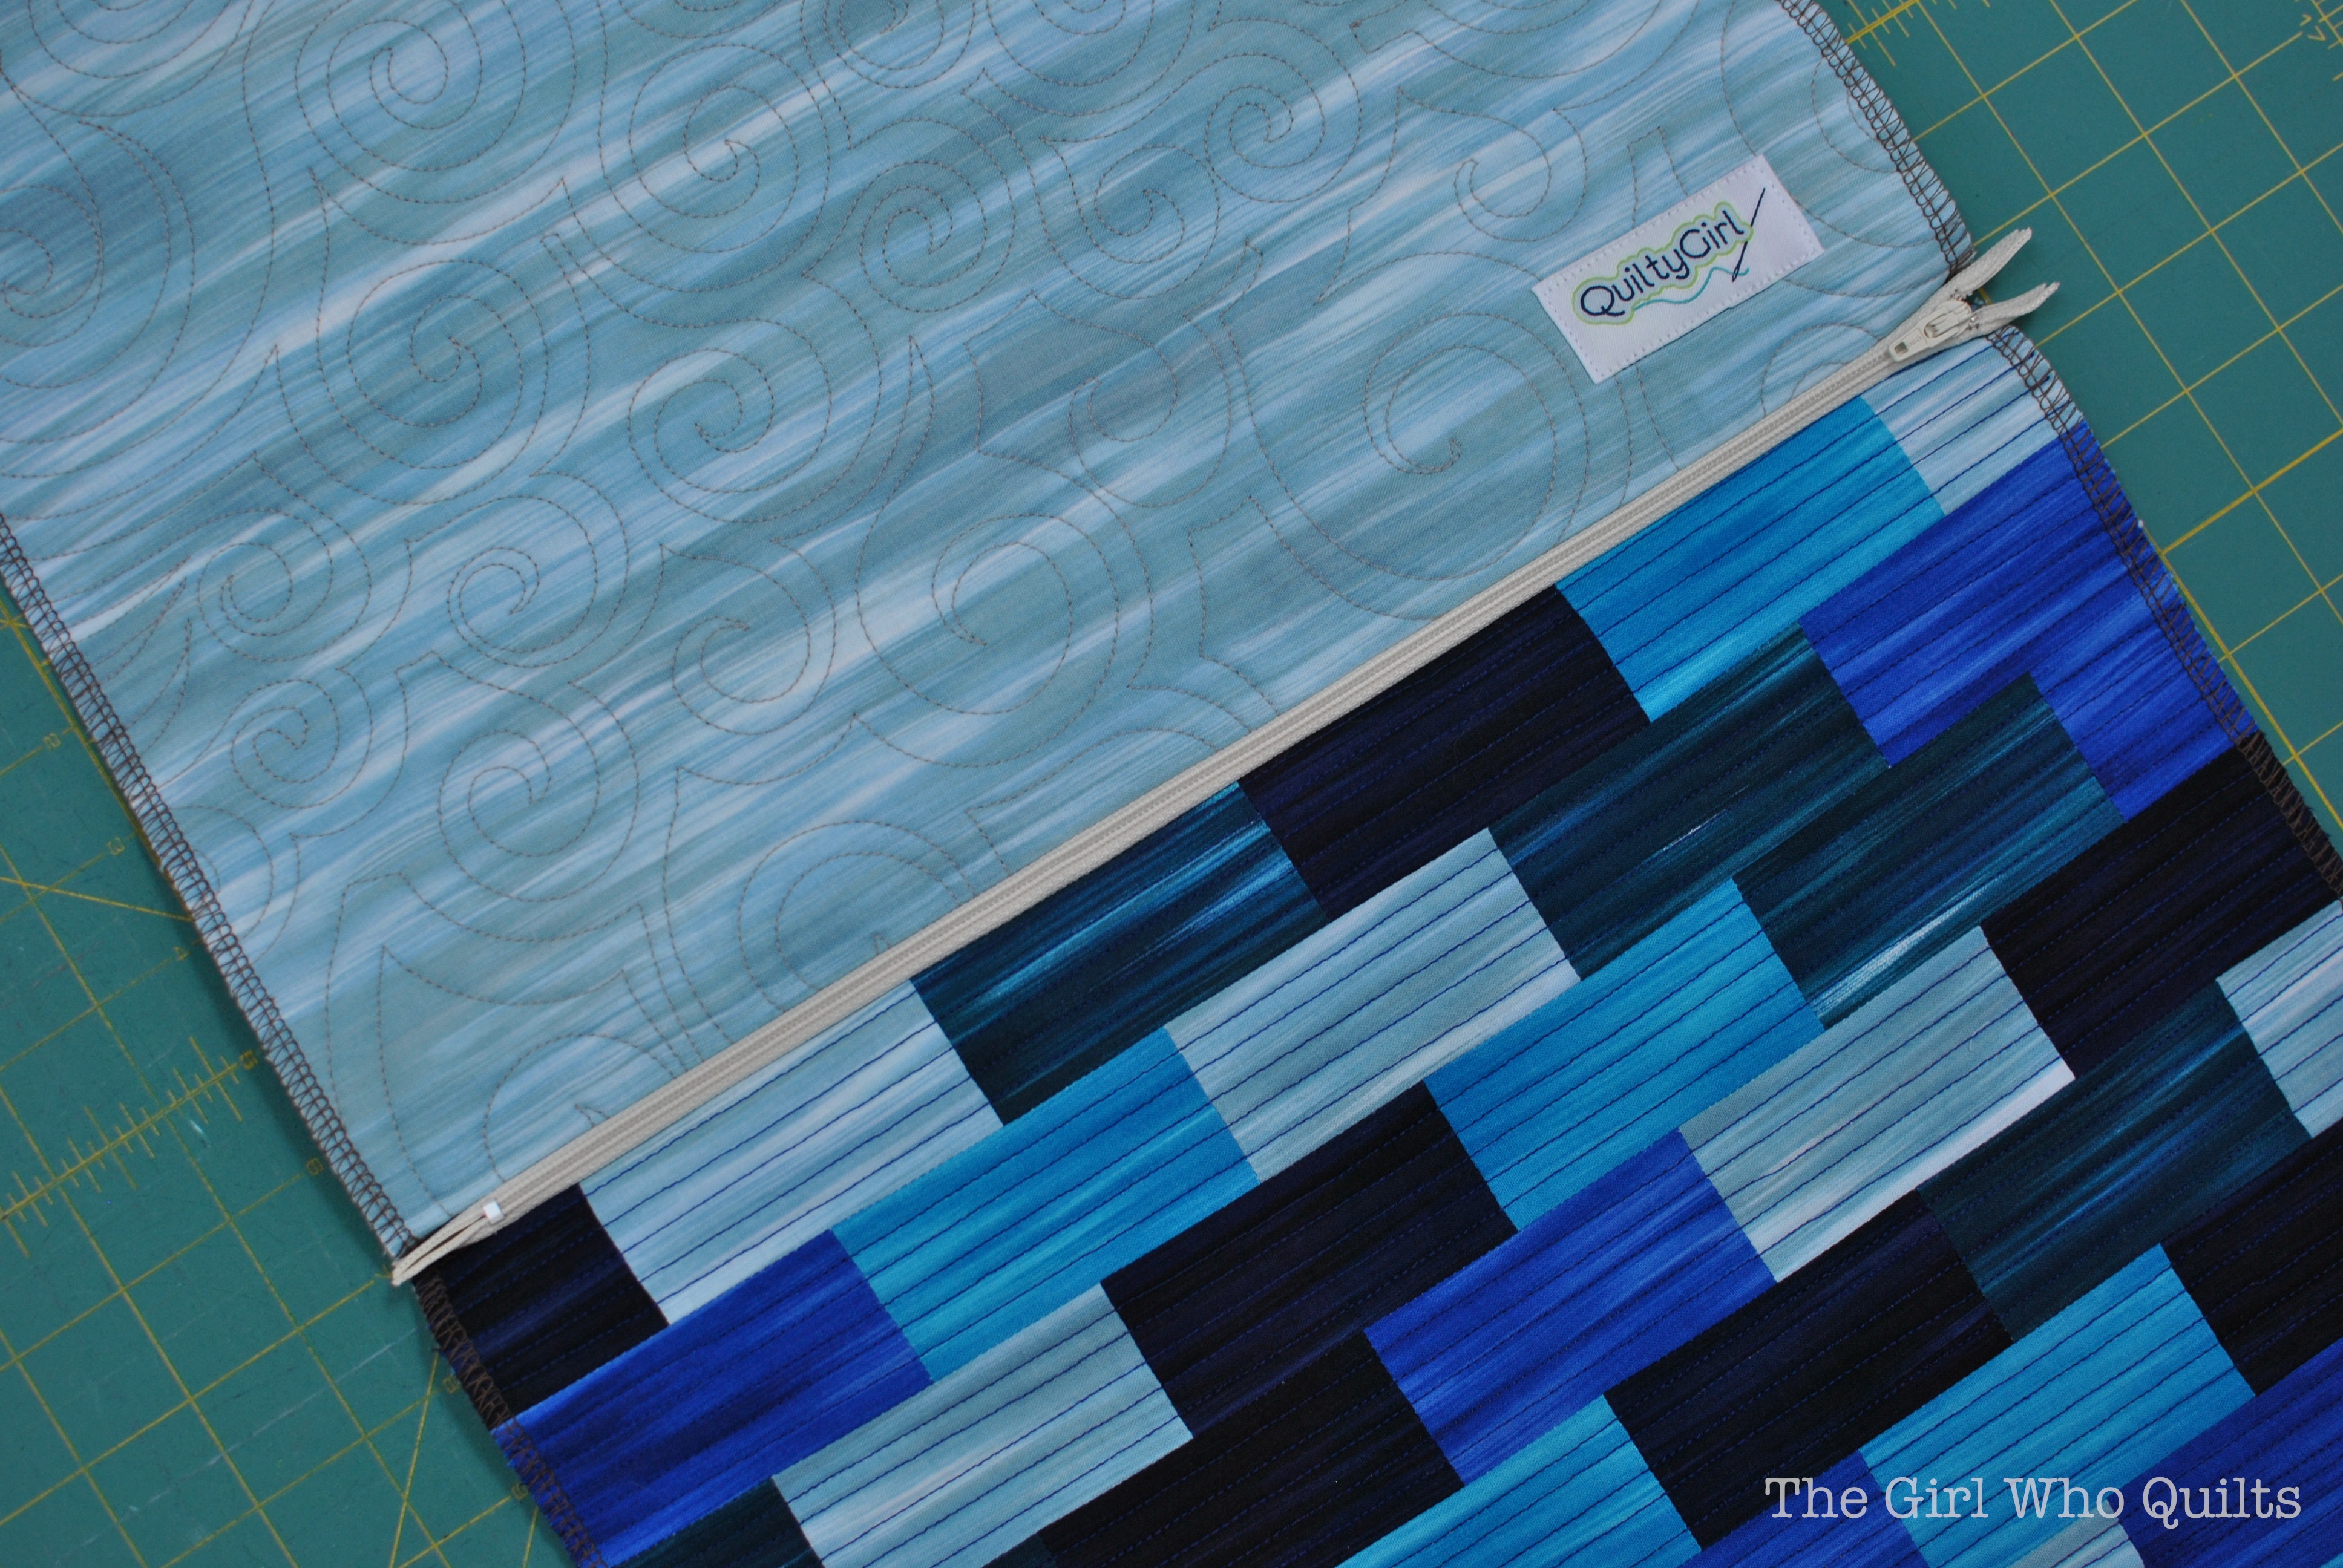
Lay the other end of the zipper tape along the bottom edge of the pillow front. Again align one end of the zipper tape at the pillow corner.
Pin the zipper in place and sew using a 1/4" seam. You may wish to open the zipper before sewing.
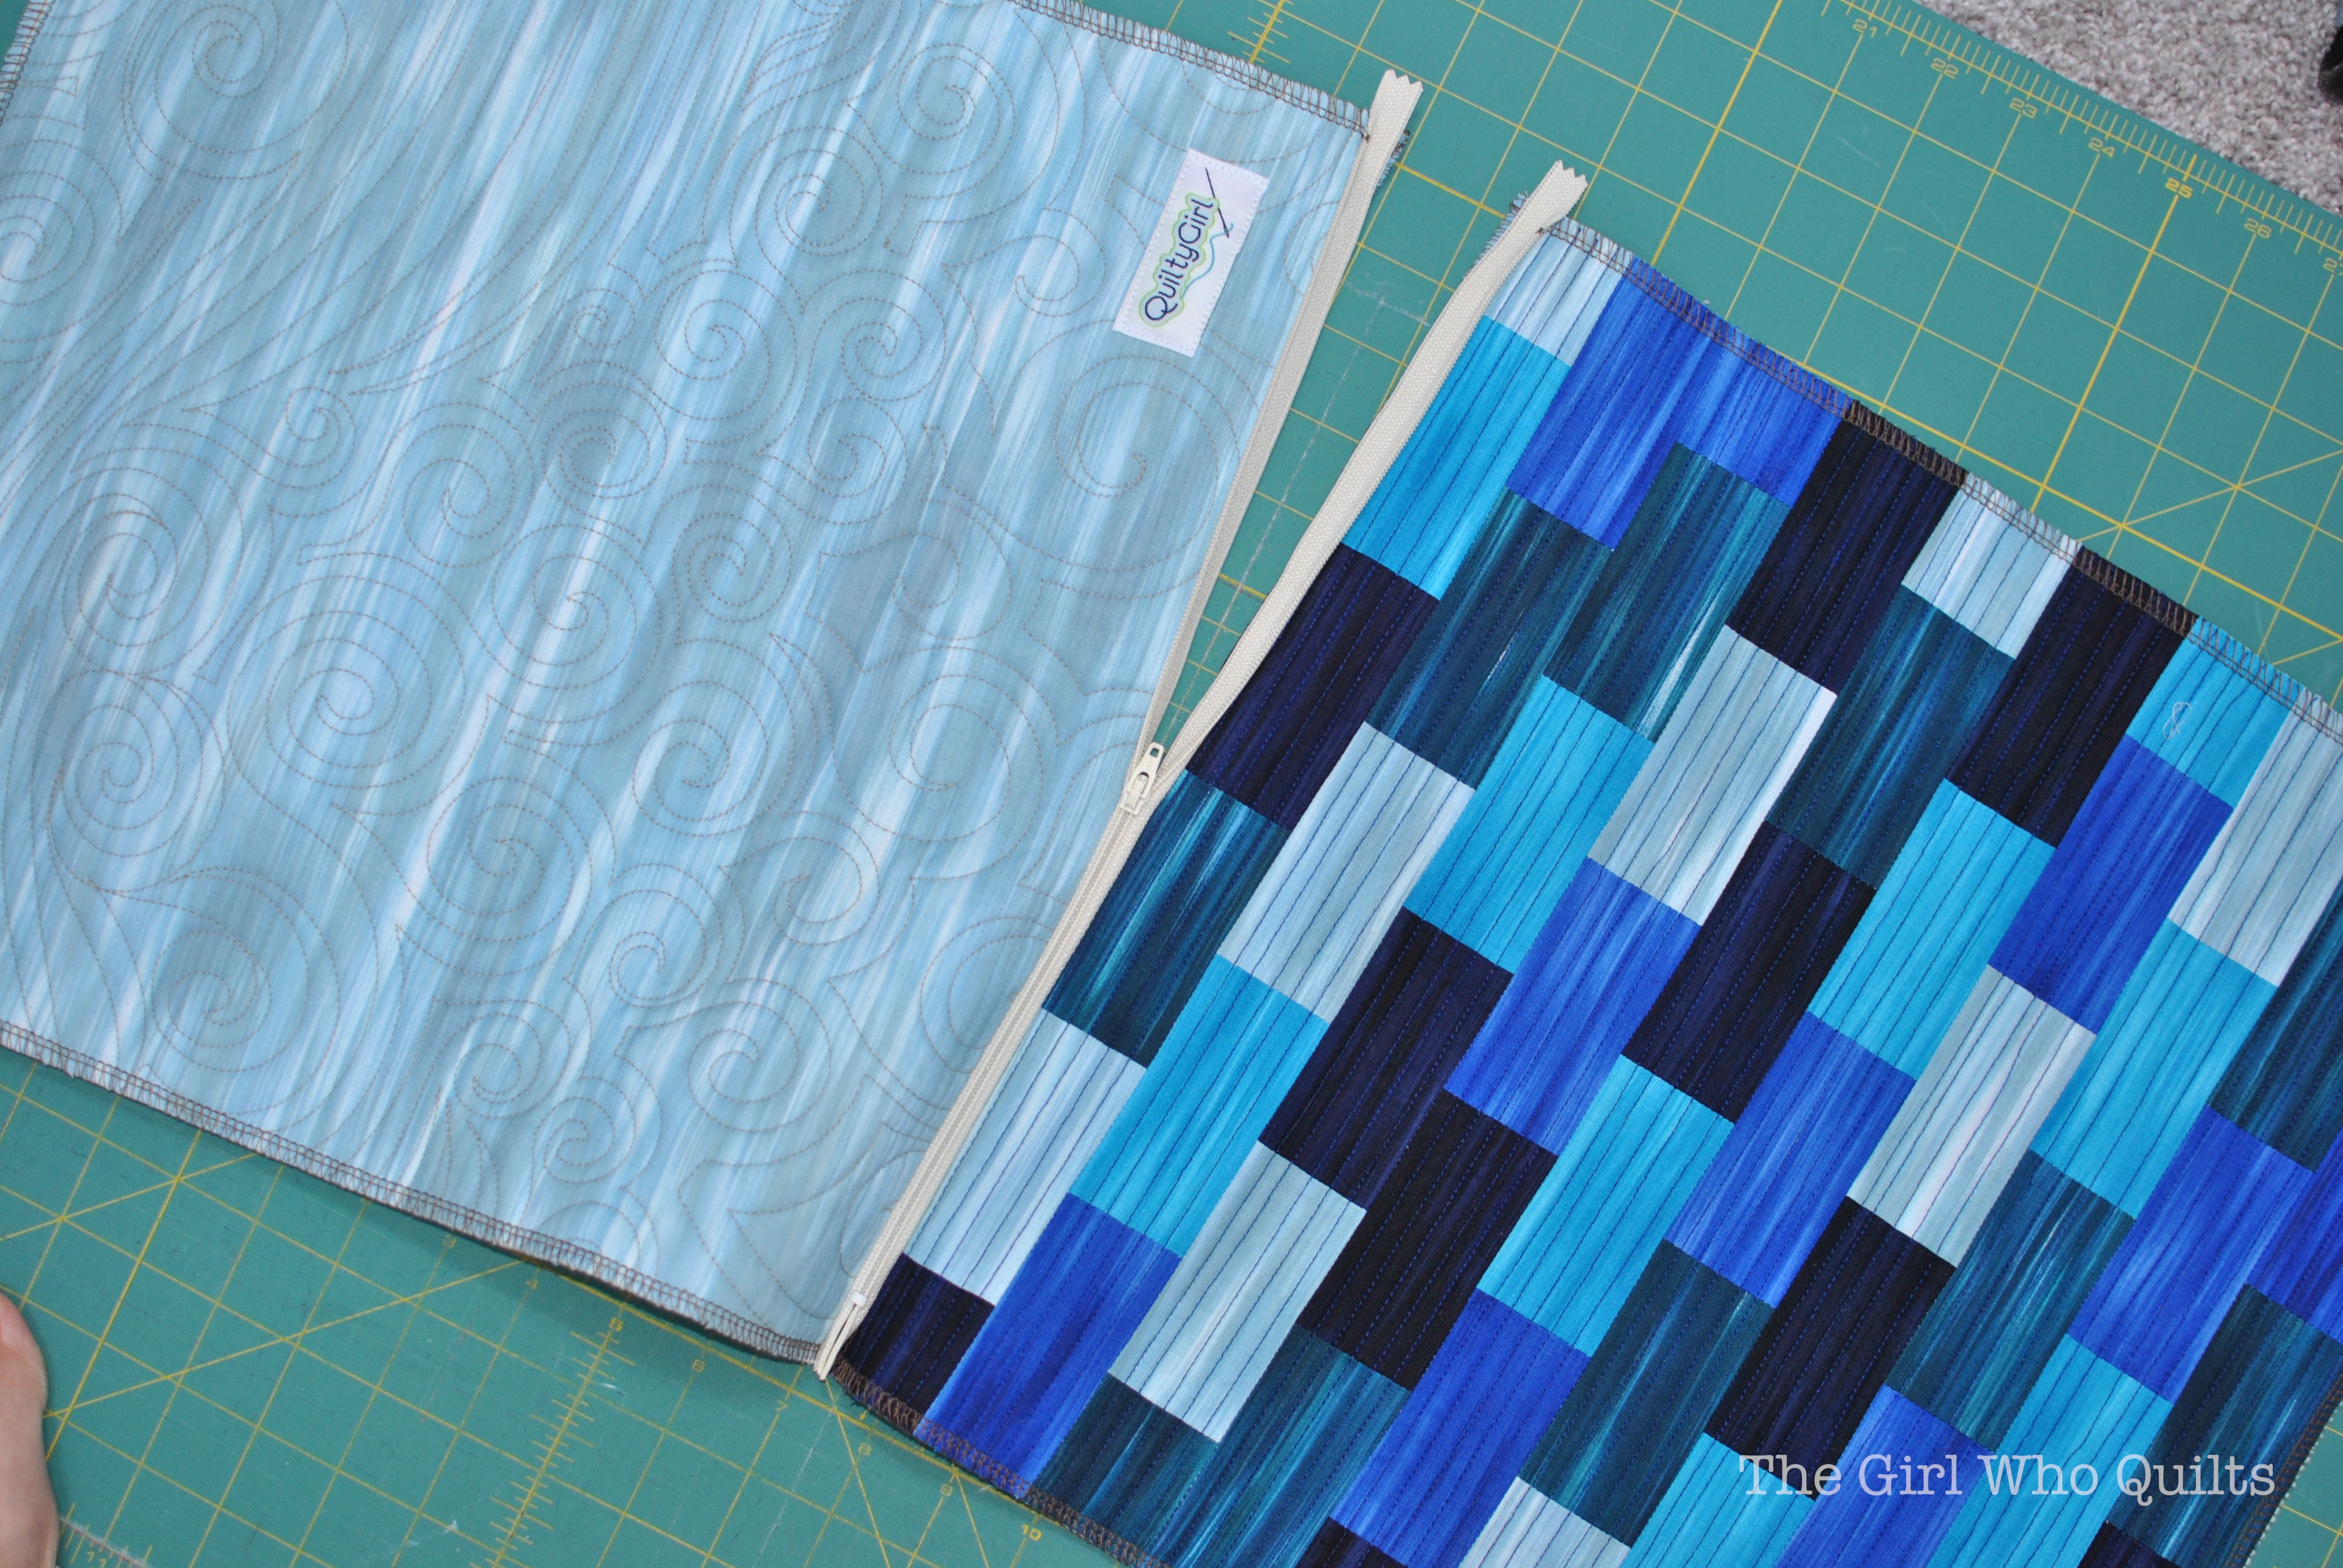
This is how the pillow should now look:
Open the zipper at least half way.
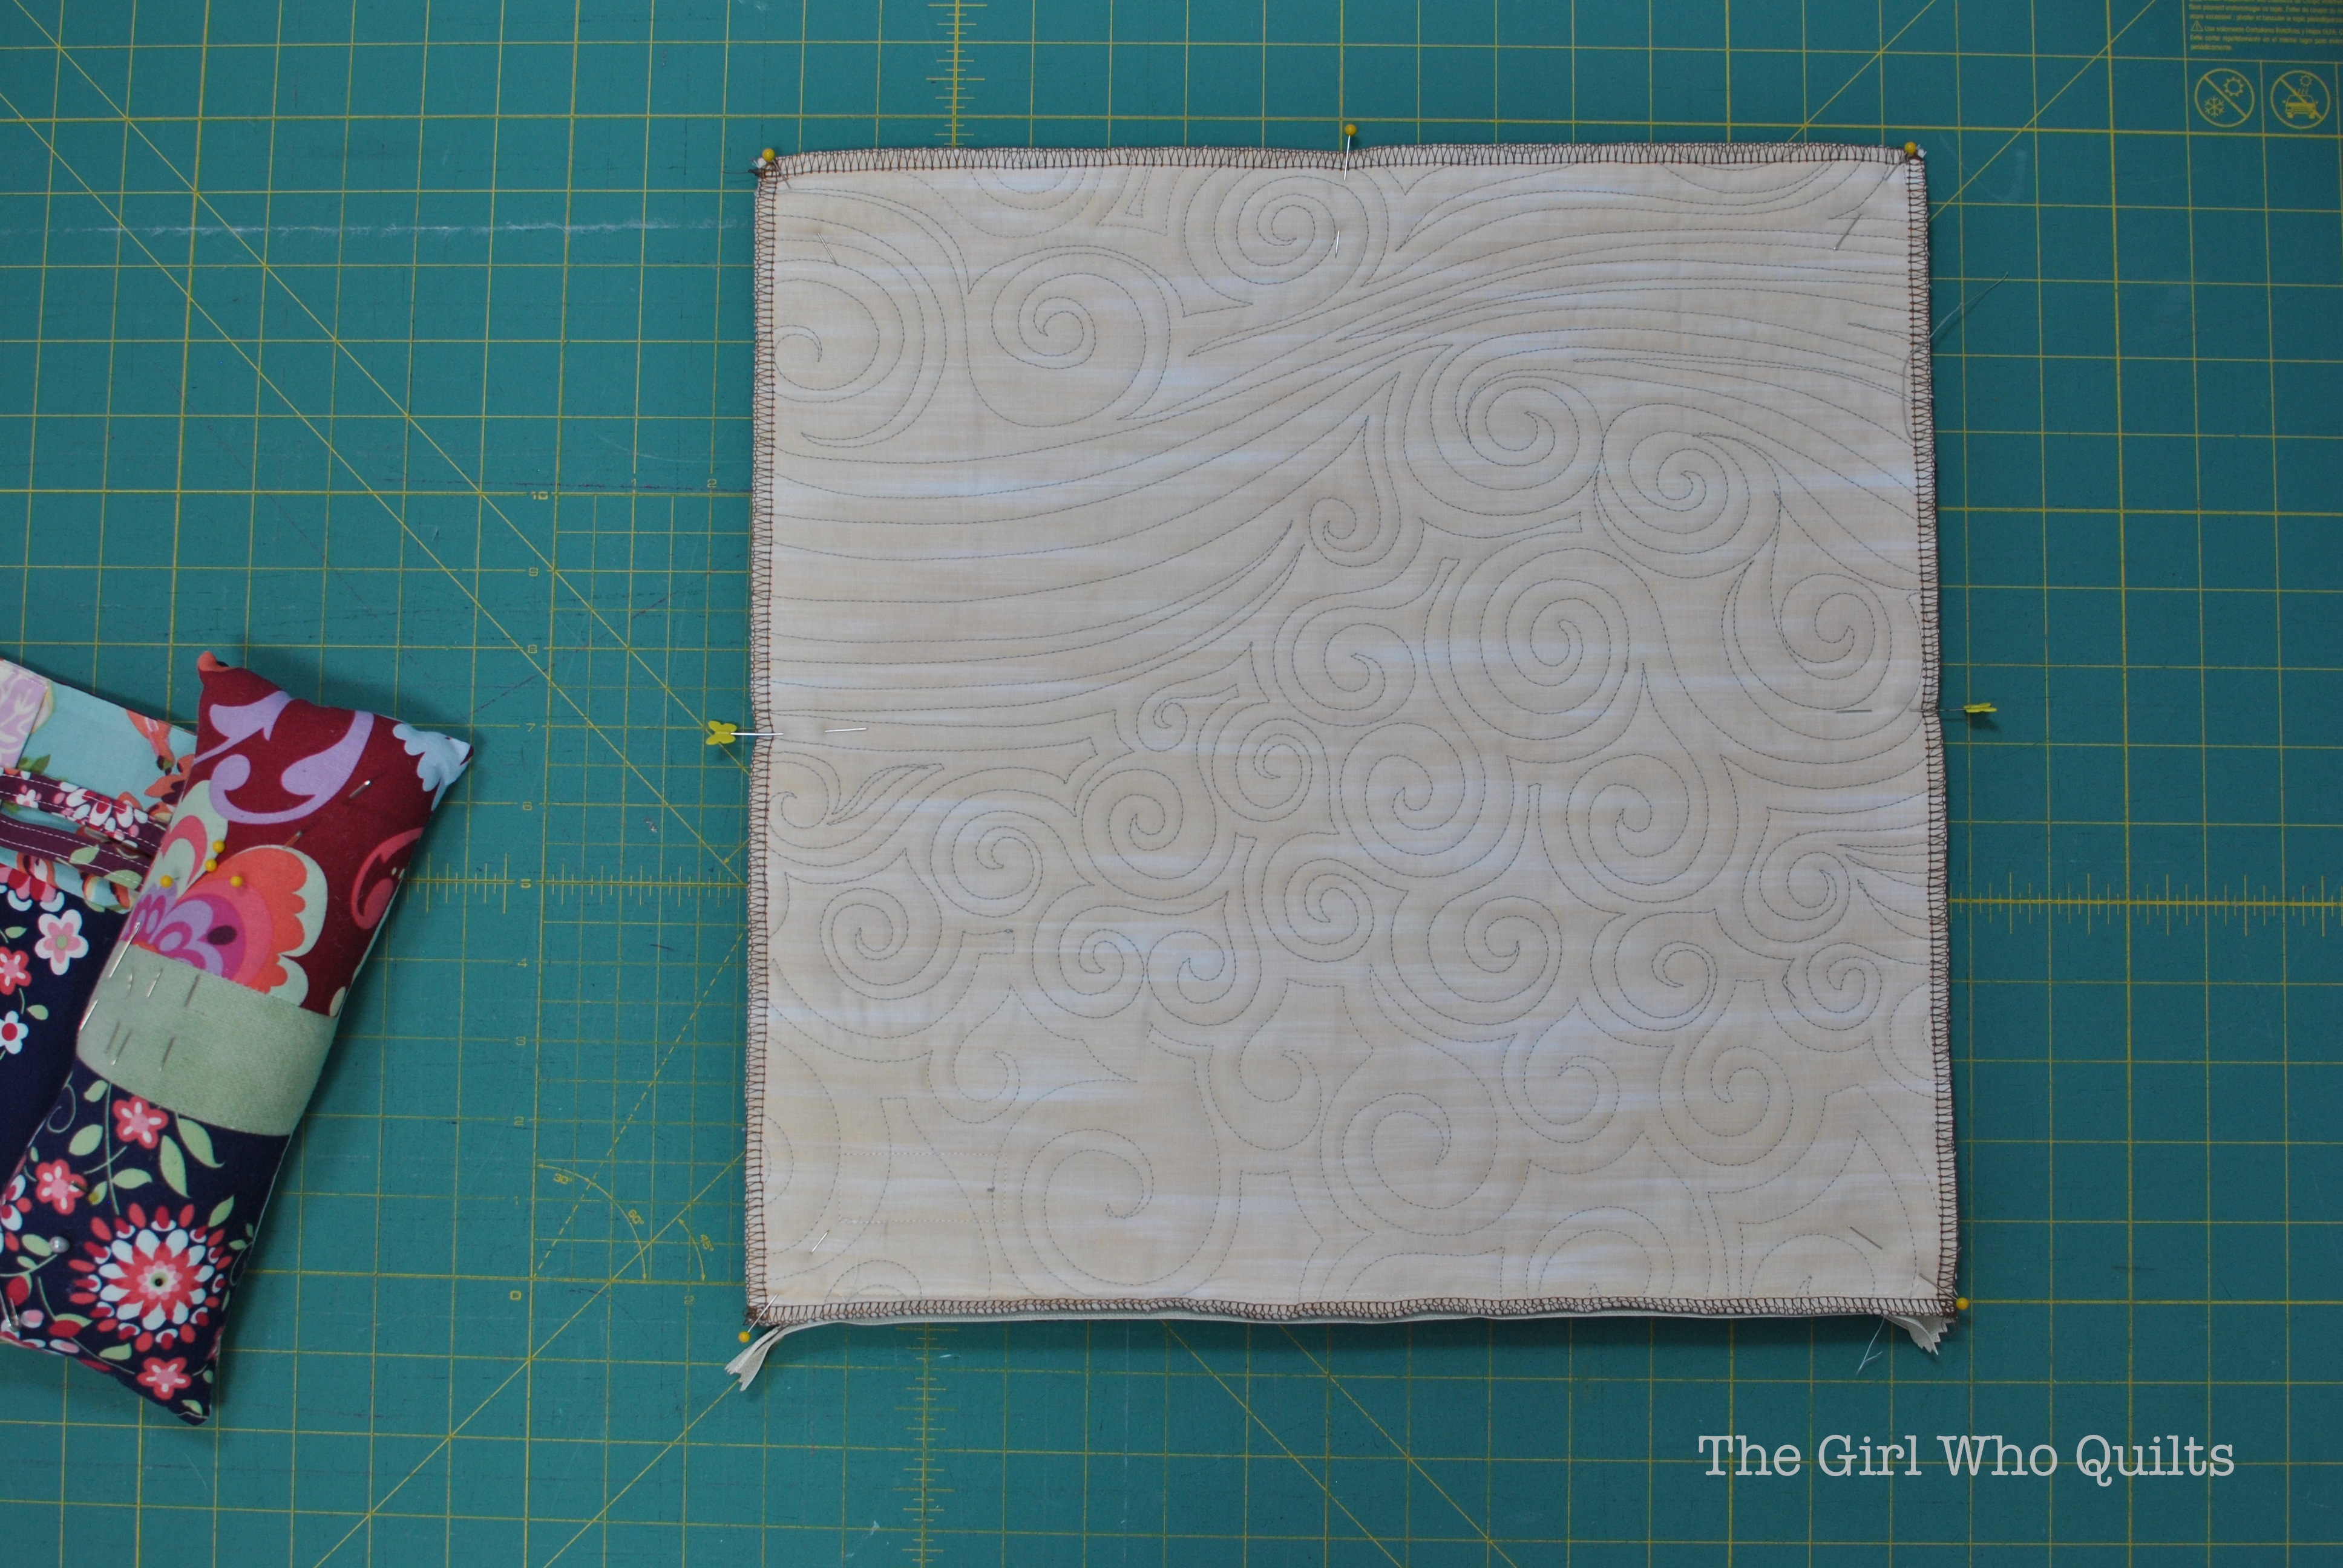
Fold the pillow so right sides are together. Pin around the sides and top of the pillow.
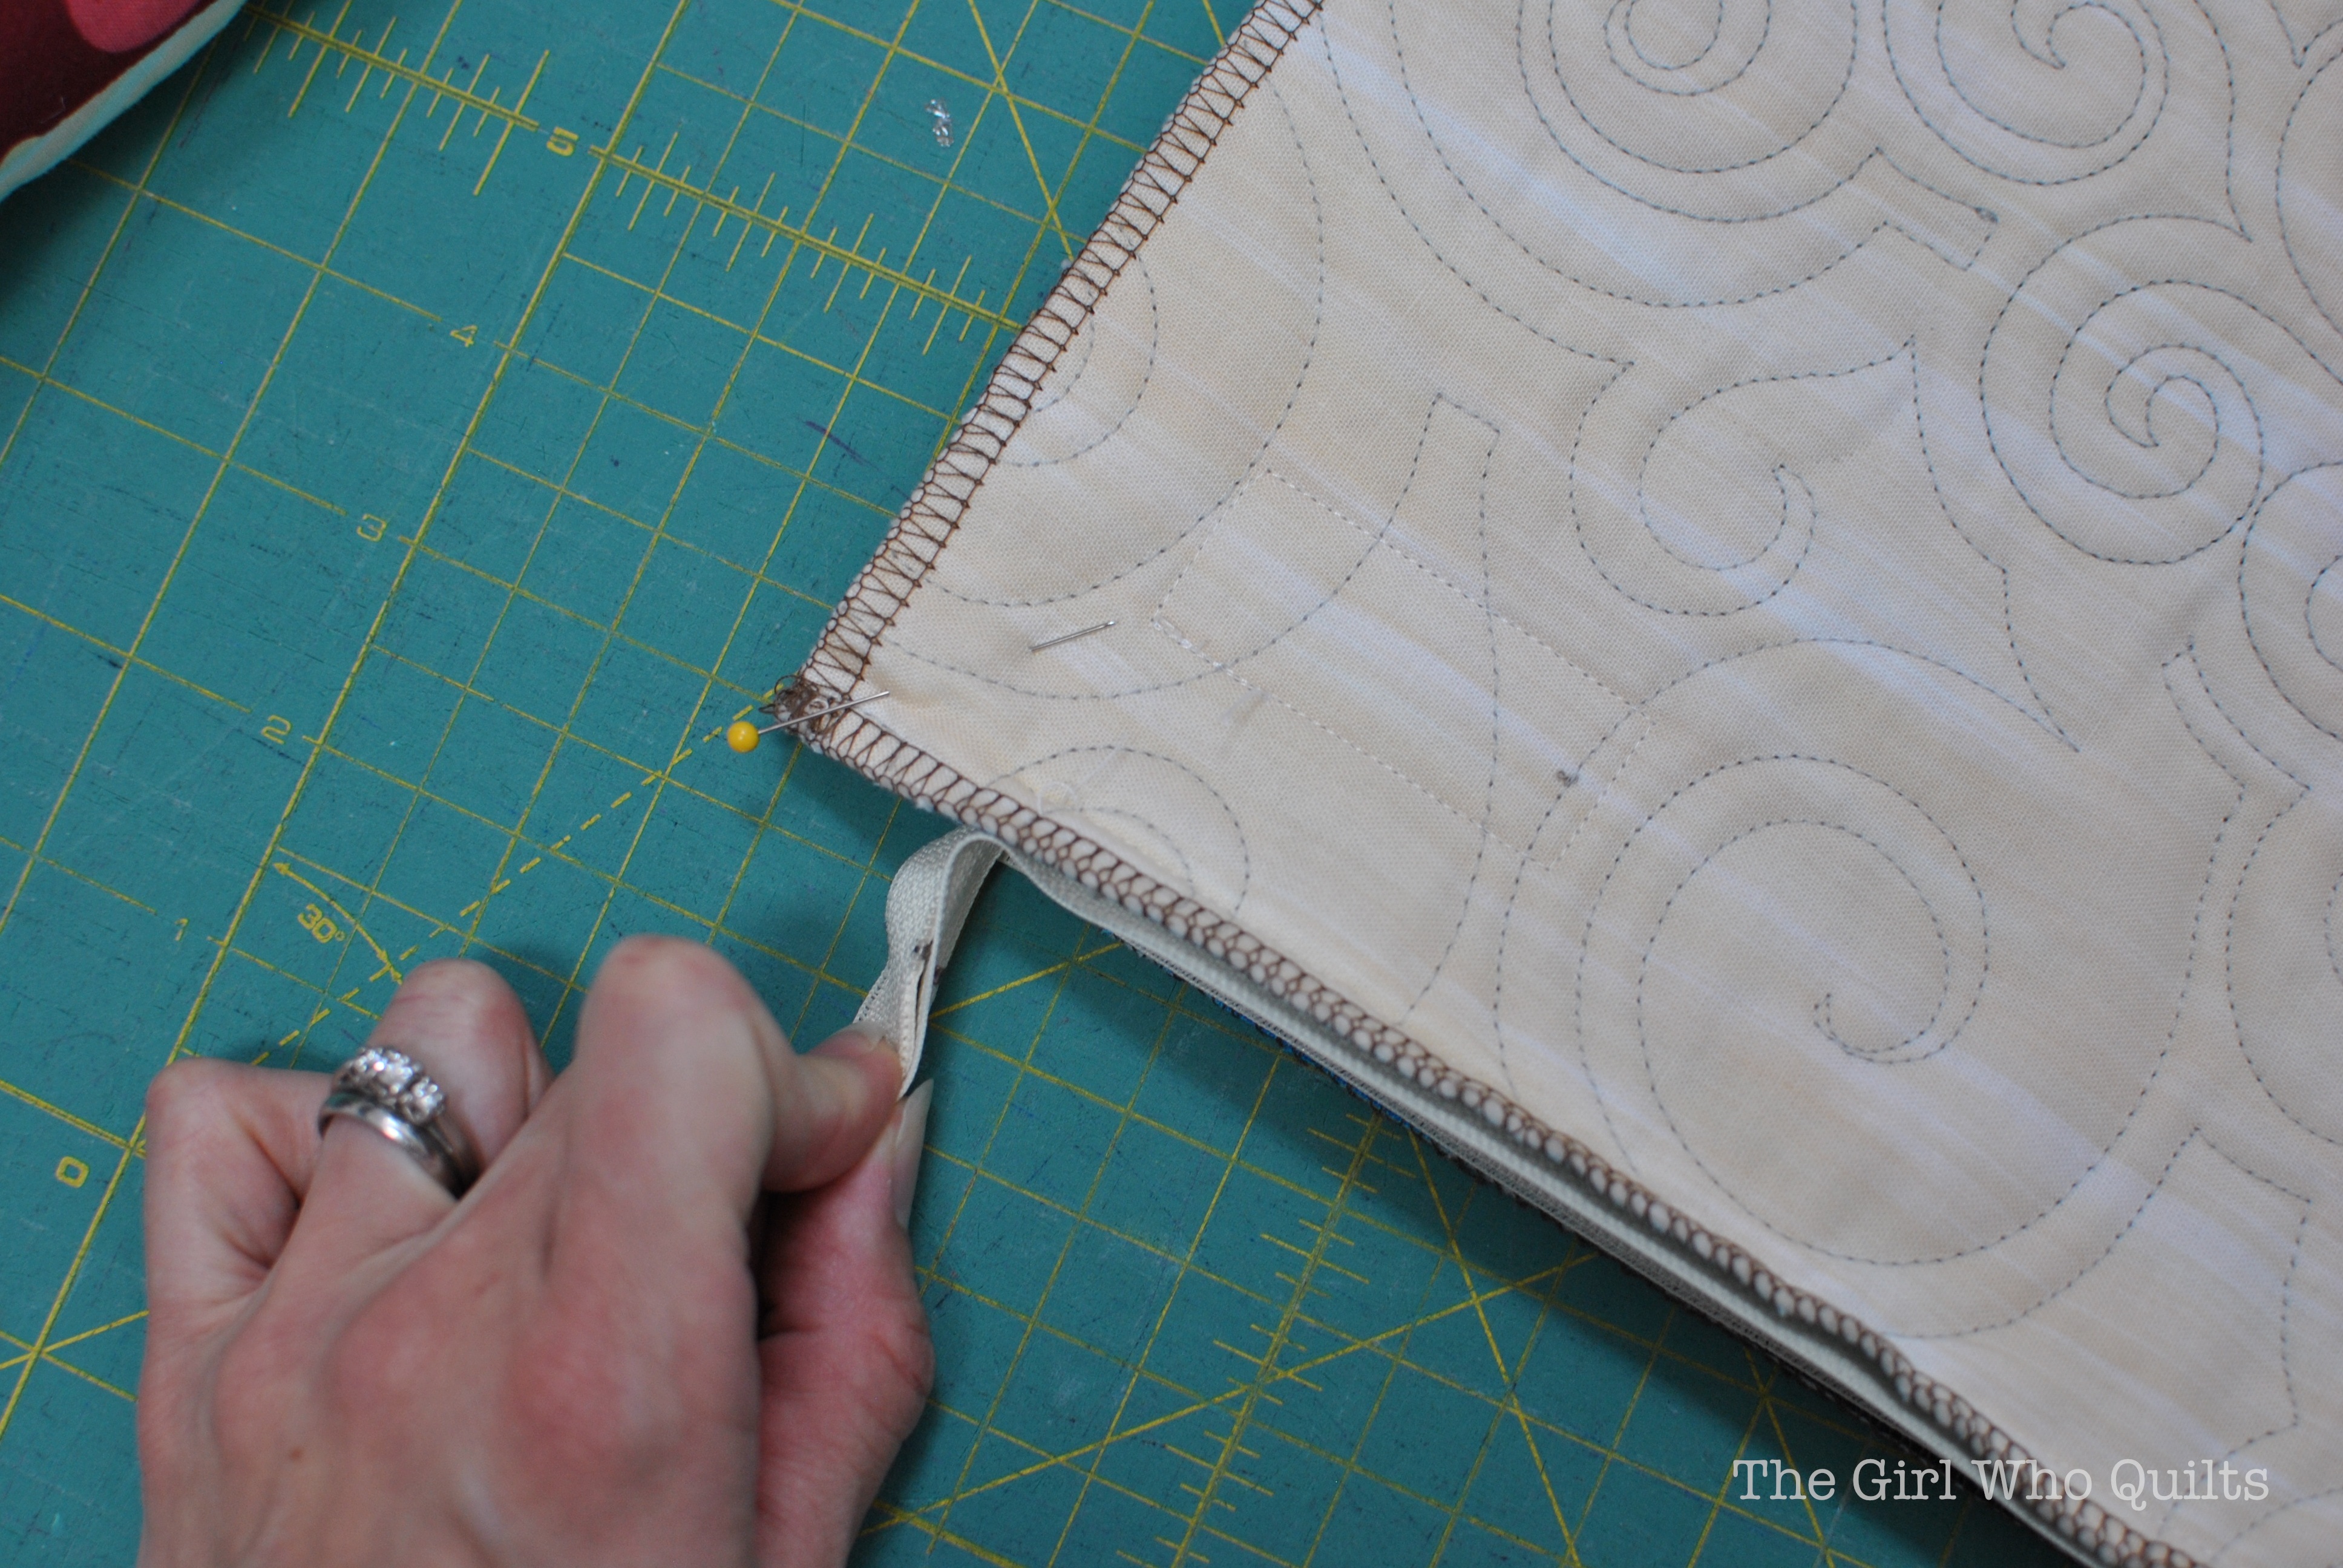
At the bottom corners, pull the zipper ends out of the way.
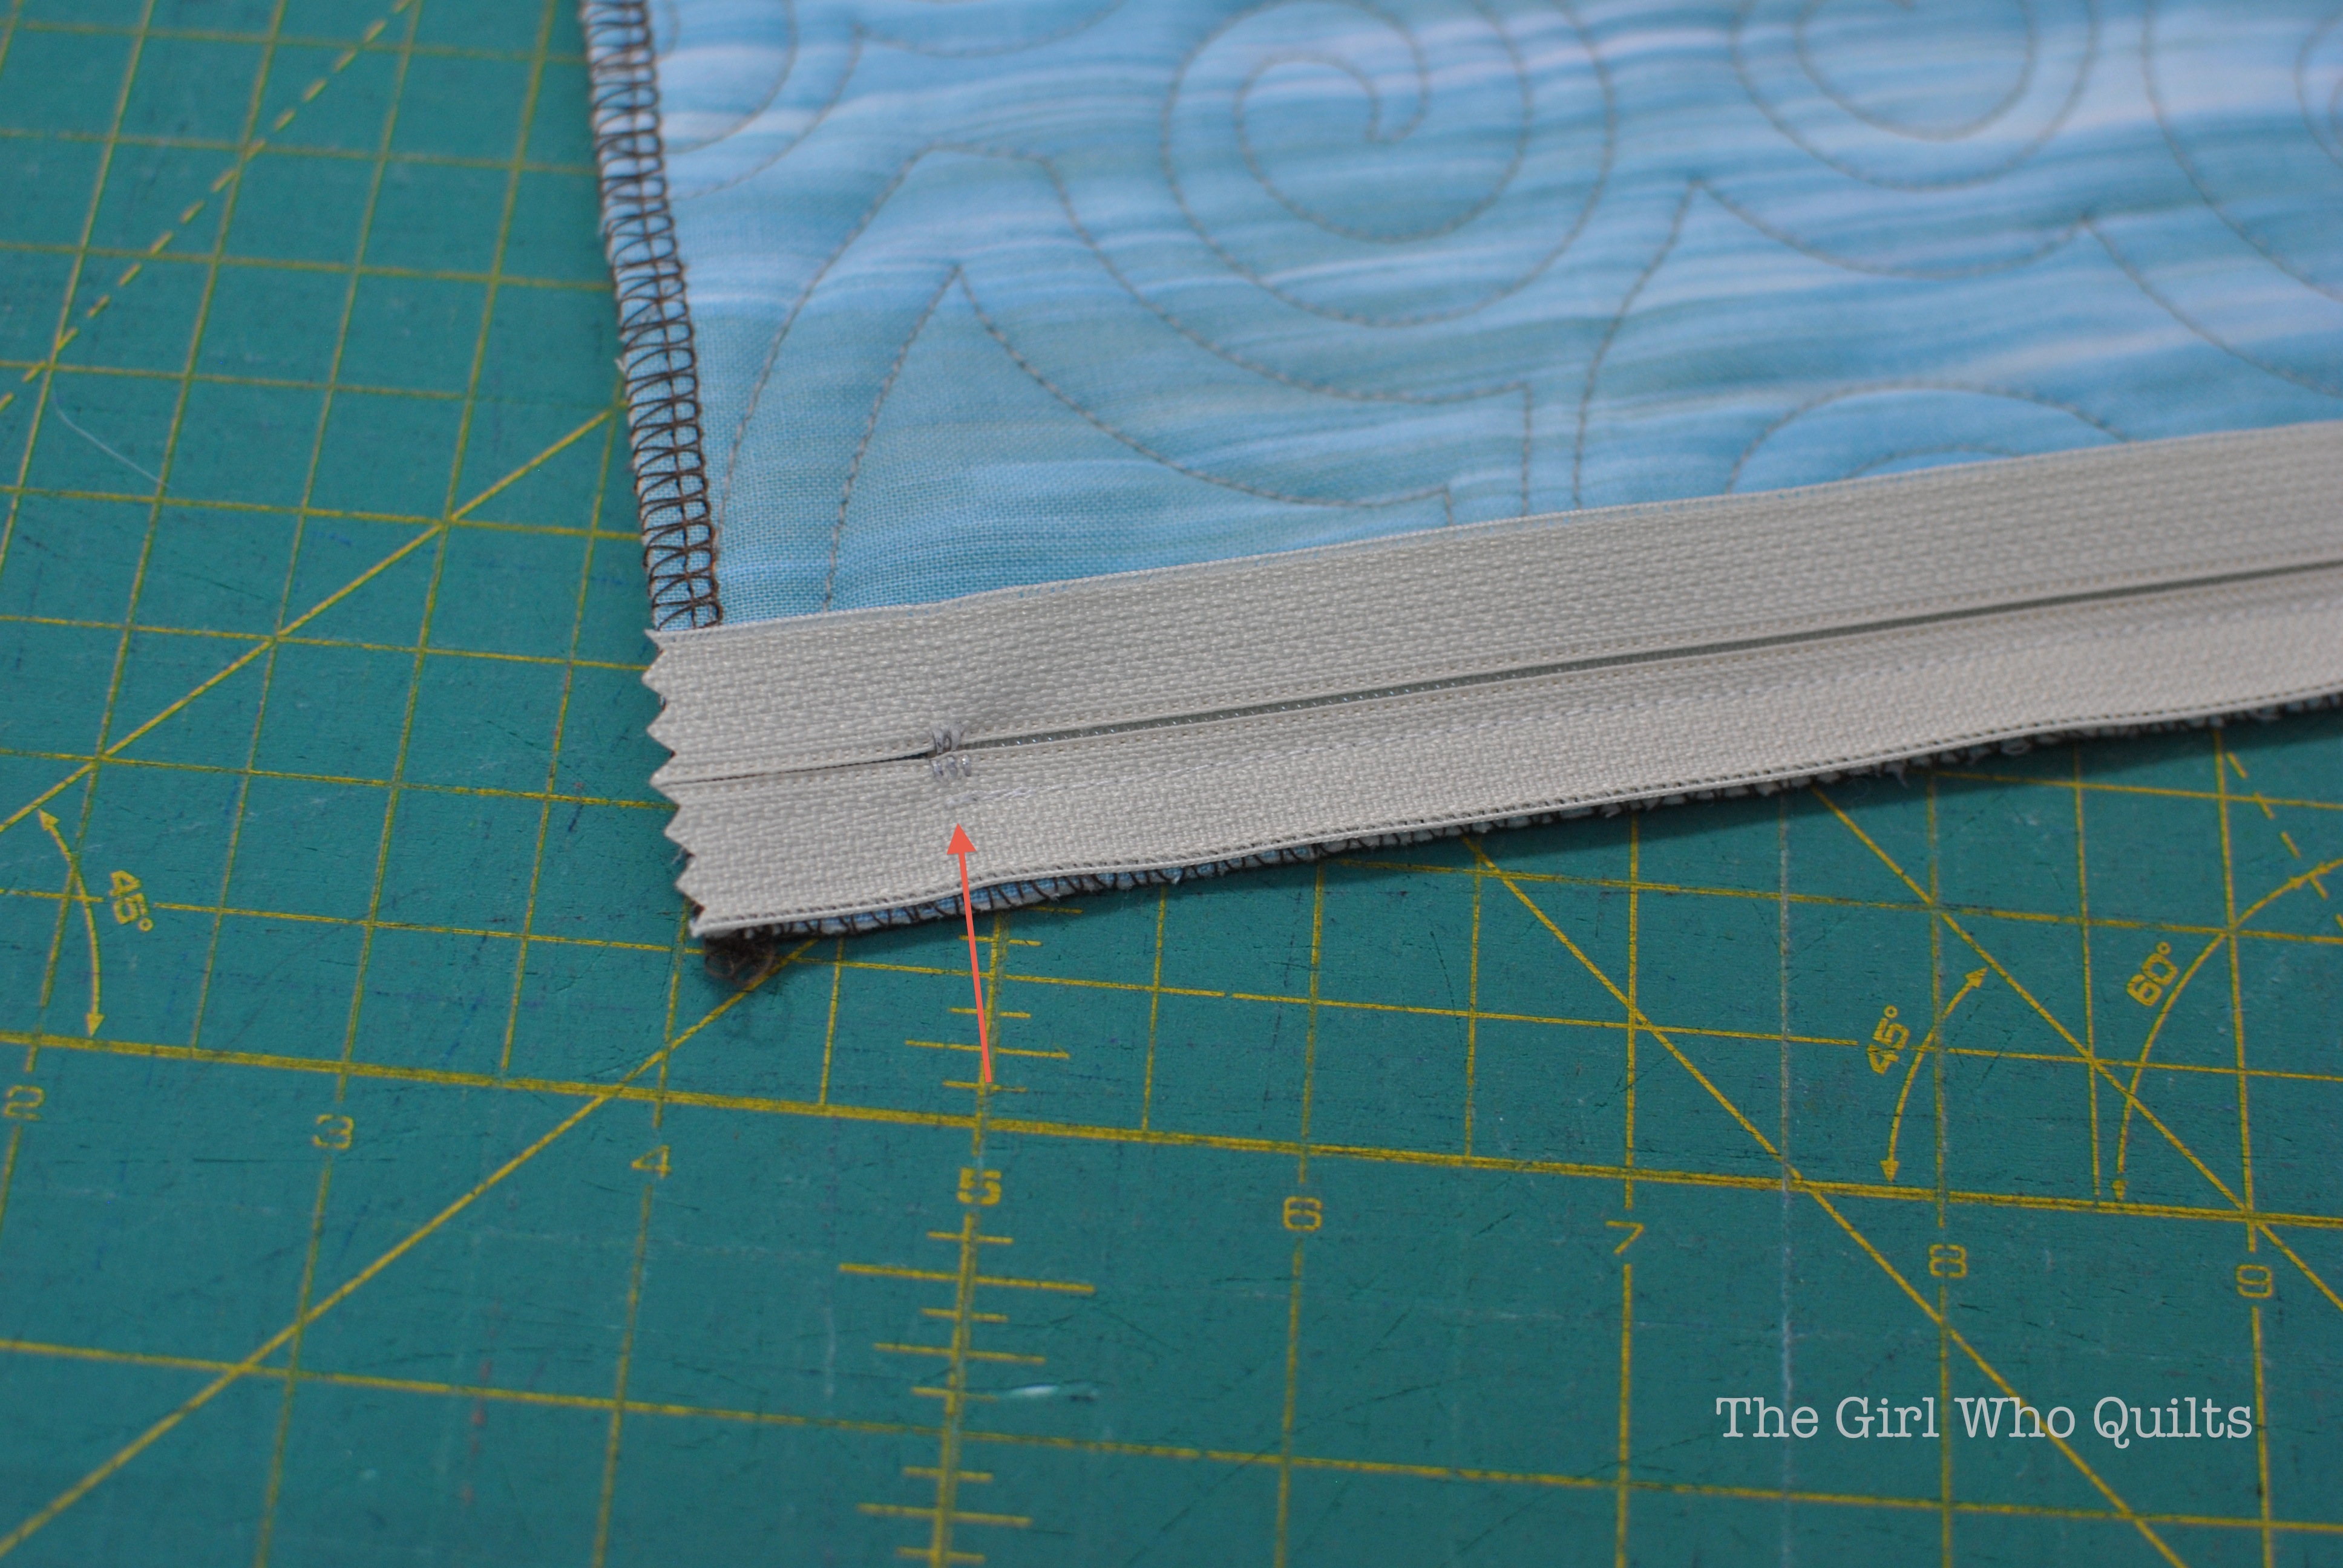
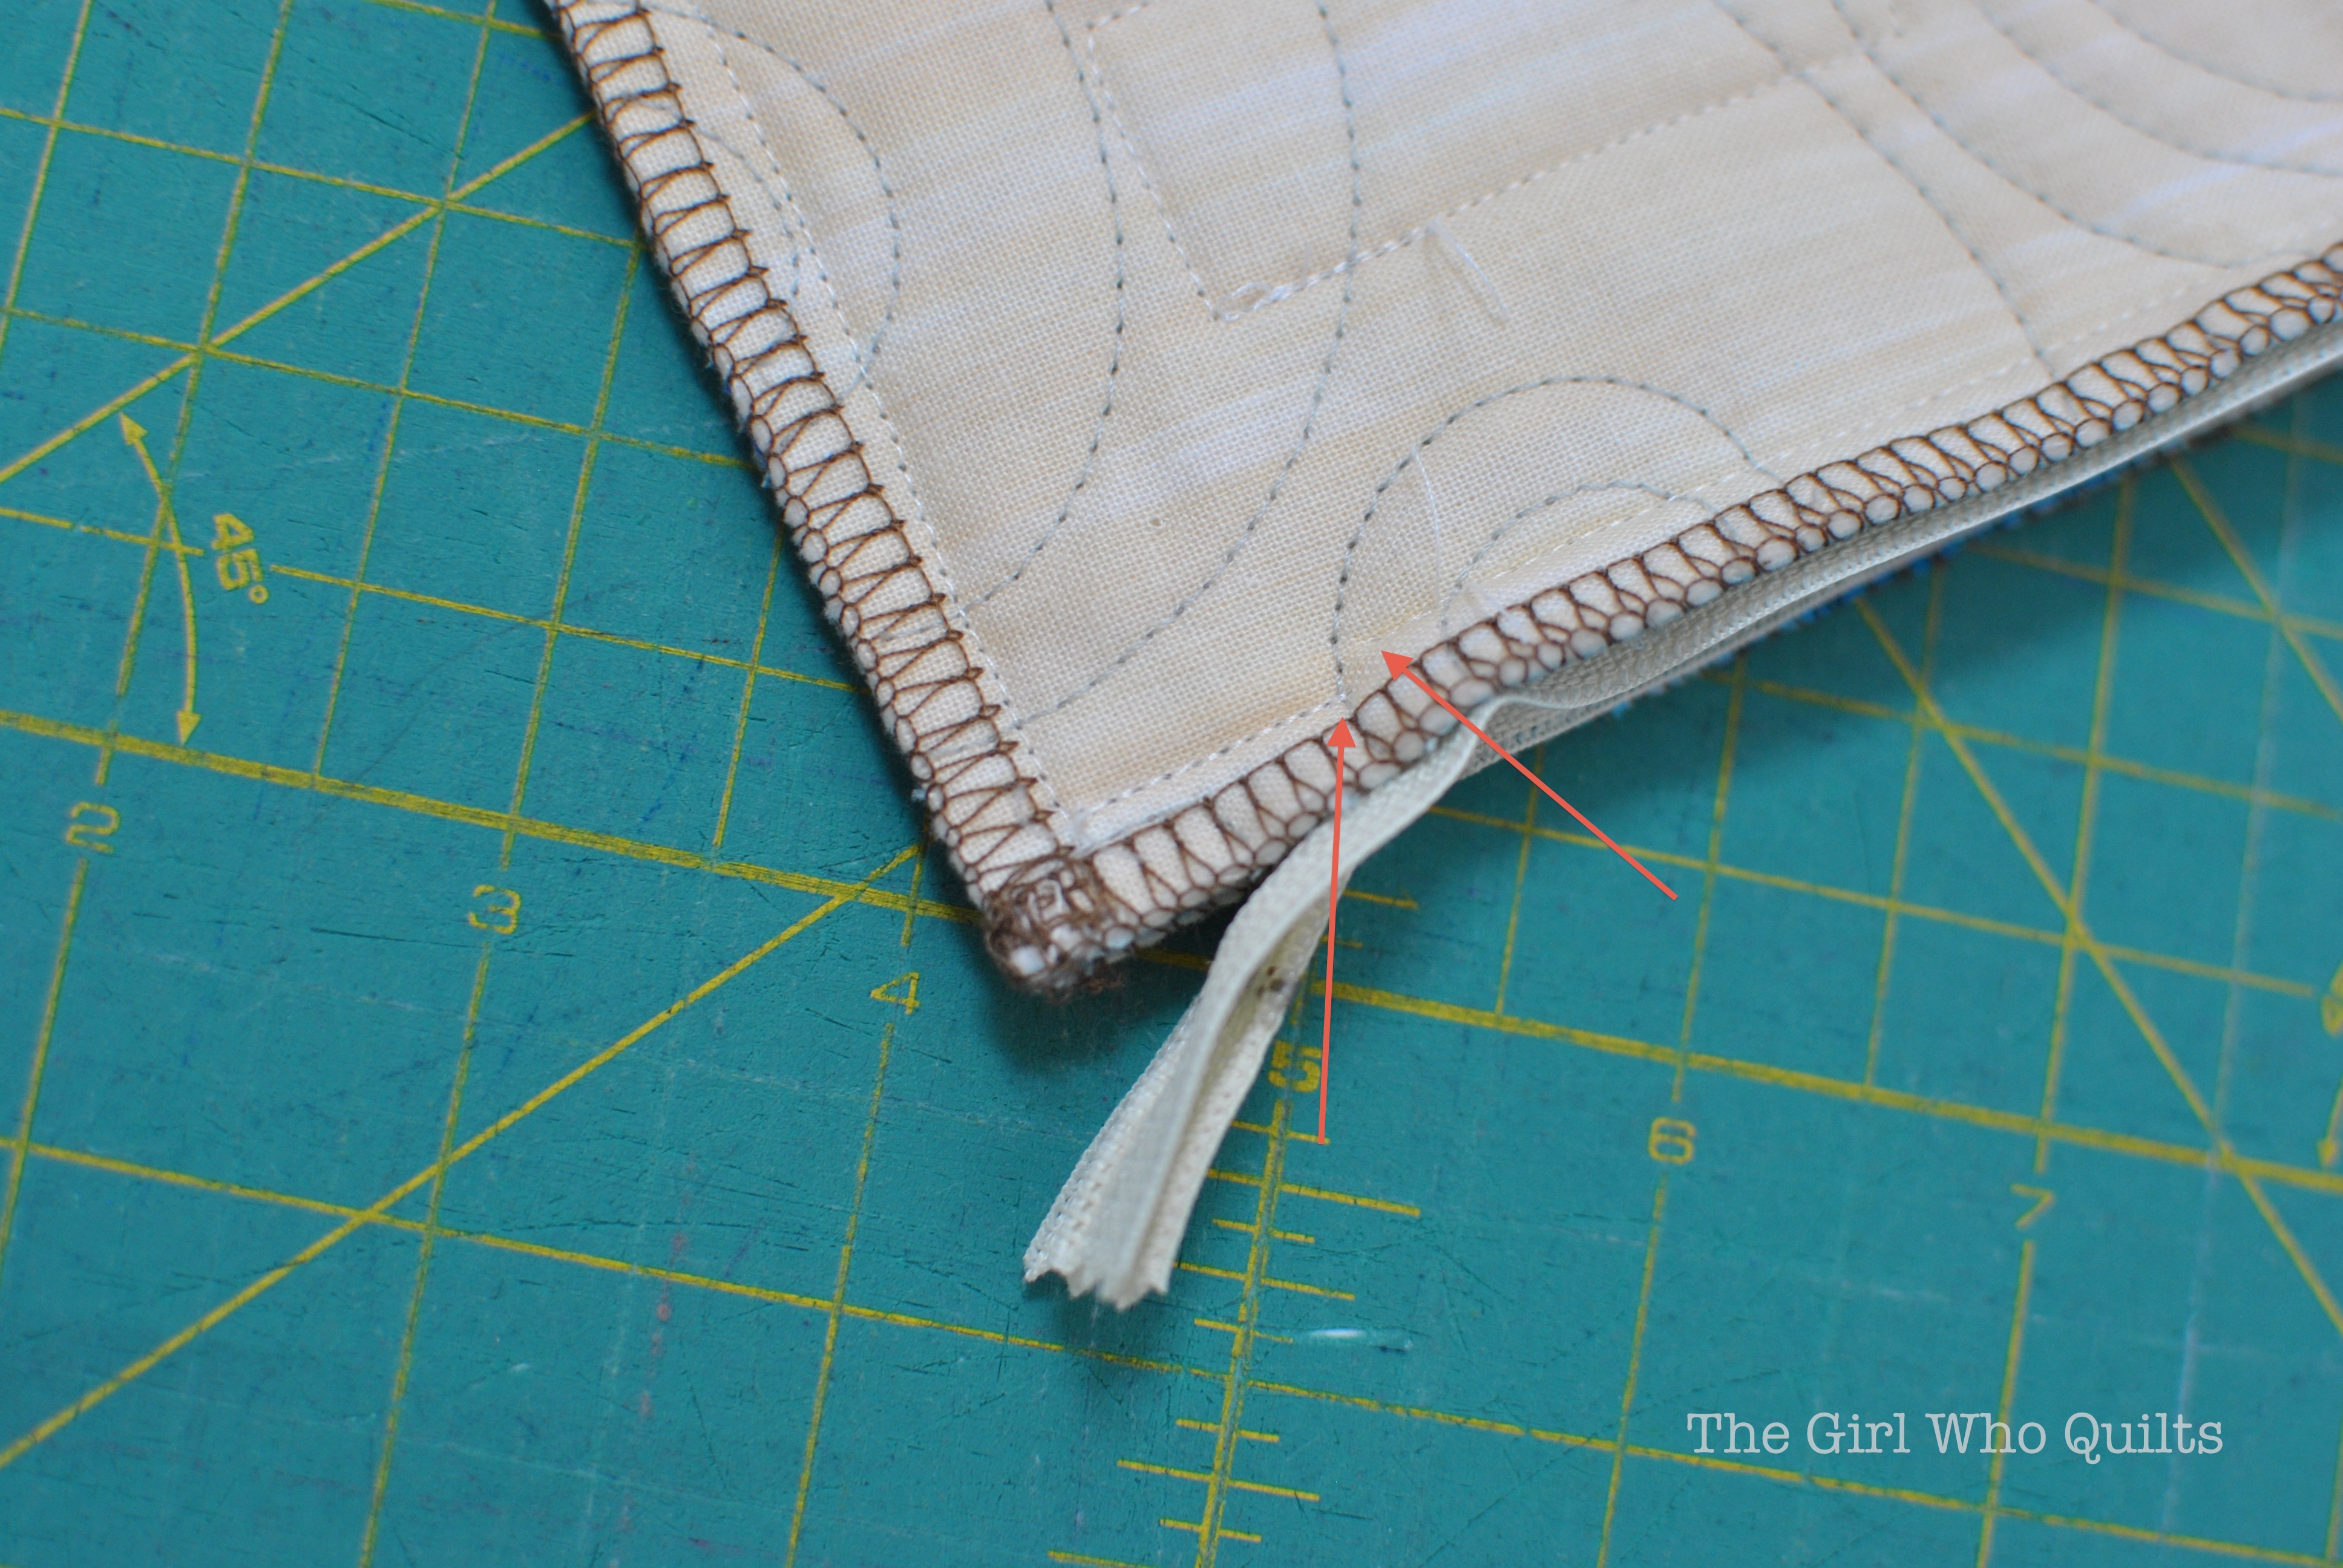
Sew around the sides and top of the pillow. On the bottom edge, stitch from the corner towards the zipper. Don't worry about getting too close to the zipper, just get as close as your presser foot will allow.
The red arrows show the gap in stitching.
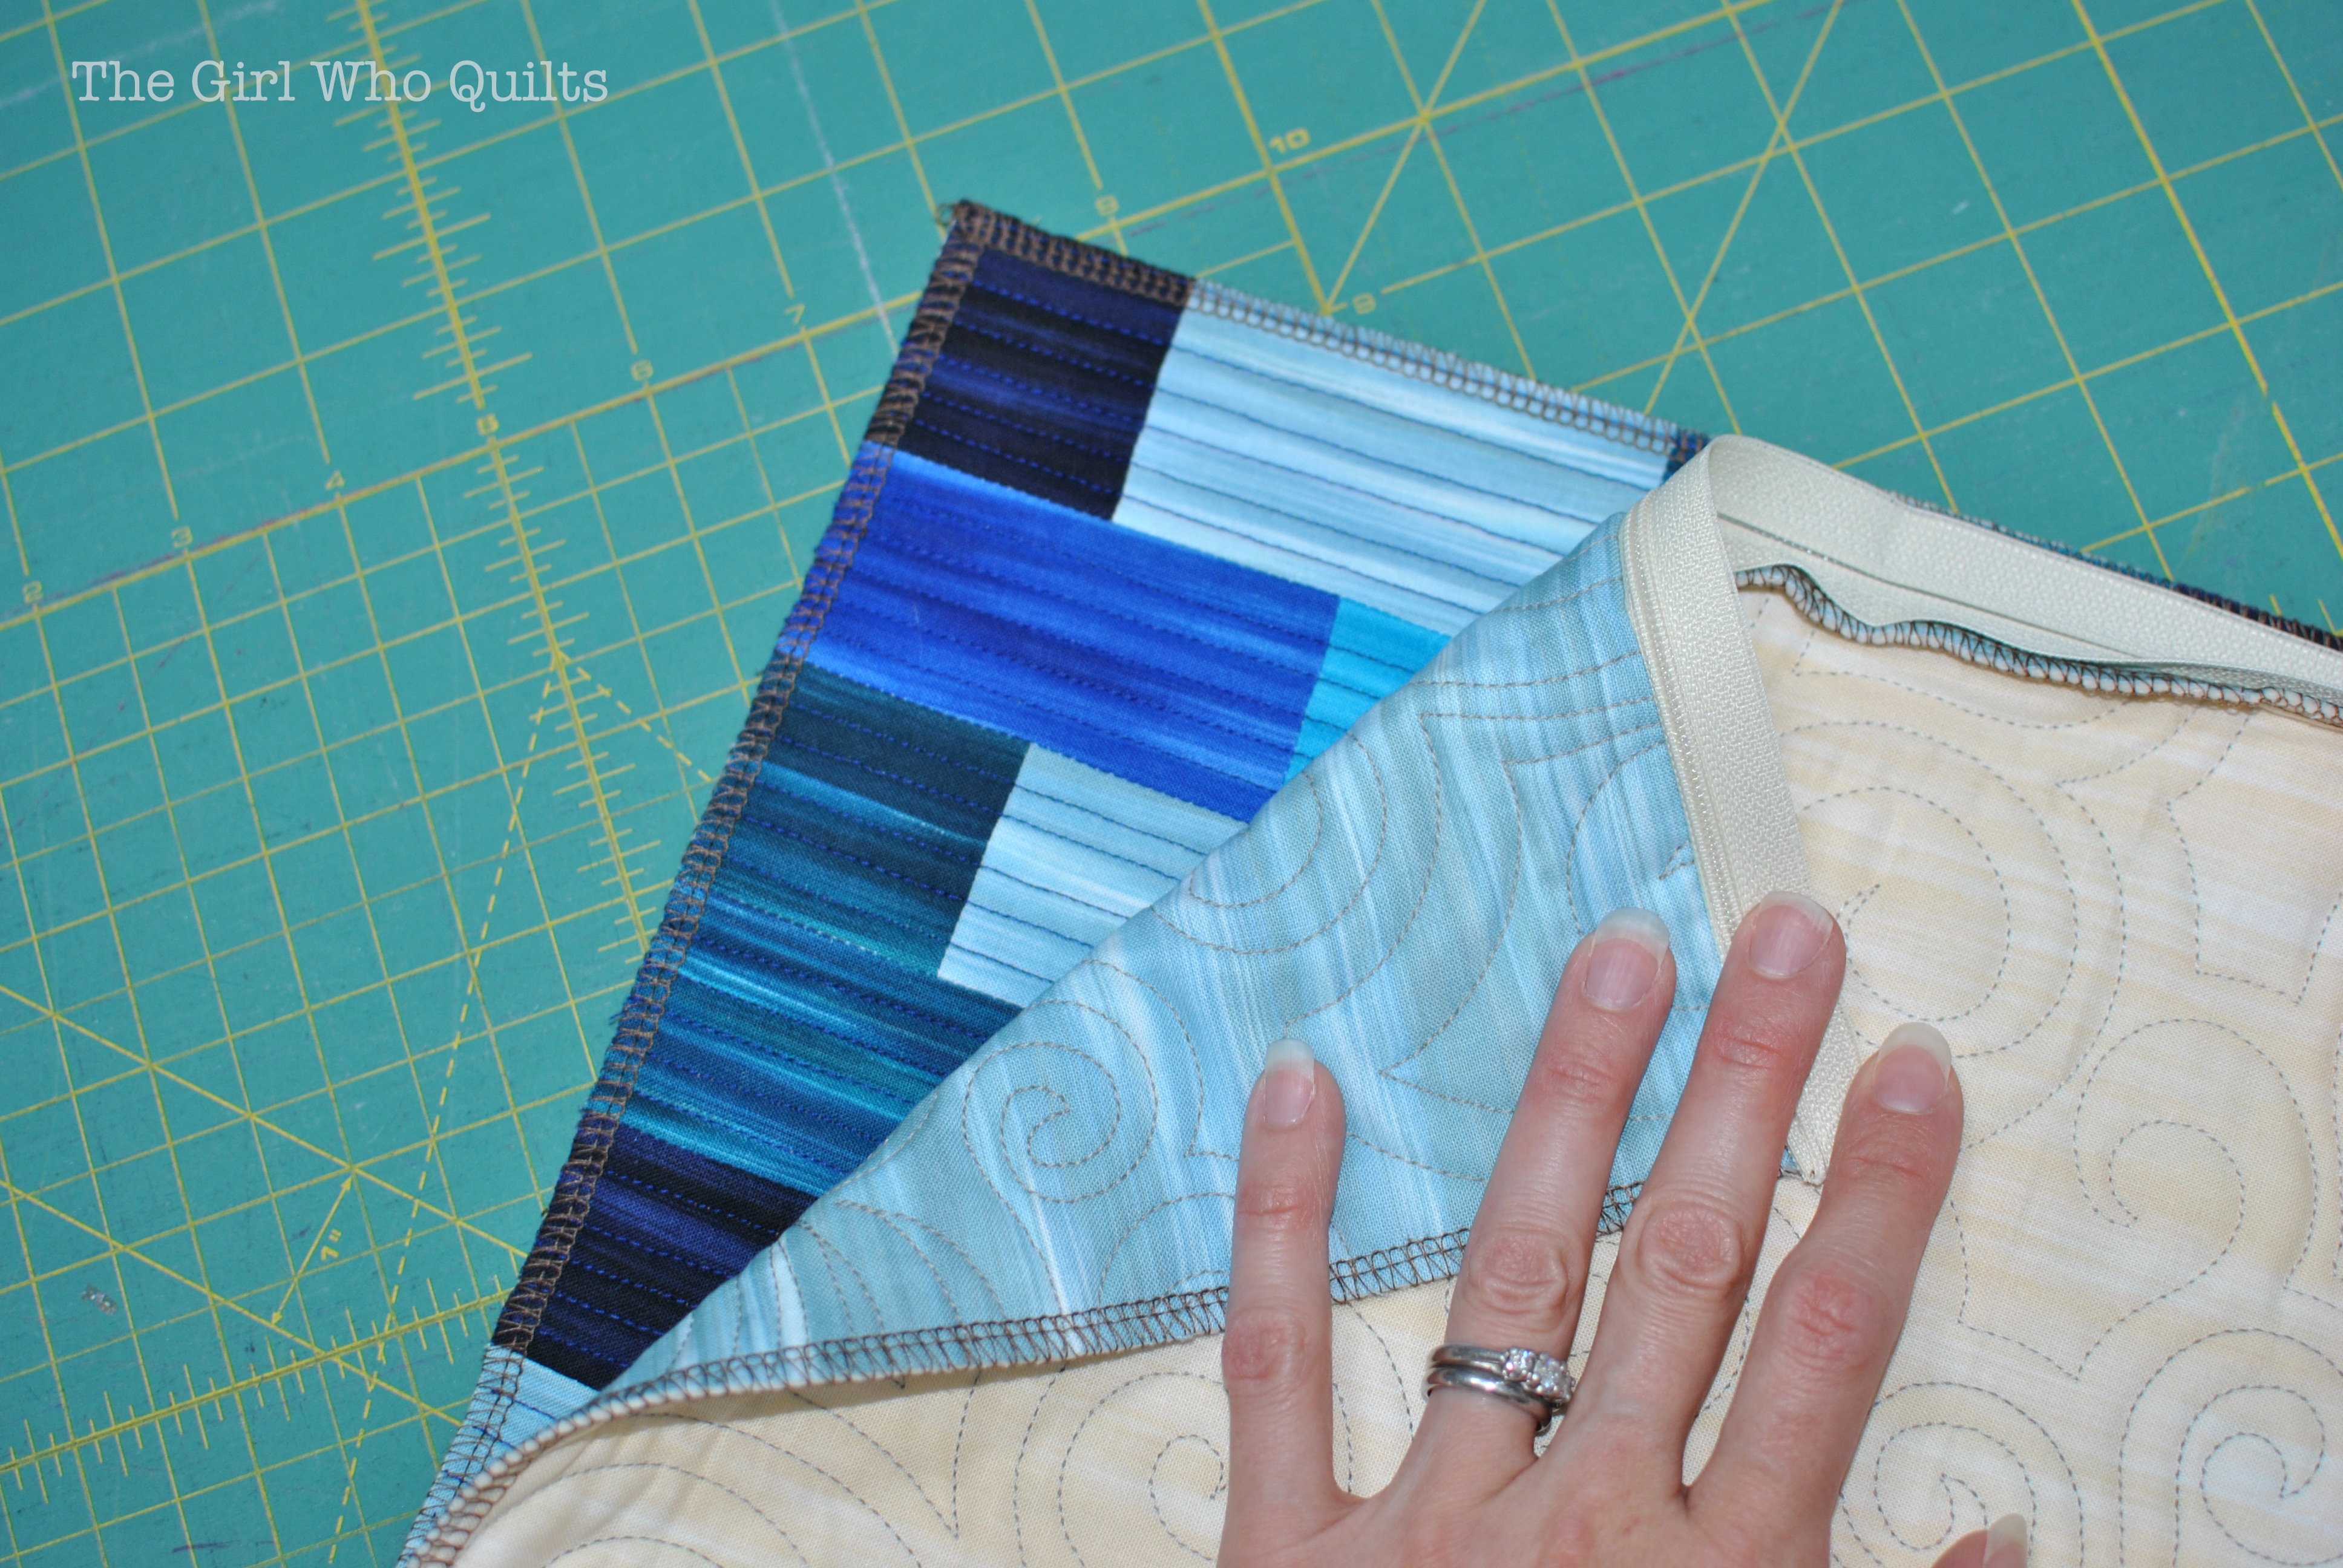
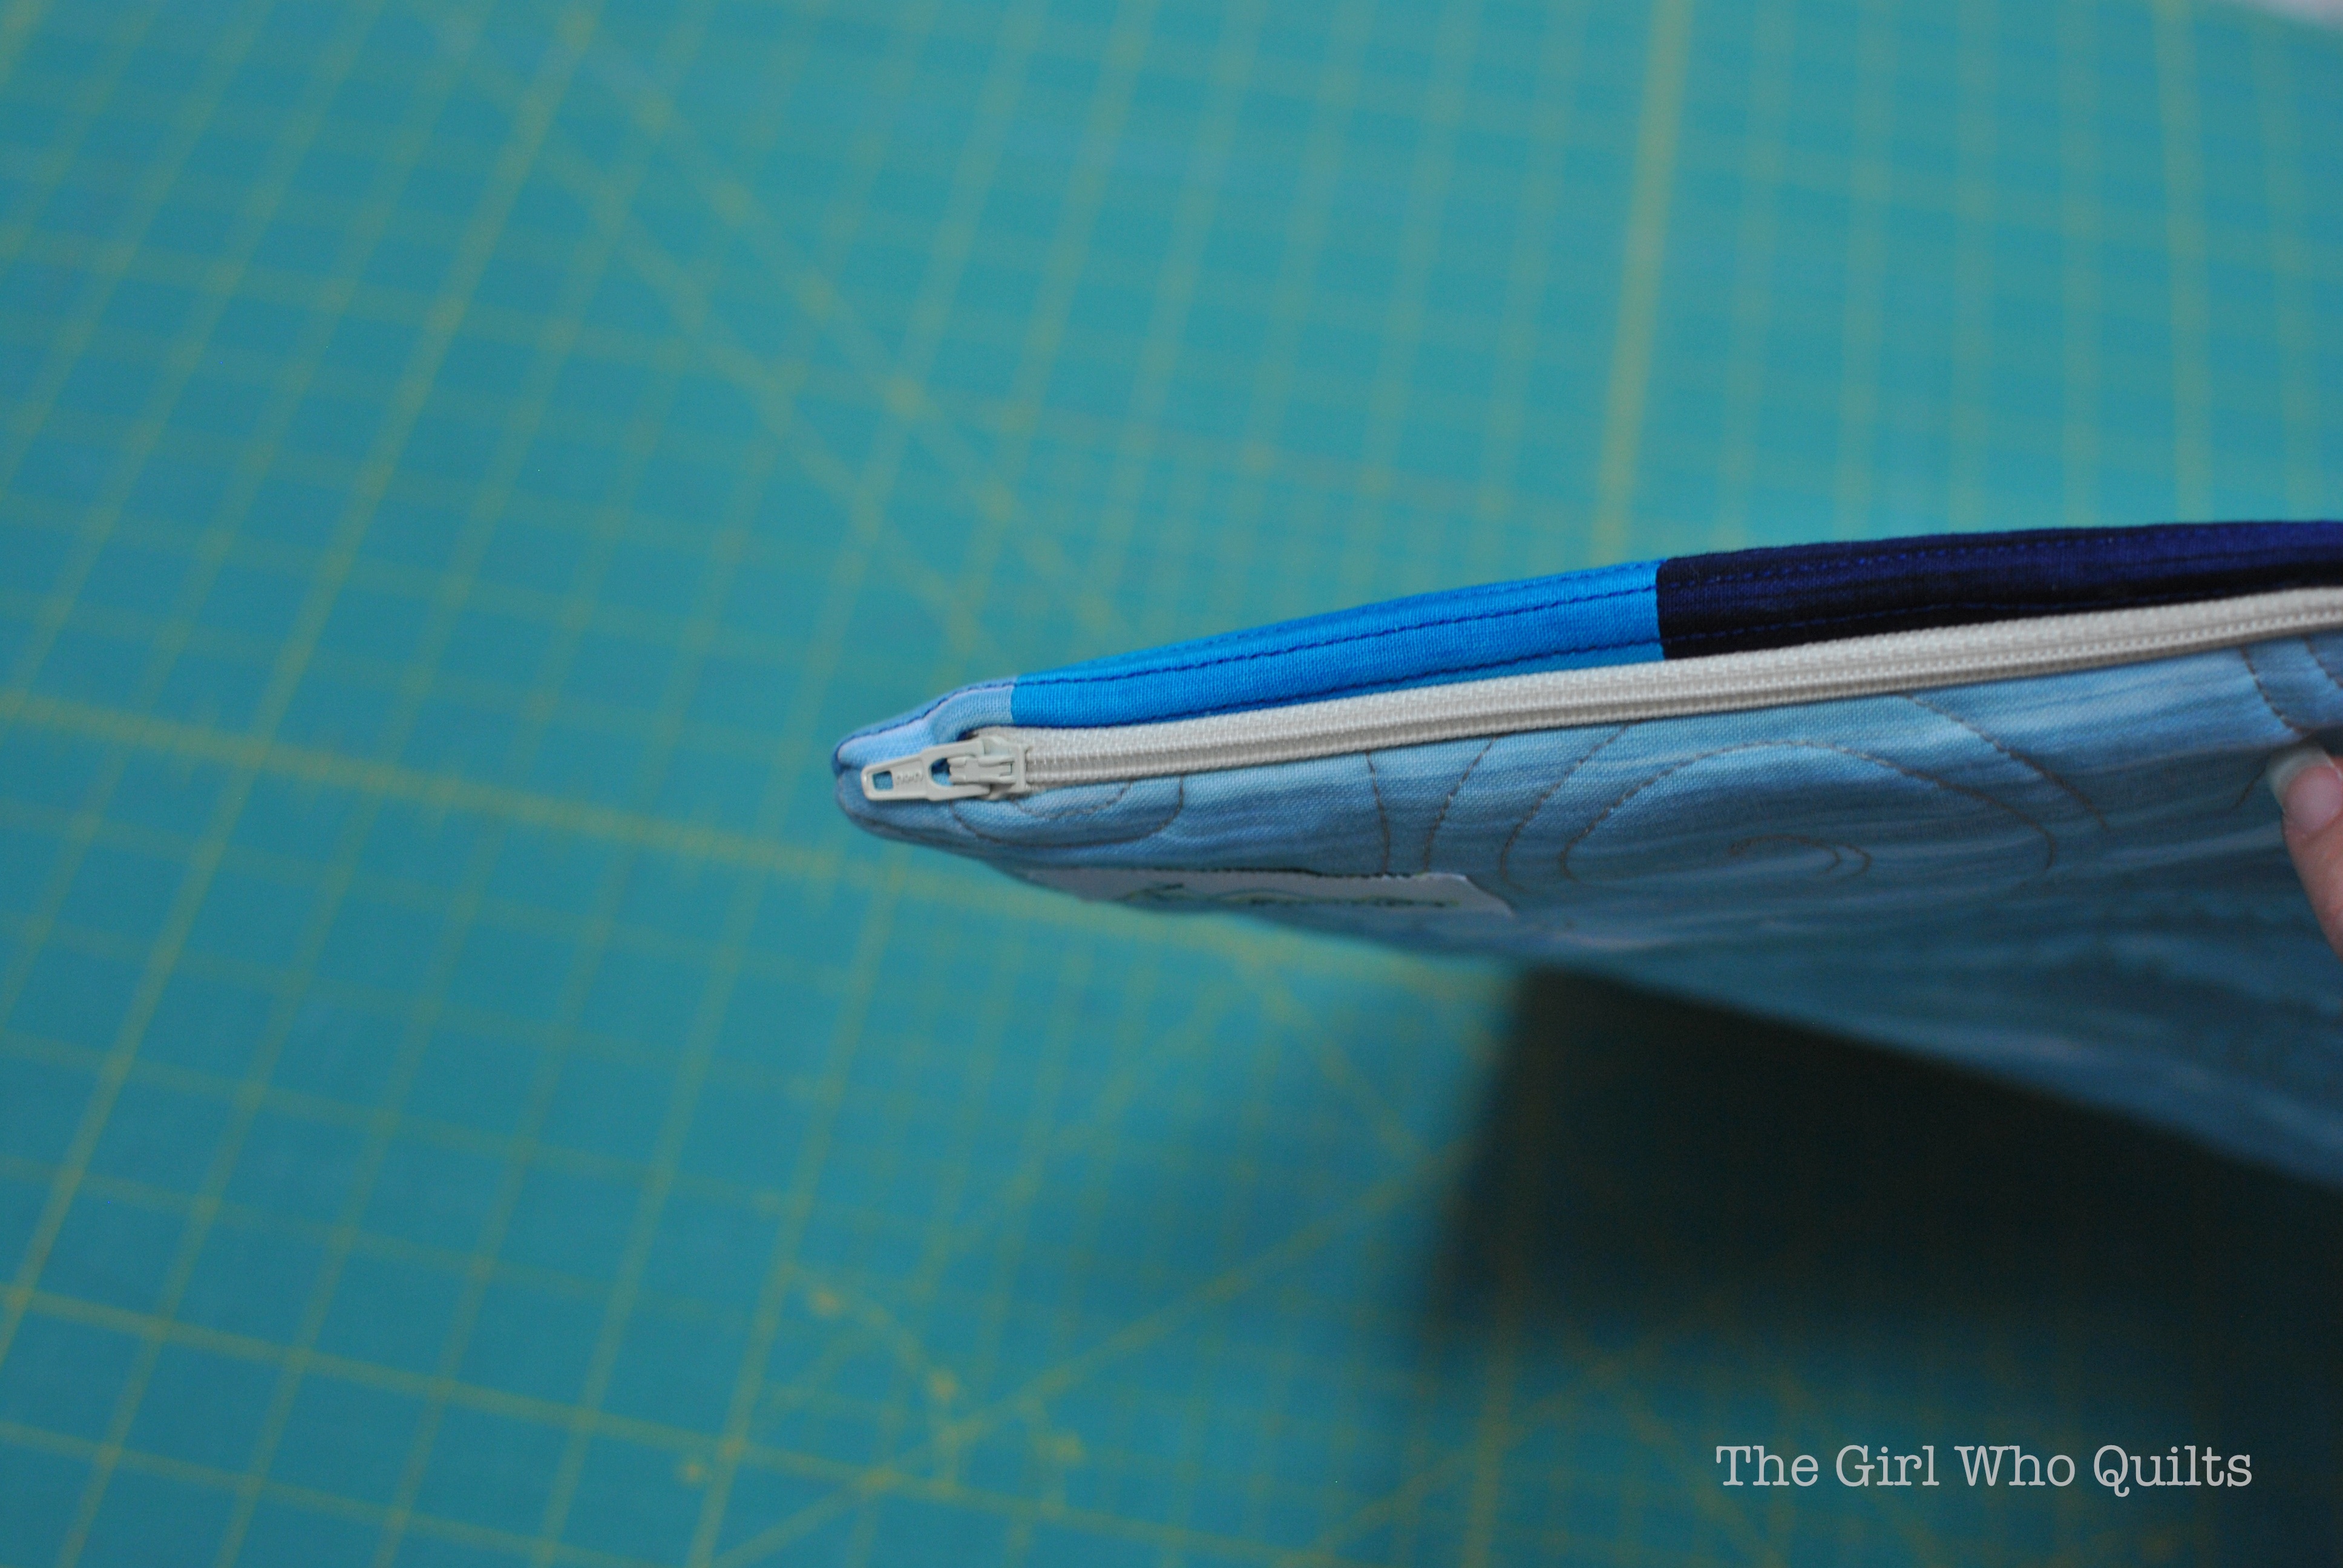
Turn the pillow right side out and gently push out the corners.
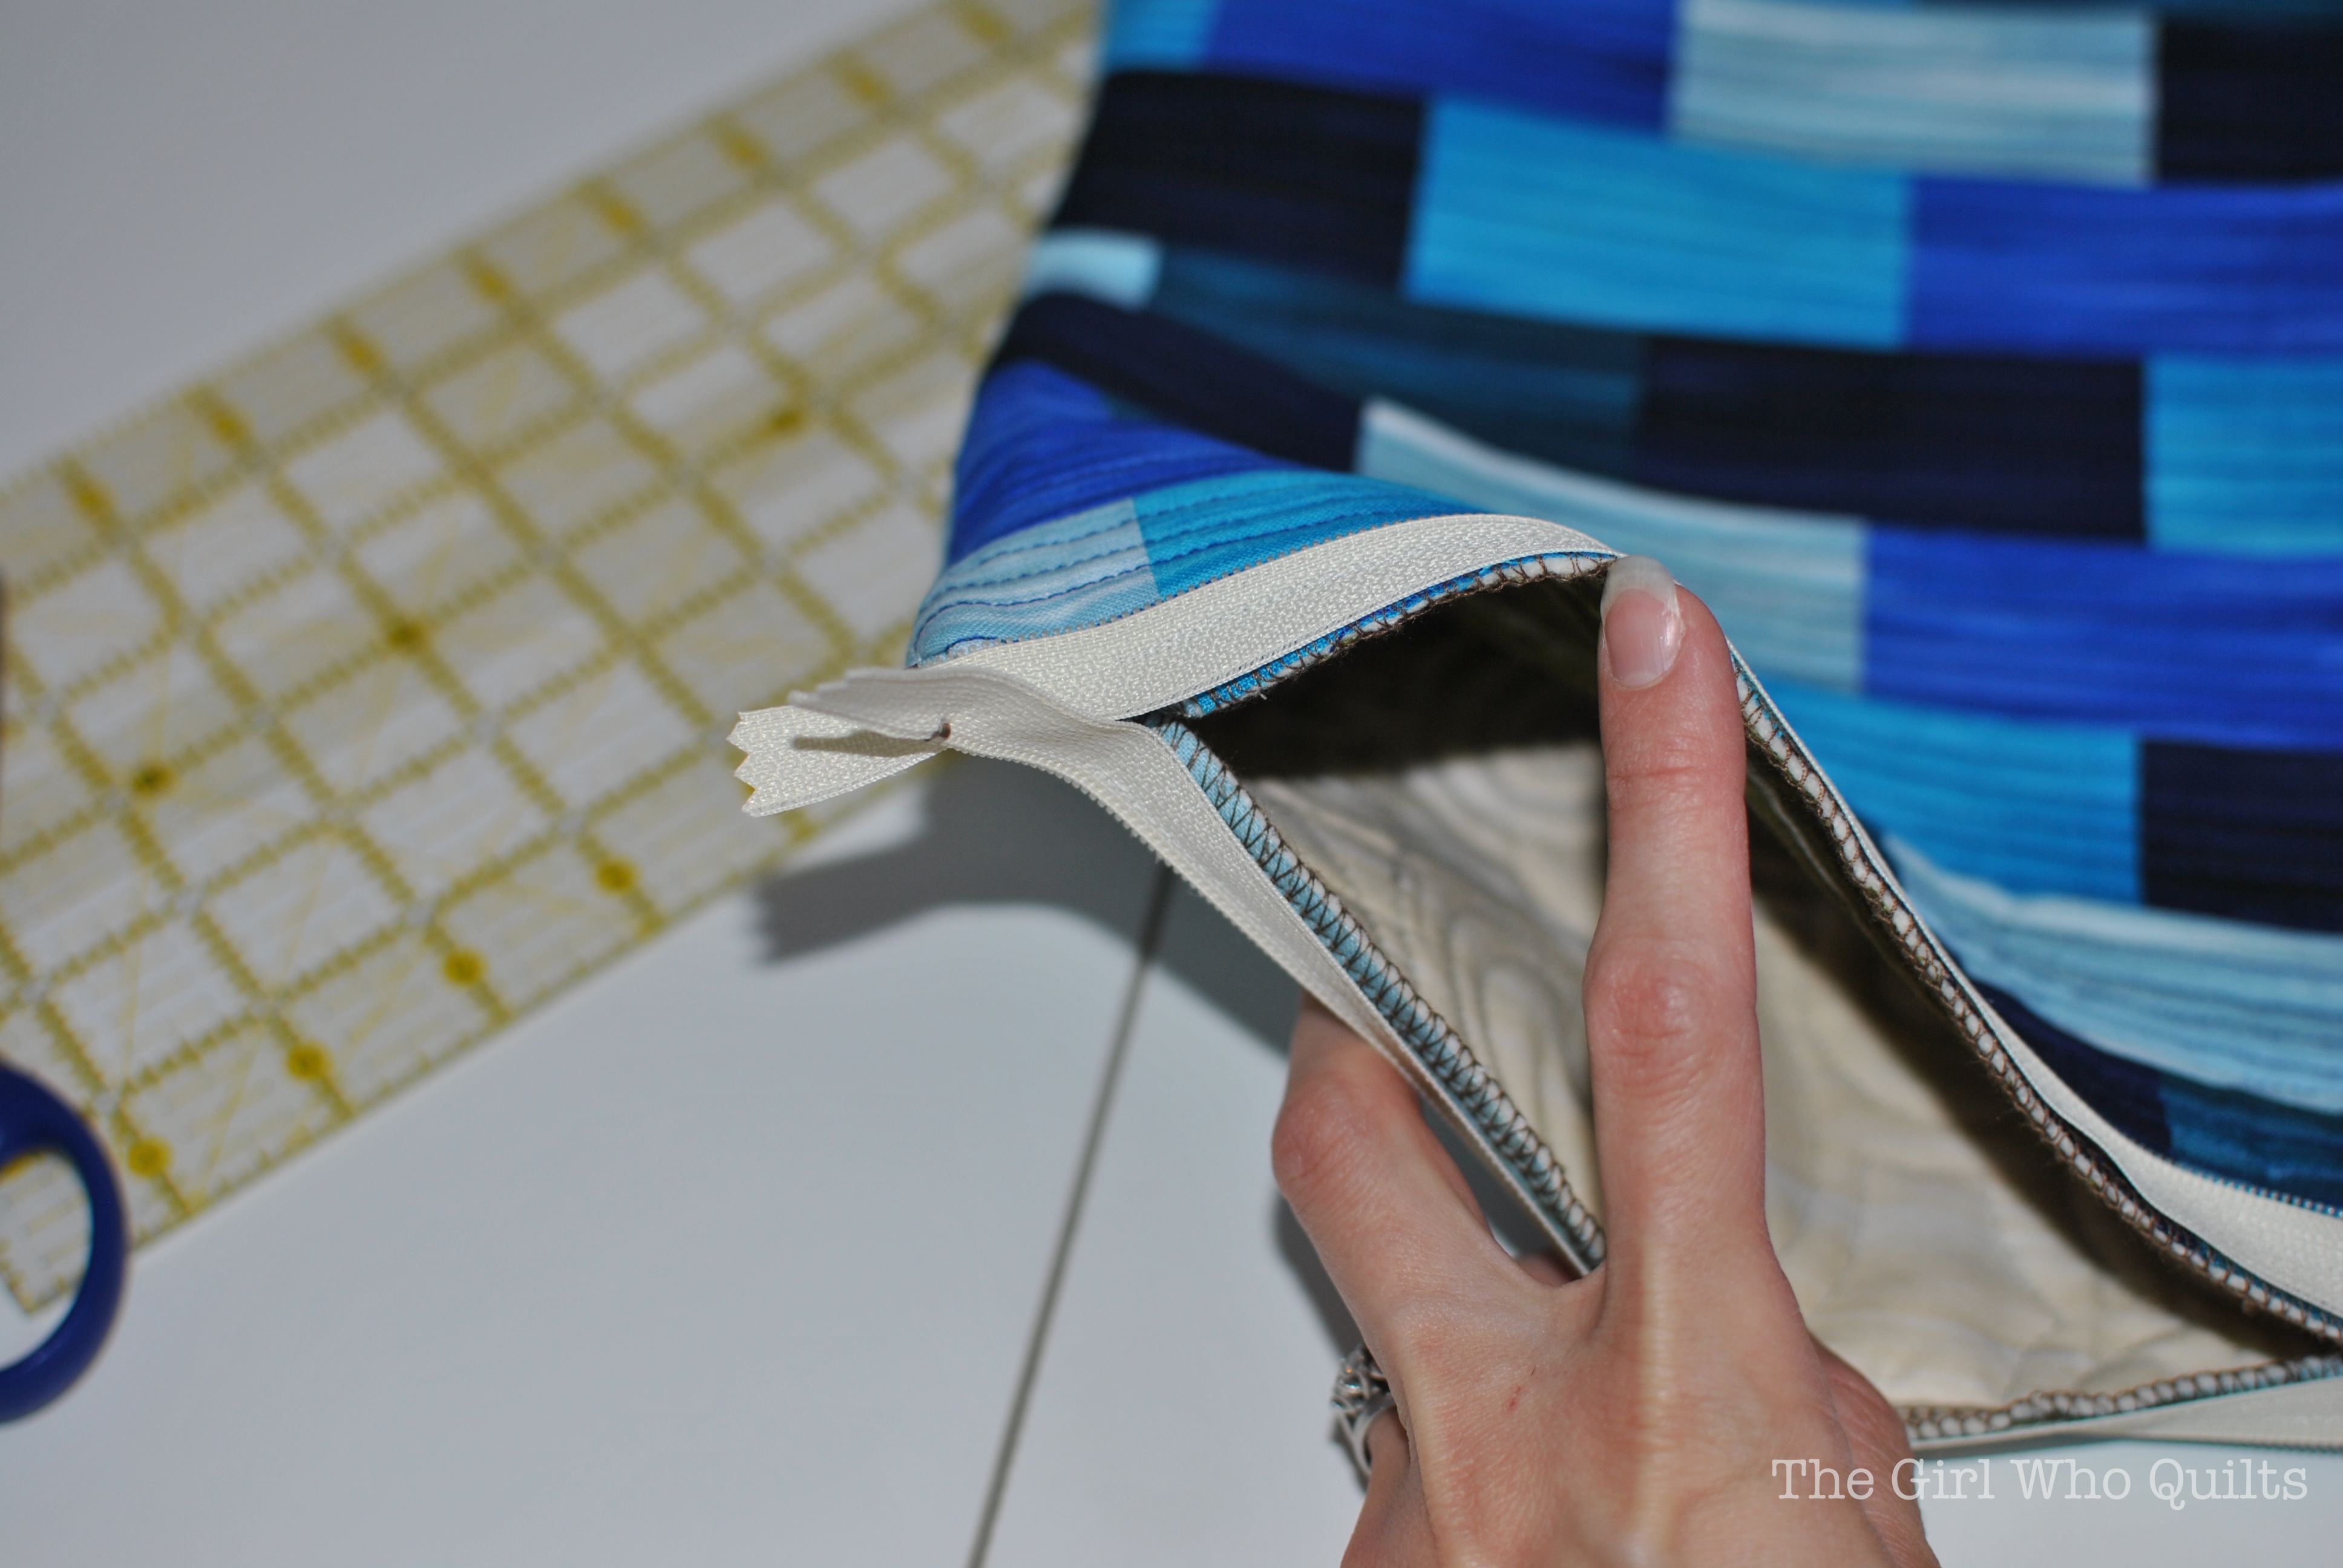
The zipper tape may be sticking out right now.
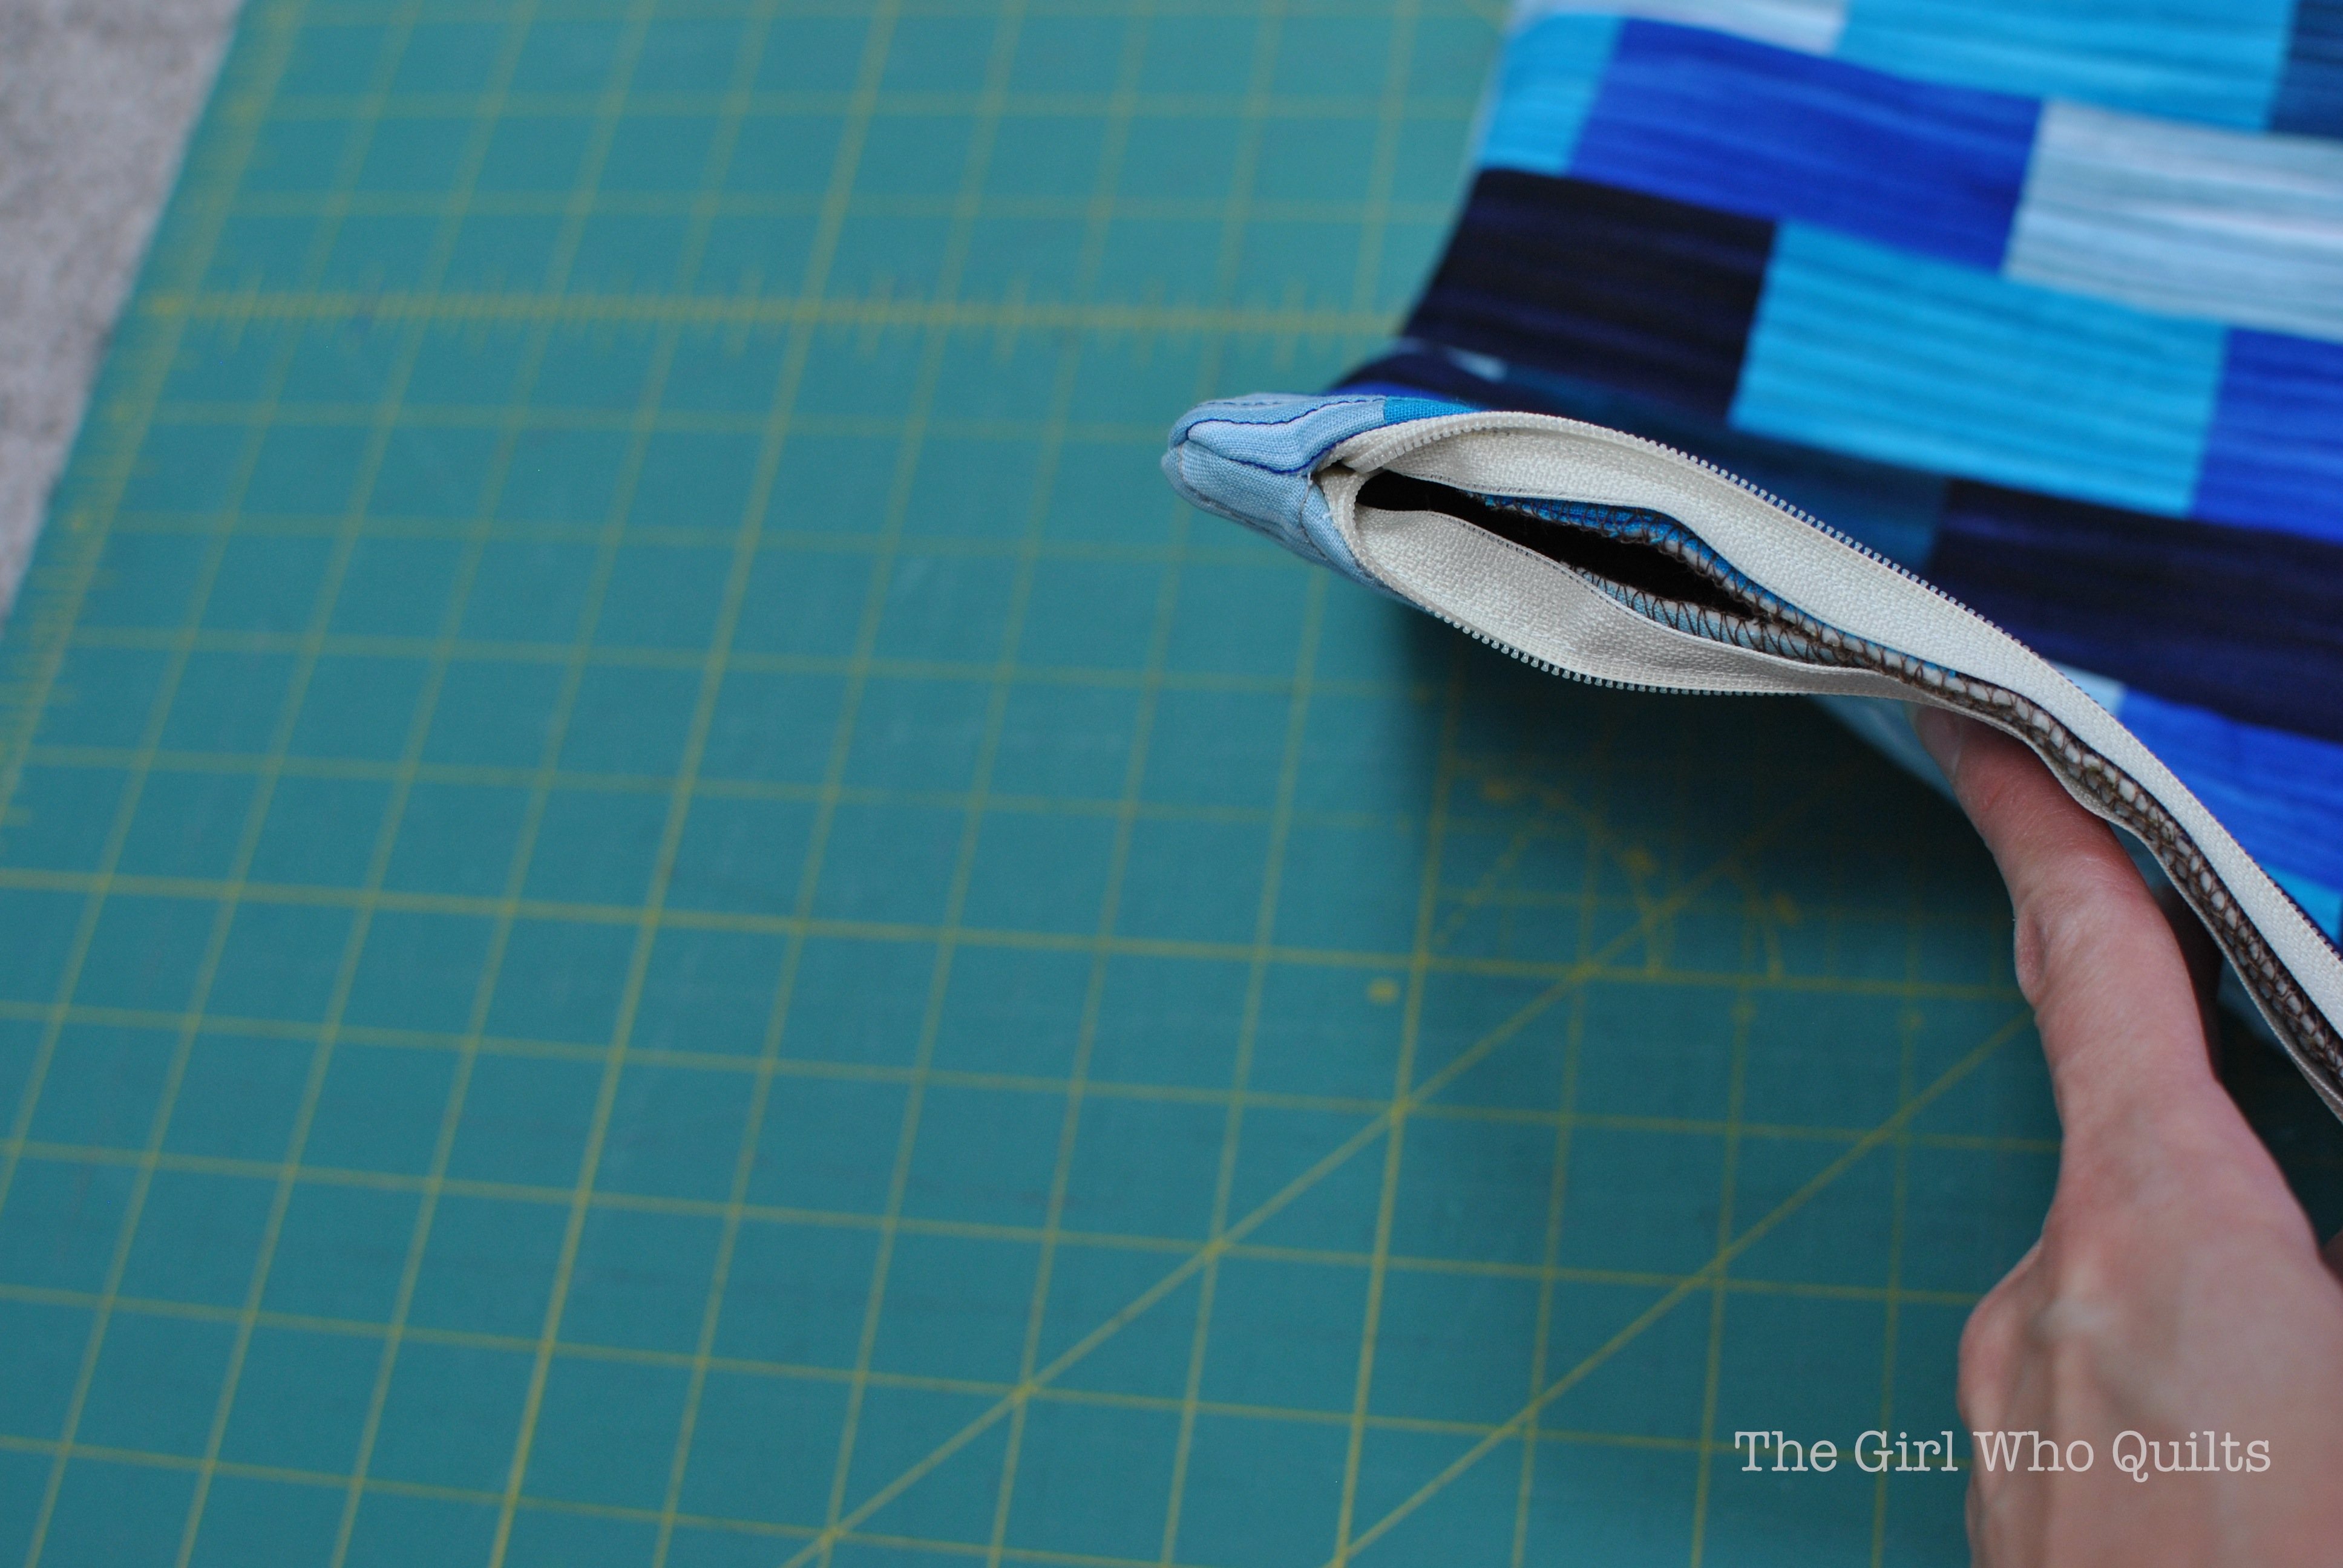
Just tuck the ends into the pillow before zipping it closed!
Stuff the pillow form into the case, and you're done!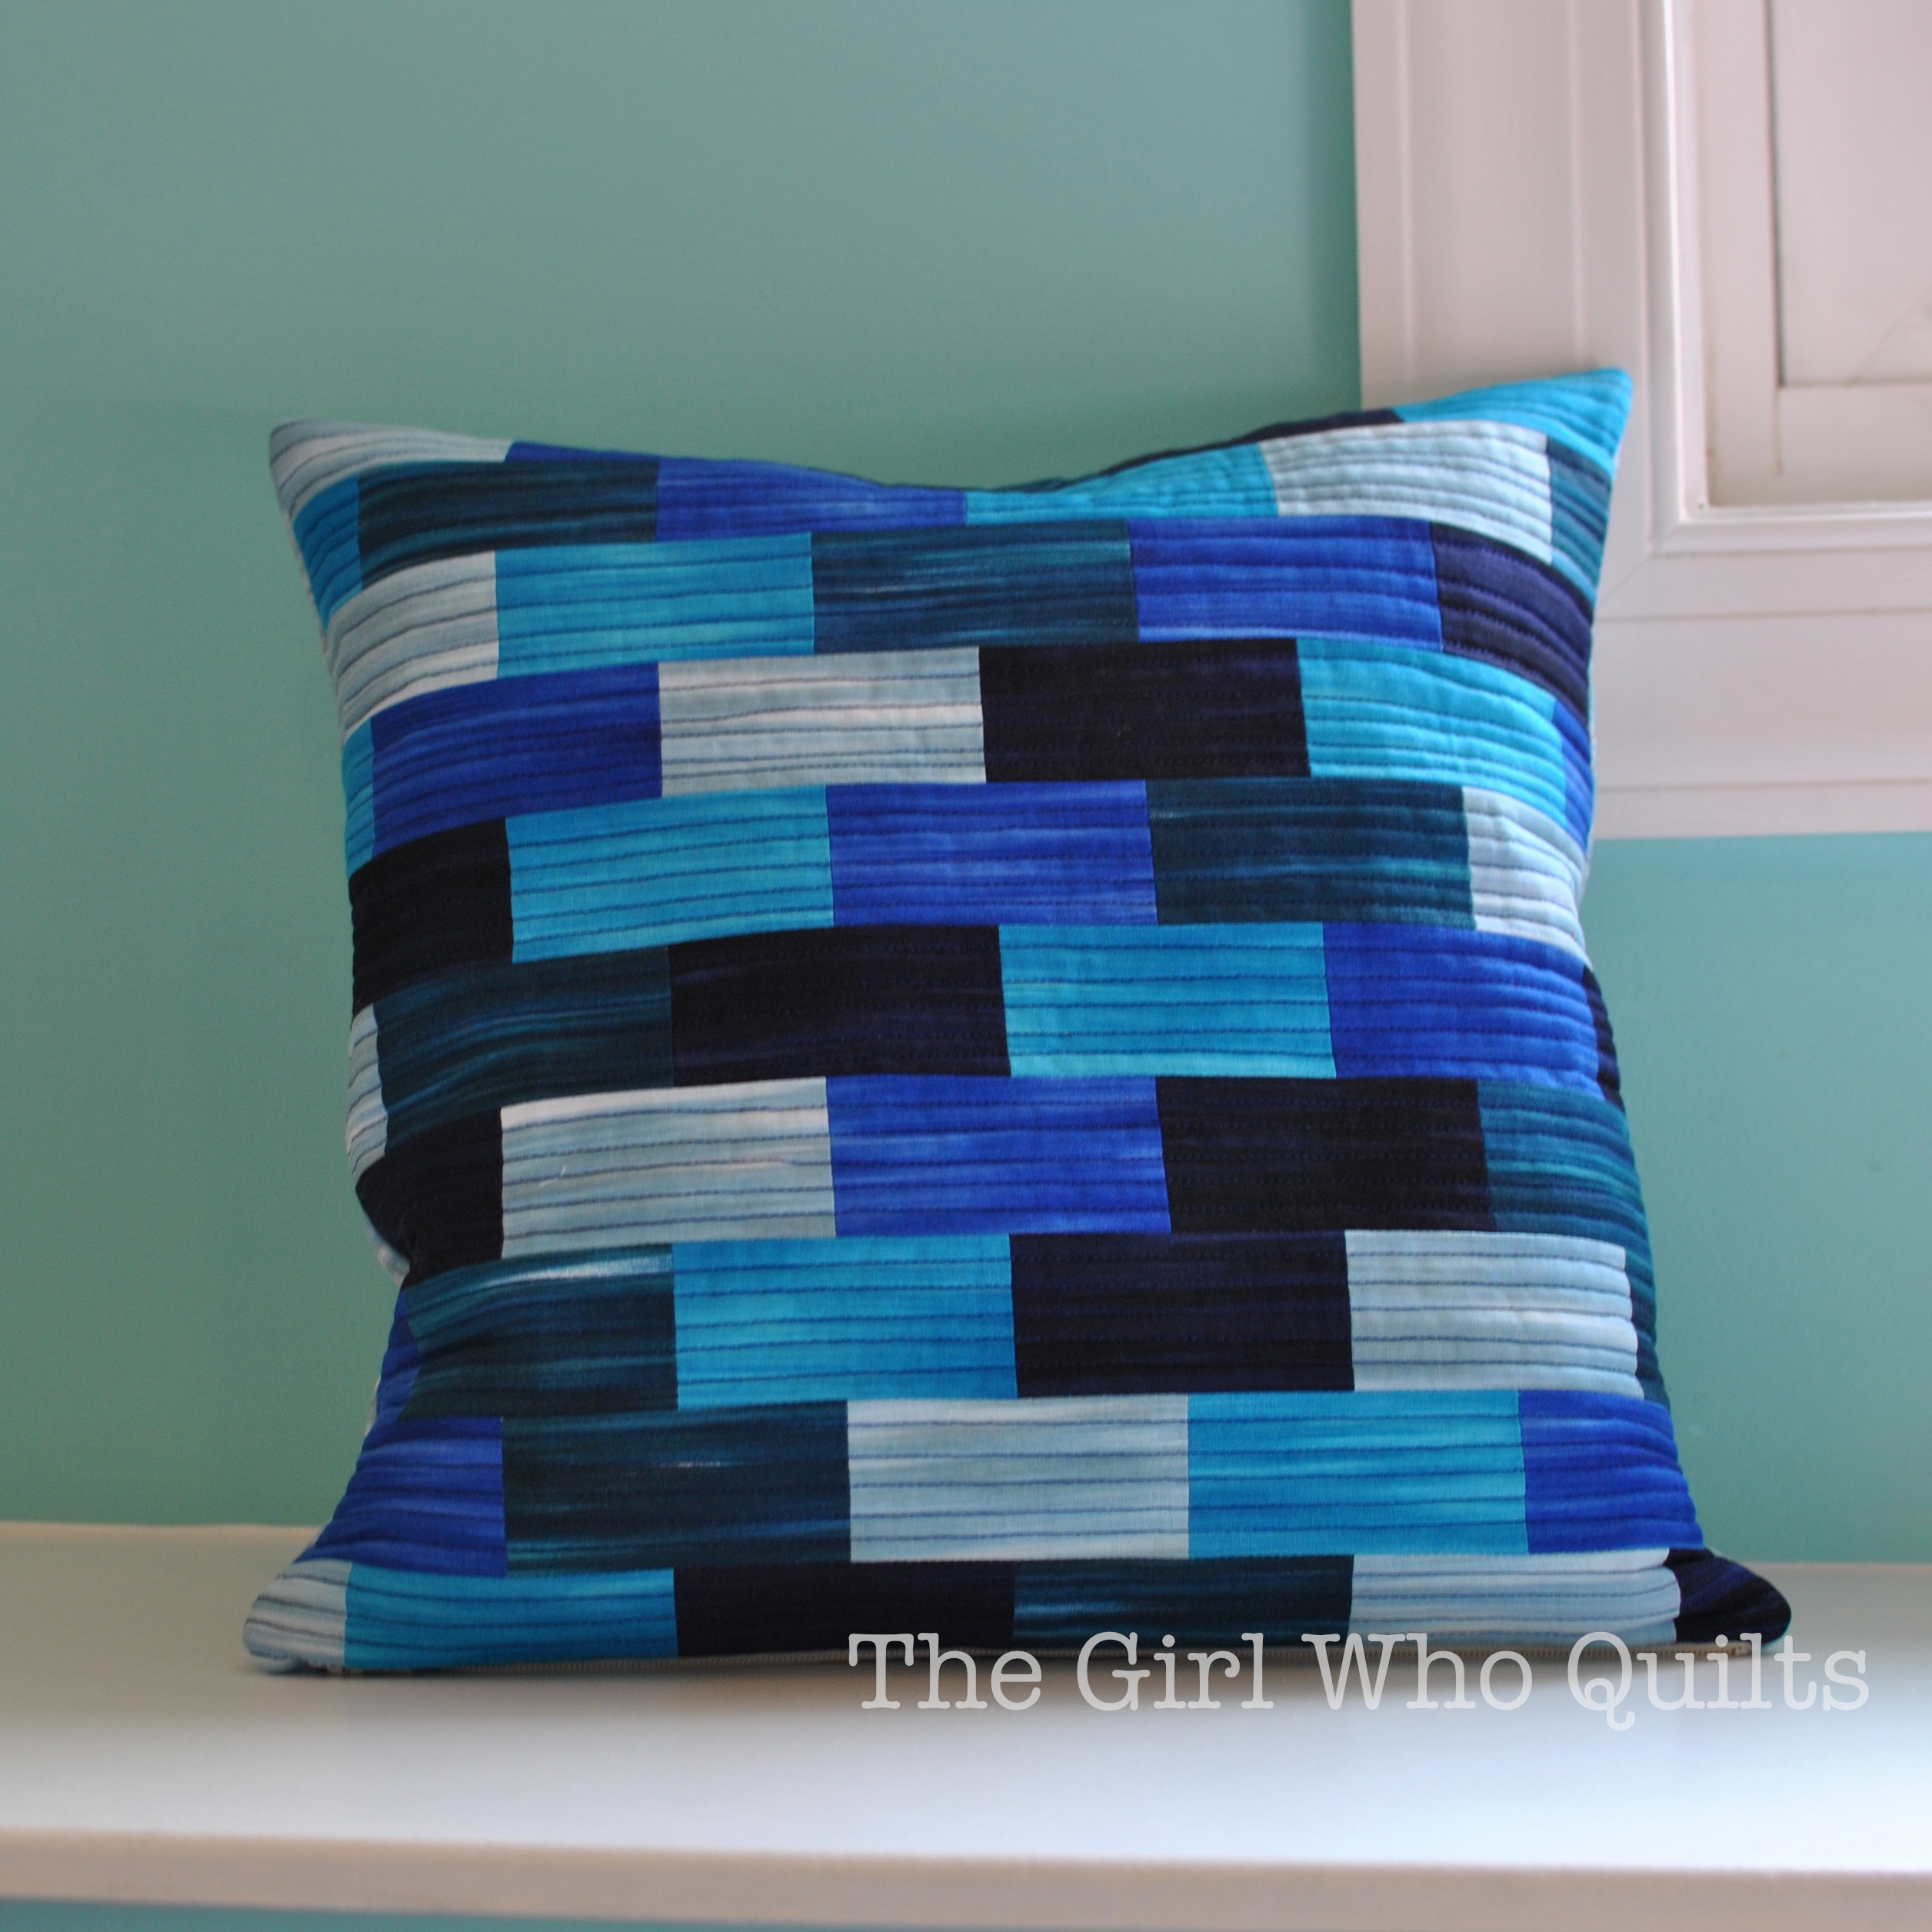
Thanks, Nikki!
Leave a comment below or on Nikki's blog for a chance to win a fat quarter bundle of Fleurish! Simply sign up to follow the Benartex blog (use the email or Bloglovin' buttons in the right hand side bar and leave a comment letting us know that you do). For a second chance to win, follow Benartex's Sew Interesting page on Facebook and leave a comment here letting us know you do. The giveaway is open through Tuesday, September 2 at 11:59 pm EST and the winner's name will be randomly selected and announced next week.
Be sure to check out the other tutorials we've featured all week long!
Blenders Blog Hop:
Tuesday 8/26: Christina from Sometimes Crafter featuring Burlap
Wednesday 8/27: Caila from Caila Made featuring Burlap
Thursday 8/28: Benartex Blog Design Team featuring Blush
Friday 8/29: Nikki from The Girl Who Quilts featuring Fleurish


