Showing posts with label Burlap Brights Block Hop. Show all posts

Friday, May 29, 2015

Burlap Brights Winners

Thanks to everyone who followed along in our Burlap Brights Block Hop the last couple of weeks! 

Below are the randomly selected winners from each day of the hop, as well as links to the tutorials in case you missed one. The winners will be receiving a fat quarter bundle of the six Burlap Brights colors we used throughout the hop. We can't wait to see what they make with these texture-look prints!


Congratulations to the winners!


Day 1: Chris from made by ChrissieD
Winner: Kathy D.

Winner: Dody

Day 3: Alison from Little Bunny Quilts
Winner: Margaret

Day 4: Debby from Debby Kratovil Quilts
Winner: Annie R.

Day 5: Kristen from KD Quilts 
Winner: Jacque

Day 6: Benartex design team
                                      Winner: Sally

Day 7: Stephanie from Stitched Together Studios
Winner: Sophie

Day 8: Julie from The Crafty Quilter
Winner: Donna W.

                                    Winner: Vicki S.

Day 10: Jessica from Quilty Habit 
Winner: Michele O.

Day 11: Wendy from Ivory Spring
Winner: TinLiz

Winners, you'll be hearing from us via email so we can get your mailing address and send these fabric rainbows out to you!

Love It? Share It! Facebook Twitter Google Pinterest Email

Thursday, May 21, 2015

Burlap Brights Blog Hop: Day 11

Welcome to the eleventh and last day of our Burlap Brights Block Hop! We hope you've enjoyed the eleven block tutorials our designing friends have been sharing here this week and last week. Be sure to stop by each day to see a new block and have a chance to win some Burlap Brights for yourself!


Today, Wendy from Ivory Spring is sharing her block. Check out her tutorial and then scroll to the bottom of this post to enter for a chance to win a fat quarter bundle of the six Burlap Brights prints featured in our hop.


Hello Everyone, this is Wendy from Ivory Spring.  I am brightly happy to be participating in Benartex's Burlap Brights blog hop.  It's always fun to be part of Benartex's hops.

So the idea is to use 6 colors from the fabric line to construct a 12" block.  Because I am kind of on a personal quest to see how many ways I could doctor and use the sawtooth star block, my block is a sawtooth star variation block.  I am calling my it Happy Go Around Star!


Supplies and cutting:
For this block, we will be using all 6 Burlap Bright fabrics and 1/8y of white ground fabric.
From white ground fabric, cut
4 (4" x 4") squares
6 (3 1/2" x 3 1/2") squares
4 (1 1/2" x 3 ") rectangles

From blue, green and purple fabrics, cut 
1 (4" x 4") square

From red fabric, cut 
1 (4" x 4") square
1 (1 1/2" x 1 1/2") square

From yellow and orange fabrics, cut
1 (3 1/2" x 3 1/2") square
2 (2" x 2") squares


Block assembly:
1.  Draw a diagonal line on the wrong side of all the colored squares, except for the (1 1/2" x 1 1/2") red square.

2.  Using the green square as example.  Place (4" x 4") green square, right sides together, on 1 (4" x 4") white square.  Sew 1/4" away from, and on right and left sides of drawn line.  


Cut along drawn line.  Open and press to yield 2 half-square-triangle (HST) units.  

Repeat for the red, blue, purple (4" x 4") as well as the yellow and orange (3 1/2" x 3 1/2") squares, using white squares of corresponding sizes.
3.  Lining up the diagonal line of the HST units against the 45 degree line of the ruler, trim the red, purple, blue and green HST units to measure 3 1/2" x 3 1/2" raw edge to raw edge, and yellow and orange HST units to measure 3" x 3" raw edge to raw edge.


4.  Making Block Center.
Sew 1 yellow HST unit and 1 orange HST unit to the opposite long sides of 1 (1 1/2" x 3") white rectangles.   Repeat to make 2 pieced rows.
Sew 2 (1 1/2" x 3") white rectangles to the opposite sides of 1 (1 1/2" x 1 1/2") red squares into a pieced rows.

Sew the rows together to complete block center.


5.  Sew 1 green HST and 1 purple HST together into a pieced column.  Repeat to make 2 columns, and add to the right and left sides of block center.

6.  Making Corner Unit.
Place 1 (2" x 2") yellow square, right sides together, on 1 (3 1/2" x 3 1/2") white square.  Sew on drawn line.  Trim 1/4" away from sewn line.  Open and press to reveal yellow corner triangle.


Repeat to make a total of 2 yellow and 2 orange corner units.
7.  Arrange and sew together 1 yellow corner unit, 1 orange corner unit, 1 red HST and 1 purple HST into a pieced row.  Repeat to make 2 rows, and add to the remaining opposite sides of block center to complete block.


Quilt Option:
You can easily make a number of these blocks, and sew them to make a quilt. 

My husband walked by my work station, and commented how he liked the block!  So, I will be making a few more blocks myself to turn it into a quilt!
Thank you for stopping by!  I hope you have liked my Happy Go Around Star block.  The colors sure make one happy, don't they?!
Even more so, I hope you have enjoyed seeing the other designers' creatively designed blocks!

Have a great day!


For a chance to win your own rainbow bundle of Burlap Brights, make sure you're signed up to follow our blog (through a blog reader or by email; both options are in the right hand sidebar). Leave a comment letting us know that you are and tell us if you've ever made a rainbow colored quilt


Make sure you check out each day's tutorial!


Day 1: Chris from made by ChrissieD
Day 3: Alison from Little Bunny Quilts
Day 4: Debby from Debby Kratovil Quilts
Day 5: Kristen from KD Quilts 
Day 6: Benartex design team
Day 7: Stephanie from Stitched Together Studios
Day 8: Julie from The Crafty Quilter
Day 9: Cynthia from Quilting is more fun than Housework

Day 10: Jessica from Quilty Habit 


To see the entire schedule, click here.
Love It? Share It! Facebook Twitter Google Pinterest Email

Wednesday, May 20, 2015

Burlap Brights Block Hop: Day 10

Welcome to the tenth day of our Burlap Brights Block Hop! We hope you've been enjoying the eleven block tutorials our designing friends have been sharing here this week and last week. Be sure to stop by each day to see a new block and have a chance to win some Burlap Brights for yourself!


Today, Jessica from Quilty Habit is sharing a wonky improv block using all six of the rainbow colors. Check out her tutorial and then head over to her blog to enter for a chance to win a fat quarter bundle of the six Burlap Brights prints featured in our hop.


Hi, I'm Jessica Skultety of Quilty Habit, and I'm excited to be a part of the Burlap Brights Blog Hop! I'm a teacher and lecturer of modern and modern traditional quilting, long-term blogger, writer, commission sewist, and home machine quilter. I blog several times a week and you can also check up on me on Instagram daily - @quiltyhabit. 
These Burlap Brights textured solids add a bit of "oomph" to what could just be a solid (I love solids, too, but that's beside the point). I can't wait to add these to my fabric stash, which is sorted by rainbow color. I use bright colors the most in my sewing, and I also love improvisation. Put both together and you have magic! That's why I decided to write a tutorial for an improvisational block, which I'm calling Wonky Piano Keys.

Wonky Piano Keys Block Tutorial

1. Cut a strip 5" wide x 18" from each of your rainbow fat quarters.

2. Cut 6 strips from each color between 2.5 inches and 1.25 inch wide. 
You can layer them for faster cutting (usually I would place them directly 
on top of each other but I have both showing here, so you can see). 


3. Decide how you will lay out your block in three horizontal panels. You 
could mix it up and go completely rainbow scrappy for the whole thing, 
or you could separate colors. I decided to make two panels of cool colors 
and one middle panel of warm colors. 

4. Sew strips together at a slight angles, with a quarter inch seam allowance. 
You can vary it up - just make sure the width of your overall strip doesn't go 
less than 4.5 inches. I decided to alternate the colors and the sizes. 

5. Trim after sewing each strip.  

6. Press the whole strip when it gets between 12.5 - 13" long. Press individual 
strips in the same direction. 
*Note: You may have to cut more strips of fabric from your 5"x18" pieces, 
based on the size of your angles. 

7. Repeat steps 4-6 for two more panels.

8. Trim all strips down to 4.5".

9. Sew together using a quarter inch seam. Press both long seams. 
10. Trim block down to 12".
 

Enjoy your new block! A whole quilt of these would be fabulous. 
If you sew it up warm vs. cool as I did, you could even alternate for the 
next block (cool in the middle, warm on the outsides). I hope you are 
inspired to experiment with improvisation!


Thanks Jessica! Head over to Quilty Habit to enter to win a fat quarter 
bundle of the six Burlap Brights she used to make her block.


Make sure you check out each day's tutorial!


Day 1: Chris from made by ChrissieD
Day 3: Alison from Little Bunny Quilts
Day 4: Debby from Debby Kratovil Quilts
Day 5: Kristen from KD Quilts 
Day 6: Benartex design team
Day 7: Stephanie from Stitched Together Studios
Day 8: Julie from The Crafty Quilter
Love It? Share It! Facebook Twitter Google Pinterest Email

Tuesday, May 19, 2015

Burlap Brights Block Hop: Day 9

Welcome to the ninth day of our Burlap Brights Block Hop! We hope you are enjoying the eleven block tutorials our designing friends are sharing here this week and last week. Be sure to stop by each day to see a new block and have a chance to win some Burlap Brights for yourself!


Today, Cynthia from Quilting is more fun than Housework is sharing a block made using Flying Geese using blue, red, orange, and yellow. Check out her tutorial (she also shows the block in green and purple!) and then head over to her blog to enter for a chance to win a fat quarter bundle of the six Burlap Brights prints featured in our hop.


Hello -  I'm Cynthia of Quilting is more fun than Housework.  I often realize how blessed I am to make a living doing what I am passionate about...and that is quilting.  I am a longarm quilter, pattern designer and quilt instructor.
  I have the Best. Job. Ever!
 
When I was recently approached by Benartex to design a block for their Burlap Brights, I was thrilled!  I love color and to have the opportunity to play with these bright fabrics made my "job" even better!


I mean take a look at this bundle!  
With such intense colors, I knew I wanted to make something that played with both the hot and cool colors that were provided.   And I am happy I get to share the tutorial for my block with you!

 So lets get started.


I will be using the cool colors for my background and the hot colors for some flying geese. 

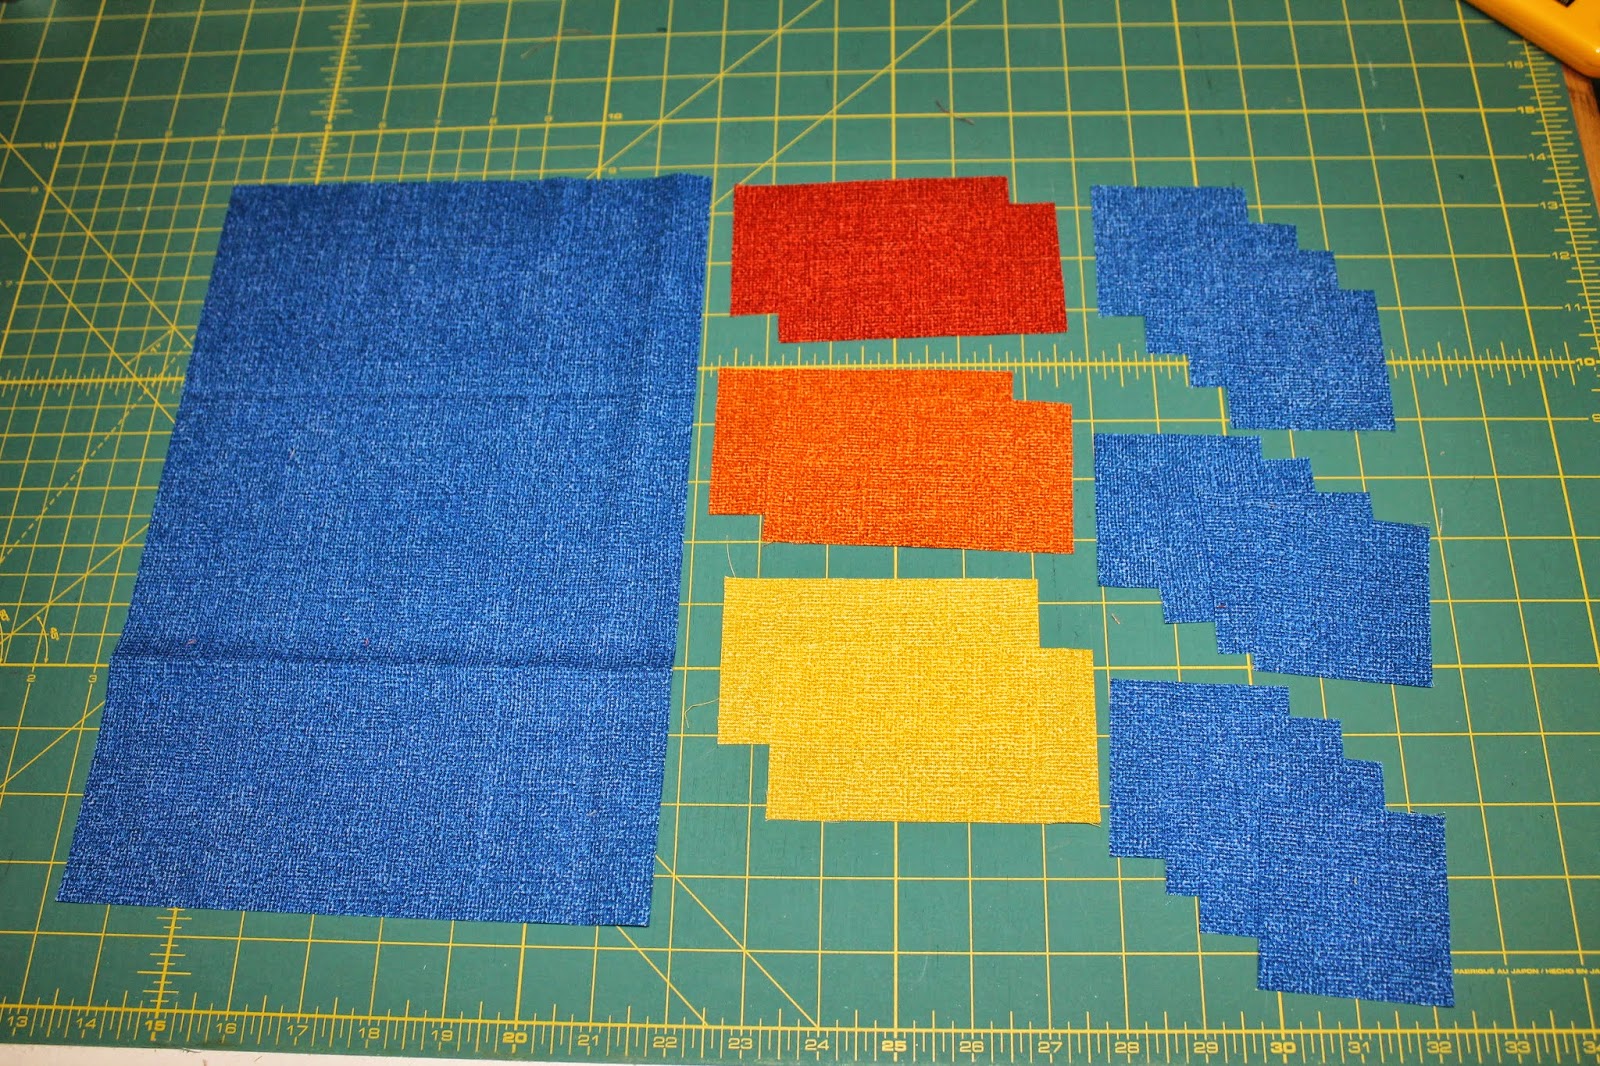
For each block you will need to cut the following:

2 ea - 2 1/2" x 4 1/2" rectangles (Red)
2 ea - 2 1/2" x 4 1/2" rectangles (Orange)
2 ea - 2 1/2" x 4 1/2" rectangles (Yellow)
12 ea - 2 1/2" squares (Blue)
1 ea - 8 1/2" x 12 1/2" rectangle (Blue)


Mark a diagonal line on the wrong side of all 12 background squares.


 Align one square as shown on each of the colored rectangles and sew on the marked line.  I always sew from the middle down to the point (so the point doesn't get sucked down into the machine or distorted with sewing)


  Trim the corners off 1/4" above the seam and press toward the background.


Add a second square to the other side of the rectangles using the same method. 


 Once again, trim and press toward the background.


You end up with a pretty geese component like this one!
 To make the finished block, you will be making 2 red, 2 orange and 2 yellow geese components.


Once your geese components are finished, they need to be laid out in this configuration.  
To sew the strip, you just join the components.


When I sew two geese together, I like to have the component with the point on top so I can see the point of that triangle so I know where to sew.  This will help to ensure you don't lose those points. 


Once you have the strip sewn, you just need to join it to the right side of the large rectangle.


Here is the finished block. It measures 12 1/2" and will finish up at a 12" block.  

It might look a bit plain...


 ...but the magic happens when you start playing with the layout!  
Here is one quick option but there are many more to discover.


Not a fan of blue, these block look great in the purple and green too!


I have enjoyed my day here on the Burlap Brights Block Hop. It was great fun playing with these wonderful fabrics.  

If you happen to use my block tutorial for a project of your own, I hope you share it with me.  
Thanks so much!  Cynthia


Thanks Cynthia! Head over to Quilting is more fun than Housework to enter to win a fat quarter bundle of the six Burlap Brights she used to make her blocks

Make sure you check out each day's tutorial!


Day 1: Chris from made by ChrissieD
Day 3: Alison from Little Bunny Quilts
Day 4: Debby from Debby Kratovil Quilts
Day 5: Kristen from KD Quilts 
Day 6: Benartex design team
Day 7: Stephanie from Stitched Together Studios
Day 8: Julie from The Crafty Quilter
Day 10: Jessica from Quilty Habit 

To see the entire schedule, click here.
Love It? Share It! Facebook Twitter Google Pinterest Email