Friday, February 28, 2014

Kids' Quilts Blog Hop: Day 4

Welcome back for Day 4 of our Kids' Quilts Blog Hop! Today Sarah from Confessions of a Fabric Addict is here, sharing a tutorial for a one-block quilt using the Yard Dog collection from Kanvas.  Sarah will also tell you about her involvement in charity quilt giving, and is hosting her annual charity quilt challenge on her blog beginning in March. Enjoy the tutorial, and don't miss the chance at the bottom of this post to enter to win a FQ bundle of Yard Dog.


Hi, all!  I'm Sarah, and I blog over at Confessions of a Fabric Addict.  I'm just thrilled to have been asked to be a part of this blog hop!!  Quilts for children is kind of a passion of mine - I think because it lets me work with fun prints and lots of color! 

Most of the quilts I make are given away, to both children and adults.  I work with a growing quilt ministry in my church, and also host a charity quilt challenge on my blog each year.  This will be the fourth year for the Hands2Help Charity Quilt Challenge.  In the past three years, we have involved 167 quilters who have donated 281 quilts to various charities, including quilts for orphans in Romania, Russia, and Ethiopia, chemotherapy patients, and hurricane survivors in New Orleans.  This year's Challenge starts on March 16th, with signups all week and a signup giveaway on March 23rd.  I hope you'll consider joining in the fun - and you could use this tutorial as your design!  


When I was asked to do a tutorial for this hop, I wanted to come up with a design that was simple but interesting, and that could be made with yardage, precuts, or scraps.  This one-block quilt tutorial is for a child-sized quilt, but this also would be easy to make larger or smaller by simply reducing or increasing the number of columns and blocks in each column.  Enjoy!!


Floating Boxes Tutorial

Quilt Size: Approximately 50” x 54”

Fabric Requirements:

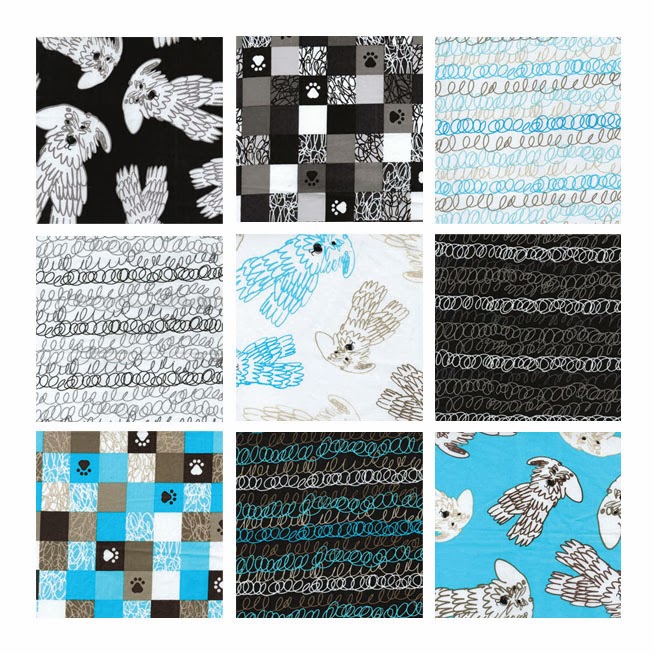
Beautiful "Yard Dog" fabrics!

Prints: You will need 21 2.5” wide strips for the 42 "A" Blocks required.  You can use strips from a jelly roll, or cut them from 1/4 yard each of seven different fabrics.

Solid:  1 3/4 yard for "A" block centers, outside of 7 "B" Blocks, strip ends, and borders.


1/2 yard for binding

3 yards for backing

This quilt is made using one basic block construction, in two different fabric combinations.  

"A" Block
"B" Block

Cutting Directions:

A and B blocks:

PRINT FABRICS:

If using yardage for the prints, cut three 2.5” WOF strips from each print. (21 strips)

Subcut each 2.5” WOF strip into eight 4.5” x 2.5” pieces. (168 pieces)

From the remainders of the 2.5” strips, cut one 2.5” x 2.5” square from each print (7 pieces total) for the centers of the “B” blocks

SOLID FABRIC:

Cut six 2.5” by WOF strips.  Subcut those into twenty-eight 4.5” x 2.5” pieces and forty-two 2.5” x 2.5” pieces.

Cut one 6.5” x WOF strip.  Subcut it into six 2.5” x 6.5” pieces and four 4.5” x 6.5” pieces. 

Borders:

Cut five 4.5” x WOF strips from the solid fabric for the borders.

Binding:

Cut six WOF strips for binding in your preferred width.


To make the block:

Use a scant 1/4 inch seam. That is a seam that is approximately 2 threads less than a true 1/4” seam.


For each block, you will need four identical 2.5” x 4.5” pieces and a 2.5” center piece.  Use a solid center for the forty-two print blocks, and a print center for the seven solid blocks.


Place the center piece face up, then lay a 2.5” x 4.5” piece on top, face down.  


Stitching on the long right-hand side of the 4.5” piece, stitch approximately 1” down, backstitch and remove from the sewing machine.  This is a partial seam that you will finish later.  


Finger press the top part of the seam away from the center block.  Lay another 2.5” x 4.5” piece on the long edge (1/2 center, 1/2 border) and stitch the entire seam.  Finger-press away from the center block.  Continue around the center piece in this fashion until you sew all four pieces on.  


Now you can finish the partial seam you made in the first step.


Press the block, pressing all seams away from the center block.

Make forty-two “A” blocks (print on the outside) and seven “B” blocks (solid on the outside).


Arrange your blocks in a pleasing order, placing six “A” blocks and one “B” block in each column.  Stagger your columns by one or two block segments as shown in the picture above to give the effect that they float on the background fabric.  Add the 2.5" x 6.5" and 4.5" x 6.5” wide pieces as needed to make the columns equal lengths.  Assemble the columns.  

Join the columns side to side.  Pin carefully to match up the seams as appropriate.

Once the center is complete, add the borders.  To make a nice flat quilt, measure across the center of the quilt from top to bottom and cut your side borders to that length, then pin the center to the borders, easing as necessary to make them fit.  Sew using a 1/4” seam.  Next, measure across the center of the quilt from side to side and cut the top and bottom borders to that length. Then pin those pieces to the top and bottom of the quilt top, easing as necessary to make them fit.  Sew using a 1/4” seam.


Your top is finished!  Quilt as desired and bind, then find a lucky child to enjoy it!


This quilt can easily be made smaller or larger by adding or subtracting blocks. You can see examples of this on my blog post today. Also, if you'd like to receive a PDF version of this tutorial, please stop by my blog, Confessions of a Fabric Addict, and leave me a comment with your email information.  I'll email it to you right away!  If you request one and don't hear from me, it's possible you are a no-reply blogger - just email me directly at the address you'll find on my blog!

Thanks for letting me share this tutorial with you!!  Be sure to check out the rest of the great tutorials that have been shared this week, too!  And remember to come by and join in the Hands2Help Charity Quilt Challenge - signups begin March 16th!!


Thanks Sarah!

For a chance to win a fat quarter bundle of the Yard Dog collection, simply sign up to follow this blog, either through Bloglovin' (or another blog reader service) or email (both options are in the right hand sidebar) and leave a comment letting us know you follow. In your comment, since the fabric featured today is Yard Dog, let us know--are you a dog person? cat person? neither? Leave a second comment and receive a second entry by following us on Facebook and letting us know. This giveaway is open through Monday, March 3 at 11:59 PM EST. 


Make sure you check out all the tutorials from the Kids' Quilts Blog Hop:
Day 1: by the Benartex Blog Team, featuring Monkeying Around
Day 2: by Nikki from The Girl Who Quilts, featuring English Rosey

Day 3: by Emily from Mommy's Nap Time, featuring Doodle Dog

And check back on Monday, when we'll share some additional free pattern ideas for kids' charity quilts, as well as a list of links of other charities accepting quilts for kids.


Love It? Share It! Facebook Twitter Google Pinterest Email

Thursday, February 27, 2014

Kids' Quilts Blog Hop: Day 3

Welcome back for Day 3 of our Kids' Quilts Blog Hop! Today Emily from Mommy’s Nap Time is here, sharing a tutorial for a quilt with a heartwarming message using pieced letters. Emily used the Doodle Dog by Greta Lynn for Kanvas to make this quilt. 


Check out Emily's instructions for easy free-form pieced letters (she'll show you "HOPE" but you can use the technique to make any word you want!), and then don't miss learning how you can create quilts for NICU babies, as well as a chance to win a bundle of Doodle Dog prints for yourself!


Hi, I'm Emily from 
Mommy’s Nap Time. I'm a wife, mother, and part-time bookseller. I have a love affair with shrinking complex quilt blocks down to teeny tiny sizes and can’t get enough of the bold saturated colors found in modern fabrics. My heart aches for the littlest babies who spend time in neonatal intensive care units (NICU)- whether they're there for a few days of a few months - so I created a quilt to give to my local NICU. I hope this quilt provides them comfort. 


See the Doodle Dog prints:


Fabric Requirements:
1 yard of a medium to large scale print
1/2 yard fabric A (background)
1/2 yard fabric B (accent / letters)
1 ¼ yard (quilt back)
½ yard (binding)

Supplies:
Sewing machine and standard quilting tools.

Cut:
Cut 3-4 strips from fabric A (background) and fabric B (accent). These strips should be varying widths from 2.5” – 1.5” x width of fabric. Don’t over think, just cut. This bit of randomness will produce more free-form letters. Try not to worry too much. Be free.

Sew:

Sew a pair of strips (fabric A and fabric B) together, right sides together, along the long side. Press seams open. This will be referred to as “strip set.”

Assemble Letter Blocks:
Each letter block will be approx 6” tall finished.


H –


  • Cut a 2.5” piece off of the strip set.
  • Cut a 2.5” piece of fabric A (cut this from one of the varied width strips cut previously).
  •  Sew together.
  • Cut (2) 6.5” pieces of fabric B and sew them to either side of the pieced section.


O –

  • Cut a 2.5” piece of the strip set.
  • Cut a 2.5” piece of fabric B.
  • Sew together.
  • Cut (2) 6.5” pieces of fabric B and sew to either side of pieced section.
  • Cut (4) 2” x 2” squares.
  • Place a 2” square at one corner of the block and sew across the diagonal. Trim the excess leaving ¼” seam allowances. Press seams open. Repeat for the other three corners.


P - 


  • Cut a 1.5” piece of the strip set, trim fabric A section to leave about 1.5” of fabric A.
  • Cut a 1.5” piece of fabric B.
  • Sew together.
  • Trim pieced section to about 3.5” x 1.5”
  • Cut a 3.5” piece of fabric B and sew to the right side of the pieced section.
  • Cut (2) 1.5” x 1.5” squares.
  • Place a 1.5” square at one (right side) corner and sew across the diagonal. Trim excess leaving ¼” seam allowances. Press seams open. Repeat for the other (right side) corner.
  • Cut a 3.5” x 3.5” square of fabric A.
  • Sew to the bottom of the pieced section.
  • Cut a 6.5” piece of fabric B and sew to the left side of the pieced section.

E –
  • Cut (2) 3” pieces of the strip set, trim both fabrics A and B so the strip set is aprox. 2.75” x 3”
  • Cut a 1.5” piece of the strip set.
  • Sew the above three pieces together according to the diagram.
  • Trim pieced section to neaten the edges.
  • Cut a 6.5” piece of fabric B and sew to the left side of the pieced section.

Sash blocks:
  • Trim the letter blocks so that they are the same height. This may require adding a strip of fabric A to the top or bottom of a letter if the block turned out a little smaller than the rest (see letter P in the example quilt). Trim the sides as needed to neaten the edges.
  • Cut a strip of fabric A 2.5” x width of fabric. From this strip cut (3) sashing pieces 6.5” x 1.5"
  • Sew the sashing pieces between the letter blocks, joining them as one unit.
  • Sew the remaining 2.5” strip to the top and bottom of the pieced unit.
  • From fabric A cut a piece 10.5” x width of fabric. From this strip cut a piece 10.5” x 4”
  • Sew the 10.5” x 4” piece to the right side of the pieced unit.
  • Sew the rest of the 10.5” strip to the left of the pieced unit.

Add background:
  • Cut the background fabric into two pieces by cutting off a 4” x 36” piece (along the selvage edge).
  • Sew this piece to the bottom of the pieced unit.
  • Sew the larger piece of background fabric to the top of the pieced unit.


·         Trim edges and quilt as desired.

About the charity: 

Today's focus isn't about a specific charity, but rather about a group of children who would benefit from donated quilts--babies spending time in the NICU. According to the March of Dimes, during a study done in 2009 and 2010, approximately 14% of newborn babies spent time in the NICU. 
Emily says:
I'll be donating this quilt to the Neonatal Intensive Care Unit (NICU) at Lurie Children's Hospital in Chicago. My guild is gathering quilts for Lurie's NICU. These quilts will provide comfort for the infants and families cared for in the NICU. At the end of their stay, the NICU patients are sent home with their quilt.

To make a donation, contact your local NICU. Many hospitals have specific requirements for these quilts, so it is best to check with your local hospital.  


Head over to Emily's blog to find out how you can enter to win a FQ bundle of Doodle Dog.


Make sure you check out all the tutorials from the Kids' Quilts Blog Hop:

Day 1: by the Benartex Blog Team, featuring Monkeying Around
Day 2: by Nikki from The Girl Who Quilts, featuring English Rosey

Day 4: by Sarah from Confessions of a Fabric Addict, featuring Yard Dog


Love It? Share It! Facebook Twitter Google Pinterest Email

Wednesday, February 26, 2014

Kids' Quilts Blog Hop: Day 2

Welcome back for Day 2 of our Kids' Quilts Blog Hop! Today Nikki from The Girl Who Quilts is here, sharing a tutorial that transforms a simple patchwork square design into something special with a little dimensional applique. Nikki used the English Rosey by Maria Kalinowski for Kanvas to make this quilt. 
Check out her technique in the tutorial, and then don't miss the spotlight on a charity accepting kids' quilts at the end, as well as a chance to win a bundle of English Rosey prints for yourself!


Hi! I'm Nikki, and I blog over at The Girl Who Quilts. I'm so excited to share a quilt tutorial today. I love to make charity quilts, so that makes this project especially fun for me!


Here are the great fabrics which Benartex provided me for this event. The collection is called English Rosey, and it's a great combination of different prints.


These are the prints that I chose to use in my quilt:


Here's what you will need to create this quilt:
4 - 5/8 yard cuts of coordinating fabric
1/2 to 1 yard of large scale print (I used a floral)
1/2 yard binding fabric
3 yards backing fabric
55" x 65" batting
Large batting scraps
Marking pen or pencil suitable to use on batting

Optional: Basting spray or glue stick to temporary hold the applique pieces


To begin, I cut 8 squares measuring 10" x 10" from each of the 4 coordinating prints.


Next I cut out 8 large floral motifs from my large scale prints. I left about a 1/4" edge around the floral motifs because I wanted the background fabric color in the floral print to frame the prints.


I am going to raw edge applique the floral pieces to one of my coordinating prints. To give them some dimension, I want to back them with batting. To cut the batting, lay each of the 8 floral motifs on the batting scraps and trace around the motifs one at a time.

I like to use a marker to trace on batting. This marker erases with ironing, but if you're using a marking pen that doesn't erase just be careful not to draw on the edges of the applique pieces.


Here you can see how I drew around my floral motifs:


All traced!


Now cut the batting *inside* the drawn line by 1/4" all the way around.


If you lay the batting over the wrong side of the applique piece, the applique piece should show around the edges by about 1/4", as shown here.


At this point, you can applique your floral pieces, or wait to do that during the quilting. To applique the floral pieces now:

Lay the floral motif on one of the 10" x 10" squares, layering the cut batting between the block and the floral motif, and stitch around about a 1/4" inside the cut edge. Feel free to use a walking foot or a free motion foot to do this step. (There are pictures of this below.)


Once the piece is sewn down, you can stitch around the different elements of the motif. If you'd prefer, you can save this step for when you quilt the quilt. (See photos below.)

You can now stitch your blocks together into a 5 block x 6 block layout. You will have 2 - 10" x 10" squares left.

If you'd rather applique the pieces during the quilting process, follow the instructions below:

I chose to wait to applique my floral pieces.

First, I stitched together my blocks in a 5 block x 6 block layout.

Next I pieced my backing and basted my top, backing, and batting.

Beginning in one corner of the quilt, I started to quilt an all-over loop design.


When I approached a square where I wanted to applique a floral piece, I placed the batting and fabric in place* and quilted my way to the edge of the applique. Rather than cut my threads, I sewed from the edge of the applique up to the edge of the floral design. Can you see the stitch line to the right of my quilting foot in this photo? That is how I transitioned from the background loop quilting to stitching down the applique!


*If you're worried about the applique shifting, try basting spray or a bit of glue stick to hold the piece in place.

Next I quilted around the entire piece, approximately 1/4" from the cut edge, holding it in place as I sewed around. No need to stitch perfectly along the print!


After quilting around the piece I outlined the individual flowers and leaves, plus added some quilting details. The double layer of batting really makes the quilting pop!


Continue to applique the pieces and quilt the rest of the quilt.

If you appliqued the pieces onto the individual blocks above, you can now baste and quilt your quilt as desired. Adding quilting details to the appliqued pieces really makes them pop!


Now bind your quilt with your favorite method!


Before washing the quilt check the applique pieces for excess batting, as shown here:


If there are large pieces of batting like this, trim a bit of it away. Be careful not to cut through the applique or quilt, though! It's better to leave the excess batting than risk cutting too close. This is as close as I would try to trim:


Now wash and dry your quilt!


 The applique edges should be soft and fluffy! Feel free to trim away any long threads. I also ironed the applique pieces to flatten the edges for this photo:


I hope you enjoyed this tutorial! I'm excited to send this quilt off to Benartex for donation to Quilts for Kids!


Thanks, Nikki! 


Meet a Charity:
Quilts for Kids


Inspired by discontinued fabric samples that were being thrown away, founder Linda Ayre began Quilts for Kids to use those samples to create quilts for children in need. Fourteen years later, the organization has facilitated the donation of almost 30,000 quilts using the following mission statement: Transforming fabrics into patchwork quilts that comfort children with life-threatening illnesses and children of abuse.

How it works: Quilters can make and send in a quilt on their own or request and receive a kit to assemble a quilt, which is then returned to the Quilts for Kids headquarters to be given to a child needing comfort. The organization is always accepting donations of finished quilts, fabric, or for volunteers to "adopt" a quilt, providing financial sponsorship. Closer to home, local chapters organize quilts for local hospitals and are happy to have more volunteers. 

To find out more about how you can get involved, visit the Quilts for Kids website.


For a chance to win a fat quarter bundle of the English Rosey collection, simply sign up to follow this blog, either through Bloglovin' (or another blog reader service) or email (both options are in the right hand sidebar) and leave a comment letting us know you follow. In your comment, let us know what you're most looking forward to about spring. Leave a second comment and receive a second entry by following us on Facebook and letting us know. This giveaway is open through Sunday, March 2 at 11:59 PM EST. 


Make sure you check out all the tutorials from the Kids' Quilts Blog Hop:

Day 1: by the Benartex Blog Team, featuring Monkeying AroundDay 3: by Emily from Mommy's Nap Time, featuring Doodle Dog
Day 4: by Sarah from Confessions of a Fabric Addict, featuring Yard Dog
Love It? Share It! Facebook Twitter Google Pinterest Email