Showing posts with label Bernina. Show all posts

Friday, December 28, 2018

Jubilee and Jubilee Holiday Virtual Trunk Show

You've seen the sparkle, shimmer and shine of Amanda Murphy's gorgeous Jubilee and Jubilee Holiday collections. Now it's time to see the quilts! We're starting off with the quilt that started it all--the Bernina 125th Anniversary Quilt. Follow along on Bernina's website to be part of the quilt-along. 

Bernina 125th Anniversary Quilt
65-1/2" square
"I see this quilt as a mixture of modern and traditional. It features classic blocks, but the layout is modern with the big open border space. My favorite part of the quilt is probably the quilting in the border and how it really integrates the octagonal framework of the quilt itself. The digitized quilting motifs are available as part of the embroidery collection." 
Click here to follow the Quilt-Along.

See Amanda's additional patterns:
Diamond Jubilee
68-1/2" square
"This quit is very dramatic looking. I think the gray background with the gold/yellow prints creates a modern look. It's paper pieced, but a very simple paper piecing, and then it's just appliqued onto the background."
Click here to purchase the pattern.

Platinum Jubilee

65" x 90"
"This pattern is 10" square friendly, but I used yardage because I wanted to make it without the red. It experiments with piecing in the sashing rather than the blocks."
Click here to purchase the pattern.

Here's the red and green version using Jubilee and Jubilee Holiday: 


Ruby Jubilee
56-1/2" x 80-1/2"
"This is a take-off on a classic red and white quilt. It's a fun quilt to piece, with multiple different blocks. I wanted a quilt that used primarily the red prints from the collection. I think this would look interesting in black and white as well!"
Click here to purchase the pattern.

And the red and green version:


Hanging Ruler Organizer
"With my Good Measures rulers coming out, I wanted to sew an organizer for someone who hates making bags, like me. It's super easy--you quilt the fabric, then topstitch the pockets on, and add the binding." 
Click here to purchase the pattern.


Christmas Magic Tree Skirt
"I designed this quick and easy tree skirt (made using 2-1/2" strips) for my upcoming Christmas Magic collection and then couldn't resist making it in Jubilee Holiday!" 

Click here to purchase the pattern.


Star Jubilee
(shown here in green!)

"This free quilt pattern is available on my website and uses a section of the ruler panel."
Click here to download the free quilt pattern.

Interested in the Holiday Jubilee versions of Amanda's Jubliee patterns that you see here? Click here to find the yardage details you'll need. 


Lucky
74-1/2" x 90"
"With all the greens, I couldn't resist a St. Patrick's Day themed quilt!"
Click here to purchase the pattern.


Technicolor
58-1/2" x 58-1/2"
"Originally designed for my Free Motion Fantasy collection, I love how this quilt looks in Jubilee!"
Click here to purchase the pattern.
Click here to download the yardage substitutions.

Click here to learn more about the Jubilee collection.
Click here to learn more about the Jubilee Holiday collection. 
Click here to see our interview with Amanda about the original Jubilee collection.

Did you enter our Win-It Wednesday contest for Jubilee fabric? Find it on our Facebook page.
Love It? Share It! Facebook Twitter Google Pinterest Email

Monday, December 24, 2018

Jubilee by Amanda Murphy


We're excited to be sharing Amanda Murphy's Jubilee and Jubilee holiday collections with you this week! Bernina asked Amanda to design a collection that celebrates their 125 years in business, and the results are these gorgeously elegant prints. Start with metallic golds and creams, and then add in rich blacks and Bernina's signature color: red! 
Today Amanda shares the story behind the Jubilee collection. 


How did the Jubilee collection come to be?
Bernina gave me the paisley motif and asked me to design a fabric collection and a quilt to go with it to celebrate their 125th anniversary.They wanted me to take the feeling of the paisley and build a collection off of it.

Let’s talk about the color palette.
It originally started with gold and cream—those are the colors used in the Anniversary quilt I designed. I wanted to add some other colors to create different looks. First the gray, and then the red—Bernina red! Some of the prints in the collection have metallic accents, and others have a pearlescent finish.

What about the panels?
There are two different designs. The emboirdery panel has a big rectangle in the center which includes the motifs used in the Anniversary quilt. That way if someone wants to make the quilt without doing the embroidery, they can fussy cut the designs from the panel instead. 


The second panel is for ruler work and can be turned into smaller projects.


Tell us about some of the prints in the collection.
It starts with the paisleys. There are six colors: gold, gold/red, gold/black, black/white, and then black tonal and cream tonal. I like the gold paisley, but I’m really drawn toward the black and white too.


The Herringbone is a great print for binding. The paisleys have a more traditional feel, so I skewed the blenders to be more modern, like this one.


The Diamond print is a great blender. I like to be able to quilt crosshatching without marking, so I almost always have a print like this in my collections—I just follow the lines of the print as I quilt.


My favorite print is the Floral. It’s really heavily pearlized, and so different. It’s an unexpected print that is a blender but not, and adds modernism to the collection.

We'll be sharing more Jubilee inspiration (+ Amanda's new line, Jubilee Holiday!) this week, so stop back for more fun!
Pssst...watch for a Jubilee-themed Win-It Wednesday on our Facebook page.
Click here to see the entire Jubilee collection.
Click here to visit Amanda's website and get a sneak peek at her Jubilee quilts. 

Love It? Share It! Facebook Twitter Google Pinterest Email

Saturday, November 10, 2018

Tour the Contempo Booth: Quilt Market

Take a virtual tour of our booths at Quilt Market! Today we're sharing the Contempo section of the booth; next up will be Kanvas. See the Benartex section here.

Amanda's Jubilee collection, celebrating Bernina's 125th anniversary.

Amanda's been busy! Her second Market collection is Thankful.

And a preview for next holiday season (available in shops in spring): Amanda's Christmas Magic collection.

Amanda stands between her fall and holiday collections.


*****************************************************

We can't wait to touch the new collection from Weeks Ringle and Bill Kerr of Modern Quilt Studio: Warp & Weft Premium Yarn Dyes.

Bill is sporting a bowtie made from his fabric.


*****************************************************

Sew much sewing machine fun in Cherry Guidry's new My Happy Place collection!

My Happy Place quilts.

Cherry's second collection from Market is Hearty the Snowman (also available in spring).

See the stuffed "Hearty" behind Cherry?


*****************************************************

These bright quilts are made from Christa Watson's new collection, Abstract Garden

Check out her coordinating apron!

Click here to see the Benartex section of our booth.
Love It? Share It! Facebook Twitter Google Pinterest Email

Wednesday, May 10, 2017

Join Cherry Guidry's Vintage Ornaments Quilt-Along!

Yes, it's only May, but the months until December speed by quickly! 
Today, Cherry Guidry is kicking off the Vintage Ornaments Quilt-Along on Bernina's blog, We All Sew. Stitch along with Cherry as she uses her new holiday collection from Contempo, Mulberry Lane, to create a gorgeous holiday quilt. You'll feel great in December when your quilt is finished and ready to use! 

Here's Cherry's Vintage Ornaments quilt:

A few close-ups of ornaments you'll be making:


Click here to find the entire first post, including fabric requirements. Cherry will be posting the 2nd week of each month between now and October. Follow along and have fun! 
Click here to see the Mulberry Lane collection. 
Love It? Share It! Facebook Twitter Google Pinterest Email

Tuesday, October 18, 2016

Mug Rug Blog Hop: Day 1

This week we're hosting the Mug Rug Blog Hop!
In celebration of fall, a season filled with mugs of apple cider, tea, and even hot cocoa, we have four different bloggers sharing a mug rug design they've created with one of our new fabric lines. 
BYOM (bring your own mug), but we'll provide the mug rug inspiration, as well as fabric giveaways! 


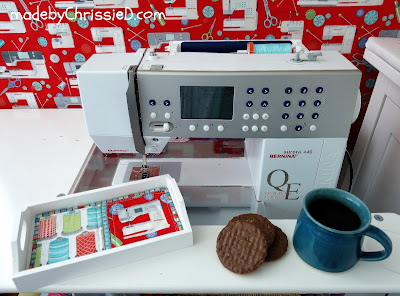
First up is Chris from made by ChrissieD, who was super excited to work with Amanda Murphy's Sewing Room line (including the coveted Bernina sewing machine print! Chris lets the adorable fabric do the work in her mug rug, and then adds a cute detail to the back. Scroll down to see! After you've checked out her tutorial, head over to her blog to enter for a chance to win a fat quarter bundle of Sewing Room for yourself! 


Hi, I'm Chris Dodsley of made by ChrissieD, a sewing teacher in Manhattan and VP of the NYC Metro MOD Quilt Guild, blogging about my textile crafts and travel adventures.  I love to share my tips, tutorials and projects on my made by ChrissieD blog, twice monthly newsletter and various social media sites including FacebookInstagramPinterestTwitter and Flickr.


It's Day 1 of the Mug Rug Blog Hop and today I'm showcasing Amanda Murphy's Sewing Room collection for Contempo.


The Sewing Room collection of 28 fabrics includes spools, scissors, dresses, tape measures and more.  The sewing machine fabrics are available in two versions WITH and WITHOUT the Bernina typed logo (compare above two images) - the Bernina logo version is available ONLY from authorised Bernina dealers.  All fabrics in the collection are 100% cotton.

SEWING ROOM MUG RUG
Finished size 8" x 4-3/8"


The Sewing Room Mug Rug is the perfect size for a mug of your favourite beverage and a handful of delicious biscuits or cookies or even a slice of cake - just what you need to give you an energy boost before you carry on stitching your latest project.

Supplies Needed:


All fabric sizes are width x height and Benartex fabric codes are in italics.

Front
4" x 4-3/8" - Spools White 3404-09
7/8" x 4-3/8" - Tape Measure Grey 3408-11
4-1/8" x 4-3/8" - Sewing Machines Red 3400A-10 without Bernina logo

Back
8" x 4-3/8" - Scissors Aqua 3402-84
8" x 7/8" - Tape Measure Grey Selvedge Edge 3408-11

Batting - 8" x 4-3/8"
Binding - 30" x 1-1/8" Tape Measure Grey Selvedge Edge 3408-11
Thread - Aurifil Variegated 50 wt  #4663 Baby Blue Eyes
Water-based glue stick


Mug Rug Front
Sew the 3 front sections together using a scant 1/4" seam allowance,


press seams,


and trim edges to straighten.


Mug Rug Back
Mark a line 3/8" from the bottom edge of the back. Press edge of selvedge back so only the first row of numbering and grey solid line are visible alongside the selvedge text.


Slip a sheet of paper behind the fabric strip and under the pressed back section of selvedge as shown below and run a water-based gluestick along this edge.


Place the bottom edge of the selvedge strip along the previously drawn line.


Press to set the glued edge.


The unglued edge can still be lifted.


With unglued edge lifted, sew down the length of the pressed line to secure selvedge to back with a stitched line.  Trim excess selvedge away at both ends.


Top-stitch down the length of open selvedge edge.  My top stitch is the blue line along the very edge of the selvedge text.


Lightly spray baste the back section,


and lay on batting.


Spray baste front section,


and attach to the other side of the batting.


Quilt through 3 layers.


Finishing Touches
Bind the quilted piece using your preferred binding method.  I've used a single fold binding that is only 1/4" finished width and perfect for mug rugs and small projects.  In the giveaway today on my blog, I've included my Single Fold Binding Tute.


SEWING ROOM MUG RUG


I hope you've enjoyed my day on the Mug Rug Blog Hop and want to make your own Sewing Room Mug Rug.  Head over now to my made by ChrissieD blog for a chance to win a Fat Quarter bundle of Sewing Room fabric and, of course, I'll be sharing my Single Fold Binding Tute with you too.  Looking forward to meeting you there! Chris :D


Make sure to catch all of the tutorials in our Mug Rug Blog Hop!
Tuesday: Chris from made by ChrissieD featuring Sewing Room
Wednesday: Debby from Debby Kratovil Quilts featuring Wings
Friday: Alison from Little Bunny Quilts featuring Kitchen Love


Love It? Share It! Facebook Twitter Google Pinterest Email