Showing posts with label Mary on Lake Pulaski. Show all posts

Tuesday, May 12, 2015

Burlap Brights Block Hop: Day 2

Welcome to the second day of our Burlap Brights Block Hop! We hope you'll enjoy the eleven block tutorials our designing friends will be sharing here over the next week and a half. Be sure to stop by each day to see a new block and have a chance to win some Burlap Brights for yourself!


Today Mary from Mary on Lake Pulaski is here, sharing her block. Check out her tutorial and then head over to her blog to enter for a chance to win a fat quarter bundle of the six Burlap Brights prints featured in our hop.

Mary Kolb here from Mary on Lake Pulaski. I am a sewing grandmother who loves fabric and everything you can do with it.


I am lucky to have the chance to work with these Burlap Brights from Benartex. The colors are so saturated and they are a great choice to add color and texture to your next project.
For the Burlap Brights Blog Hop I have chosen the Double Sawtooth Star block Because it shows off the colors so well. Below is the tutorial so you can make your own.
I had the above colors to choose from and chose the yellow, red and blue.


Supplies
  • Fabric (3 F8's)
  • Rotary cutter
  • Ruler
  • Cutting board
  • Iron
  • Ironing surface
  • Sewing machine
  • Thread
Cut the following:
From blue:
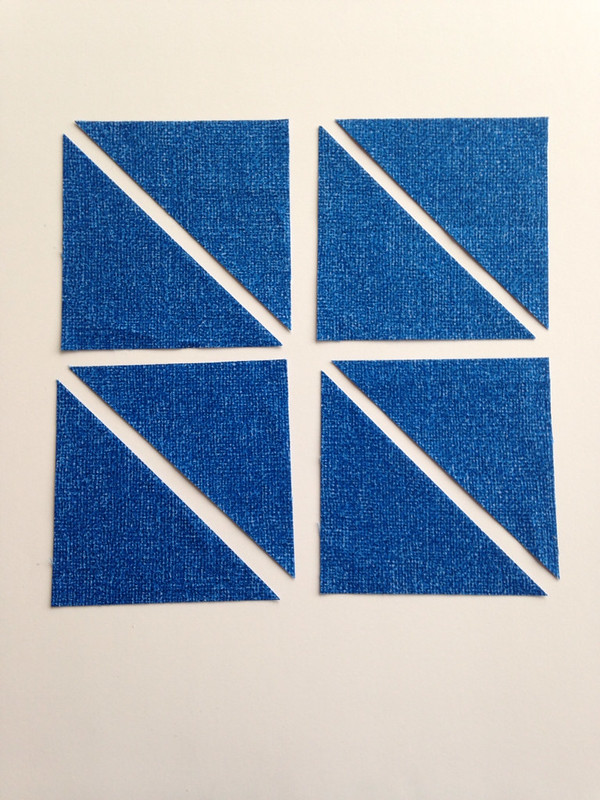
  • 4 blocks 3 7/8" square cut in half on the diagonal to produce 8 HST's (C)
From red:
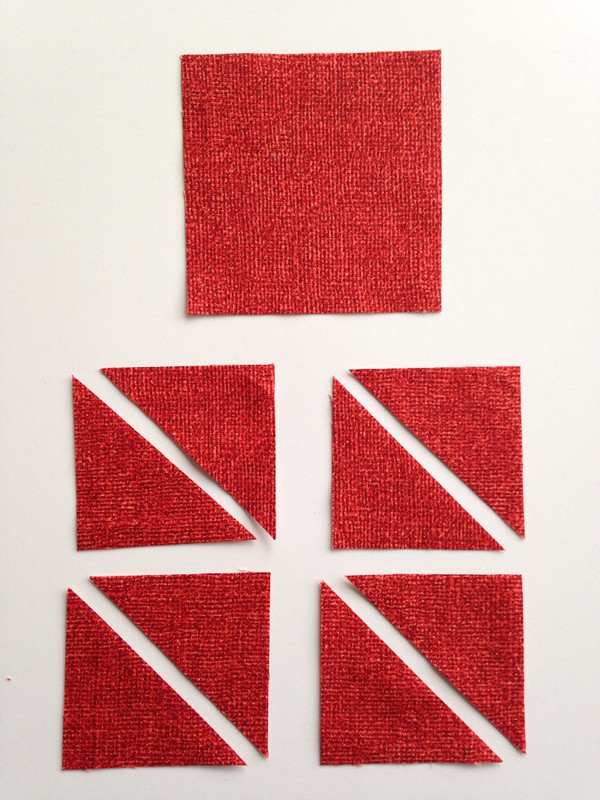
  • 1 block 3 1/2" square (G)
  • 4 blocks 2 3/8" square cut on the diagonal to produce 8 HST's (F)
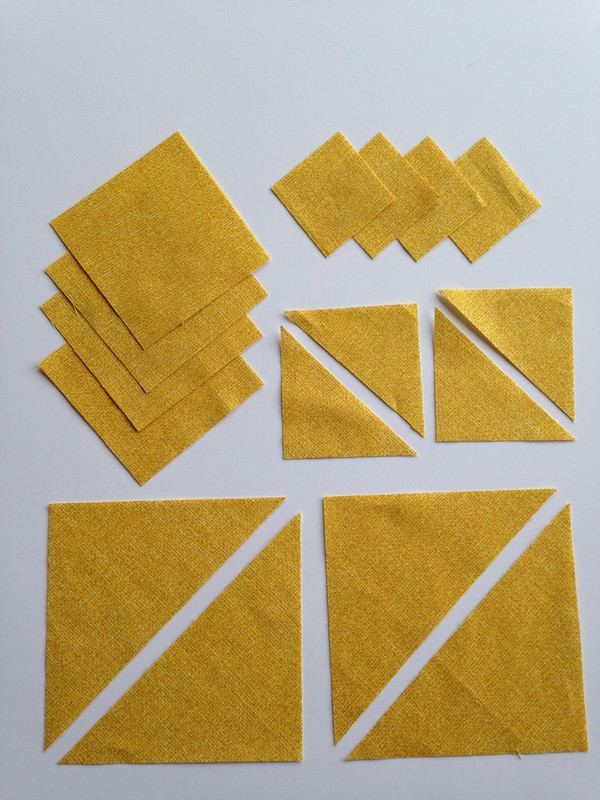
From Yellow:
  • 4 blocks 3 1/2" square (A)
  • 4 blocks 2" square (D)
  • 1 block 7 1/4" square cut both ways diagonally to produce 4 triangles (B)
  • 1 block 4 1/4" square cut both ways diagonally to produce 4 triangles (E)
Sew the following:
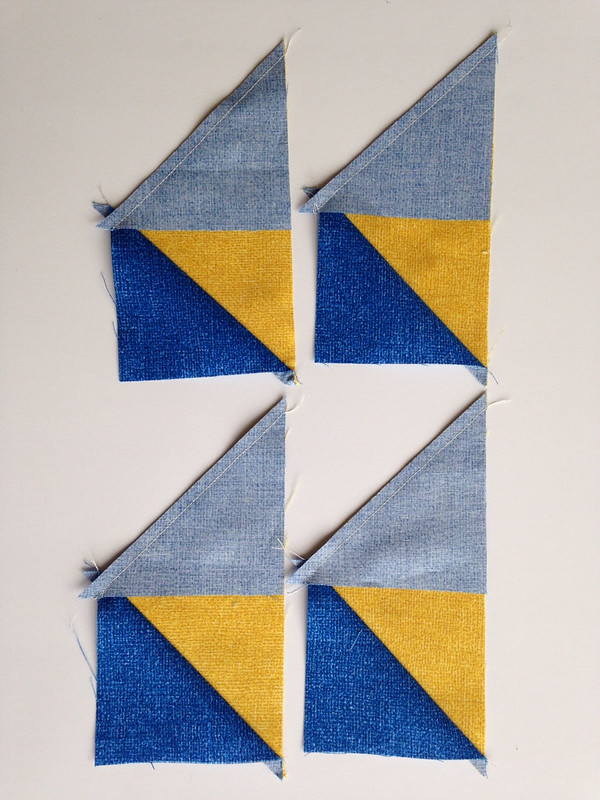
  • 2 (C)'s to each (B), press seams to center & trim dog ears to produce 4 flying geese.


  • Sew 2 (F) to each (E), press seams to center & trim dog ears to produce 4 flying geese
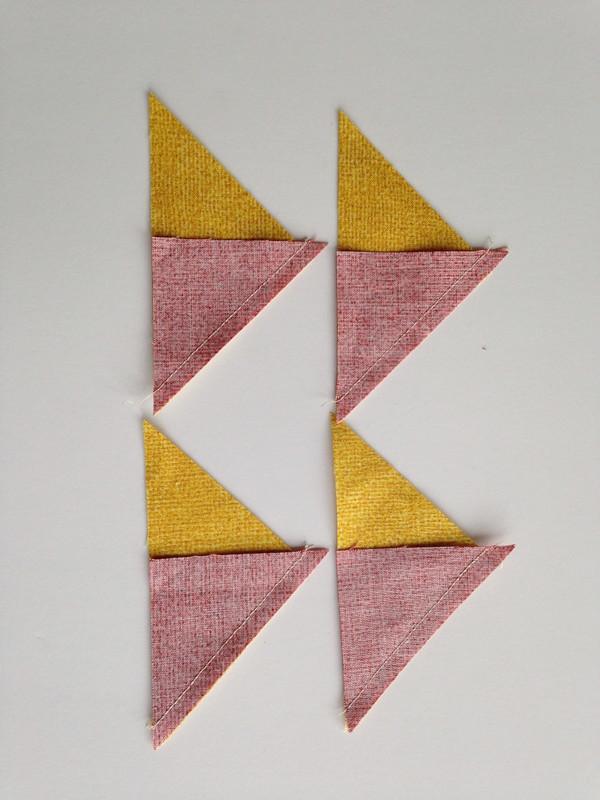

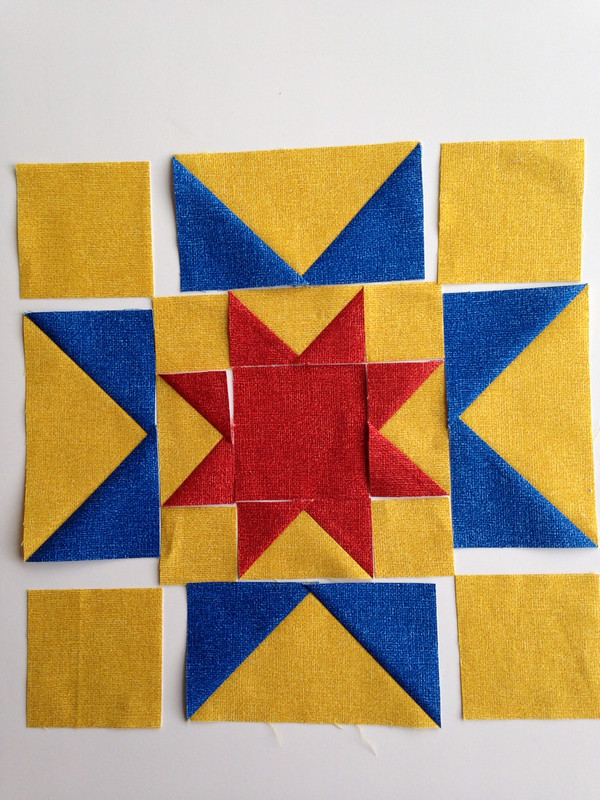
  • Lay out all block sections as shown:
  • Piece center star block as shown above and press seams open.
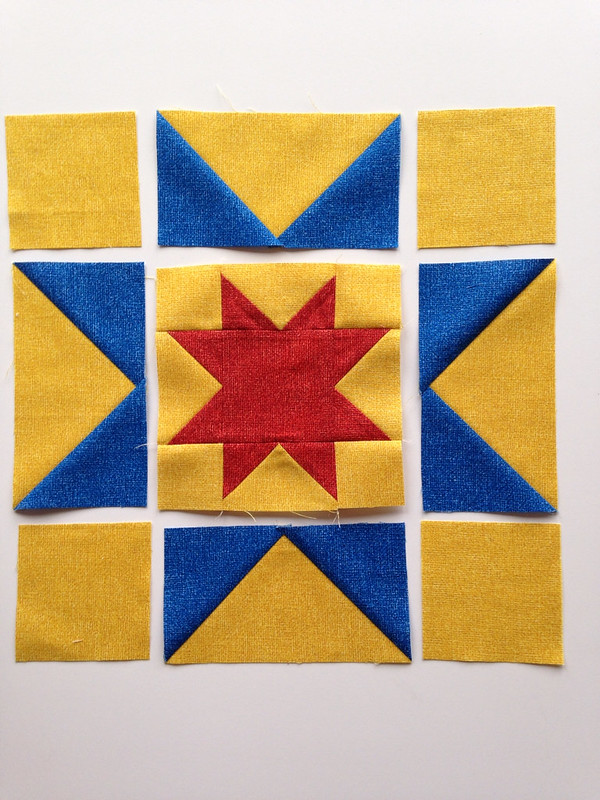
  • Piece the rows together as shown and then the columns; press seams open. Press block well.
  • Now you will have a Double Sawtooth Star. If you make one, I'd love to see it. Here is mine.
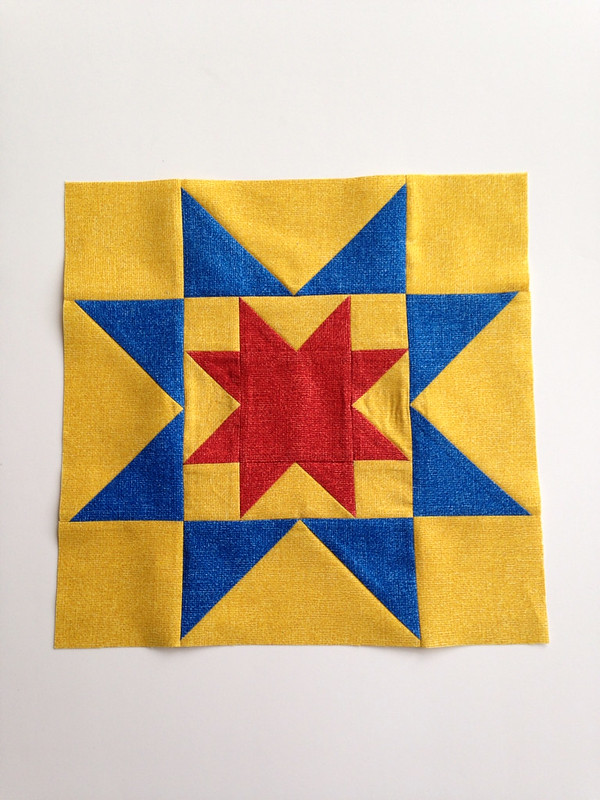

Thanks Mary! Head over to Mary on Lake Pulaski to enter to win a fat quarter bundle of the six Burlap Brights she used to make her block. 

Make sure you check out each day's tutorial!
Day 1: Chris from made by ChrissieD
Day 3: Alison from Little Bunny Quilts
Day 4: Debby from Debby Kratovil Quilts
Day 5: Kristen from KD Quilts 
Day 6: Benartex design team
Day 7: Stephanie from Stitched Together Studios
Day 8: Julie from The Crafty Quilter
Day 9: Cynthia from Quilting is more fun than Housework
Day 10: Jessica from Quilty Habit 

To see the entire schedule, click here.
Love It? Share It! Facebook Twitter Google Pinterest Email

Friday, July 26, 2013

Christmas in July Blog Hop: Day 3

Today Mary from Mary on Lake Pulaski is here on the blog, sharing her tutorial for a Snowfolk Portrait Gallery Mantel Quilt. This is a great technique for hanging quilted pieces on your mantel without using nails or tacks! After you check out Mary's tutorial, head over to her blog to see how to enter to win a bundle of Snowfolk fabrics for yourself! 

Hello, Mary from Mary on Lake Pulaski blog here to bring you a tutorial for your very own Mantel Quilt made with the new Snowfolk line of fabric from Benartex.

Here is what you will need to make one just like mine:

1 panel from the Snow Folk line
2 yards of Snowfolk Allover in Blue
2 yards of Snowball Texture in Blue  
approximately 30 inch by 60 inch piece of quilt batting
sewing machine thread in colors to match fabric
perle cotton #8 in colors to match fabric 
freezer paper or other large sheets of paper
white marking pencil
1.  Cut out the Snowman rectangles from the panel along the sides and bottom on the very outside edge of the frames. Cut a piece of  Snowball Texture and batting the same size leaving an extra inch + on the top side of each piece.
   
2. Place the two pieces of fabric right sides together and the batting on the bottom and pin.  Sew 1/4" seam along the sides and bottom. Trim the corners, turn right side out, press and then baste raw edges together 1/4" from the top of the frame.  Complete the other two in the same manner.
3.  Hand quilt with the matching perle cotton around as much detail as desired on all three "portraits" and set aside.


4.  Lay paper over mantle with straight edge along the back and crease paper along all of the outer edges.

5.  Cut out on the crease.


6.   Iron or pin to one layer of batting, one layer of Snowfolk Allover and one layer of  Snowball Texture.  Cut out adding 1/2" to all edges.   Mark center and add the portrait you want in the middle centered on this mark with all raw edges matching as shown and pin.   Add the other two portraits 1/2" from the end.


7.  Sew around all sides with 1/2" seam catching the portrait pieces as pinned.  Leave a 6" opening on the long straight side (this will be against the back of the mantle). 


8.  Trim corners and turn right side out through the opening.

9.  Press raw edges of opening under 1/2" toward inside.  Top stitch 1/4" from edge around entire mantle quilt.
10.  Place on your mantle, add whatever other decorations go with your Snow Folk Portrait Gallery and enjoy!
Let me know if you have any questions. 
Thanks Mary! What a great idea! Head over to Mary's blog to see how you can enter to win a bundle of Snowfolk fabrics. Read more about Cheryl Hayne's Snowfolk collection here.

If you missed the other tutorials from the Christmas in July blog hop, click on the links below:
Day 1: Ho-Ho-Ho, Let It Snow advent calendar, click here.
Day 2: Christmas Spectacular table runner tutorial, click here.  

And...don't forget to head over to our Facebook page and enter a recipe in our Christmas cookie exchange--we'll be compiling all the entries into a pdf recipe book to share!


Love It? Share It! Facebook Twitter Google Pinterest Email