
Welcome back to the Everyone's a Star Quilt Along!
Today, we'll be making Star Block #1.
I'm Lisa and I'll be sharing the tutorial for this block using the Zentastic collection.
Let's get started!
When I began playing around with the Zentastic fabrics for this quilt along, I decided to create a scrappier version of this quilt, partly because there were so many great colors and I couldn't narrow down my choices! I decided to use the constants of the same white, black and gray prints, and then add in a different bright print in each block.

My tutorial shows the block made with the Marigold Squiggle, but at the end you'll see I actually have four different colored blocks, and this is reflected in the cutting.

Cutting:
(to make four blocks)
From the Sparkles White/Black:
Eight 5" squares
Four 4-1/2" squares
Four 4-1/2" squares
From the Petals Gray/White:
Four 5" squares
Eight 2-1/2" squares
From the Whiskers Black/White:
Twelve 5" squares
From each of the Marigold, Hot Pink, Blue/Green and Citron:
One 5" square
Two 2-1/2" squares
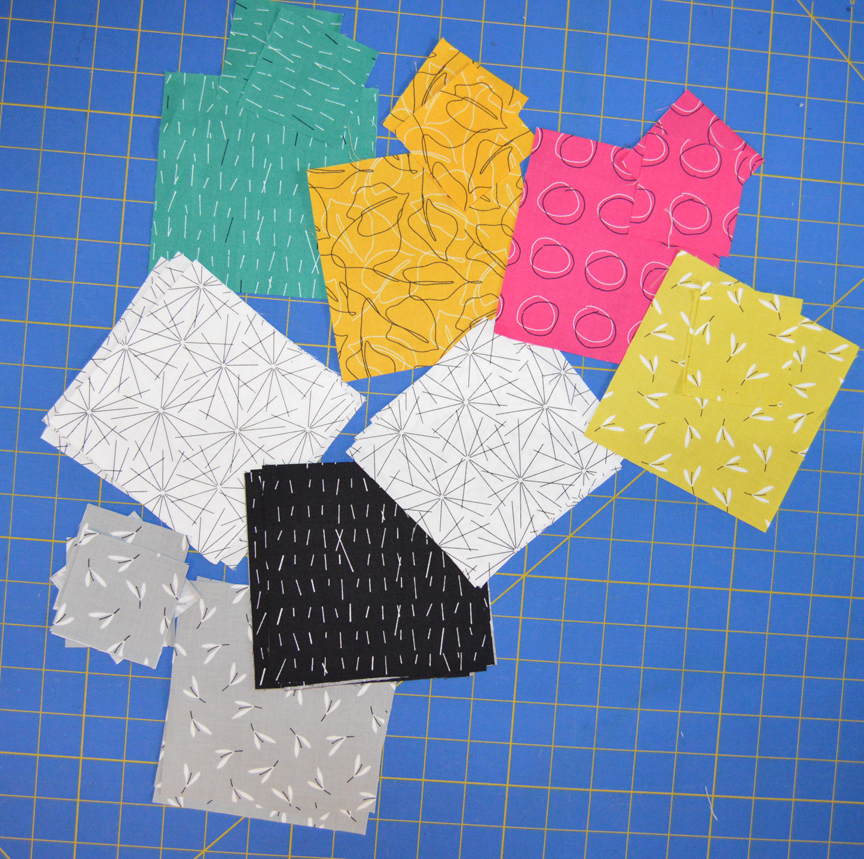 |
| My cut pieces |
Making the Block:
Step 1: Draw a diagonal line on the wrong side of four 5" black squares. Note: The black print I chose is directional, and so these directions show how to work with that so the print runs the same direction throughout the block. If your fabric is not directional, or you don't care if the print runs the same direction throughout the block, just draw your diagonal lines and hop ahead to step 2.
To deal with directional fabric, draw the diagonal line from upper left to lower right on two squares with the dashes running vertically. Draw the diagonal line from upper left to lower right on the other two squares with the dashes running horizontally. Pair up one vertical dash square with a white square and one with a Marigold square. Pair up the horizontal dash squares with the gray square and the second white square. (Or just make yours match the photo below!)

Step 2: Sew 1/4" on either side of the marked line for each pair. Cut apart on the marked line, and press open.

Step 3: Square each unit to measure 4-1/2" square. This is what your HSTs will look like:

Step 4: Draw a diagonal line on the wrong side of the two 2-1/2" gray squares and two 2-1/2" Marigold squares. Position the marked gray squares on the 4-1/2" white square as shown.

Step 5: Stitch on the lines, trim seam allowance to 1/4" and press open.

Step 6: Position the Marigold squares on the remaining corners.

Step 7: Stitch, trim and press. Here's what your center square will look like:

Step 8: Lay out the eight HSTs and the center square. Pay close attention to orientation of the HSTs. If you're concerned with fabric print directionality, keep an eye out for that too.

Step 9: Sew the units together into rows. Press the seams in the first and third rows in the same direction. Press the seams in the middle row in the opposite direction.

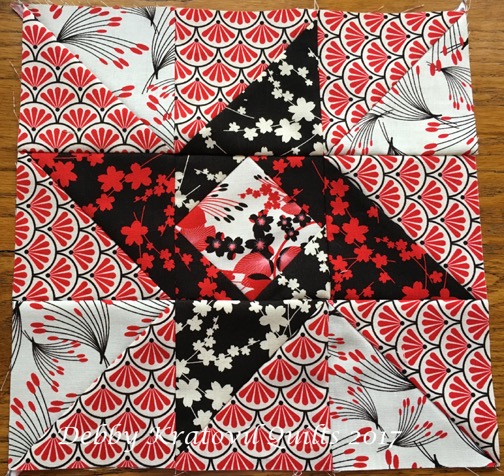
Step 10: Sew the rows together to complete the block. Repeat to make three additional blocks.

Congratulations! You have 33.33% of your quilt along blocks finished!
Head over to her blog to learn more about it.

Head over to her blog to learn more about it.
Come back Thursday, February 16th for the tutorial to create Block #2!
**********************************************************
Join us to make this quilt in just 5 weeks!
Which version will you make? Or will you use another Benartex, Kanvas, or Contempo line to create our Everyone's a Star quilt? Share your progress by e-mailing your pictures to us at BenartexQAL2017@gmail.com – we will post them on Facebook and Instagram throughout the Quilt Along. We are looking forward to quilting with you!
**PRIZE ALERT**
Email us a photo of your finished Everyone's a Star quilt top made with any Benartex/Kanvas/Contempo fabric collection for a chance to win a box of Fossil Fern fat quarters! (Bonus entry if your quilt is quilted and bound as well!)Email your photo by Thursday, April 6, 2017 to be entered in the drawing.
Love It? Share It!


how big is the finish block... did not see a size listed
ReplyDeleteNonnie, it's 12" square finished.
Delete