

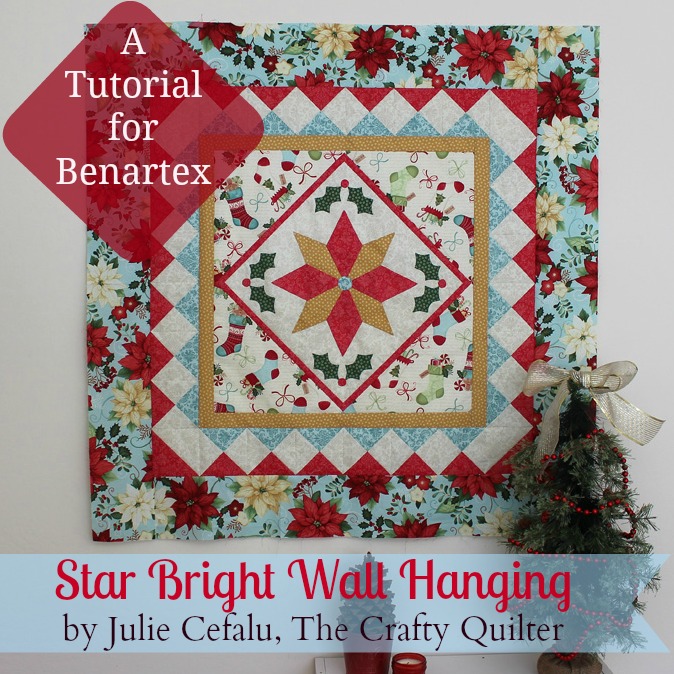
It's Day 5 of our Christmas in July blog hop, and our final tutorial. And it's a great one! Julie from The Crafty Quilter has designed a beautiful wall hanging that includes both piecing and applique, using Michele D'Amore's Home for the Holidays collection. Check out Julie's tutorial below, and then head over to her blog to see how you can win a fat quarter bundle for yourself!
Fabric Requirements:
All fabric is from the Home for the Holidays collection by Michele D'Amore.- Ivory Damask: 1/2 yard
- Light Red Damask: 1/2 yard
- Aqua Damask: 1/4 yard
- Ivory Stockings: 1 fat quarter
- Gold Metallic Dot: 1/4 yard
- Green Metallic Dot: 1/8 yard
- Aqua Flower: 7/8 yard
- Binding: 1/2 yard
Cutting Instructions:
Ivory Damask: Cut (1) 15" square for applique background. From remaining fabric cut (3) 5-1/2" strips, subcut into (12) 5-1/2" squares and (2) 5" squares for pieced border.Red Damask: Cut (1) 5-1/2" strip, subcut into (6) 5-1/2" squares for pieced border. Cut (1) 5" strip, subcut into (2) 5" squares for pieced border. Use remainder of this strip for applique. Cut (2) 1" strips, subcut into (2) 1" x 14-1/2" rectangle and (2) 1" x 15-1/2" rectangle for applique border.
Aqua Damask: Cut (1) 5-1/2" strip, subcut into (6) 5-1/2" squares for pieced border.
Gold Metallic Dot: Cut (4) 1-3/4" strips, subcut into (2) 1-3/4" x 22" rectangles and (2) 1-3/4" x 24-1/2" rectangles for inner border.
Ivory Stocking: Cut (2) 12" squares, cut in half diagonally once for setting triangles.
Aqua Flower: Cut (4) 5-1/2" wide strips; Measure quilt top before cutting into the following border pieces: (2) 5-1/2" x 32-1/2" rectangles and (2) 5-1/2" x 42-1/2" rectangles.
All seams use 1/4" wide seam allowance.
Applique Instructions:
Fold 15" background square in half and in half again; press lightly. Repeat on the diagonal. This will give you placement guides for your applique pieces.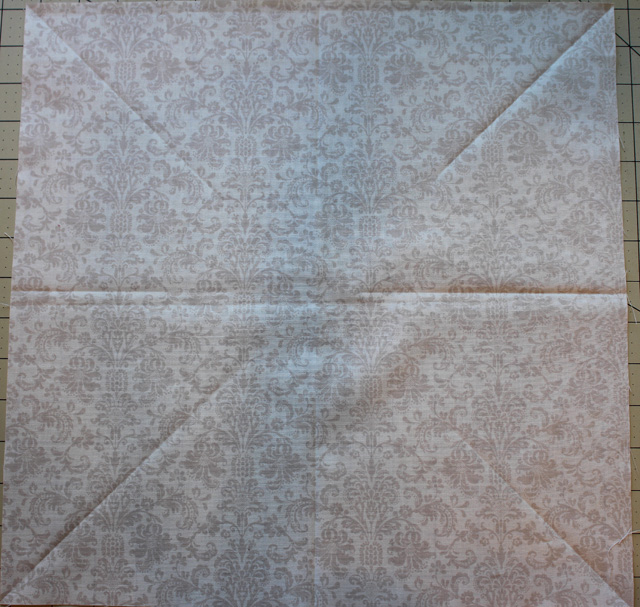
Using the applique pdf file (click here to download) and your favorite applique technique, make (1) gold star, (4) red star points, (8) green holly leaves, (4) red berries and (1) center circle. a) Place the gold star on the background square so that the points line up on the 90 degree placement lines. b) Add the red star points so that the points line up on the diagonal placement lines and at the center of the star. c) Place one red berry at the diagonal line, 2" from each corner; add two holly leaves extending from each berry as shown. d) Place one aqua circle in center of star.
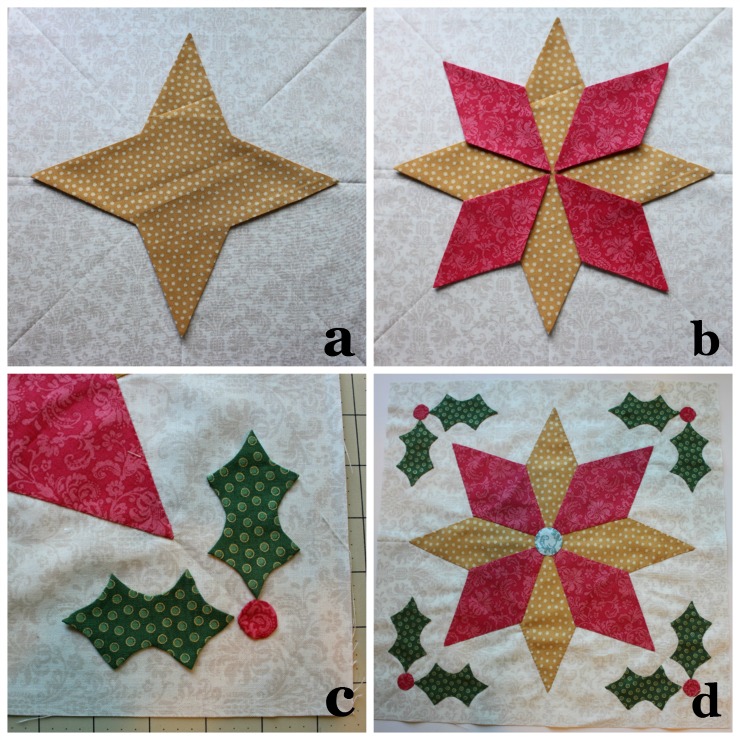
Applique all pieces in place. I used a turned edge applique technique and stitched with invisible thread and a blind hem stitch. You can find my tutorial for the invisible machine applique stitch here and my tutorial for raw edge machine applique can be found here. Trim the applique square to 14 1/2".
Applique borders and setting triangles:
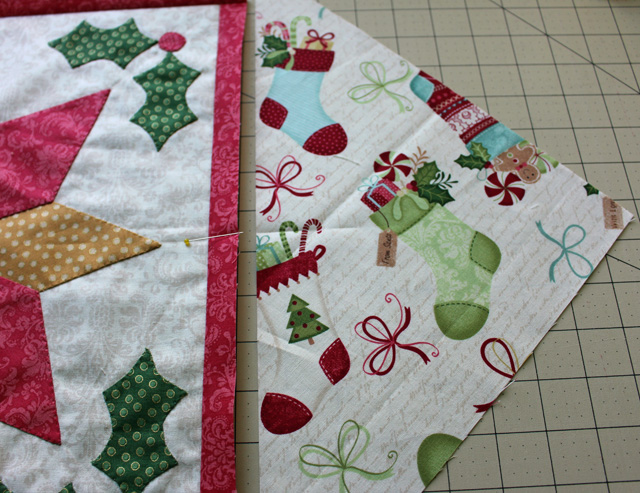
Stitch the red 1" x 14-1/2" strips to opposite sides of the applique square. Add the remaining two 1" wide strips to the other two sides. Press toward borders.
Match the center of each setting triangle with the center of each side and stitch in place. Press toward setting triangles.
Trim the center applique unit to 22" square.

Stitch gold 1-3/4" x 22" inner border pieces to the center applique unit. Add remaining 1-3/4" x 24-1/2" inner border pieces. Press towards inner border.

Pieced border assembly:
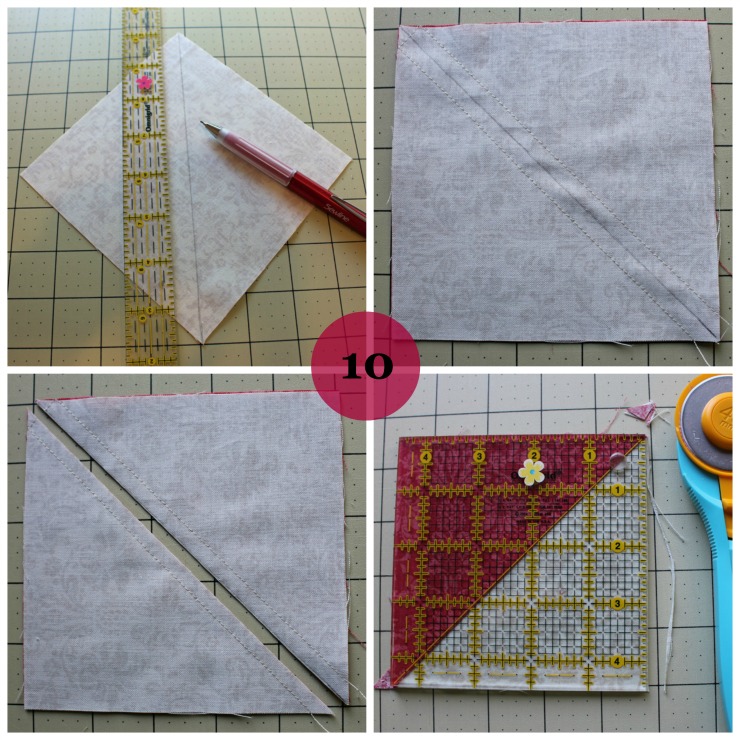
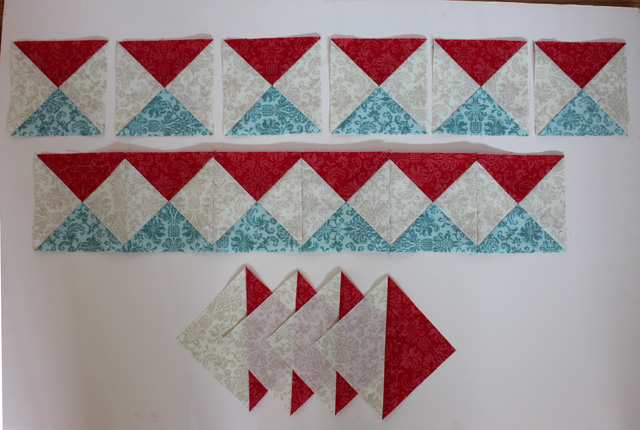
1. Draw a diagonal line on ivory 5-1/2" squares. 2. With right sides together, pair up an ivory square with 6 each red and 6 each aqua squares. 3. Stitch 1/4" on each side of drawn line. Cut in half on diagonal line. 4. Press towards dark fabric. Now you have a total of 24 half square triangle units (HST's).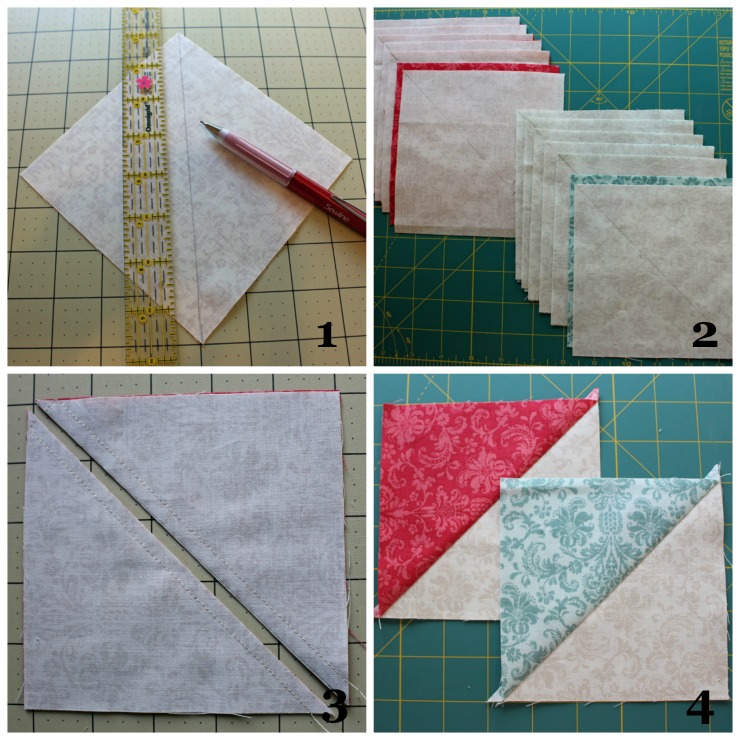
5. Pair up HST's of opposite colors, matching seams. 6. Draw a diagonal line that runs perpendicular to seam. 7. Stitch 1/4" on each side of drawn line. Cut in half on the diagonal line. 8. Trim unit to 4-1/2" square. I used Quilt in a Day's triangle square up ruler which is so nice for trimming quarter square triangles.
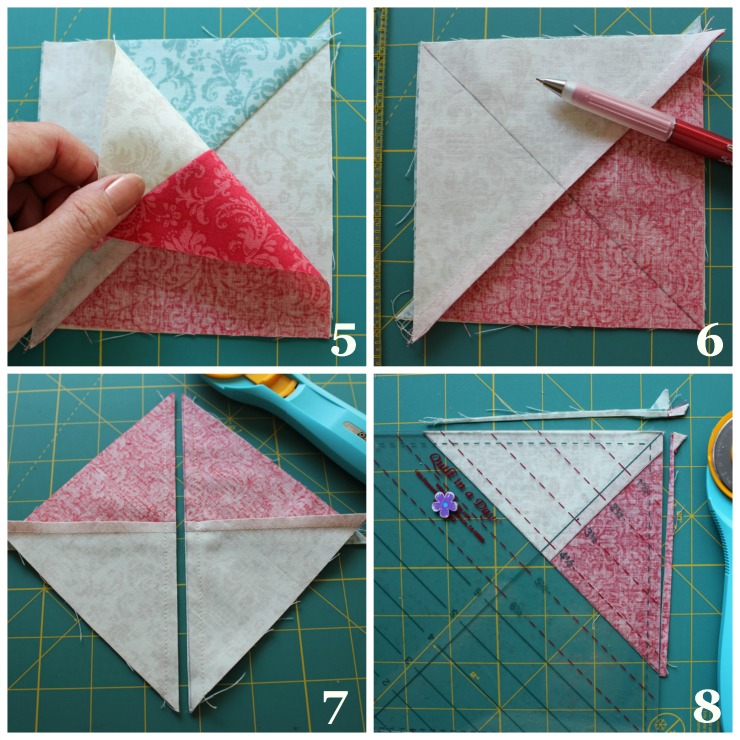
9. Press seam to one side or as shown:
10. Make four half square triangle units using the (2) 5" ivory squares and (2) 5" red squares as shown. Trim to 4-1/2" square.
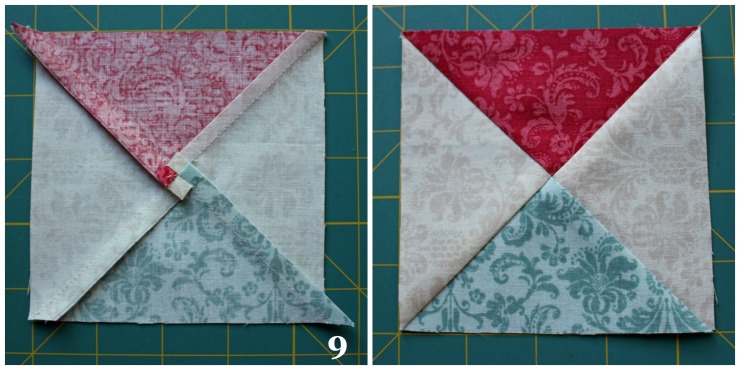
11. Stitch (6) quarter-square triangle units together, matching seams. Press seams open. Repeat to make four pieced border units. They should measure 24-1/2" long.
Adding borders:
Arrange pieced border units and HST's around the center applique unit. Stitch a pieced border to each side. Press towards inner border.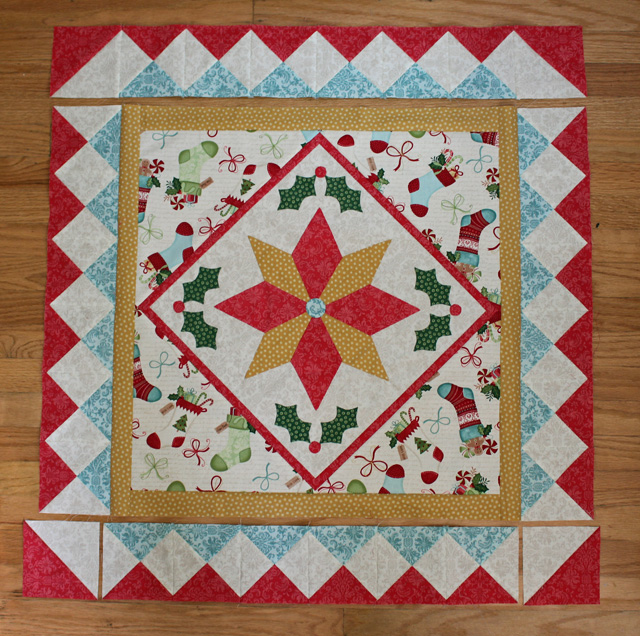
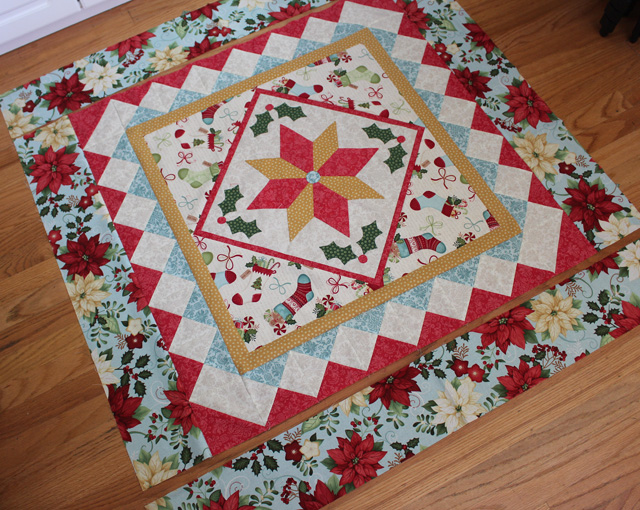
Stitch the HST's to each end of a pieced border unit. Add to the top and bottom of center applique unit. Make sure to match seams at the corners. Press towards inner border. Stitch 5-1/2" aqua floral border strips to each side of wall hanging. Press towards outer border.
Finishing:
Layer, baste and quilt as desired. Add binding and a hanging sleeve to finish it off. Mine is not finished yet, but I'm working on it!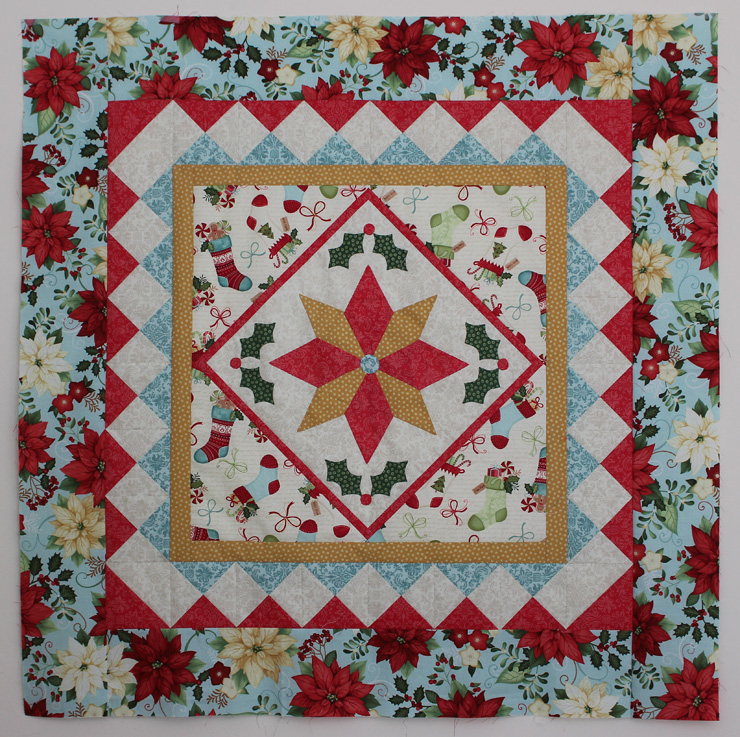 |
| Star Bright Wall Hanging by Julie Cefalu |
Thanks, Julie! What a gorgeous wall hanging! (And so nice to have it almost finished with Christmas still 5 months away!) To find out how to enter to win a fat quarter bundle of the Home for the Holidays collection, visit Julie's blog.
If you missed the other tutorials from the Christmas in the July blog hop, click on the links below:
Day 2: Christmas Spectacular table runner tutorial, click here.
Day 3: Snowfolk Mantel quilt tutorial, click here.
Day 4: Peppermint Twist pillow tutorial, click here.
Love It? Share It!


Such a fun series! I've really enjoyed Christmas in July all over blogland.
ReplyDeleteWhat a lovely design. Enjoyed following along.
ReplyDeleteThe wall hanging is gorgeous. Thank you for sharing.
ReplyDeleteThanks for another great idea, I love the colors & fabrics. kspanjer@cableone.net
ReplyDeleteBeautiful wall hanging.
ReplyDeleteI just signed up to follow this blog and I'm so excited for all of the new ideas that will be shared! The fabric line is so gorgeous and the wall hanging is just lovely! Great job!
ReplyDeleteDawn array-dawn@cox.net
Great borders! Cute fabrics and great Blog series! Thanks.
ReplyDeleteFabulous wallhanging and borders.The fabric line is luscious.Thanks for sharing!!
ReplyDeleteoh, that is gorgeous. i love that stocking fabric.
ReplyDeleteOh this is absoulutely gorgeous. Love the applique center.
ReplyDeleteGreat pattern. Love the design!
ReplyDeletevery nice, i am now following this blog
ReplyDeleteLOVE THIS PROJECT!
ReplyDeletemsstitcher1948@yahoo.com
Thank you for all of the great projects. It has been fun follow ing the hop.
ReplyDelete