
Hello! Great to see you! This blog hop is all about novelty prints from Kanvas--fun designs that make you smile--and our talented designing friends are offering up great ideas for using them! Be sure to stop back each day for a new tutorial.

Today Jennie from Clover & Violet is here, using the Jet Set collection to make two boxy pouches. We love the tab and snap details she added and think you will too! Enjoy Jennie's tutorial, and then head over to her blog for a chance to win some of these fun prints for yourself.

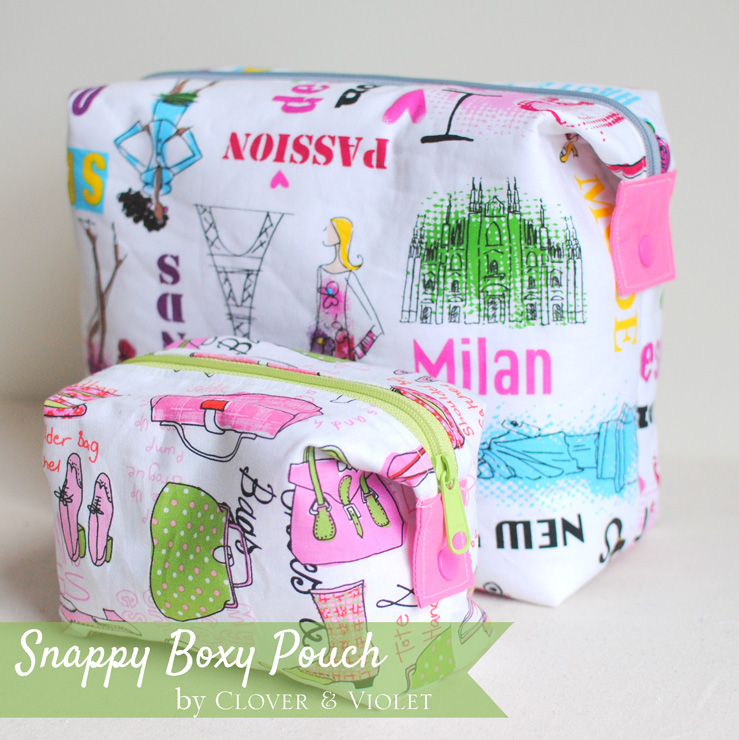
Do you love the look of boxy pouches, but feel intimidated about actually making one? Me too! Instead of making mine the traditional way, I've added little tabs and snaps to a regular pouch and turned it into a boxy pouch.
The fabric is Jet Set by Greta Lynn for Kanvas, and it's so cute and whimsical. I think this would make an excellent make up bag set: one for home and one for on the go.
Read all directions before beginning. All seam allowances 3/8" unless otherwise stated.
Supplies (small pouch is in parentheses):
- 1/2 yard (fat quarter) feature print
- 1/2 yard (fat quarter) lining
- 1/2 yard (fat quarter) interfacing
- Such as Pellon® TP971F Fusible Thermolam® Plus for the large bag
- Such as Pellon® 931TD Fusible Midweight for the smaller
- 4 1/2" square solid fabric
- 2 1/2" x 4 1/2" scrap of interfacing
- 15" (10") zipper
- Snaps and snap setter
- Optional: Jeans needle
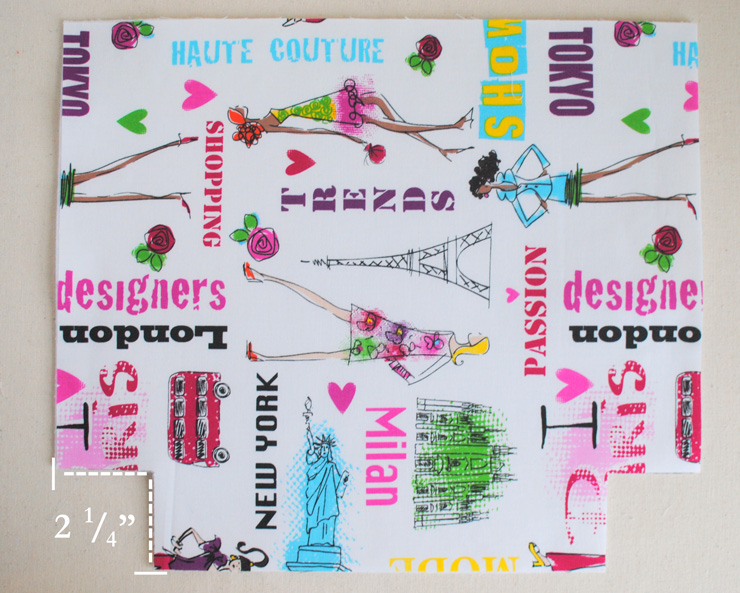
Cut 2 - 15" x 13" (10" x 8") rectangles each of the feature fabric, interfacing, and lining. Follow the manufacturer's directions to fuse the interfacing to the wrong side of the feature fabric. Along one 15" (10") inch edge, draw and cut out two 2 1/4" squares from each piece. This is the bottom of the bag.

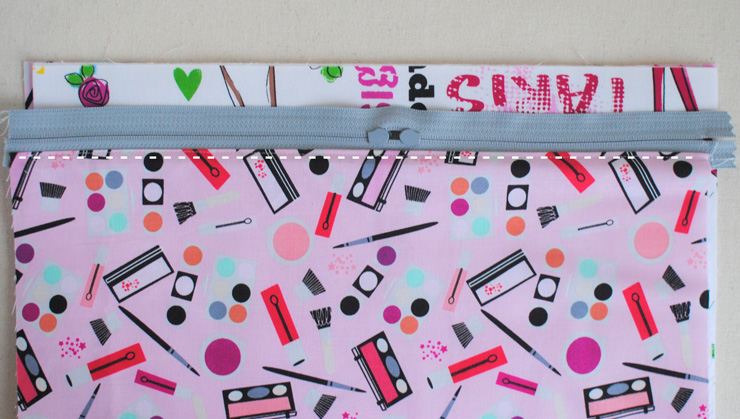
Place the zipper pull side down on the top edge of one feature fabric piece. Baste in place at 1/8". Place the lining fabric on the feature fabric, right sides together, and sew along zipper edge.

Turn fabrics wrong sides together, press, and sew next to zipper.
Place zipper, pull side down, along the top edge of the second feature fabric piece, baste zipper at 1/8". Then place second lining piece right sides together, and sew.
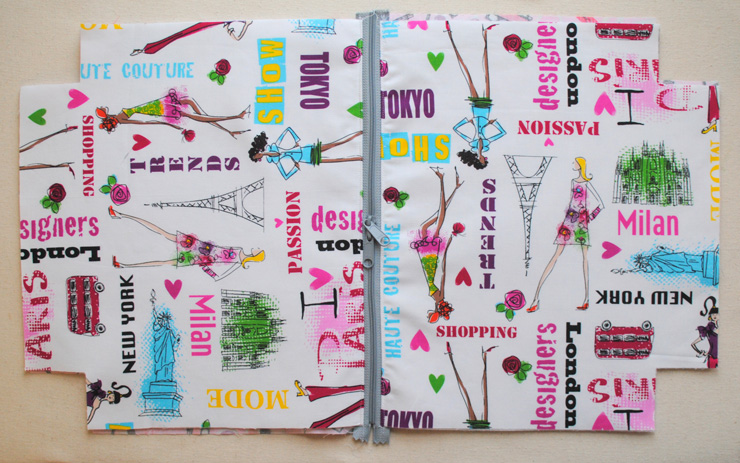
Turn right side out and top stitch through zipper on the other side.
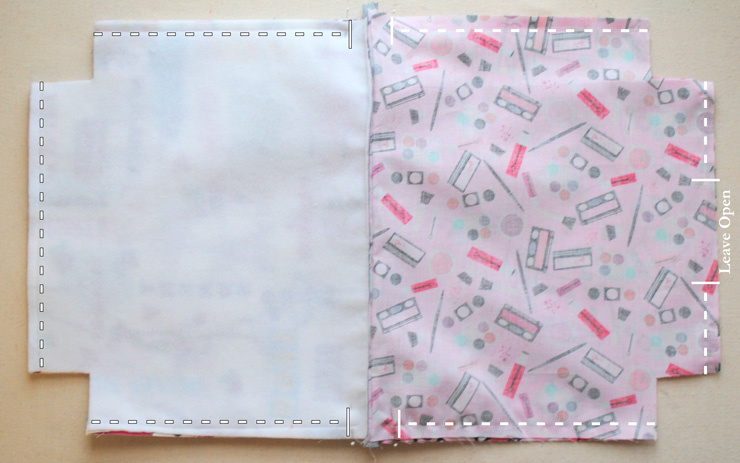
Fold the bag so the two feature fabric pieces are right sides together and the lining pieces are right sides together. Make sure to leave the zipper partially unzipped for easier turning.
Back stitching at beginning and end, sew along feature fabric bottom. Sew along sides stopping 1/4" before zipper as shown. Sew along lining bottom seam leaving a 4" opening as shown.

Pinch the one corner rectangle so the side and bottom seams match, sew across. Repeat for remaining 3 corners. This will create a box on the bottom of the bag.
Turn the bag right side out through the opening in the lining.

Sew the opening used for turning closed. Then tuck the lining inside the bag.
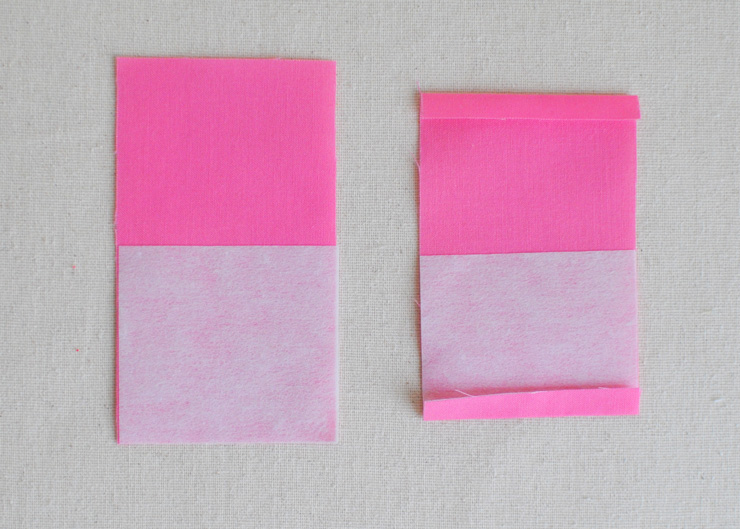
From the solid fabric, cut two 2 1/2" x 4 1/2" (2" x 4") rectangles. Fuse one 2 1/2" x 2 1/4" (2" x 1 3/4") rectangle interfacing to one half of one solid rectangle. Along both shorter edges, fold 1/4" toward the wrong side.

Fold the rectangle in half, right sides together, and sew the sides with a 1/4" seam allowance. Clip corners. Turn right side out.
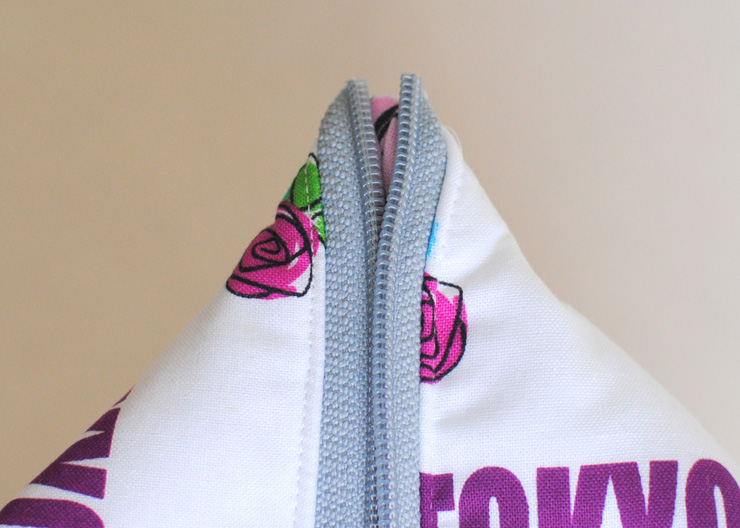
Fold the zipper corner out and trim the zipper end even with fabric.

Slip the zipper tab over the corner, pulling it down as far as possible with out wrinkling fabric.
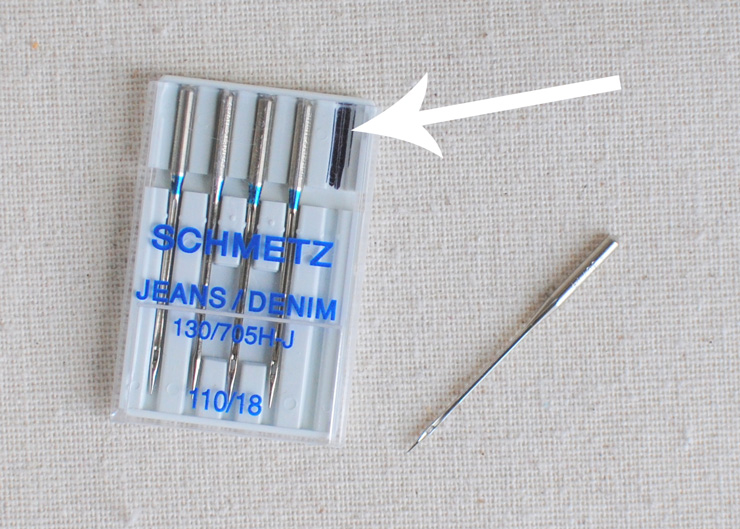
I sewed this next part with a jeans needle. I keep one package on hand and draw a black line behind the needle I used, then, I put it back after sewing with it. This helps for getting through those thick spots without wasting a needle.
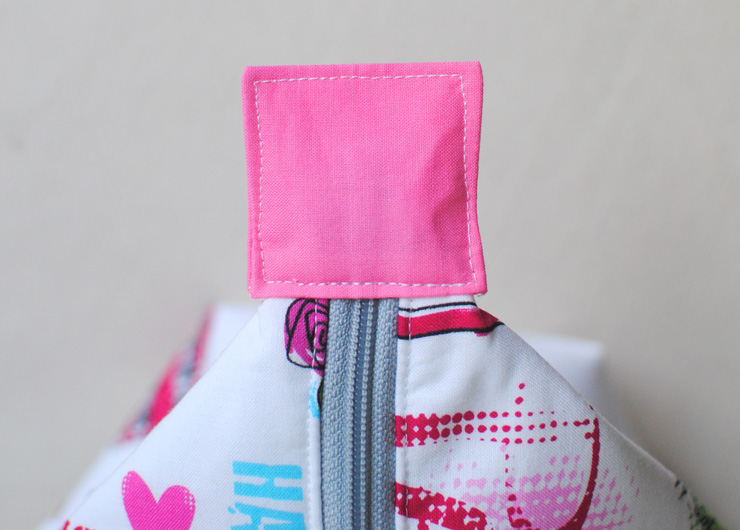
Top stitch 1/8" around zipper tab, back stitching over the zipper portion. I often hand crank my machine when I go over the zipper teeth. Then I can feel any resistance and go slowly to avoid breaking needles - which often happens when sewing zippers.
Repeat for other zipper tab.
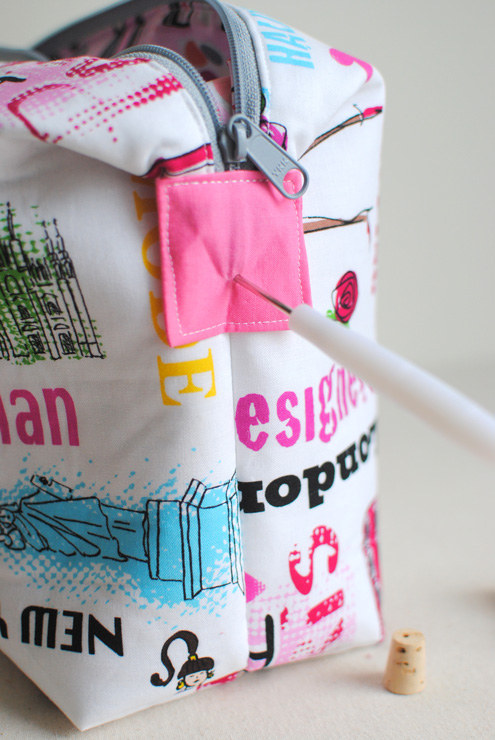
Fold the zipper tab down the side of the bag to desired position. The bottom of my tab is 4 3/4" (1 1/2") from the bottom corner of the bag. Use the awl to poke through the zipper tab and bag to make the snap hole.
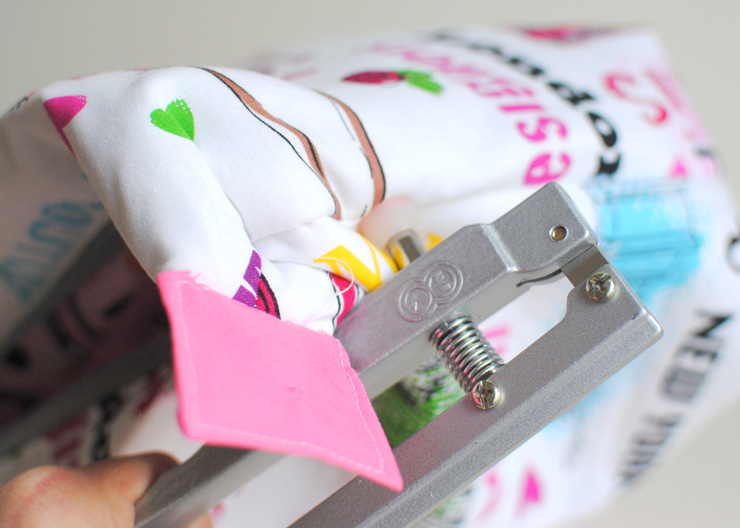
Follow the manufacturer's directions to set the snaps. I used regular, size 20 KAM snaps and pliers - I had to wiggle the pliers down to the bag snaps. The longer shank snaps would have worked easier, but with a tiny bit of extra effort, these worked just fine.
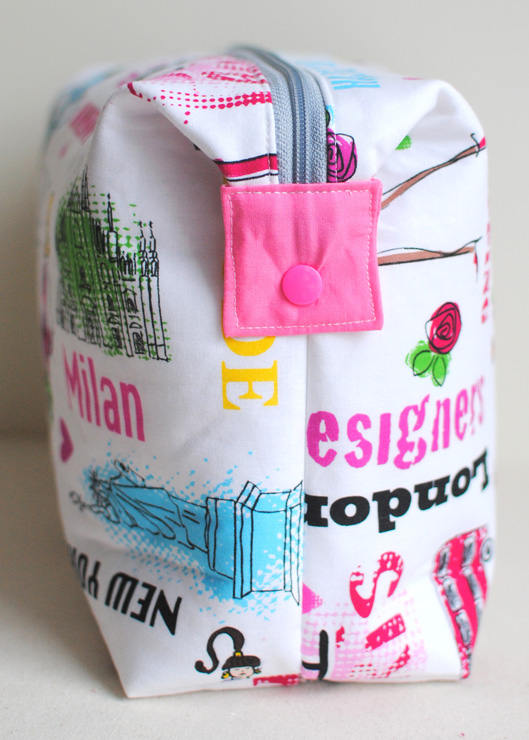
Set the snap on the tab and fasten! And your pouch is finished!
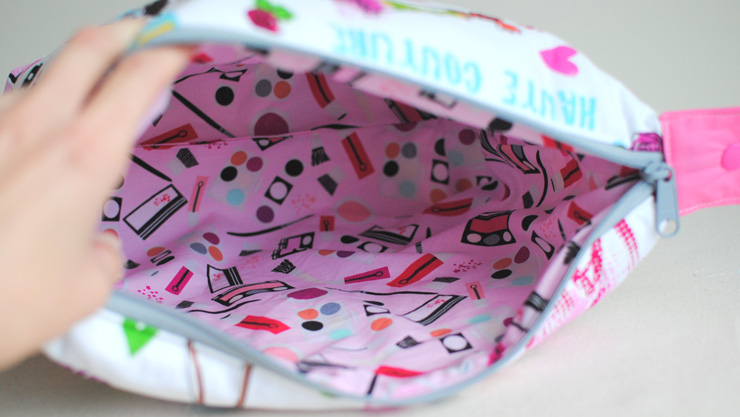
Here's a peek at the inside too!
If you make a Snappy Boxy Pouch we'd love to see it. Tag it on social media with #cloverandviolet #snappyboxypouch. Also, feel free to add it to our Flickr group here.
Thanks Jennie! Head over to Jennie's blog to find out how you can enter to win a fat quarter bundle of the Jet Set prints.
Don't miss our other novelty print tutorials!
Day 1: Reverse applique pillow by Lisa from Stubbornly Crafty
Day 3: Drawstring camera bag by the Benartex blog design team
Love It? Share It!


Thank you for this tutorial! I've been thinking about making pouches for a long time and have never tried.
ReplyDeleteGreat tutorial....thank you!
ReplyDeleteI've saved this tutorial! Never tried making pouches but your directions are the best! I think I can do it!
ReplyDeleteThank you for a wonderful tutorial. I've done boxy pouches before, but not with the snap ends - this is a cute element to add..
ReplyDeleteGreat tutorial! Love the fabric she used.
ReplyDeleteThanks for a great tutorial - I shall definitely be making some!!
ReplyDeleteAwesome tutorial!! I must make some of these for my daughter and nieces, they would love a few of these pouches each!!
ReplyDeleteSuper cute fabrics! These are really nice looking bags as well. Great tutorial.
ReplyDeleteLOOOOOVE these Pouches!! Thanks so much for great Tutorial!!! (Fabrics used are Awesome too!)
ReplyDeleteGreat tutorial. Thank you!
ReplyDeleteGreat looking bag!
ReplyDeleteThank you for the great tut!
ReplyDeleteSiuch a beautiful pouches and fabrics.Love them.Great tutorial,many thamks!!
ReplyDeleteI really like the extra touch with the snaps!
ReplyDeleteCool! What an interesting way to treat the zipper ends.
ReplyDeleteGreat tutorial and very cute print.
ReplyDeleteWould love to get my hands on some of those prints. Pouches like these aren't that hard to make, and using basting tape makes putting the zippers in even easier.
ReplyDeleteThis fabric is so cute. I follow both the blog and on facebook. I would team up with my great niece to make something of her choice - probably a bag or to add to a quilt.
ReplyDeleteOk, I must be the only one who's confused....no where in the list of what you need do you mention a zipper with two pulls on it, yet the 2nd photo down shows two zip pulls but only one zipper?????
ReplyDeleteNaomi