Showing posts with label Sweetie Pie. Show all posts

Tuesday, October 1, 2013

September Blog Hop Day 5: Stair Steppin' Baby Quilt


Welcome back! Today is the last day of our September blog hop (yep...on October 1!). We think you'll love this simple tutorial for a quick baby quilt by Candace from Saltwater Quilts. Candance used Michele D'Amore's Sweetie Pie collection--pretty prints to make a pretty quilt.

Hello, my name is Candace and I regularly blog at SaltwaterQuilts.com.  My grandmother taught me to hand quilt when I was 16 (which was quite some time ago) and I have been obsessed with quilting ever since.

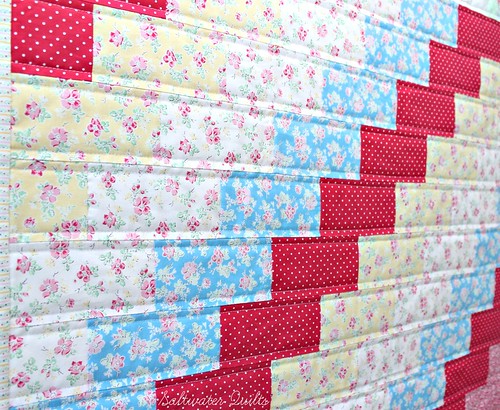
I am excited to share my latest tutorial "Stair Steppin' Baby Quilt" with you using the fabrics from the Sweetie Pie collection from Benartex. The collection is perfectly named because the fabrics are so sweet and lovely. Perfect for a baby quilt. This is a great project for a beginner quilter because there are no seams to line up. It is a quick and easy project and makes a great baby gift.
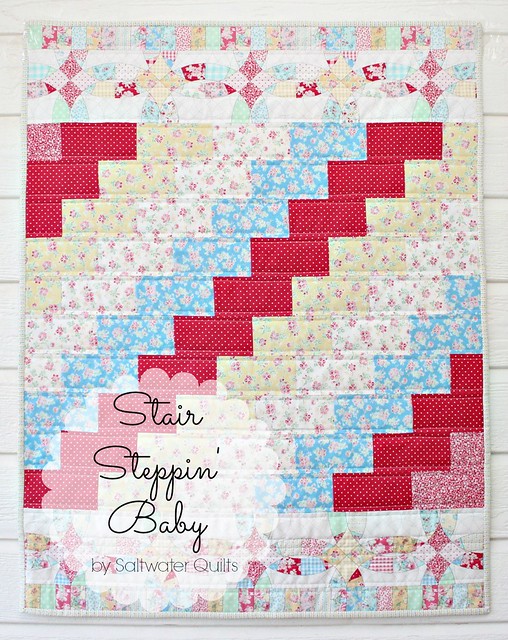
  IMG_5777a

IMG_5747

Quilt Measurements: 30" X 38"

Fabric Requirements:
1 yard of Sweetie Pie Multi
1 yard of a combination of 6 fabrics
1/3 yard of binding fabric


Cutting Measurements:
rectangle - 5.5" by 3"
square - 3" by 3"

binding - 4 strips of 42" by 2.25"

Cut:
Color A - 15 rectangles and 2 squares
Color B - 13 rectangles and 2 squares
Color C - 13 rectangles and 2 squares
Color D - 13 rectangles and 2 squares
Color E - 1 rectangle and 2 squares


An easy way to cut fabric for colors A, B, C, D is to cut two 3" strips across the length of the fabric (42").  Then stack the two strips.


Trim the selvedge edge, then cut three 5.5" sections.


Unfold the center of the rows, stack them and cut one more 5.5" section, 3" section and there will be a little left over (see arrow above).  This will give you 14 rectangles and 2 squares.  There will be one extra rectangle for colors B, C, and D.  For color A you will need to cut one more rectangle.


Sew the center section together by sewing each row and then sew the rows together as shown in the diagram above.  Once the center section is complete, trim the Sweetie Pie Multi to fit the center.

Trim 1/4" above the line marked by the top arrow in the picture below and 1/4" below the line marked by the bottom arrow.  Trim the width of this strip to match the width of the completed center section.  Cut both selvedge edges of the Sweetie Pie Multi fabric this way and sew to the top and bottom of the center section.  Press the quilt top with an iron, pressing all of the horizontal seams towards the bottom.
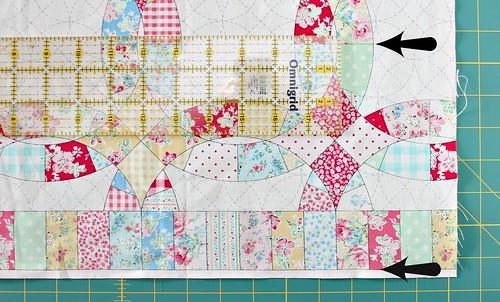

tutorial step 4

Use the extra Sweetie Pie Multi and other fabrics for the backing.
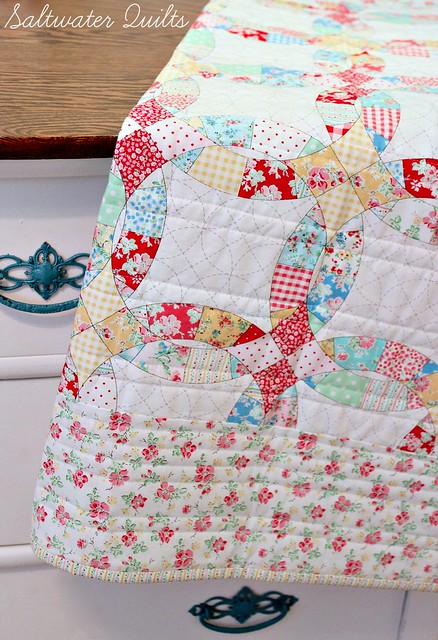
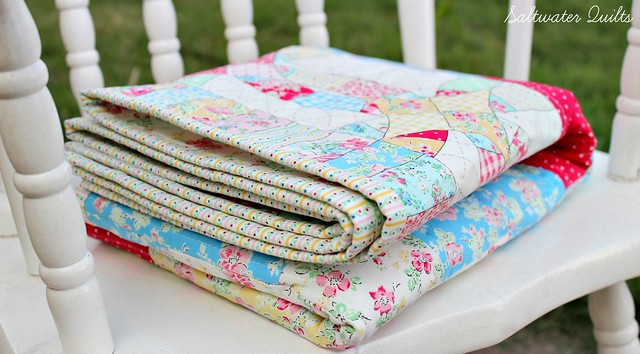
Sweetie Pie Quilt Back

Assemble the layers and quilt as your prefer.  Enjoy your lovely baby quilt!
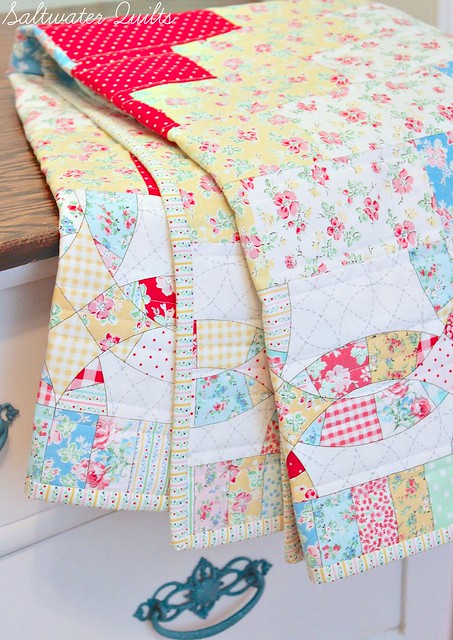

Baby Quilt

Folded Baby Quilt

Thanks Candace! What a sweet quilt! Head over to Candace's blog to find out how you can enter to win a fat quarter bundle of Sweetie Pie.


Don't miss the other tutorials (and giveaways!) featured in our September blog hop:
Day 1: Urban Oasis Table Runner from Kristen of KD-Quilts

Day 2: QAYG Drawstring Backpack from the Benartex blog team

Love It? Share It! Facebook Twitter Google Pinterest Email

Wednesday, July 17, 2013

Sweetie Pie: Classic and Clean


Last week we showed you Michele Crawford's version of Sweetie Pie; today we have a more contemporary take to share, Caitlin Bevevino's pinwheel "Precious in Pink," featured in the August-September issue of Quilt magazine. 

"Precious in Pink" by Caitlin Bevevino,
featured in the August-September issue of Quilt magazine.

What attracted you to the fabric line?
I chose the Sweetie Pie collection because it was something fun and bright for a kid's quilt, without looking juvenile. 

What prompted to use only one color (the pink) in this quilt?
My aesthetic is pretty classic and clean, so using only pink was a natural choice for me. 

Why did you decide to make a pinwheel quilt?
I used pinwheels for the same reason; I love classic blocks and pinwheels have always been one of my favorites.  And, I think the mix of the bright fun fabric with the classic pattern gave it a nice contrast, and the pink really pops against the white. 

How did you decide on a border treatment?
The borders are pretty plain, but I think they accent the quilt nicely; they frame the quilt well without taking away from the pinwheels.  I usually lean toward plain borders when I want to really showcase the quilt blocks. 

Tell us about the coordinating pillows.
For the pillows, I added large rick rack and ball fringe because I've always loved those trims - especially rick rack! 

Find the kit for this project here.
See the entire Sweetie Pie collection here.
Find Quilt magazine here. 


Love It? Share It! Facebook Twitter Google Pinterest Email

Thursday, July 11, 2013

Sweetie Pie: Soft and...Sweet


As fabric lovers, one of our favorite things is seeing how two different people choose to use the same fabric line. A certain print or colorway grabs one designer's fancy, while another goes in the opposite direction. In the following posts we'll show you two perfect examples of this concept, both featuring Michele D'Amore's Sweetie Pie collection. 

This quilt, featured in the August-September 2013 issue of The Quilter, uses the soft, delicate florals from the line. Designer Michele Crawford, a pink, blue and white lover, picked her favorite prints to stitch an easy-to-stitch quilt that shows off the medium tones of the fabric. Michele talked to us about how she designed the quilt below. 


What attracted you to the Sweetie Pie fabrics?
I am very traditional and love florals! I thought this would be a perfect collection for a summertime quilt. It reminds me of happily waking up under a quilt in grandma's house with a breeze coming through white Cape Cod curtains. I can also see myself cuddled under this quilt on a porch swing on a cool summer night.

What is your favorite print in the collection?
The main blue floral used in the outer border. I LOVE pink, blue and white together.


Why did you decide to pair the prints with a white on white tonal?
Using a white on white tonal [instead of a solid] gives a softer look to the quilt in person. I like contrast in my quilts and thought the white tonal would also keep it looking fresh and "summery."

How did you come up with the block design?
I am inspired by the fabric first, and then design the quilt to feature the fabric in the best possible way. I have been viewing a lot of modern quilts on Pinterest lately, and wanted something traditional yet modern and simplistic.

What do you like best about the quilt?
I had imagined this quilt on a white wicker chair or rocker on a porch. The editor liked my vision and I was happy that that's the way it was photographed.

Talk about how the machine quilting.
The only machine quilting that I do myself is to "stitch in the ditch" so the "fancy quilting" as I call it is done by my professional quilter, Kay Kimball who uses a Gamill with a Statler. Kay is the one who truly determines how my quilts are quilted. Sweetie Pie is quilted with white thread. The center of the blocks are cross hatched while there is a "loopy" stitch used in the white and striped borders, and the outer border feature a meandering leaf pattern.
  
Anything else you'd like to share?
I love the double wedding ring fabric from this collection and used it on the back of the quilt.


Find the kit for "Sweetie Pie" and learn more about Michele here.
See the entire Sweetie Pie collection here.
Find The Quilter magazine here.


Love It? Share It! Facebook Twitter Google Pinterest Email