Showing posts with label table runner. Show all posts

Thursday, April 18, 2019

Star Spangled Runner

Memorial Day and the 4th of July are right around the corner, but there's still plenty of time to stitch up a patriotic project! 
Ramona Sorensen's All Hands on Deck table runner is featured in the Summer 2019 issue of Easy Quilts magazine. This red, white and blue runner is made using a Card Trick block variation and features the Star Spangled collection from Kanvas. We asked Ramona to talk to us about her design.


What attracted you to the Star Spangled collection?
It reminded me of summer--picnics, parades, friends and families getting together.

Do you have a favorite print in the fabric line?
I like the whole collection, but my favorites are the 4th of July prints and the fireworks prints.

How did you come up with the design?
It started with the block. I was making a quilt for a club at work. I picked up two card trick blocks to stitch together and realized there was another block "hidden" in them. After some thought, I sketched out the block and then I started playing with quilt designs. 

How did you choose the border treatment?
When  I was experimenting with designs, I decided that the square in a square blocks would make a good edge finish for the project. They fill in the zig zag edges of the blocks. 

What do you like best about the runner?
I like that you can use a centerpiece without taking anything away from the design. And you can cover it with serving platters and the touches of red and blue still peek through to remind you of the occasion being celebrated.

What makes table runners so appealing? 
You can always hang them if you prefer--there are no rules that say it can only go on a table.


Click here to see the entire Star Spangled collection.
Click here to find the Summer 2019 issue of Easy Quilts magazine.
Love It? Share It! Facebook Twitter Google Pinterest Email

Thursday, December 8, 2016

Deck the Halls Blog Hop: Day 4

The Christmas countdown has begun! This week we'll be sharing five holiday-themed tutorials to add to that festive feeling. 


Today we're welcoming Alison from Little Bunny Quilts. Back in our July hop, she made a tree skirt using the Sparkle collection, and she's back today with a table runner using the same fabric line. After you check out her tutorial, head over to her blog for a chance to win a bundle of holiday fabric. 

Here's Alison:
Hello! Alison from Little Bunny Quilts here, and I am back today to share another fun holiday tutorial using Amanda Murphy's Sparkle line! Today I'm sharing a fun table runner pattern!


You will need to make three 12 inch finished (12.5 inch unfinished) blocks for a table runner. For each block you will need:

Four (4) - 2 1/2 inch squares in your outer color (green shown in the tutorial)
Four (4) - 3 3/8 inch squares in your outer color (green shown in the tutorial)
One (1) - 4 1/2 inch square in your center color (teal and green stripe shown in the tutorial)
Four (4) - 3 inch squares in your star point color (red and grey print shown in the tutorial) 
Four (4) - 2 1/2 inch background fabric squares
Four (4) - 2 1/2 inch x 4 1/2 inch background fabric rectangles
Four (4) - 3 inch background squares


Using your 2 1/2 inch squares and 2 1/2 inch x 4 1/2 inch rectangles to make the corner units as shown below. Make four.


Cut each of your 3 inch squares in half diagonally once. Arrange four triangles around each 3 3/8 inch square as shown below and sew together to make four square in a square units. Pay attention to the arrangement of your outer triangles -- these will form your star points! If necessary, trim your blocks to 4 1/2 inch square.


Arrange your corner units, square-in-a-square units, and center square as shown below. Sew together in rows, then sew your rows together.


Make three total Star of Wonder blocks.

From your background also cut:
Four (4) strips 1 1/2 inches x 12 1/2 inches
Two (2) strips 1 1/2 inches x WOF

Lay out your blocks and background strips as shown below and sew together for your table runner top.


Quilt and bind as desired. Enjoy your festive table runner!


You can use this basic table runner pattern with any 12 inch finished blocks (12.5 inches unfinished), so if you have your own favorite blocks, you can switch them up!


For a chance to win a bundle of one of our holiday collections, head over to Alison's blog.  

Make sure to catch all of the tutorials on our Deck The Halls Blog Hop!
Tuesday 12/6: Paula Nadelstern
Wednesday 12/7:  Debby from Debby Kratovil Quilts
Thursday 12/8: Alison from Little Bunny Quilts
Friday 12/9: Benartex blog design team

p.s. Looking for more holiday inspiration? Click here to check out the tutorials featured in our Christmas in July blog hop. 
p.p.s. See another Sparkle table runner on Fons & Porter's website.
Love It? Share It! Facebook Twitter Google Pinterest Email

Monday, February 8, 2016

Oh Fudge! Table Runner Tutorial

Recently we showed you Maria Kalinowski's Oh Fudge collection for Kanvas, perfect for chocolate lovers, especially around Valentine's Day, the unofficial season of chocolate. 
This week we'll be offering a few tutorials showing you ideas of what you can make with these mouth-watering fabrics. Enjoy, and make sure you enter our giveaway for a chance to win some of these delicious fabrics for yourself!


What's up today? We'll show you how to take 10" Oh Fudge squares and Blush fabrics in pale pink and dark brown and create the "Pieces of My Heart" table runner--a cut and swap project using fusible web. 

Here's a close-up of just one heart: 

Here's what you'll need:
1 pack of precut 10" squares (you'll use 10)
1/2 yard Blush Tea Rose (light pink)
1/3 yard Blush Espresso (dark brown)
3/4 yards backing fabric
Fusible web


Cutting: 
Set aside four 10" squares for the hearts (Hint: Choose squares with a variety of colors and size of motifs for more interesting hearts.)

From four darker brown 10" squares:
Cut a total of thirteen 2-1/2" x 10" pieces (for sashing)

From two lighter 10" squares:
Cut a total of ten 2-1/2" squares (for sashing squares)

From the light pink:
Cut four 10" squares

From the dark brown:
Cut three 2-1/4" x 42" strips for binding

From the fusible web: 
Cut four 9-1/2" squares

Making the Blocks:
Note: Download the heart template here
1. Following manufacturer's directions, adhere the fusible web squares to the wrong side of each of your four reserved 10" chocolate squares. 
2. Trace the half heart template to make a full heart. Lay the template on each square and cut out the heart shape. 


3. Stack the four fabric hearts. Using your rotary cutter and ruler, cut through all four layers to create a "puzzle." Start by cutting the heart into two bigger pieces. Divide each bigger piece into smaller pieces. Aim for somewhere between seven and nine pieces. Keep pieces stacked.

4. Lay out the four 10" light pink squares. Lay out the pieces from the top heart, positioning a few on each square. Continue adding pieces from each heart until you have four scrappy looking hearts, leaving roughly 1/4" of space between pieces. 


5. Reposition the pieces as needed to center each heart on a square, with the bottom point angled toward a corner of the square (moreso than you see in this picture!) Carefully fuse the pieces to each square, making sure they don't shift as you work. 

6. Lay out the four heart squares with the thirteen 2-1/2" x 10" sashing pieces and ten 2-1/2" sashing squares. Rotate the heart squares so they face in alternate directions. 

7. Join the sashing pieces and blocks into rows and join the sashing squares and pieces into rows. Join the rows to complete the runner top.
8. Layer with backing and batting, baste, and quilt as desired. We recommend also stitching on the raw edges of the hearts--either with a straight stitch or a zig zag stitch. Bind with the three 2-1/4" x 42" dark brown strips. 

We hope you enjoyed the "Pieces of My Heart" runner tutorial! For a chance to win a pack of 10" Oh Fudge squares, make sure you follow our blog (either by blog reader or by email; see right hand sidebar). Then leave a comment letting us know, as well as letting us know your favorite way to eat chocolate (ice cream, chocolate covered strawberries, candy bars, by the pound...) 

Stop by tomorrow for another Oh Fudge tutorial and giveaway!

Click here to see the entire Oh Fudge collection

Love It? Share It! Facebook Twitter Google Pinterest Email

Monday, July 27, 2015

Christmas in July: Table Runner and Napkins

Welcome to Benartex's Christmas in July Blog Hop here at Sew in Love with Fabric! We shared holiday-themed tutorials all last week and have two more this week, so be sure to check out all the tutorials and see how to win some fabric to get your own holiday sewing started!


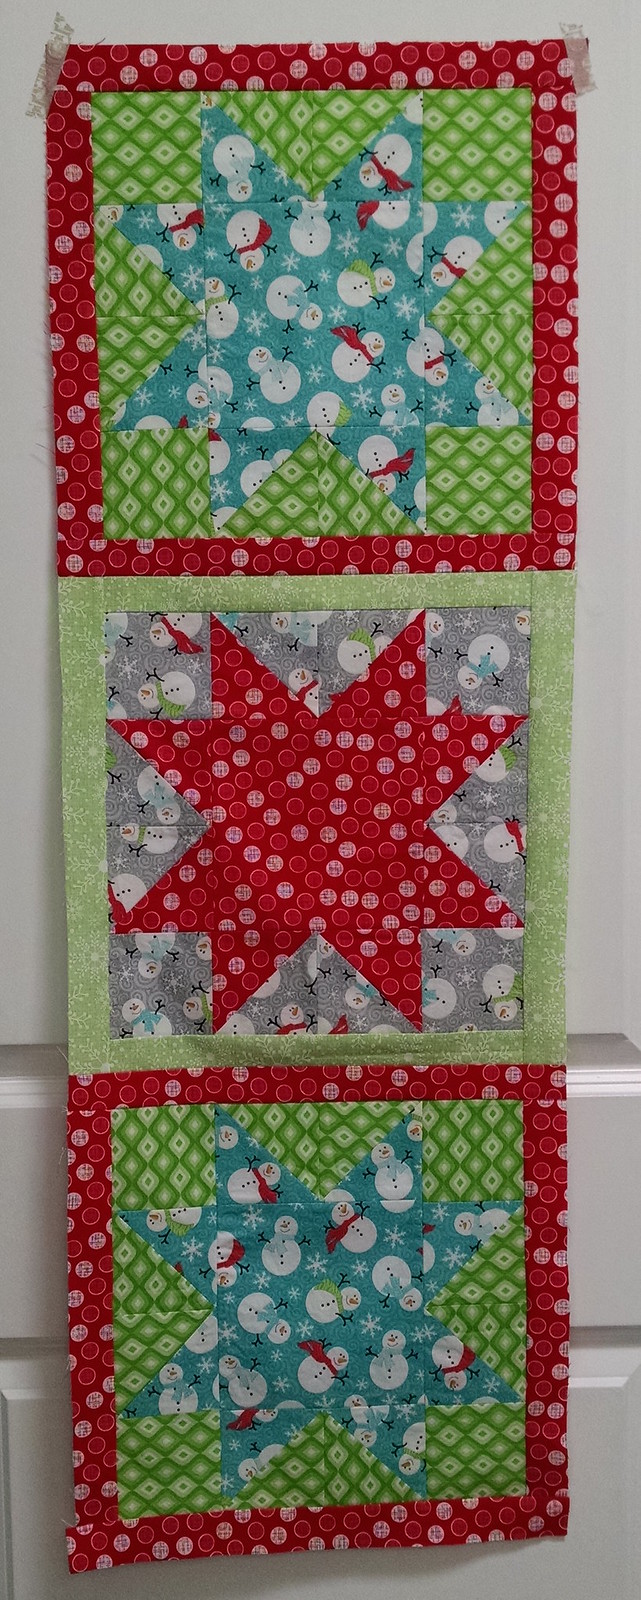
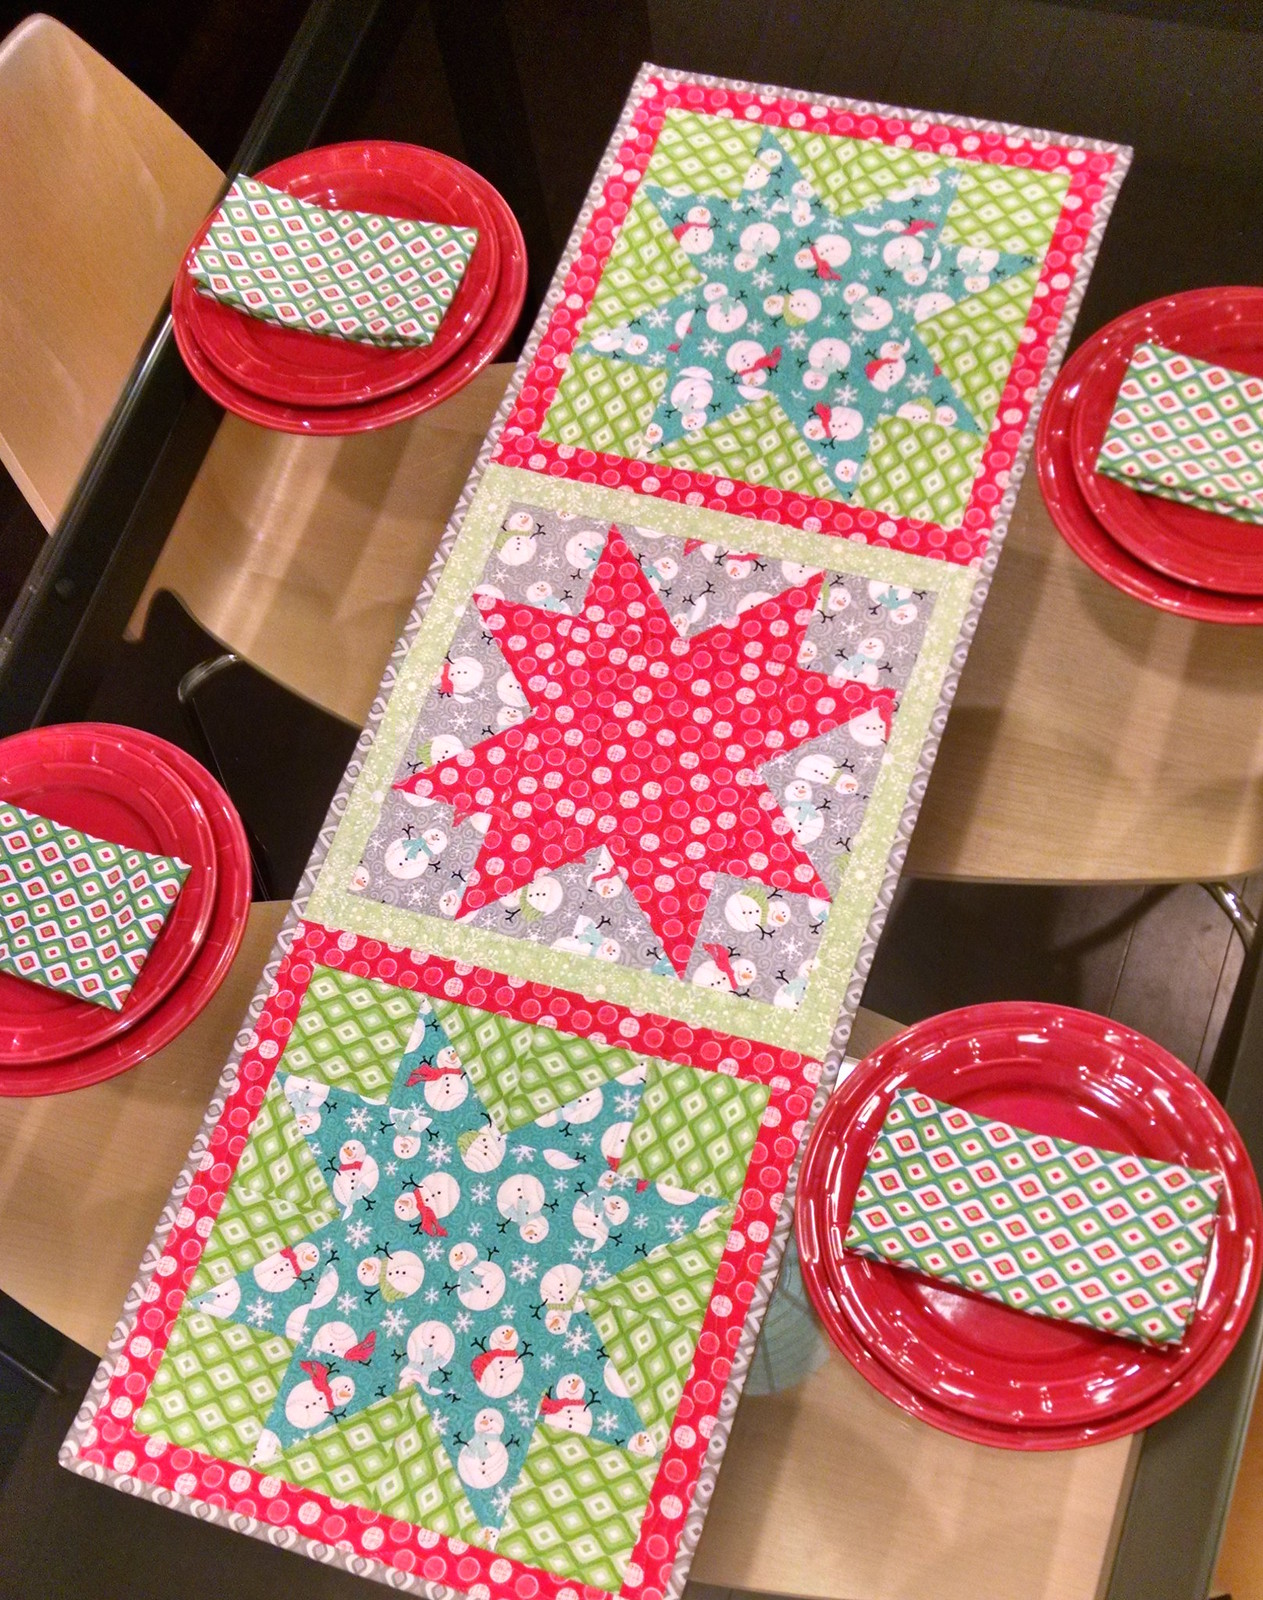
Today Nikki, from The Girl Who Quilts is here with a snowman-filled star table runner and napkin set using the Frosty Forest coordinates. Check out Nikki's tutorial and then head over to her blog to find out how you can win a fat quarter bundle of Frosty Forest plus two of Cherry Guidry's Frosty Forest patterns.


Hi! I'm Nikki, from The Girl Who Quilts! Today I'm going to share a tutorial for a cloth napkin and tablerunner set using the adorable Frosty Forest fabric line by Cherry Guidry.
Christmas In July Tutorial for Benartex

Let's get started!

Here are the prints that I used for this project:

1 yard of Jubilee Geo Multi
1 yard Jubilee Geo Grey
1/8 yard Frosty Snowflake Green
1/2 yard Dot Jubilee Red
1/4 yard Jubilee Geo Green
1/4 yard Snowman Swirl Grey
1/4 yard Snowman Swirl Turquoise

You will also need 18" x 50" of batting if you choose to quilt your table runner.

Cut the following pieces from your fabrics:
From Jubilee Geo Multi:
4 squares at 17" x 17"

From Jubilee Geo Grey:
cut 3 binding strips at 2 1/2" x WOF
(Save remaining fabric for backing)

From Frosty Snowflake Green:
2 strips at 1 1/2" x 12 1/2"
2 strips at 1 1/2" x 14 1/2"

From Dot Jubilee Red:
4 strips at 1 1/2" x 12 1/2"
4 strips at 1 1/2" x 14 1/2"
1 square at 6 1/2" x 6 1/2"
4 squares at 4" x 4"

From Jubilee Geo Green:
8 squares at 3 1/2" x 3 1/2"
8 squares at 4" x 4"

From Snowman Swirl Grey:
4 squares at 3 1/2" x 3 1/2"
4 squares at 4" x 4"

From Snowman Swirl Turquoise:
2 squares at 6 1/2" x 6 1/2"
8 squares at 4" x 4"

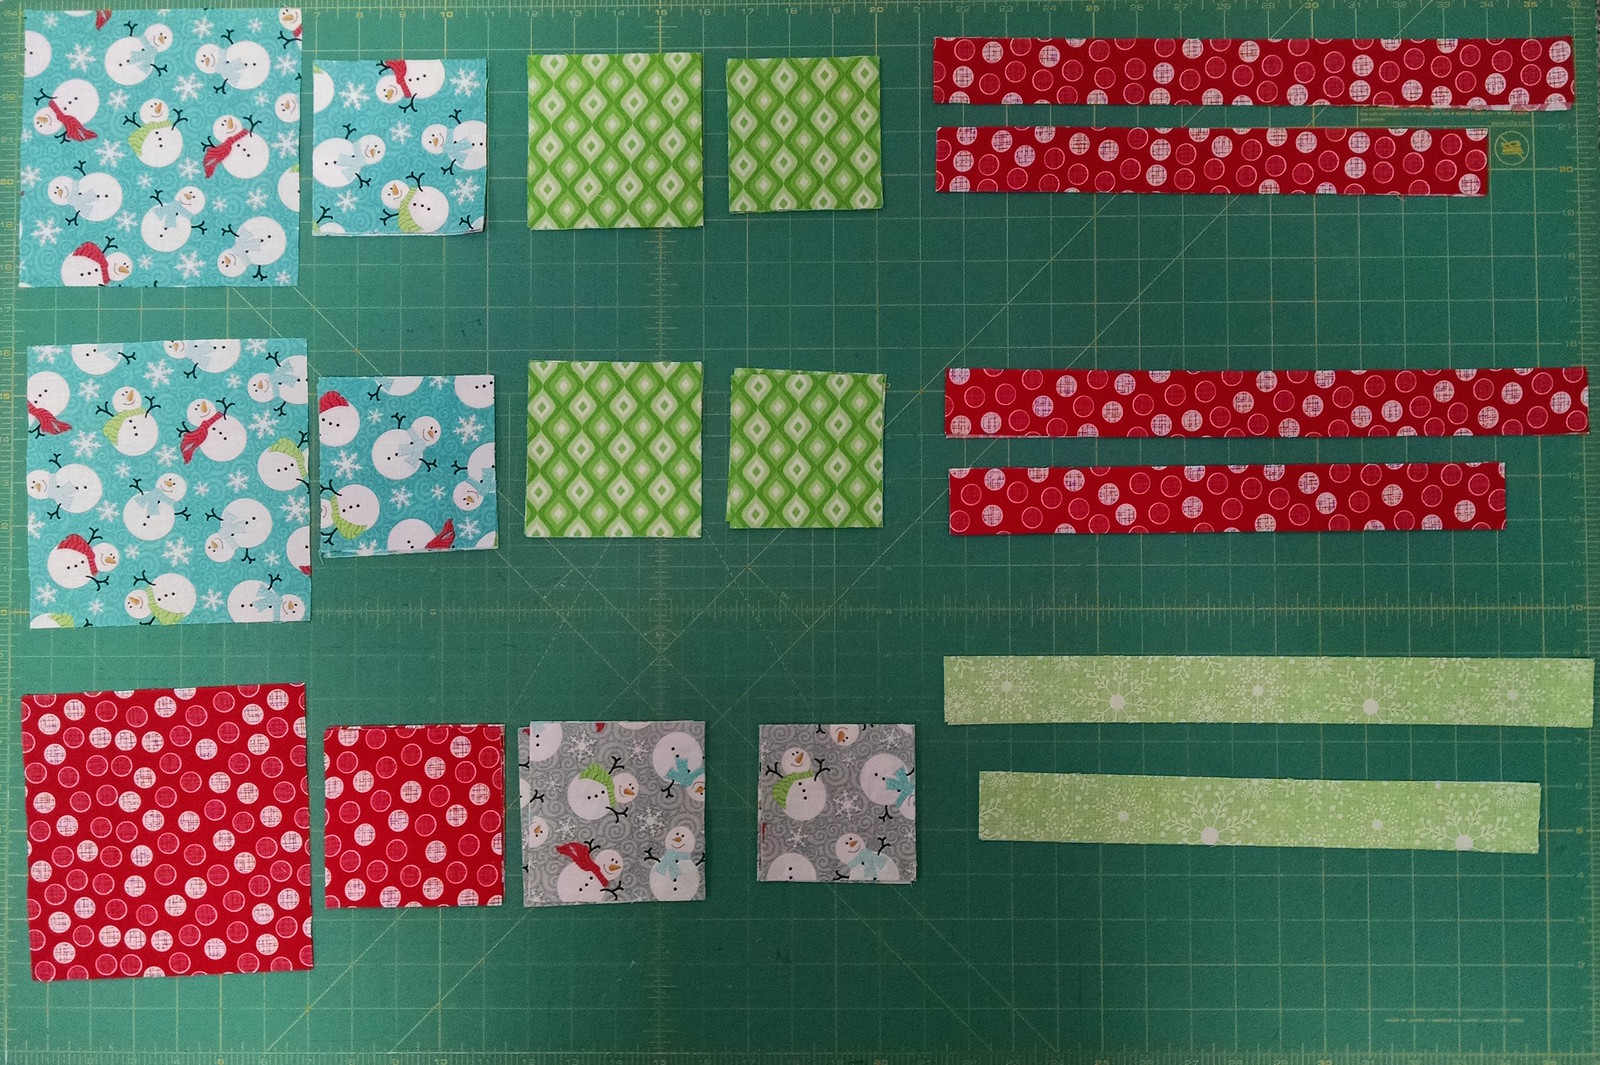
Here are the different size pieces for the table runner:

Christmas In July Tutorial for Benartex

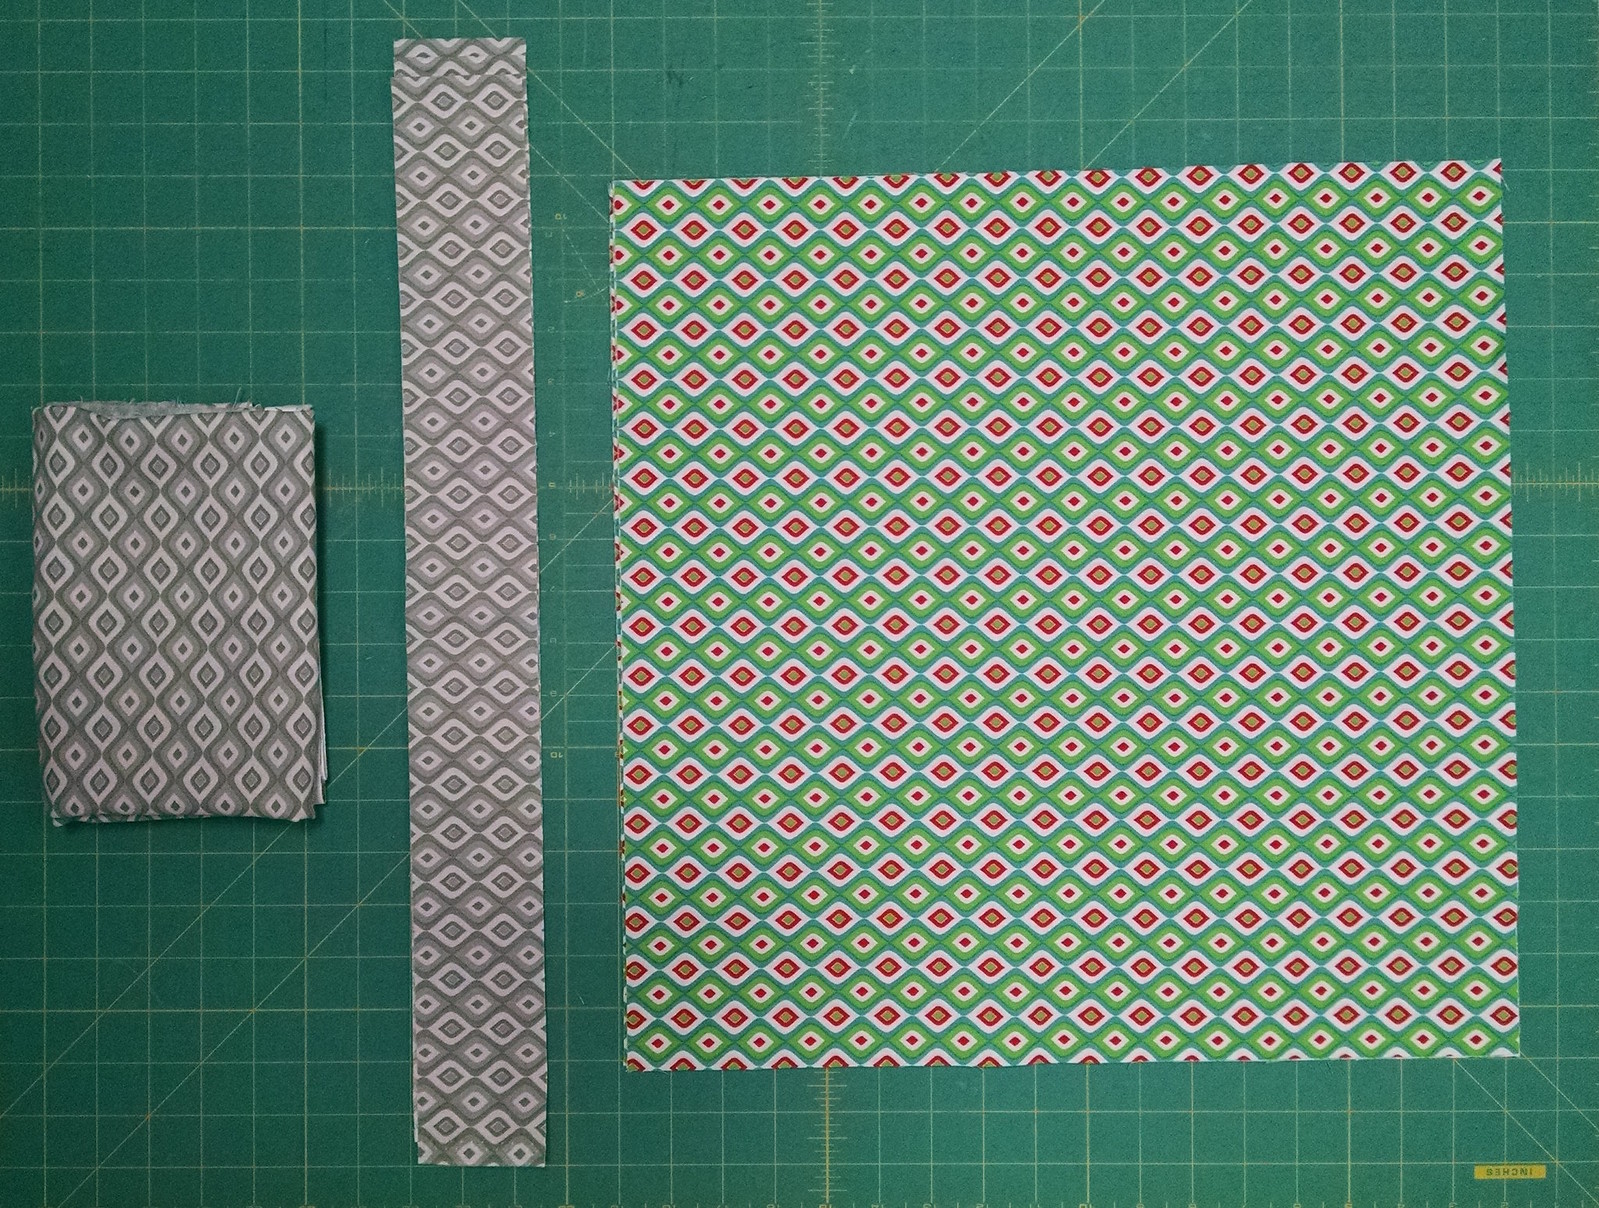
The backing fabric (folded on left), binding strips and napkin fabric:

Christmas In July Tutorial for Benartex

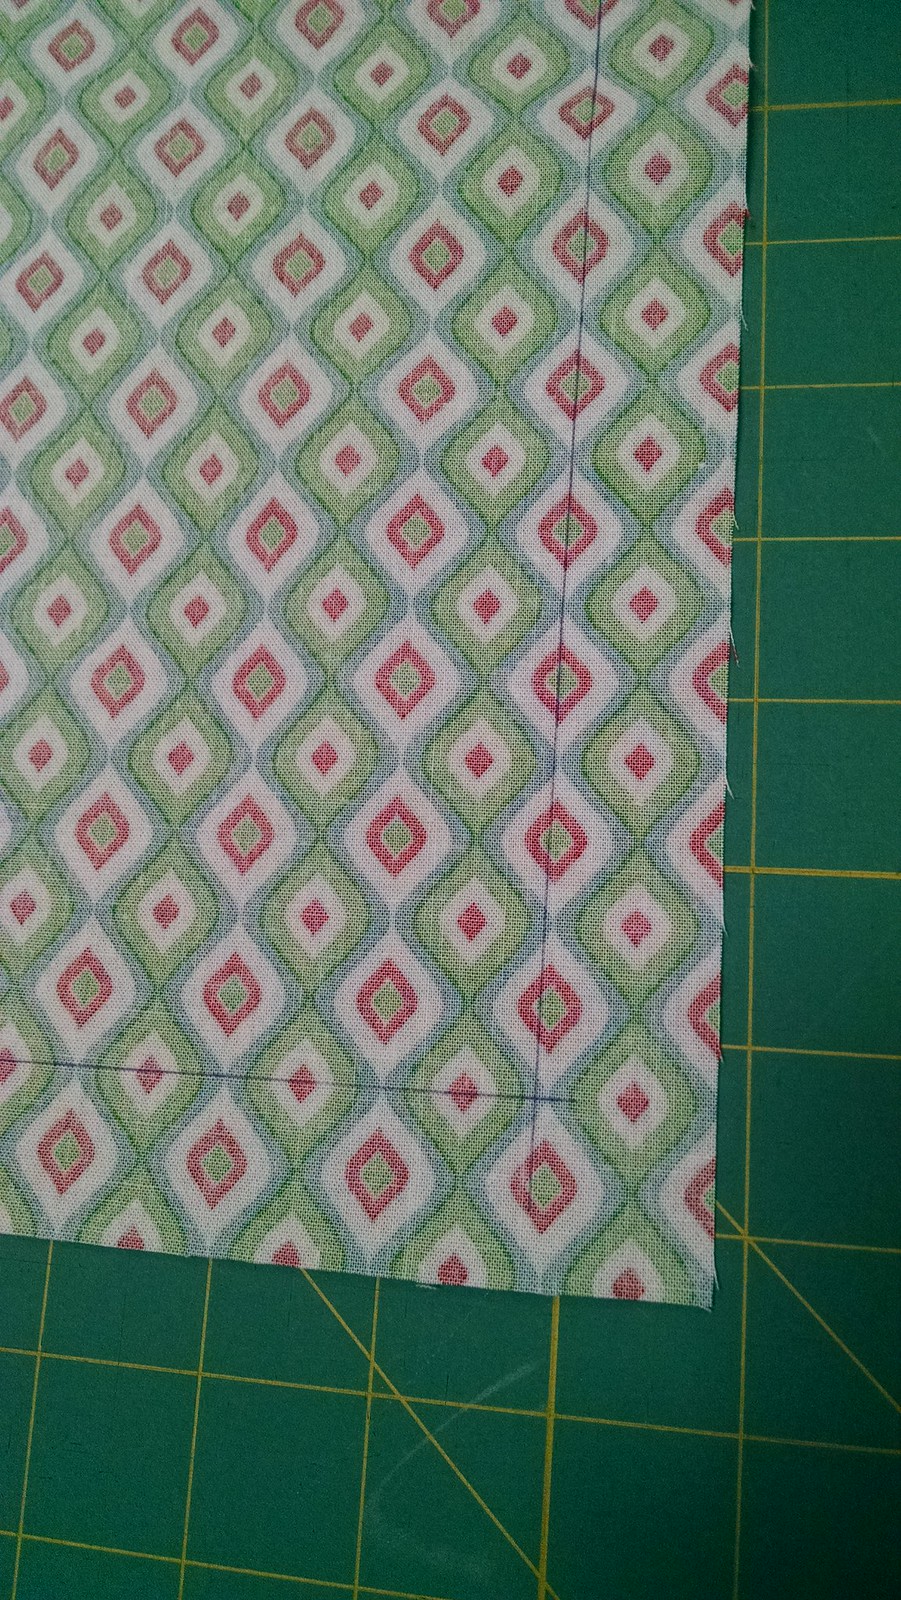
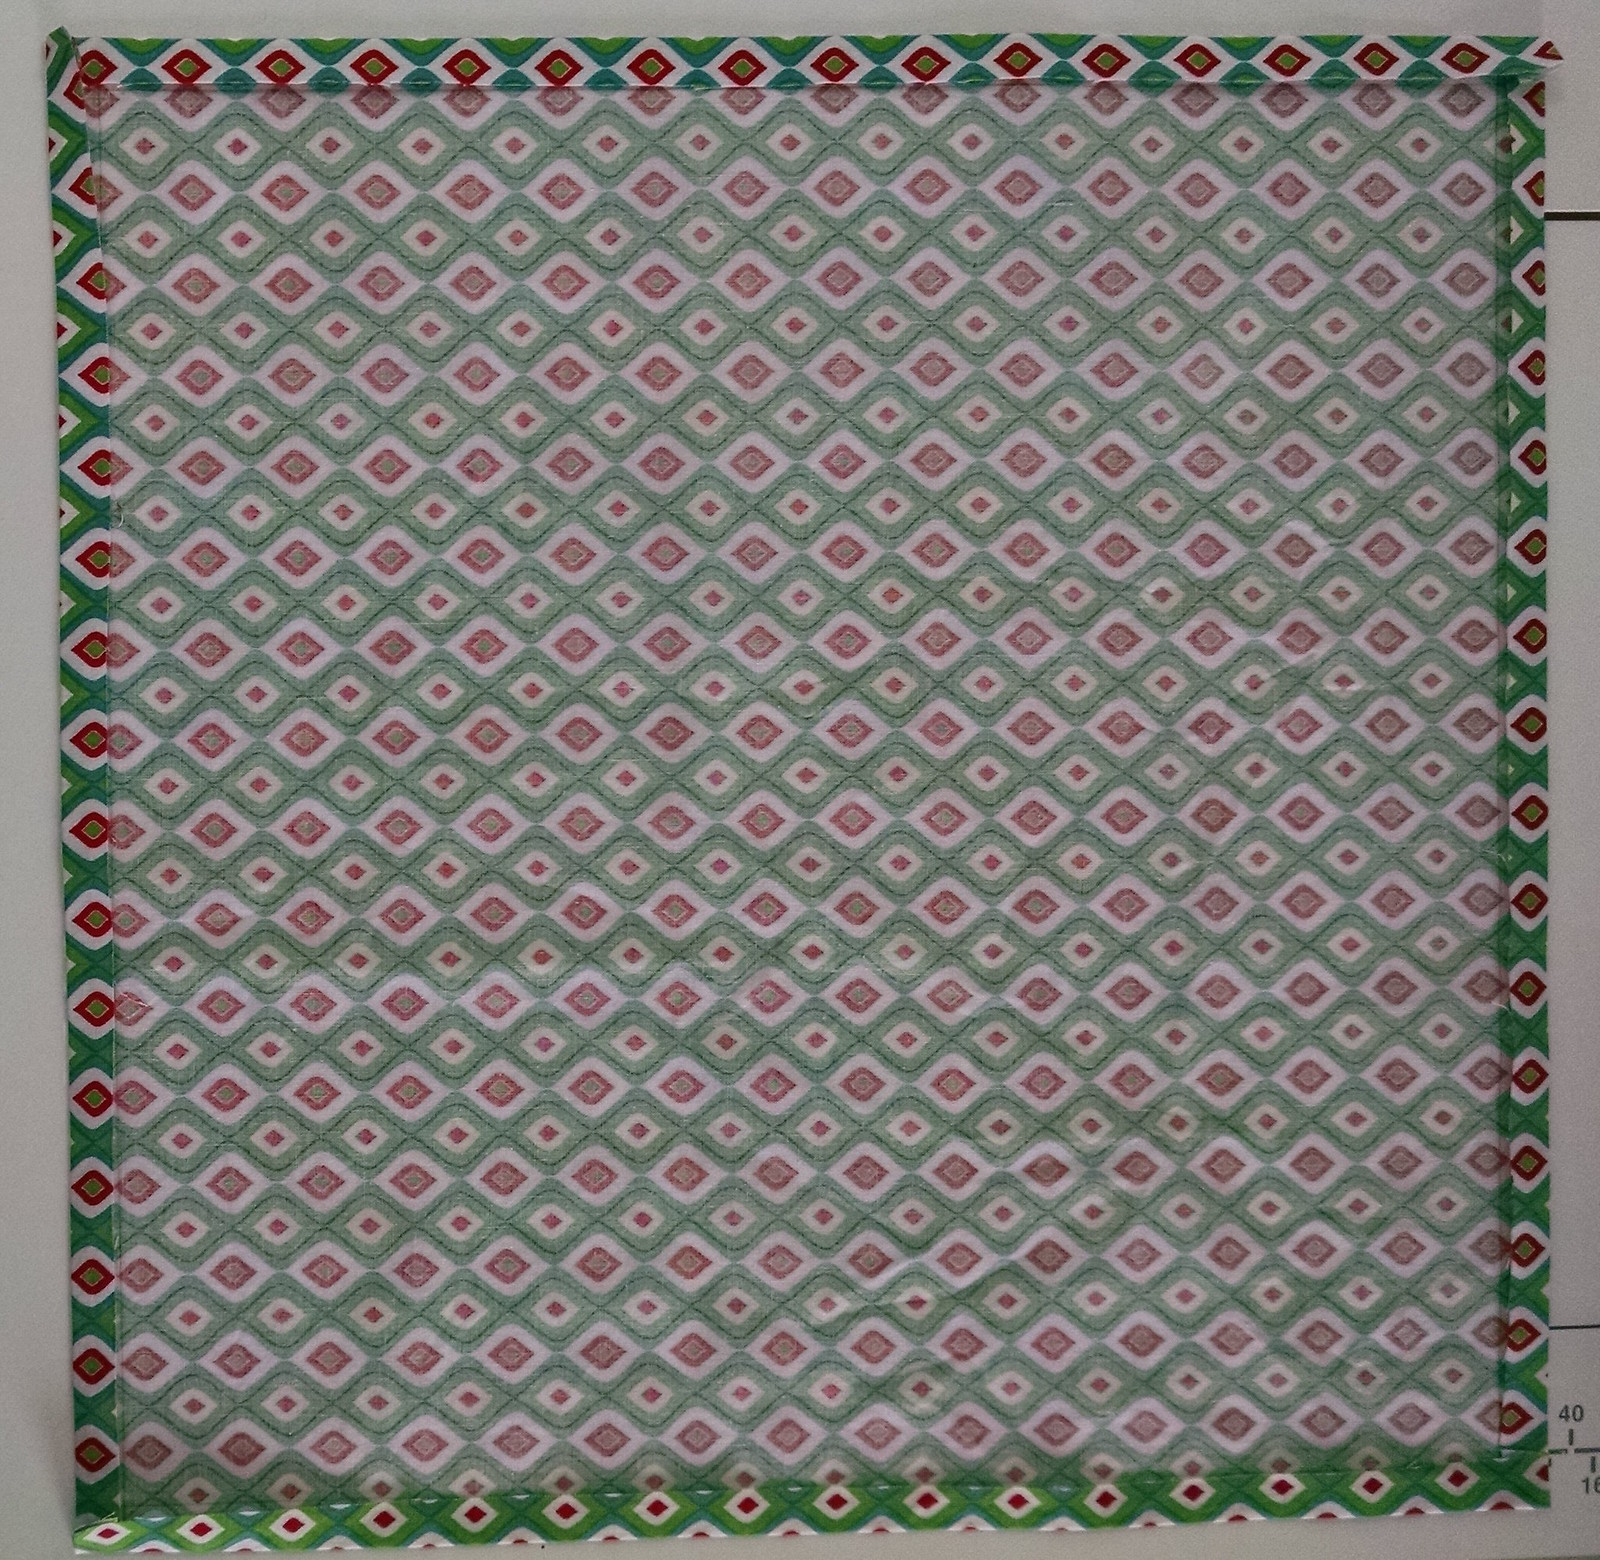
To finish the edges of the napkins, draw a line 1" from each edge of the napkin square on the wrong side of the fabric. Use a pencil or a pen that does not disappear or set with heat:

Christmas In July Tutorial for Benartex

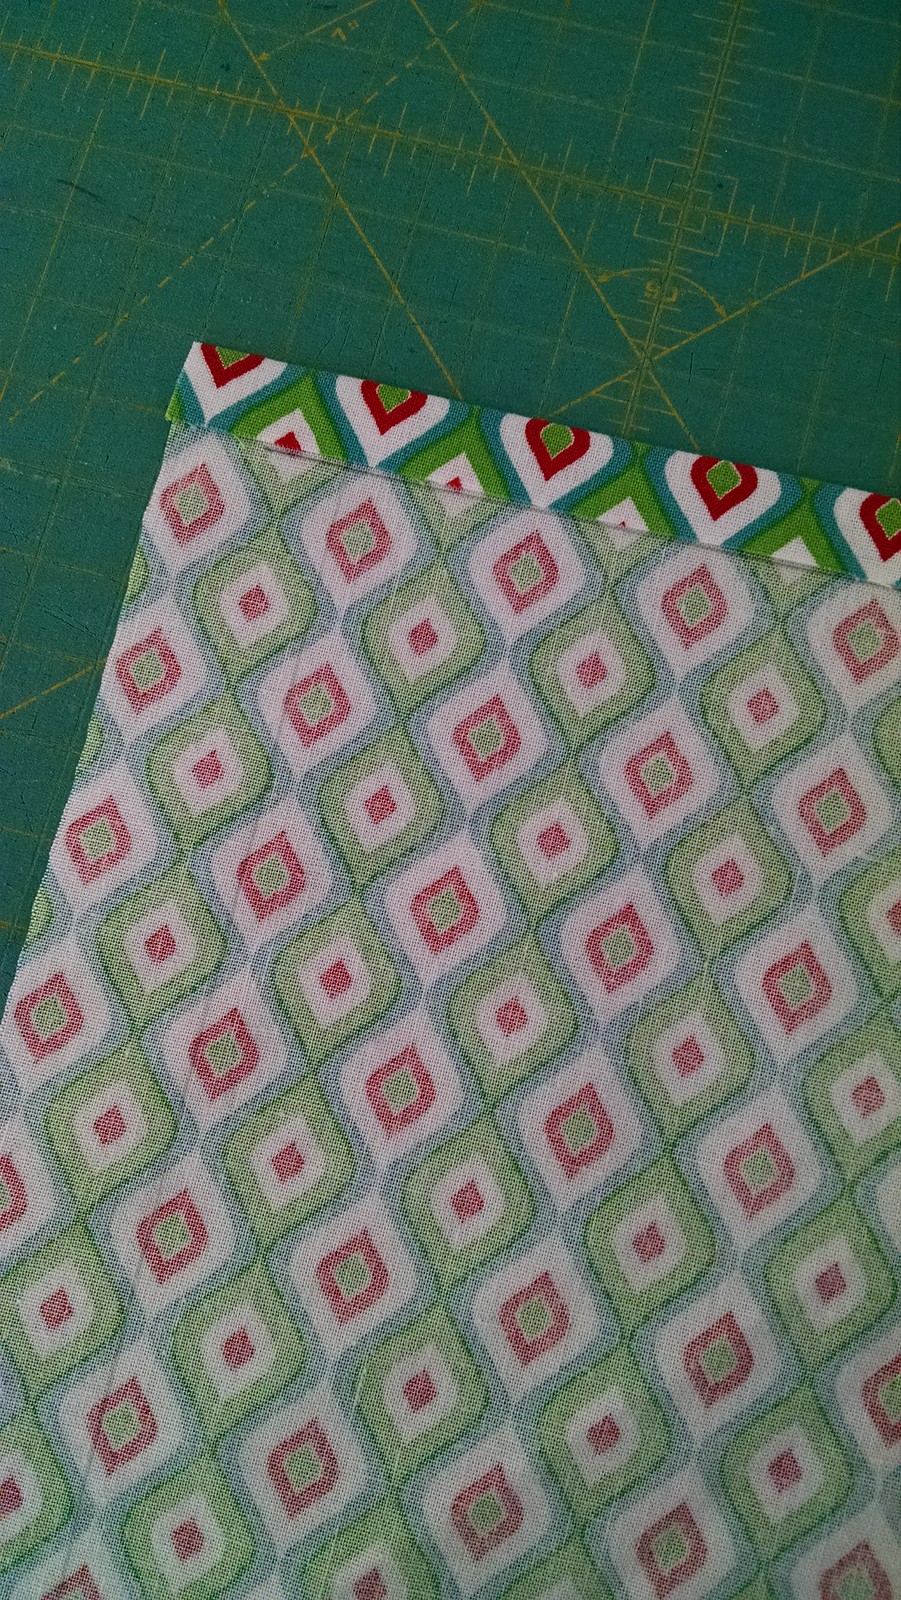
Next, fold each edge in to the drawn line. This should create a 1/2" fold (first edge is shown folded below, repeat with all 4 edges):

Christmas In July Tutorial for Benartex

Once all 4 edges are folded into the lines, fold in again by 1/2" on all 4 edges:

Christmas In July Tutorial for Benartex

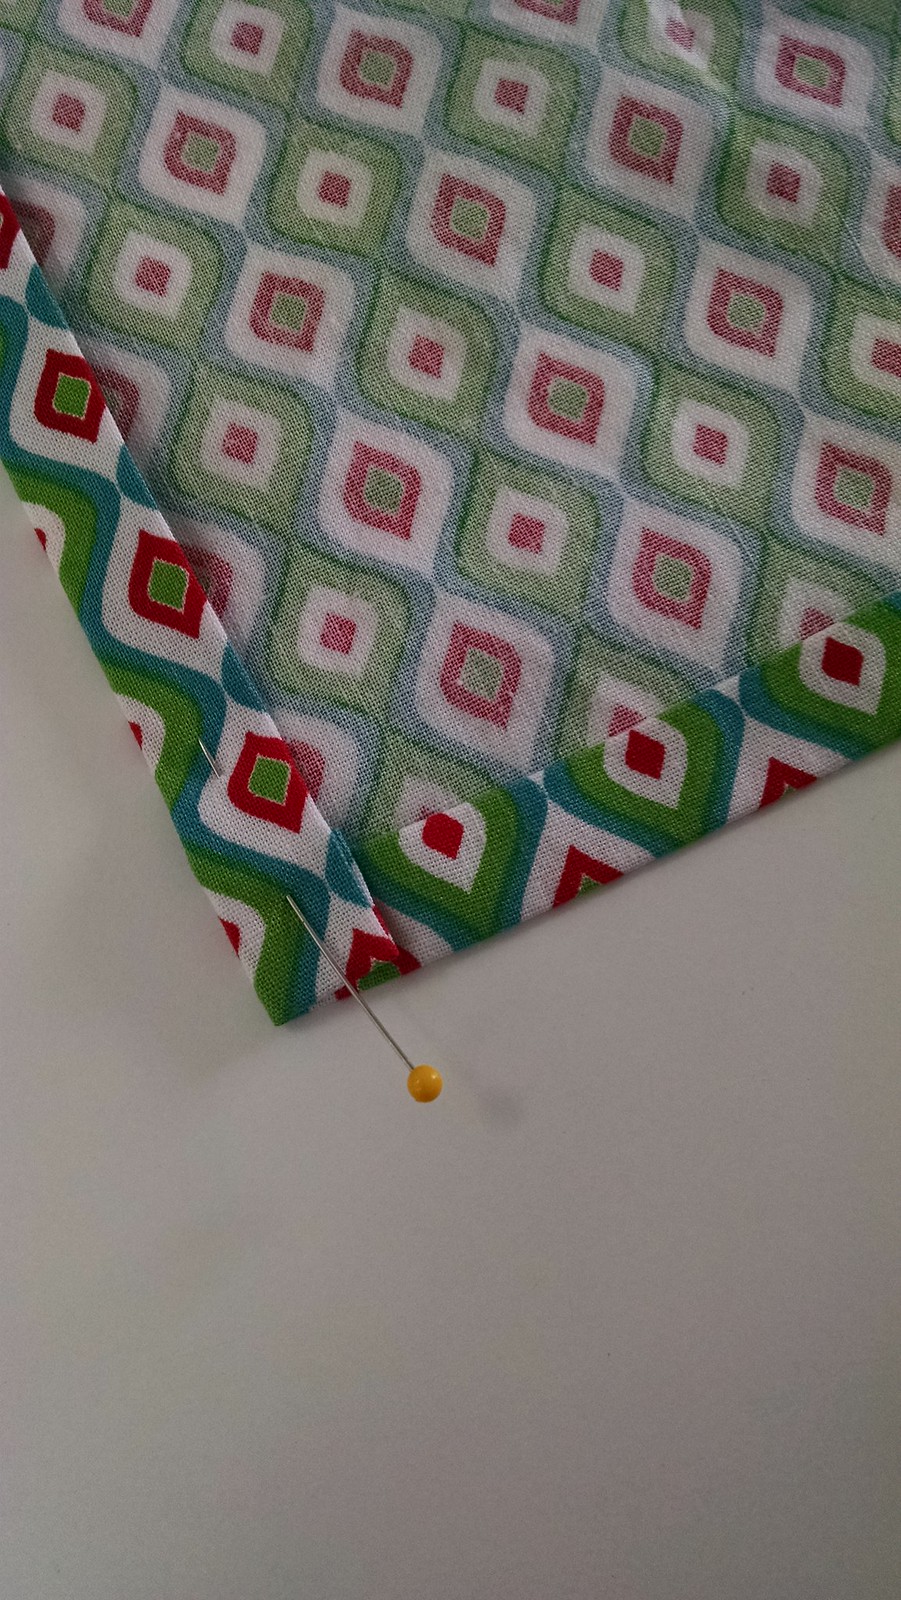
I like to pin the corners in place:

Christmas In July Tutorial for Benartex

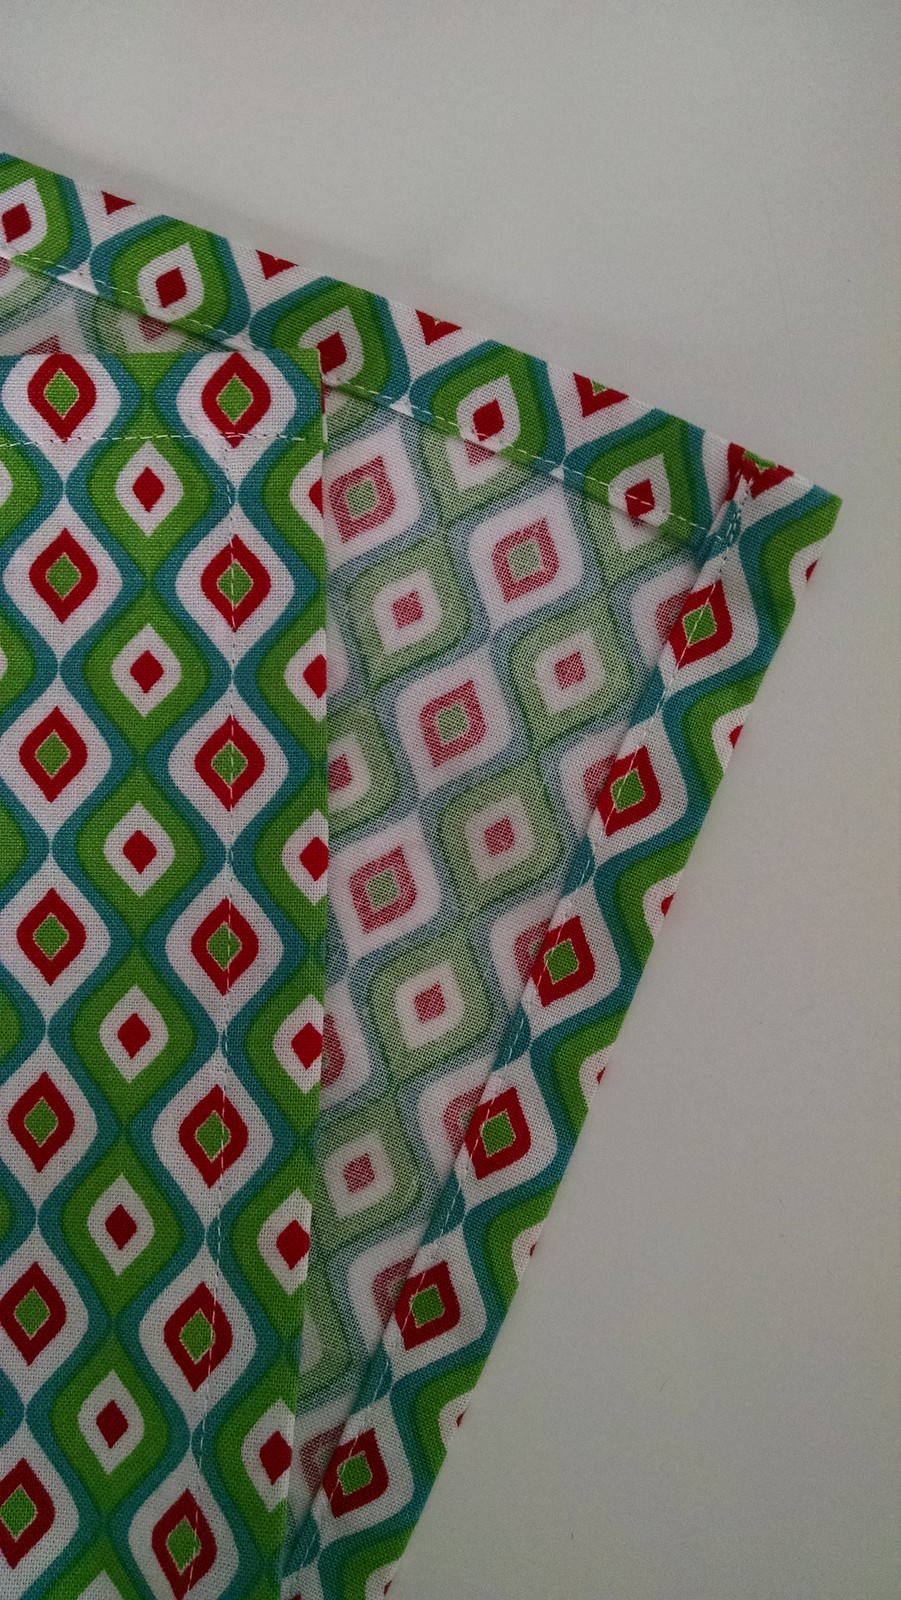
Now stitch down all of the folded edges, being sure to catch the corners in the stitching:

Christmas In July Tutorial for Benartex

Repeat to create all 4 napkins!


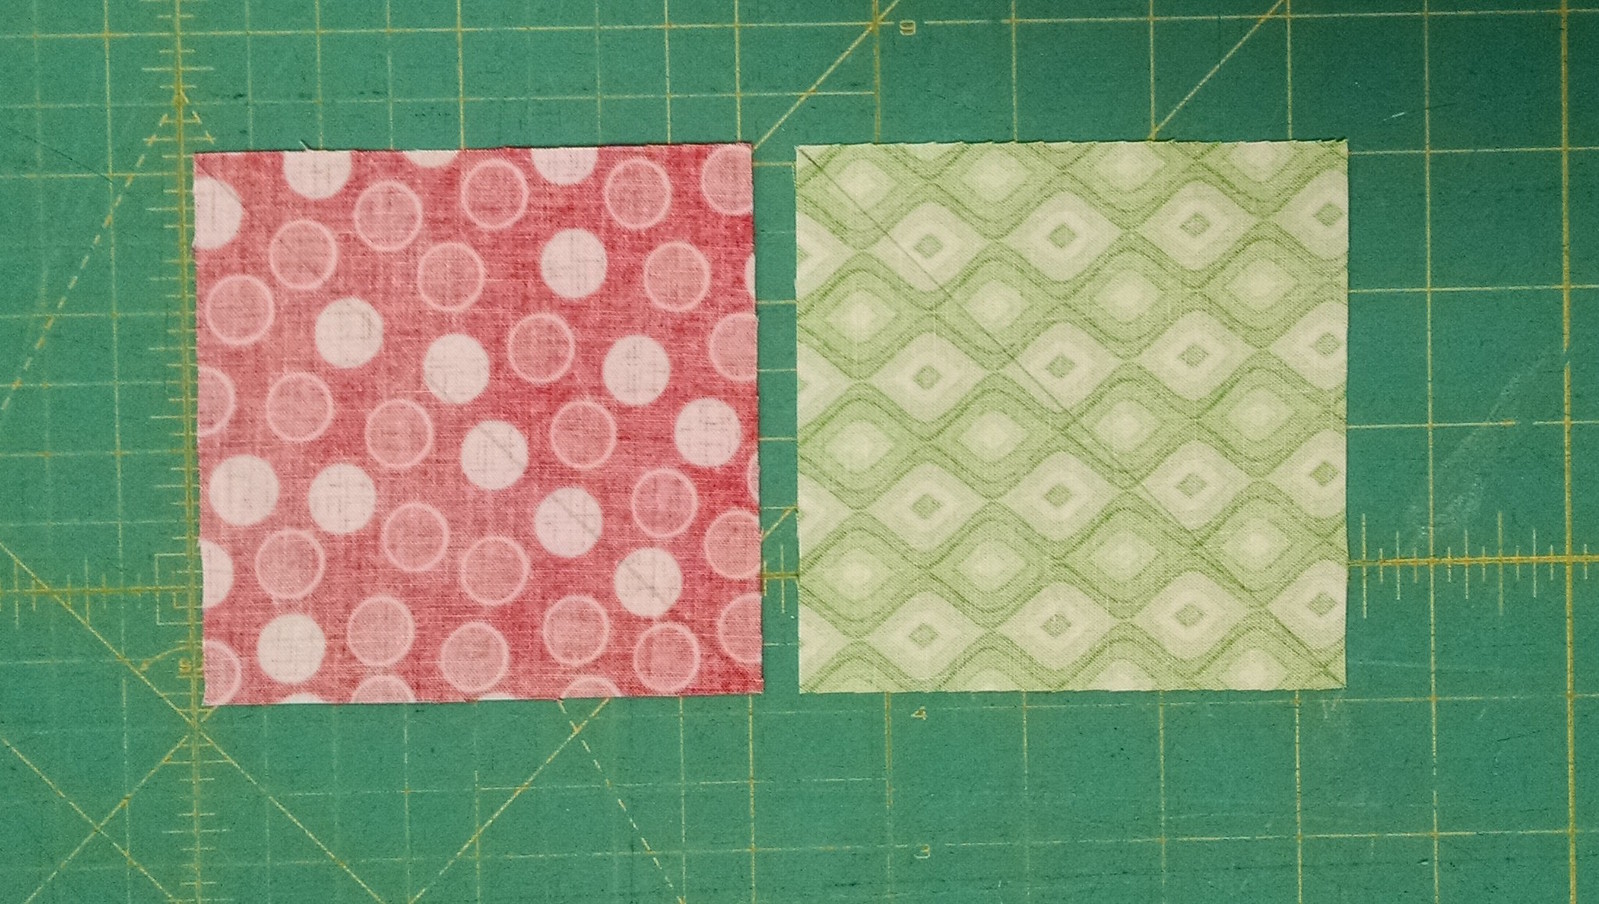
To make the table runner, begin by drawing a diagonal line on the back of each Dot Jubilee Red 4" x 4" square and each Jubilee Geo Green 4" x 4" square:

Christmas In July Tutorial for Benartex

Next pair each red 4" x 4" square with a Grey Snowman Swirl 4" x 4" square.
Pair each green 4" x 4" square with a Turquoise Snowman Swirl 4" x 4" square.
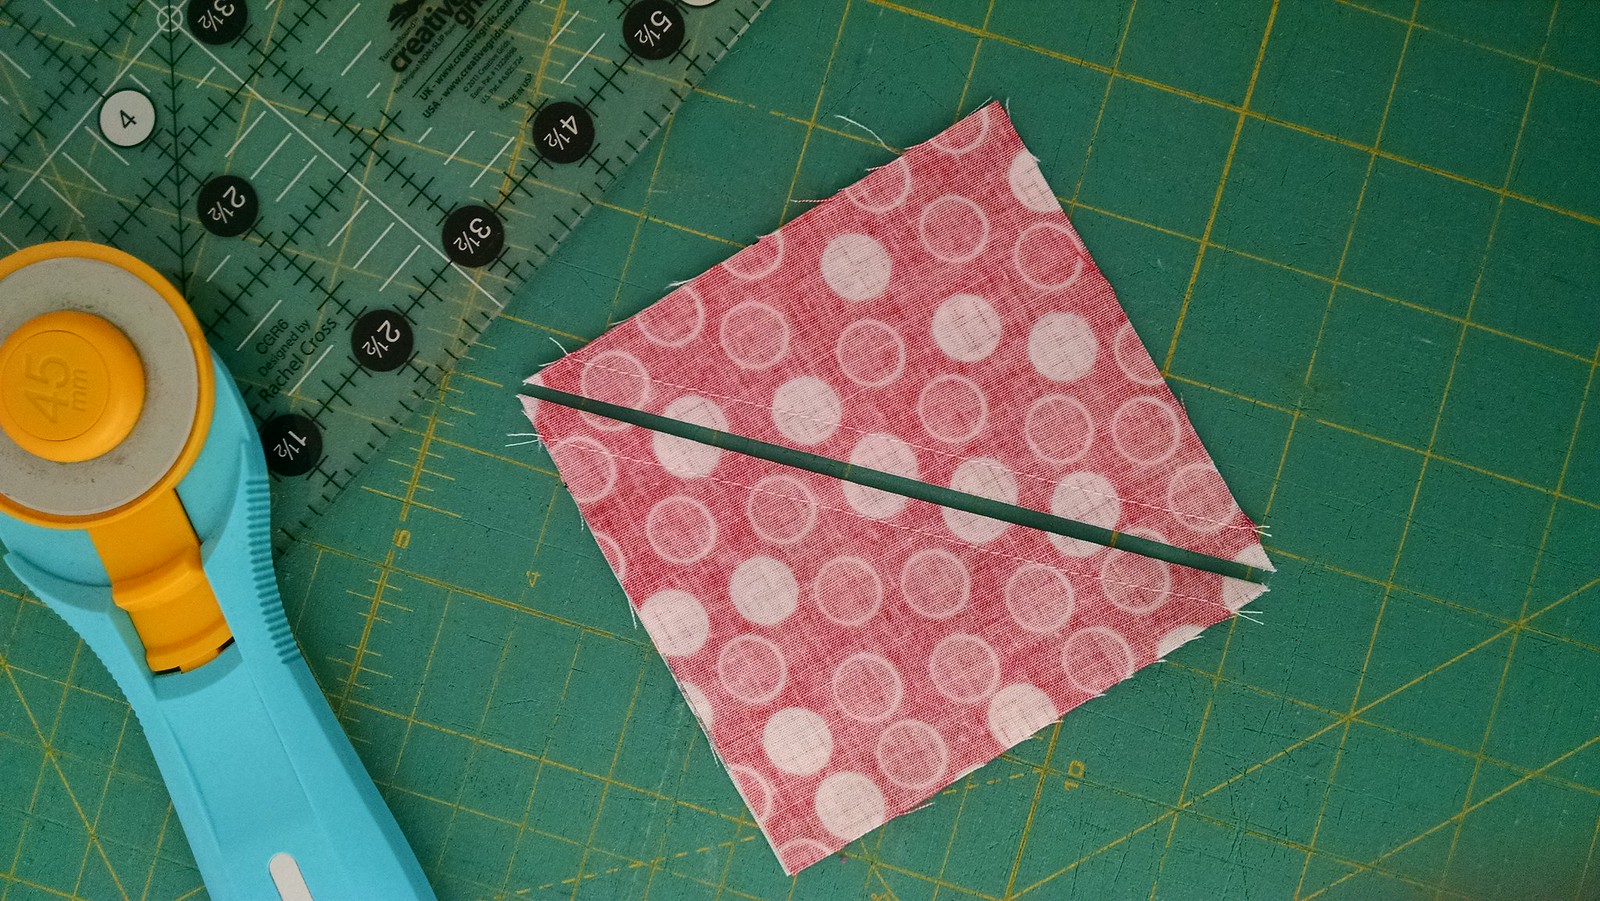
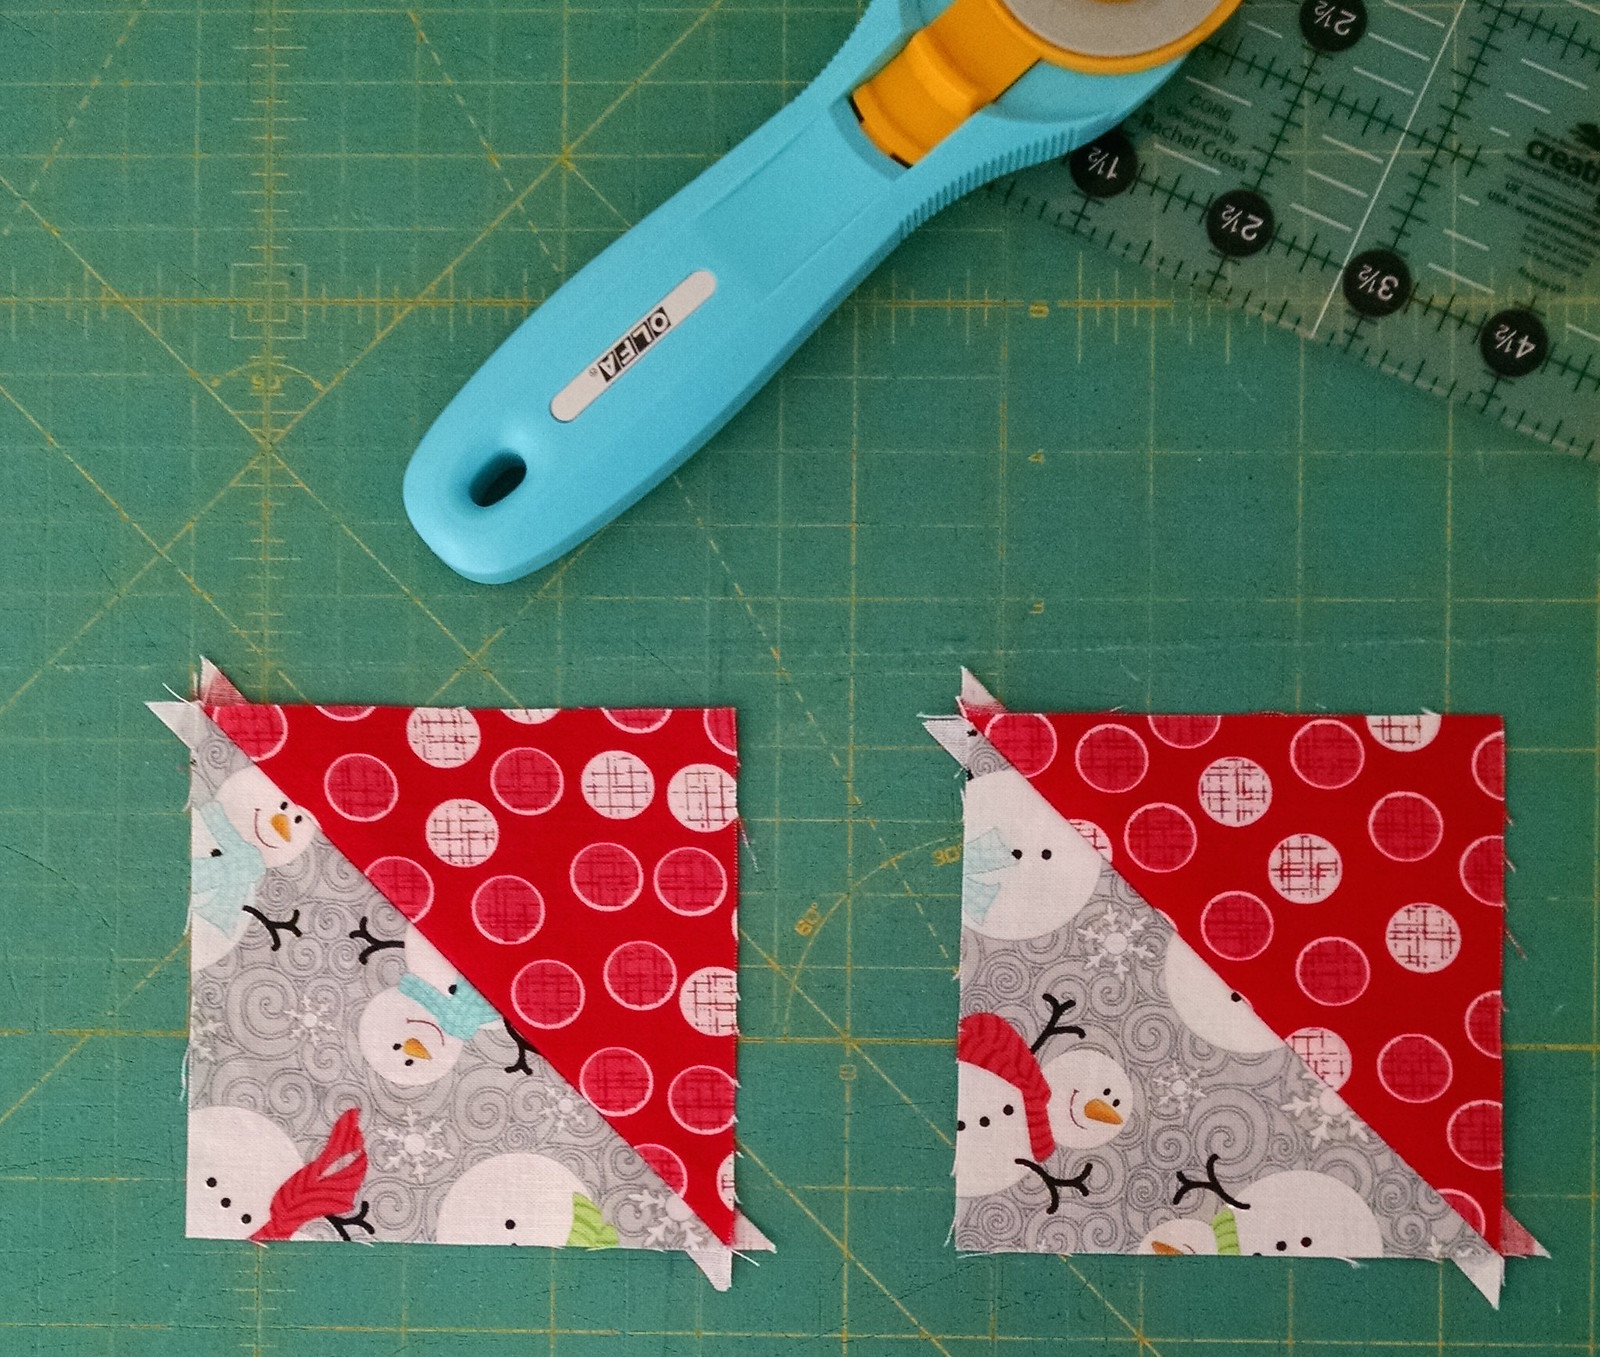
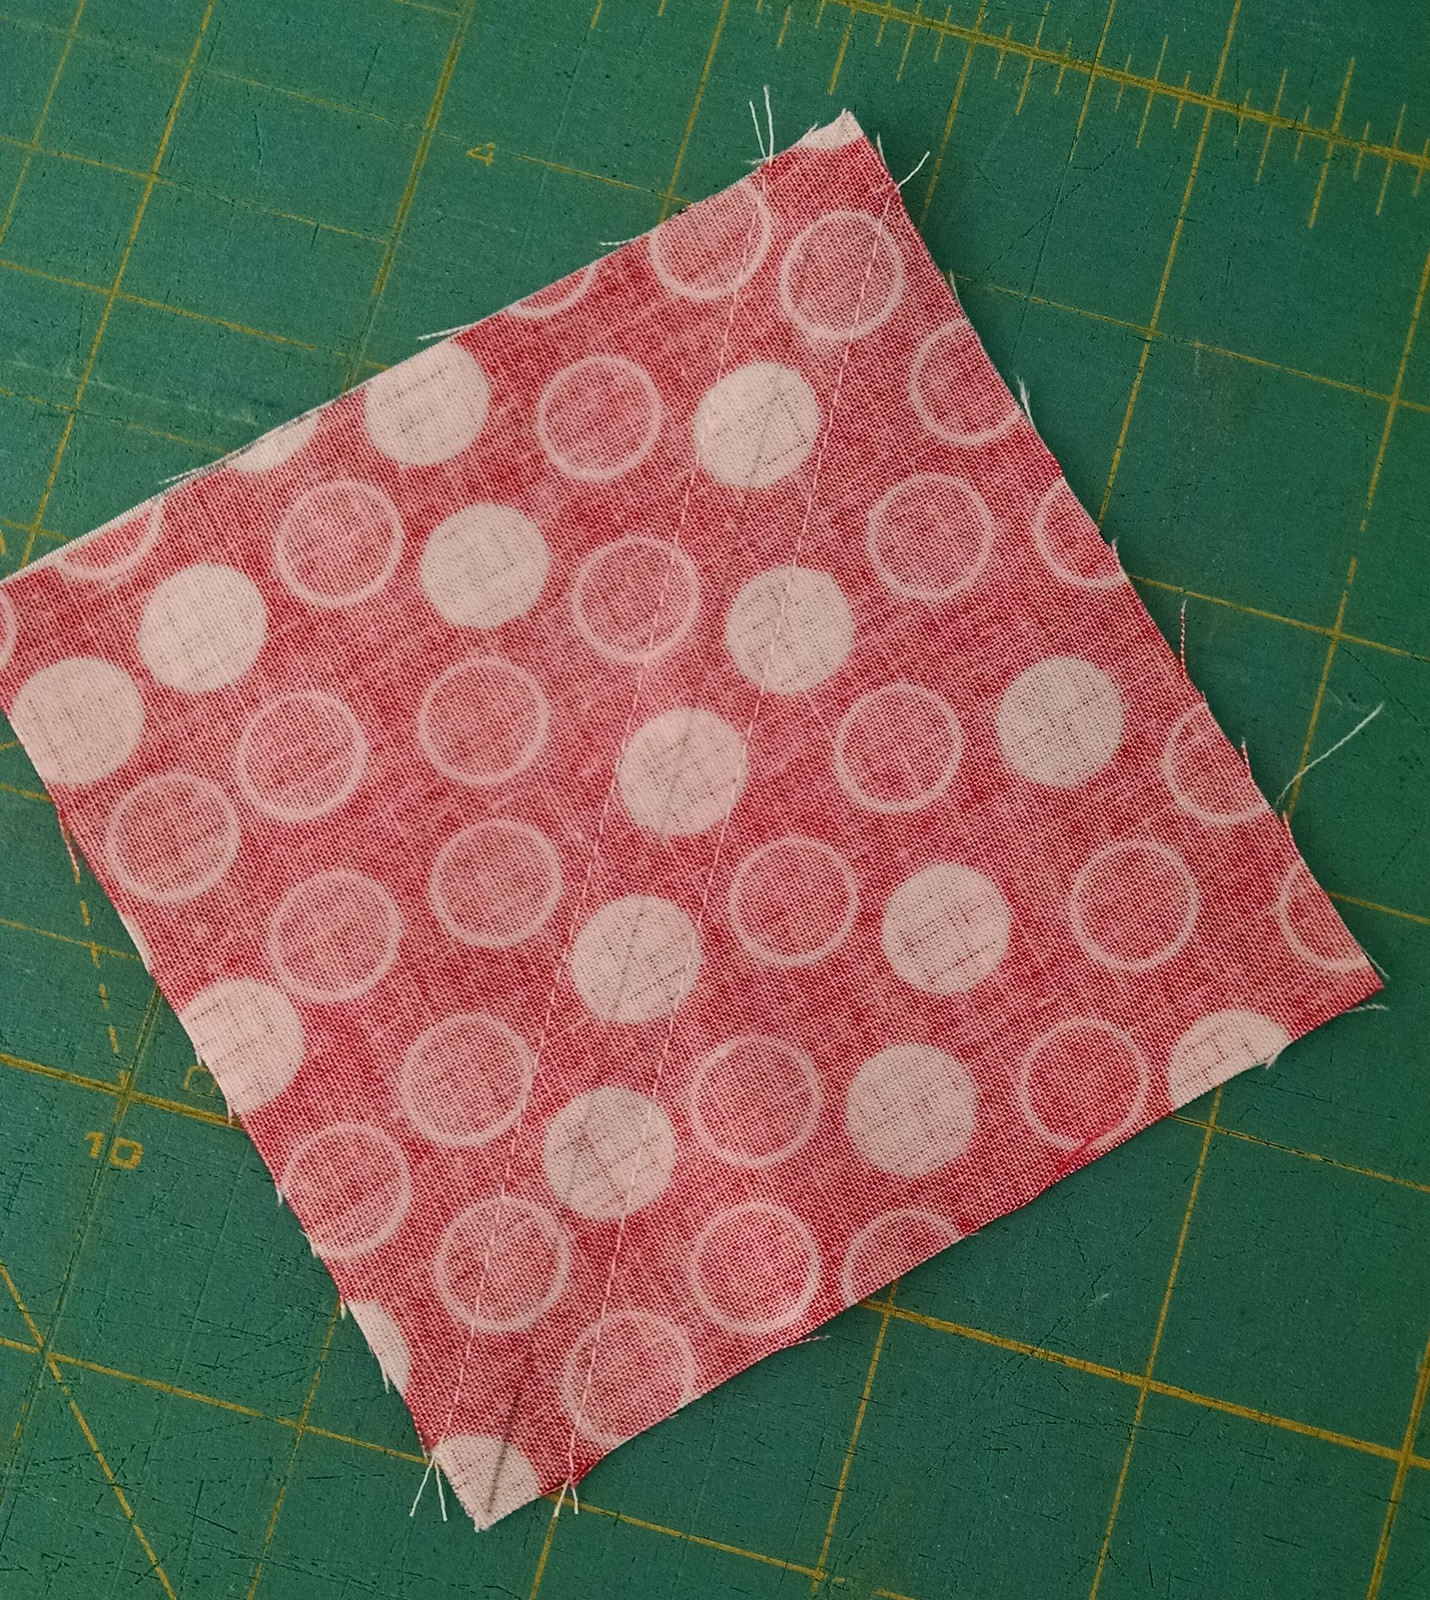
Stitch 1/4" from the both sides of the drawn line. Repeat for all of the paired squares:

Christmas In July Tutorial for Benartex

Trim the squares apart on the drawn lines:

Christmas In July Tutorial for Benartex

Press your seams (you can choose to press open or to one side):

Christmas In July Tutorial for Benartex

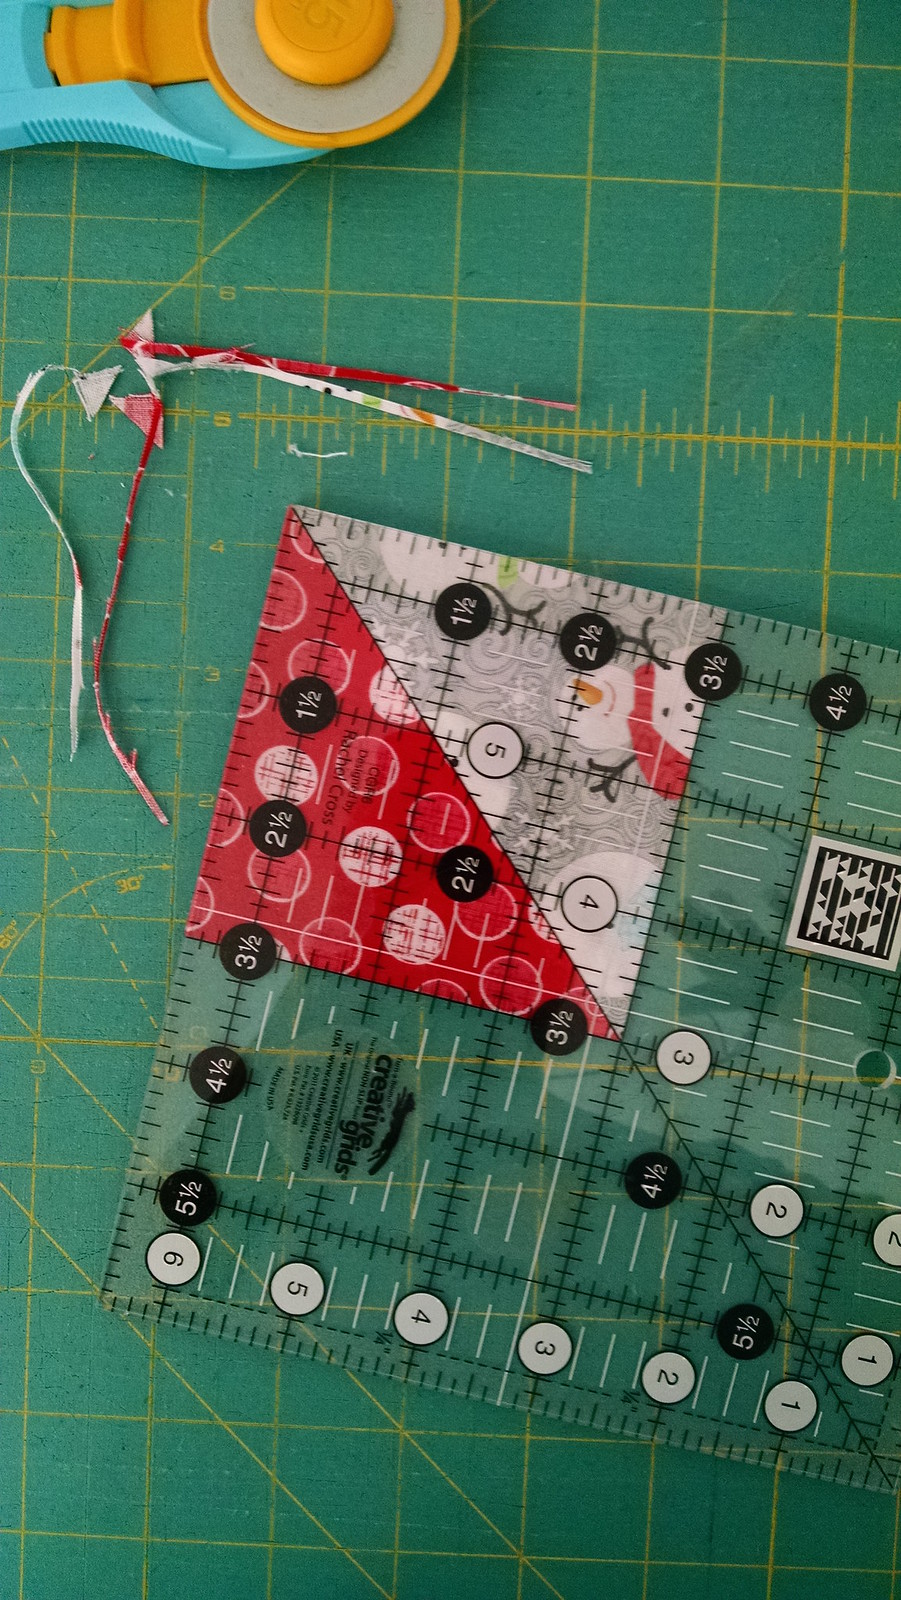
Now square up all of these half square triangles to 3 1/2" x 3 1/2". I like to use a 6 1/2" square ruler and line up the diagonal line of the ruler with the seam line of each half square triangle:

Christmas In July Tutorial for Benartex

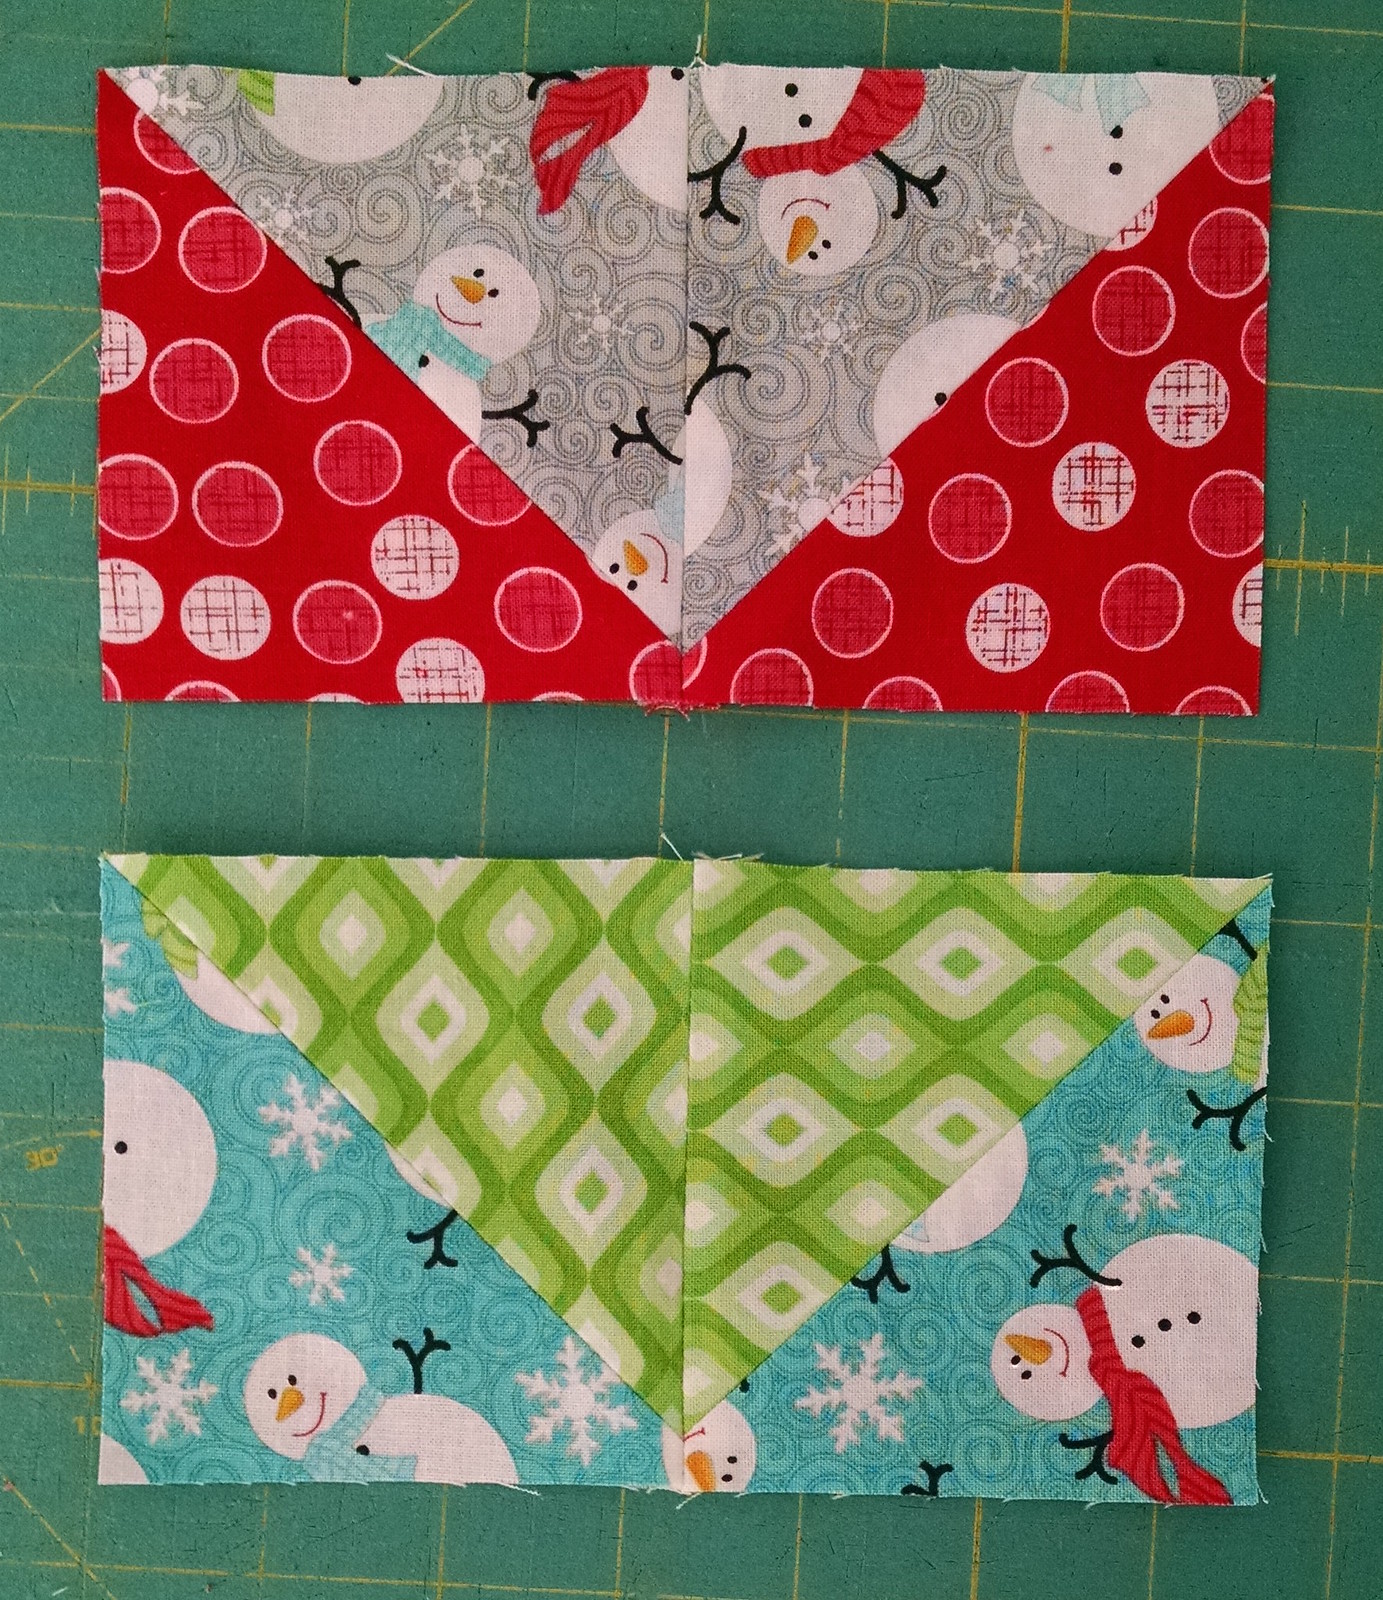
Next sew the half square triangles into pairs, as shown below. Press the seams. You will create 4 sets of the grey/red and 8 sets of the green/blue:

Christmas In July Tutorial for Benartex

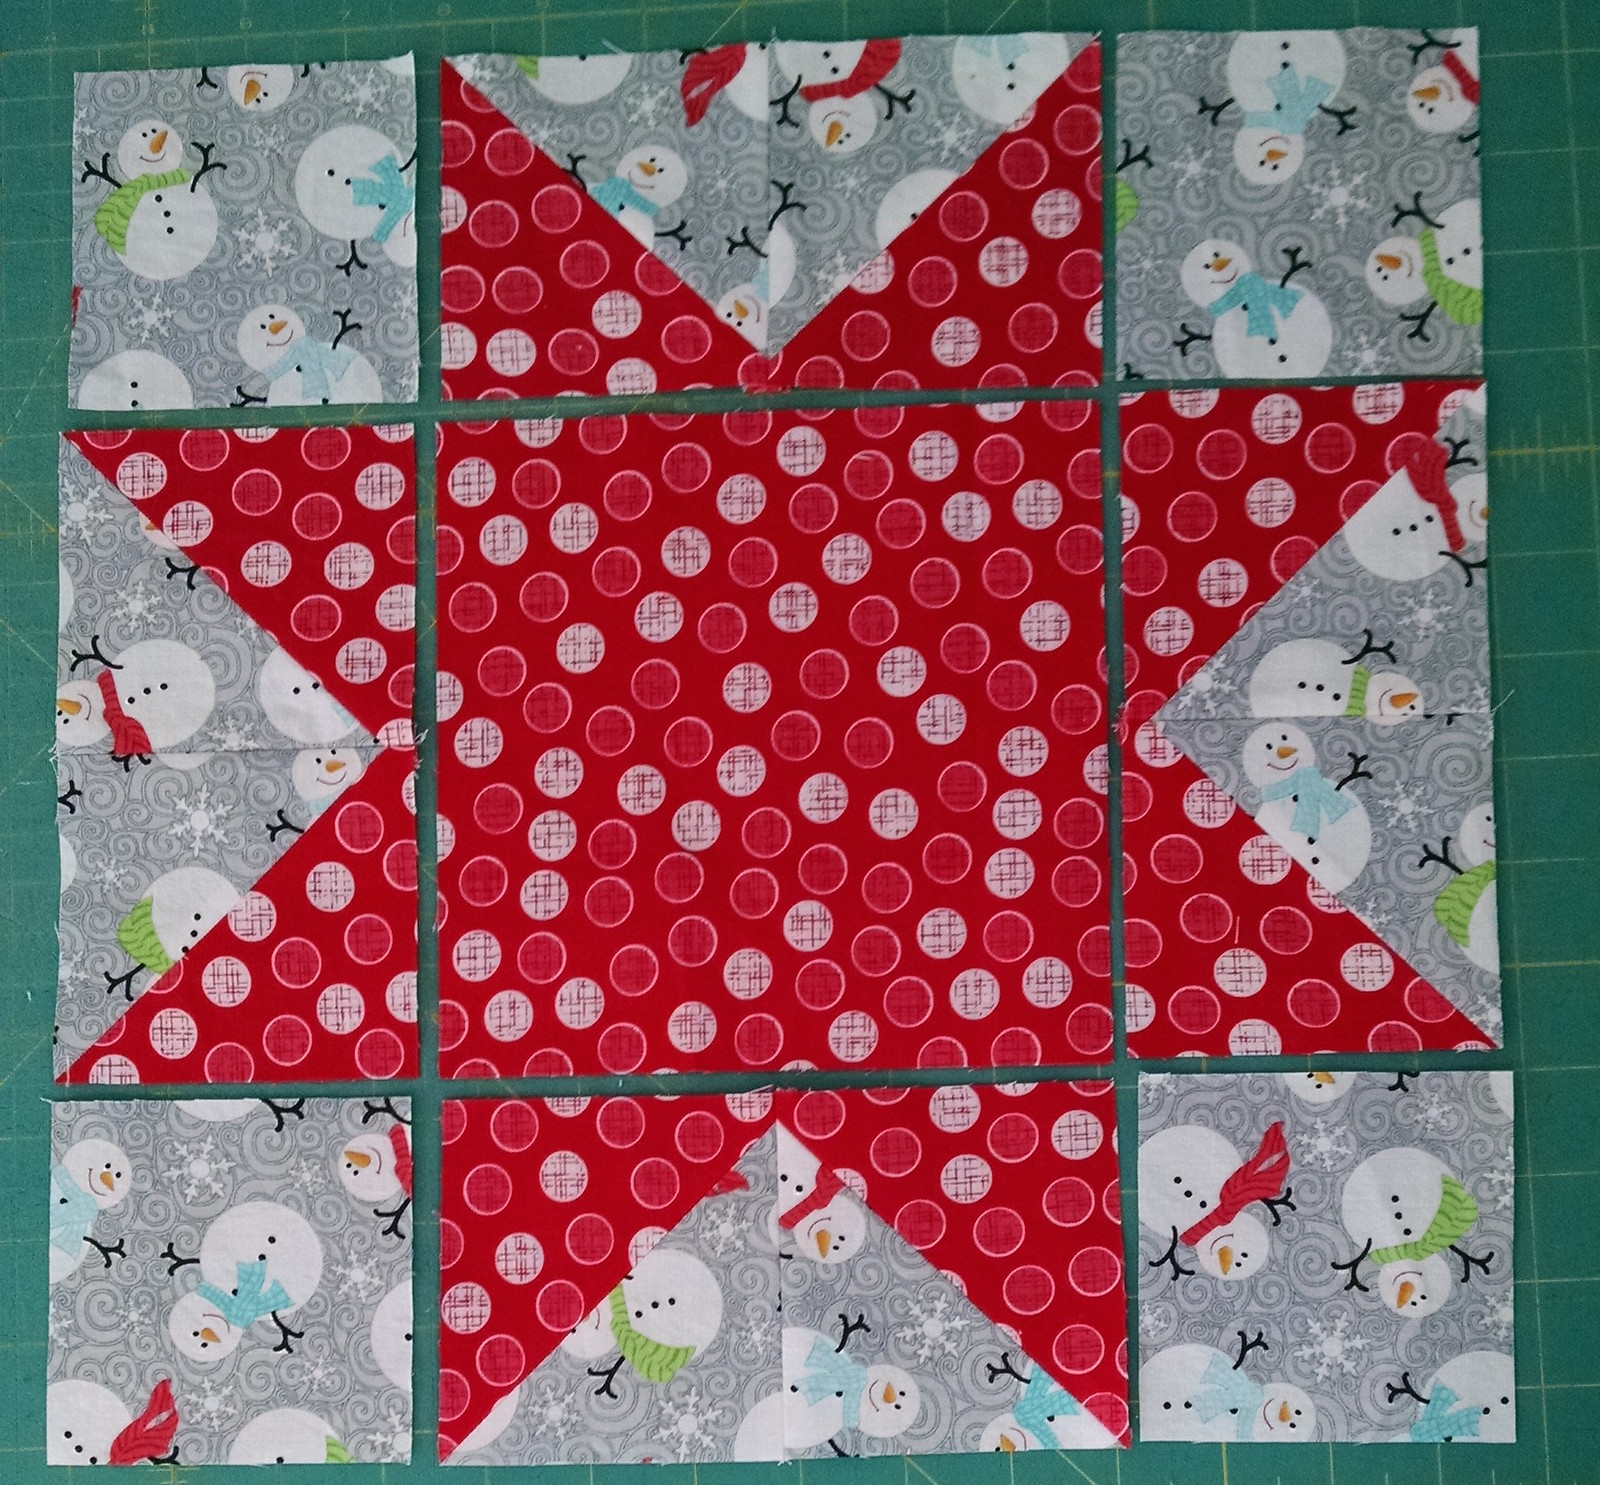
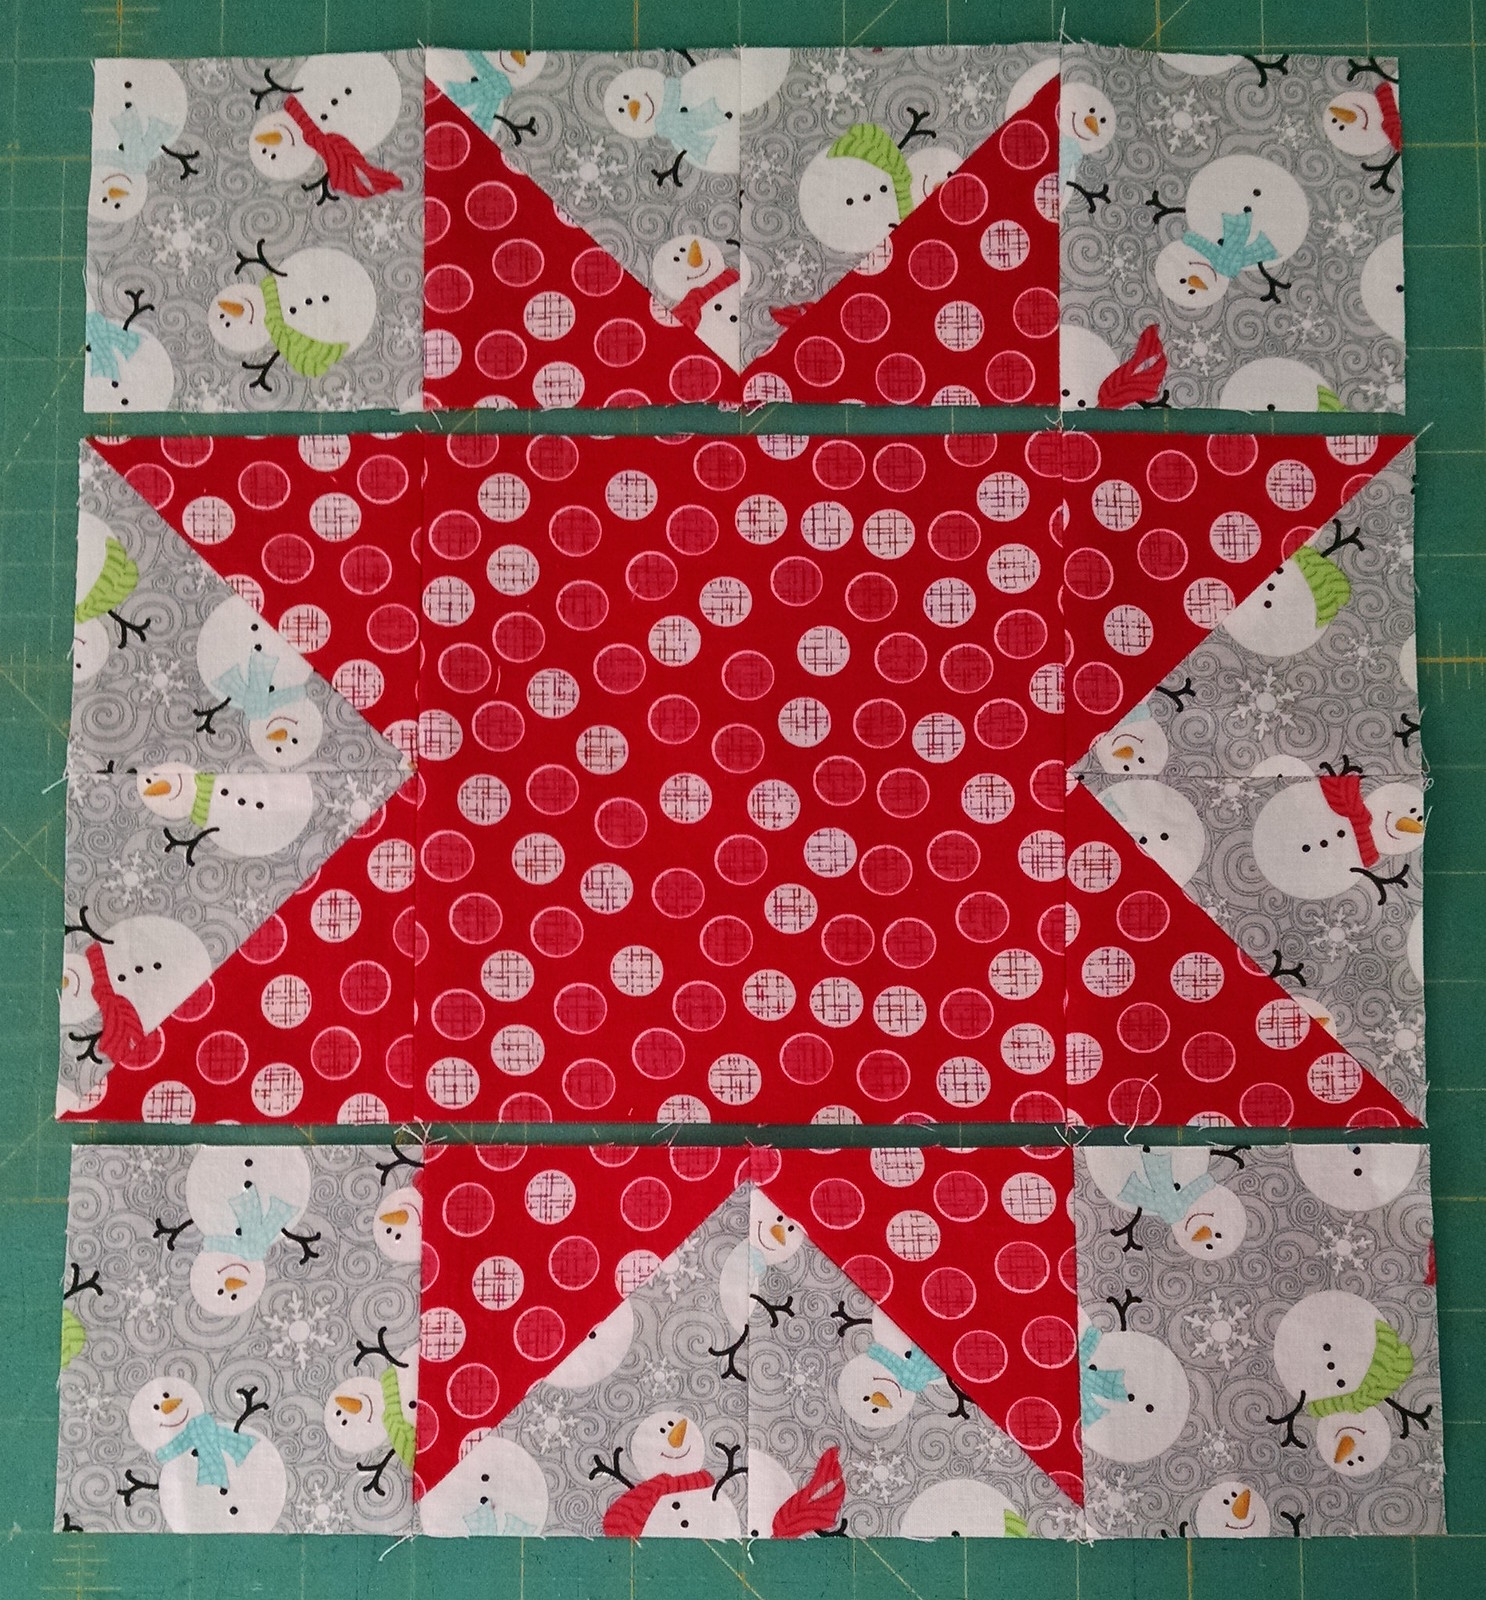
Now we will work with one block at a time. Begin by laying out the red and grey block as shown:

Christmas In July Tutorial for Benartex

Sew the pieces into rows and press the seams:

Christmas In July Tutorial for Benartex

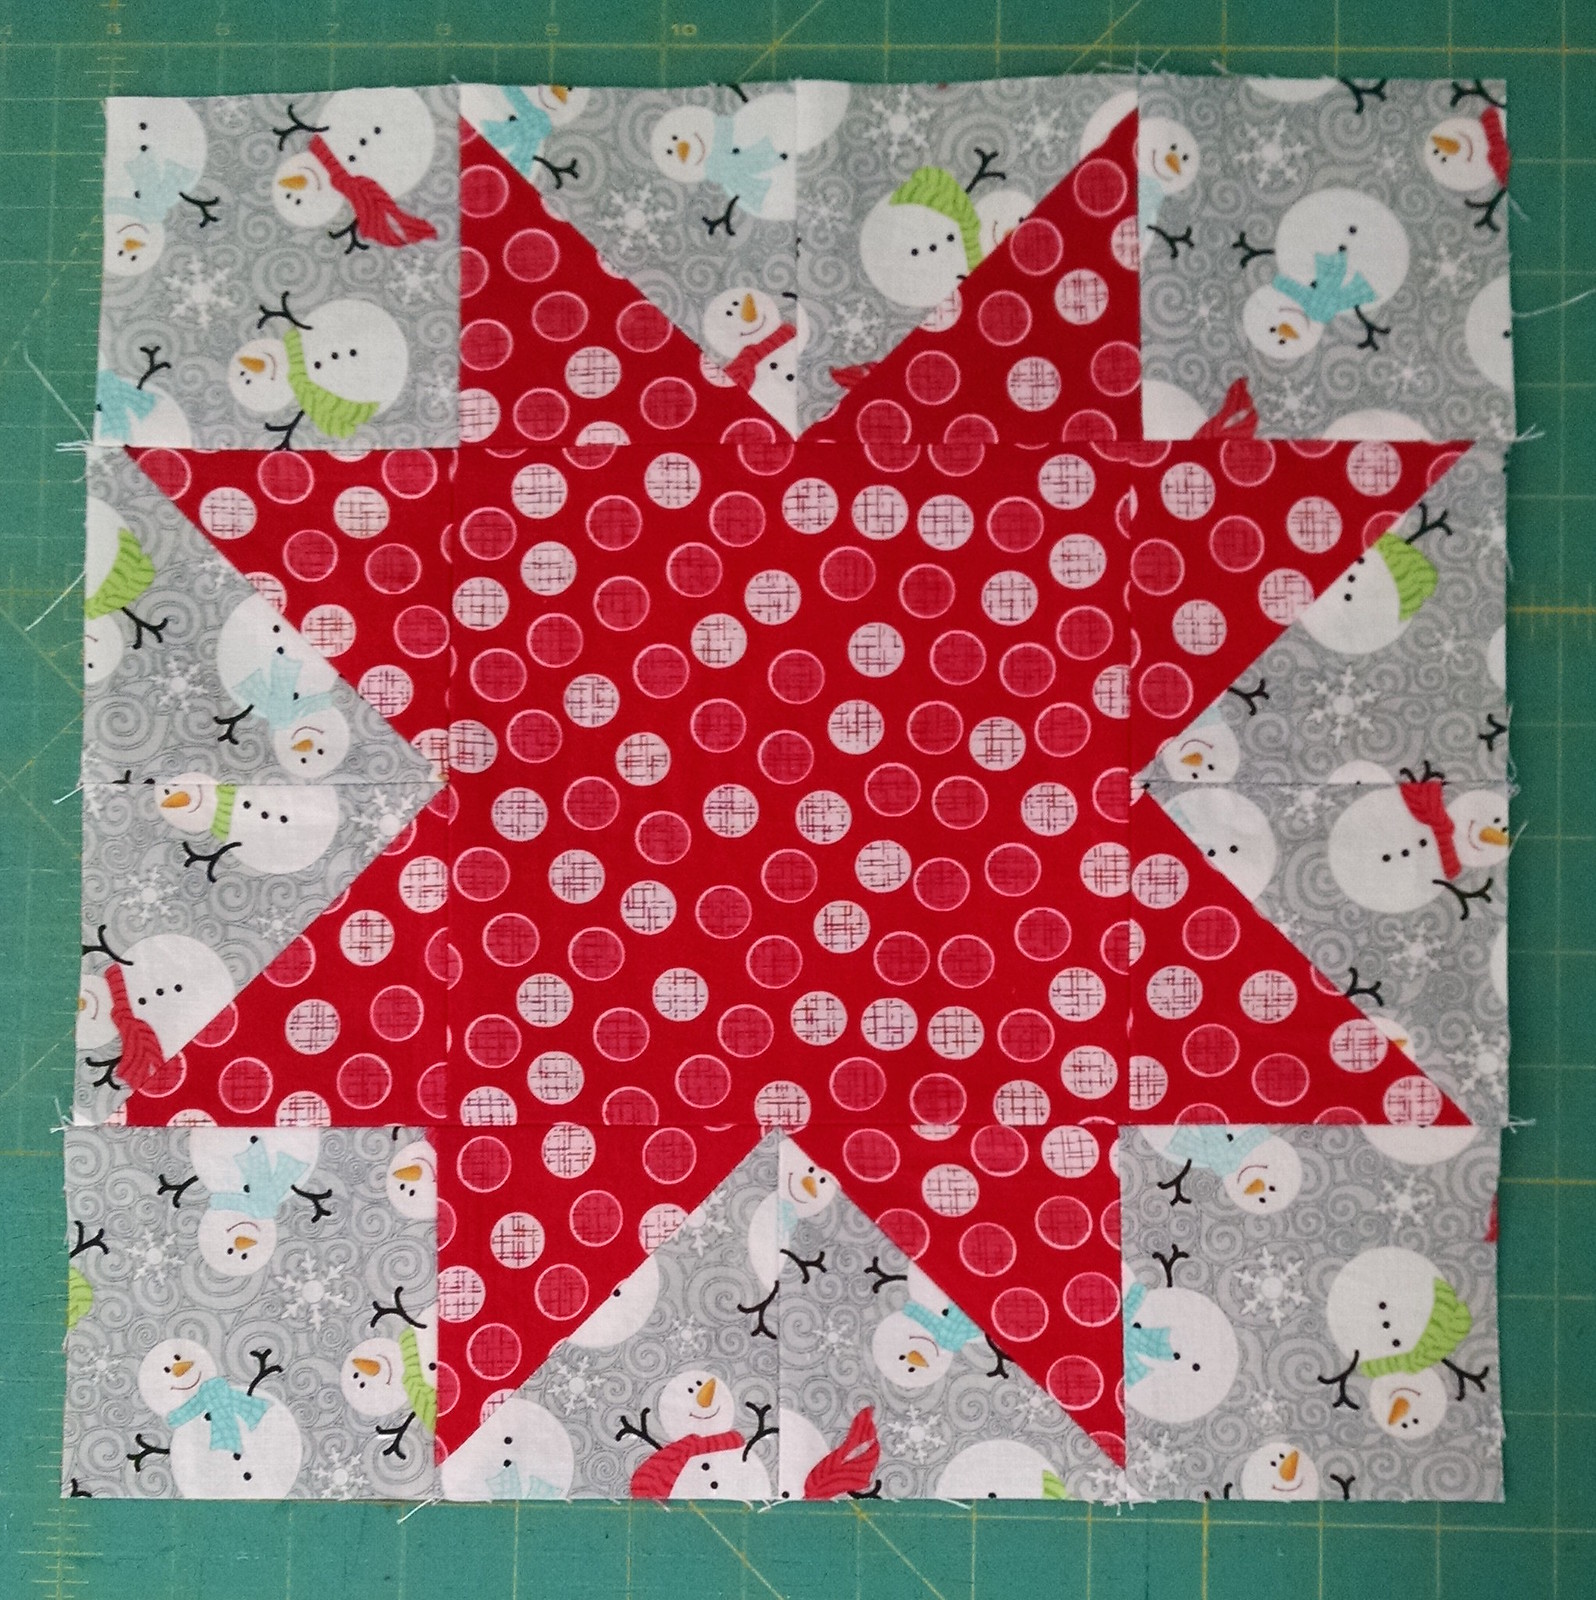
Next sew the rows together and press the seams to complete the block:

Christmas In July Tutorial for Benartex 

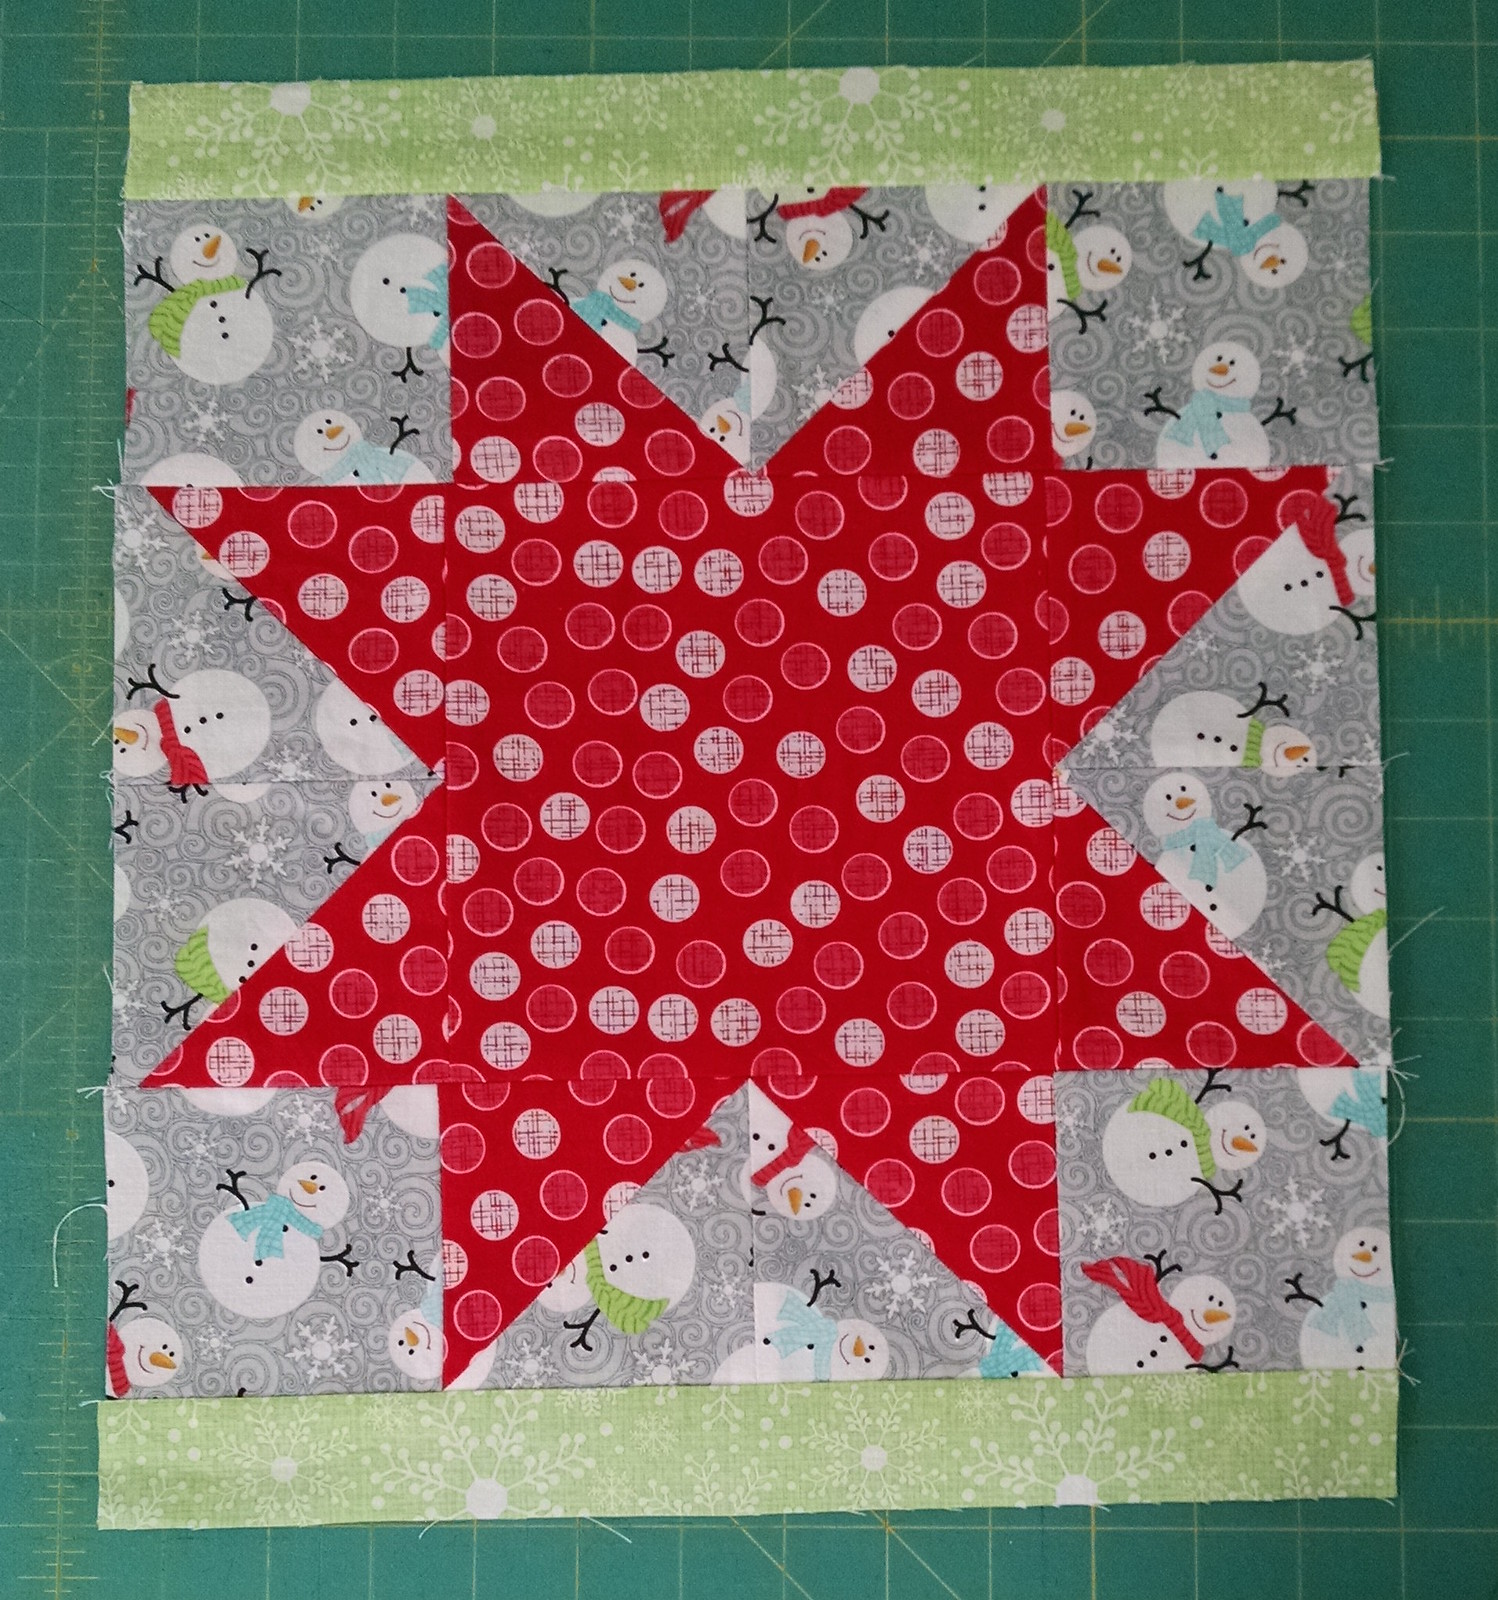
Attach a 1 1/2" x 12 1/2" Frosty Snowflake Green strip to the top and bottom of the block. Press seams:

Christmas In July Tutorial for Benartex

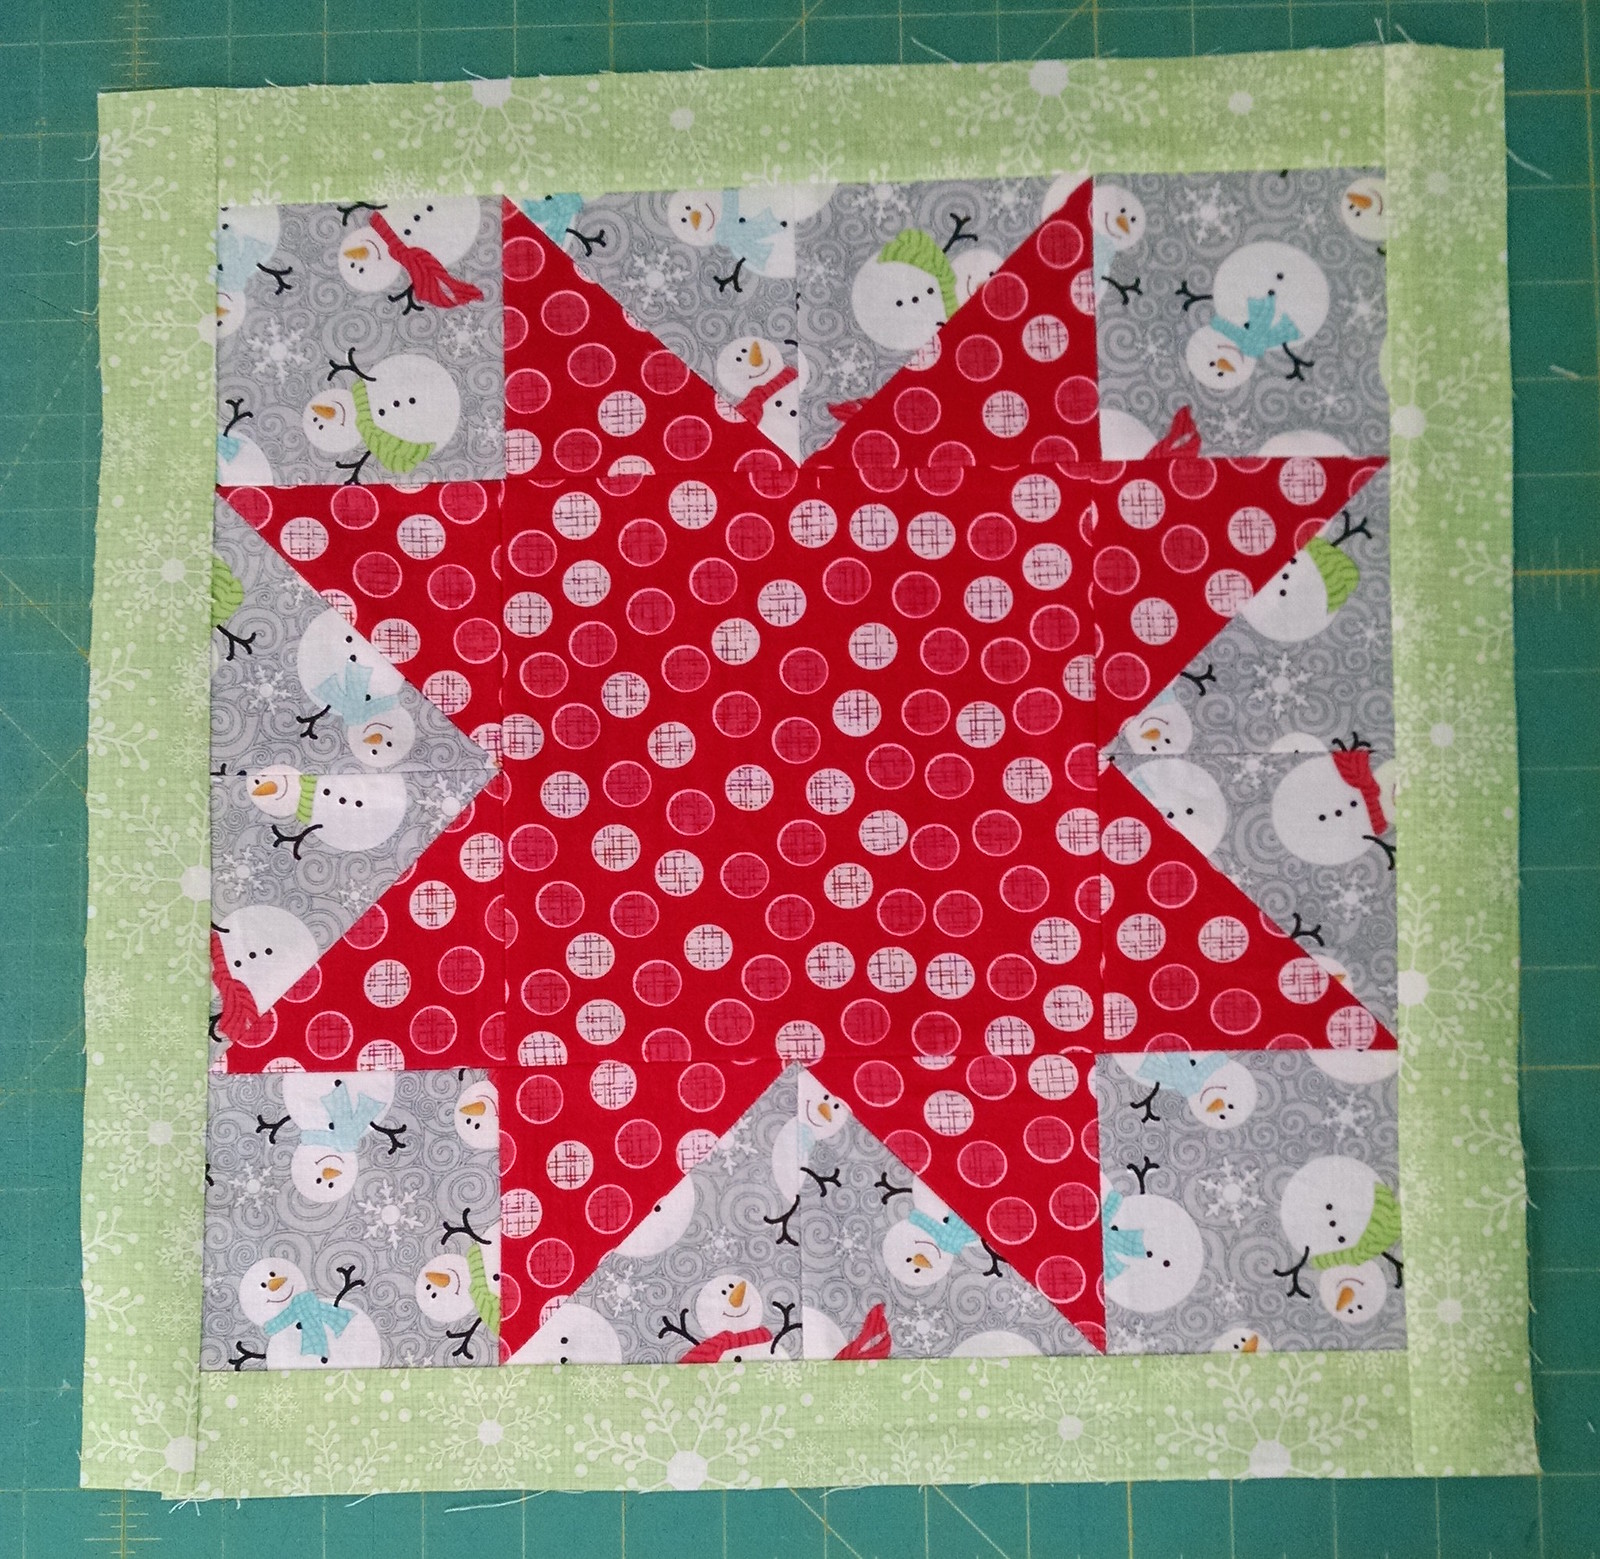
Now attach a 1 1/2" x 14 1/2" Frosty Snowflake Green strip to each side of the block. Press seams:

Christmas In July Tutorial for Benartex

Repeat the above steps to create TWO blue/green blocks with red borders.
Stitch the 3 blocks together with the red/grey block in the center and press the seams:

Christmas In July Tutorial for Benartex

For the backing, the remaining piece of Jubilee Geo Grey fabric must be cut into 2 pieces measuring approximately 28" x 20" and pieces together along the 20" sides to create a piece measuring approximately 55" x 20".
At this point you can finish your table runner with a simple backing or quilt it. I prefer to quilt my table runners.

To finish the table runner with a bound edge, sew together the 3 binding strips of Jubilee Geo Grey and bind using your favorite method!

Christmas In July Tutorial for Benartex

Look at that, it's only July and you've got a Christmas decoration and/or gift all ready to go!

Thanks Nikki!
Head over to Nikki's blog to enter for a chance to win some Frosty Forest fabrics (plus two of Cherry's patterns) for yourself!


And be sure to stop back each day of our blog hop for a different Christmas in July tutorial featuring our holiday fabrics!


Here's our schedule:

Monday: Santa Sack by Chris from Made by Chrissie D using Happy Holidays Snowmen
Tuesday: Tree Skirt by Debby from Debby Kratovil Quilts using Homespun Holiday
Wednesday: Throw Pillow by Kelly from My Quilt Infatuation using Ornamental Splendor
Thursday: Wonky Star Placemats by Kristen from KD Quilts using Santa's Here
Friday: Christmas Card Organizer by Melissa from My Fabric Relish using Frosty Forest
MondayTable Runner and Napkins by Nikki from The Girl Who Quilts using Frosty Forest
Tuesday: Wintry Wall Banner by Wendy from Ivory Spring using Shades of Winter
Love It? Share It! Facebook Twitter Google Pinterest Email

Monday, October 6, 2014

Feels Like Fall Blog Hop: Day 4

Welcome back for Day 4 of our Feels Like Fall Blog Hop! Today we're sharing a reversible table runner made using Greta Lynn's Fall Festival collection from Kanvas. This runner is the perfect design to showcase a large focal print, and the simple pieced back is a fun way to finish it off and provide a different look for your table, simply by flipping it over. Scroll down to the bottom of the post to find out how you can enter to win a fat quarter bundle of Fall Festival.

Hello! Fall Festival is just the essence of fall--so many great prints to choose from, plus matching plaid coordinates. We used the adorable owl print as the focal print for the runner, but the fruit print, leaves, or harvest print would work equally well. 


This tutorial uses the pillowcase method of finishing. If you'd prefer to quilt the runner and use a traditional binding, we've provided alternate measurements for the backing; you'll also need (5) 2-1/4" x 42" binding strips to finish it up.

Let's get started!


Materials:
1/2 yard green plaid
1/4 yard cream plaid
1/4 yard red plaid
2/3 yard owl print
1/6 yard each apple print, leaf print and harvest print
1 yard solid black (1-1/4 yards if not using the pillowcase method)
20" x 72" batting


Cutting:
From the green plaid:
Cut (3) 2-1/2" x 42" strips
Cut (2) 2-1/2" x 12" strips
Cut (2) 2-1/2" x 8" strips
Cut (1) 3-1/2" x 42" strip (for runner back)

From the cream plaid:
Cut (2) 2-1/2" x 11-1/2" strips
Cut (2) 2-1/2" x 5-1/2" strips
Cut (1) 3-1/2" x 42" strip (for runner back)

From the red plaid:
Cut (2) 2-1/2" x 7-1/2" strips
Cut (2) 2-1/2" x 5-1/2" strips
Cut (2) 2-1/2" x 4-1/2" strips
Cut (1) 3-1/2" x 42" strip (for runner back)

From the owl print:
Cut (2) 5-1/2" x 42-1/2" strips
Cut (4) 5-1/2" x 8" pieces with owls running vertically

From the apple print, leaf print, and harvest print:
Cut (1) 3-1/2" x 42" strip from each (for runner back)

From the black solid:
Cut (1) 4-1/2" x 42-1/2" strip
Cut (2) 4-1/2" x 8" strips
Cut (2) 2-1/2" x 8" strips
Cut (2) 2-1/2" x 5-1/2" strips
Cut (2) 2-1/2" x 4-1/2" strips
Cut (3) 6-1/2" x 42" strips (for runner back)*
*Cut these strips 9" wide if not using the pillowcase method.


Make the Runner Front
1. Sew a 2-1/2" x 4-1/2" red plaid strip and black strip together. Sew a 2-1/2" x 5-1/2" red plaid strip and black strip together. Make 2 of each.

2. Sew the 4-1/2" long red plaid/black unit to the 4-1/2" x 8" black piece. Sew the 5-1/2" long red plaid/black unit to a 5-1/2" x 8" owl print piece. Make 2 of each.

3. Sew a 2-1/2" x 12" green strip between the two units from step 2. Make 2.

4. Sew a 2-1/2" x 11-1/2" cream plaid strip to the top (unit D). Make 2. 

5. Sew a 2-1/2" x 5-1/2" cream plaid strip and black strip together. Make 2.

6. Sew the cream plaid/black unit to a 4-1/2" x 42-1/2" owl print strip. Make 2.

7. Sew the (3) 2-1/2" x 42" green plaid strips short ends together into a long strip. Sew to the top long edge of the unit from step 8 and trim excess green plaid strip (unit B1). Sew the remaining green plaid strip to the second long owl strip and trim excess (unit B2).


8. Sew a 2-1/2" x 8" green plaid strip to the left side of a 5-1/2" x 8" owl piece. Make 2.

9. Sew a 2-1/2" x 7-1/2" red plaid strip to the top (unit A). Make 2.

For the following steps, refer to the diagram as you sew.
10. Sew an A unit to the B1 unit and an A unit to the B2 unit.
11. Sew the 4-1/2" x 42-1/2" black strip (unit C) to B1, starting where indicated. Stop sewing 1/4" before the end of the black strip. 
12. Sew a D unit to the end of the B1/C unit. Sew the opposite side of the C unit to B2, starting where indicated.
13. Sew the remaining D unit to the edge of C/B2 as shown in both the diagram and photo below.


Here is the remaining D unit pinned in place, ready to be attached.

This is what the runner will look like at this point. All you need to do is finish the sewing the partial seam. Fold the runner, pin, and stitch from the opening to the end of the runner.


Make the Runner Back
1. Sew the (6) 3-1/2" x 42" strips together lengthwise in an order you like. Crosscut the strip set into (4) 6-1/2" wide segments.

2. Sew the four segments short ends together to create a long pieced strip. 
3. Sew the (3) 6-1/2" x 42" black solid strips short ends together into a long strip. Sew to opposite long sides of the pieced strip and trim excess. *Note: If you are quilting and binding this rather than using the pillowcase finishing method, your black strips should be 9" x 42".

Assembling the Runner
1. Layer the runner top and back right sides together, matching raw edges on the long sides. Note: The back will be slightly longer and you'll need to trim it to match the front. Lay on top of batting and pin the three layers in place. 
2. Sew around all four sides with a 1/4" seam allowance, leaving an opening for turning. Clip corners. Turn right side out and slip stitch the opening closed. Topstitch around edge of runner if desired.


Enjoy your new reversible table runner!

For a chance to win a fat quarter bundle of Fall Festival, sign up to follow the blog (see options in the right hand sidebar) and/or follow us on Facebook. Leave us a comment letting us know you do, as well as telling us if you've ever made a quilt/table runner/etc. with a pieced back. The giveaway is open through Thursday, October 9 at 11:59 pm EST.


This is the fourth of six autumn and/or Halloween themed tutorials coming your way, from Wednesday, October 1 through Wednesday, October 8. Be sure to check out all six and enter for a chance to win a fun fall fabric bundle!

Here's the line-up:
Day 1Kelly from My Quilt Infatuation featuring the Harvest Song collection
Day 2Christina from Sometimes Crafter featuring the Spooktacular collection
Day 3: Melissa from My Fabric Relish featuring the Daily Zen collection
Day 4: Benartex blog design team featuring the Fall Festival collection
Day 5: Debby from Debby Kratovil Quilts featuring the Spooktacular collection
Day 6: Erin from Why Not Sew featuring the Indian Summer
 collection

Love It? Share It! Facebook Twitter Google Pinterest Email