Showing posts with label Little Bunny Quilts. Show all posts

Tuesday, September 19, 2017

Meadow Dance Blog Hop: Day 1

Get ready for more Meadow Dance inspiration! We've seen what Amanda Murphy has created with her new fabrics (click here if you missed it), and now it's time for some more fun! This week we'll be featuring four different projects using the gorgeous Meadow Dance florals and coordinates. Enjoy the tutorials, and make sure to enter to win a fat quarter bundle!


First up is Alison from Little Bunny Quilts, who picked a few favorite fabrics to make a Pocket Wall Organizer. Being organized is a wonderful thing, and having an attractive organizer is even better! Follow her tutorial and then head over to her blog to enter to win some Meadow Dance fabric. 

Here's Alison!
I'm Alison from Little Bunny Quilts and I am so happy to be back sharing a new project featuring Meadow Dance by Amanda Murphy! As I might have mentioned before, Amanda Murphy is probably my favorite designer so I feel so lucky to be able to participate in another one of her blog hops with Benartex!


I decided to challenge myself to make something new and am very happy with the results! Rather than being a pieced and quilted project, this project uses quilted sections to build a rather simple wall hanging with pockets!

You will need:
A total of 2 yards for the quilted sections of the wall hanging
     I used 1 yard of the aqua print, 1/2 yard of the large floral print, and 1/2 yard of the aqua/red print
1/3 yard for binding
     I used the aqua/grey print

Note: This is more that sufficient fabric for the wall hanging made below, but in case you want to scale up or make a mistake, I wouldn't start with less fabric than this. I found it was easiest to oversize my quilted sections and cut down to my desired size.


For the main background/base of your wall hanging, you will need a piece of fabric for the "front" and the "back" as well as a piece of batting. My desired size was 12" wide by 32" long, so I cut my pieces all an inch larger.


Layer your backing, batting, and main fabric and quilt as desired. Trim to the desired size of your wall hanging. I quilted mine with loops and trimmed to 12" x 32".


Repeat this process for your pockets. My three pockets are 12" x 8", so I cut my pocket fabrics and batting approximately 13" x 25". I found it to be easier to quilt one larger section and cut it into the three sections I needed for my pockets than to make three sections individually.


Cut four 2.5 inch strips for binding and for finishing the raw edges. Since my pockets are 12" wide, I cut one WOF binding strip into 14" strips for covering the top raw edge on each pocket piece. I sewed the strip to the piece exactly as I would for regular binding and trimmed off the excess. Repeat for each pocket. You do not have to worry about the raw edges on the bottom and the sides as these will be covered by the final binding.


Space your pockets evenly along the length of the wall hanging. For all pockets except the bottom, you will need to sew the pocket to the wall hanging right sides together as you would a regular seam and then press. Along the sides of each pocket and the bottom of the bottom pocket, stitch each directly to the wall hanging using a very scant 1/4 inch seam (my seam was slightly larger than 3/16" -- this will ensure that all of these seams will be hidden in our final binding.)


Don't forget to add some sort of hanging pocket! I used a 11" by 5" rectangle to create my pocket.


Add binding around the edge of your wall hanging just as you would any project -- I needed three strips for my wall hanging. There are times that you will be sewing through 3 layers of batting and 6 layers of fabric -- you will want to consider using your walking foot and sewing slowly! I also found it helpful to try to space my binding seams in places that did not have multiple layers of batting.


Hang as desired and fill with whatever your heart desires! While I made this with bright cheerful fabrics, it would be a great way to make a Christmas card holder as well! It's easy to start with this basic shape and modify it for whatever purpose you desire - you could modify this with smaller pockets to hold jewelry or larger pockets for sorting paperwork.

Follow along on all four days of our Meadow Dance blog hop!
Tuesday: Alison @ Little Bunny Quilts
Wednesday: Benartex blog design team
Thursday: Sandra @ Mmm Quilts
Friday: Chris @ made by ChrissieD

Click here to see our original Meadow Dance post. 
Click here to see the entire Meadow Dance collection.
Click here to visit Amanda's website and find her patterns.
Love It? Share It! Facebook Twitter Google Pinterest Email

Wednesday, May 17, 2017

Summer Mini Quilt Blog Hop: Day 3

We can't wait for summer! To help put us all in a carefree, sunshine-y mindset, this week we're hosting the Summer Mini Quilt Blog Hop! Thanks to our talented designer friends, we'll be featuring tutorials to make four different summer-themed mini quilts.


Today Alison from Little Bunny Quilts is here with a bright star mini quilt. Enjoy her tutorial (featuring some of the colorful prints from Ann Lauer's Anything Goes collection) and then head to her blog for a chance to win some Anything Goes for yourself! 

Here's Alison!
Hello, quilters! I am Alison from Little Bunny Quilts and I am happy to be back here today at Sew In Love With Fabric to share a tutorial for a quick and fun mini quilt made from the new line Anything Goes by Ann Lauer.

Here's a sampling of some of the fabrics in this line:


I used mainly the green and blue prints in this mini, which finishes at 20 inches square. I used one of my favorite blocks -- the Ohio Star -- and used partial blocks to give the design a little more pizzazz.

Cutting:
3 - 5.5 inch squares background fabric (for QSTs)
8 - 4.5 inch squares background fabric
1 - 5.5 inch square blue #1 fabric (for center QSTs)
2 - 5.5 inch squares green #1 fabric (for center QSTs)
2 - 5.5 inch squares blue #2 fabric (for outer QSTs)
4 - 5.5 inch squares green #2 fabric (for outer QSTs)
5 - 4.5 inch squares white print fabric


Draw diagonal lines on all of your green squares. Pair up each 5.5 inch square as listed below to create HSTs by sewing 1/4 inch on each side of the line, cutting apart on the drawn line, and pressing toward the green. Do not trim your units yet.

For center QSTs:
1 - 5.5 inch green #1 square + 1 - 5.5 inch background square (yielding 2 green/background HSTs)
1 - 5.5 inch green #1 square + 1 - 5.5 inch blue #1 square (yielding 2 green/blue HSTs)

For outer QSTs:
2 - 5.5 inch green #2 squares + 2 - 5.5 inch background squares (yielding 4 green/background HSTs)
2 - 5.5 inch green #2 squares + 2 - 5.5 inch blue #2 squares (yielding 4 green/blue HSTs)


In this picture, the units that will be used for the center QSTs are in the top row, and the units that will be used for the outer QSTs are in the bottom two rows.

Cut each HST in half, perpendicular to the sewn seam. Note: it is important to cut perpendicular to the seam, rather than just from corner-to-corner as this ensures nice "square" seams at the center of  your QSTs. If you find that your two corners are not perfectly aligned when you line your ruler perpendicular to the seam, do your best to position the cut such that the cut splits the difference between the offset corners, as in the diagram below.


After cutting your HSTs in half, pair each half with the corresponding complementary half to make your QST units. Sew together, making sure to align the center seam. Press seam open to reduce bulk and trim your QST units to 4.5 units, making sure that the center intersection remains the center of the trimmed block.


Lay out your QST units and 4.5 inch white print and background squares as shown below.


Sew together for your mini top.


Quilt as desired and bind. I quilted my mini with a swirly flower motif. I made bias binding with one of the black prints in the collection and also used the same print for my hanging pockets. I pieced together the leftovers from the green floral print and blue dot print for my backing fabric.


Thanks for letting me share this fun tutorial with you! I love making minis and I hope you do too! Hop on over to Little Bunny Quilts to win a mini bundle of fat quarters from the Anything Goes collection!

Click here to see the entire Anything Goes collection. 


Don't miss the other days of our Summer Mini Quilt Blog Hop!

Summer Mini Quilt Blog Hop:
Day 1: Debby from Debby Kratovil Quilts using Liberty Garden
Day 2: Benartex blog design team using Play Ball
Day 3: Alison from Little Bunny Quilts using Anything Goes
Day 4: Kelly from My Quilt Infatuation using Patio Splash
Love It? Share It! Facebook Twitter Google Pinterest Email

Thursday, December 8, 2016

Deck the Halls Blog Hop: Day 4

The Christmas countdown has begun! This week we'll be sharing five holiday-themed tutorials to add to that festive feeling. 


Today we're welcoming Alison from Little Bunny Quilts. Back in our July hop, she made a tree skirt using the Sparkle collection, and she's back today with a table runner using the same fabric line. After you check out her tutorial, head over to her blog for a chance to win a bundle of holiday fabric. 

Here's Alison:
Hello! Alison from Little Bunny Quilts here, and I am back today to share another fun holiday tutorial using Amanda Murphy's Sparkle line! Today I'm sharing a fun table runner pattern!


You will need to make three 12 inch finished (12.5 inch unfinished) blocks for a table runner. For each block you will need:

Four (4) - 2 1/2 inch squares in your outer color (green shown in the tutorial)
Four (4) - 3 3/8 inch squares in your outer color (green shown in the tutorial)
One (1) - 4 1/2 inch square in your center color (teal and green stripe shown in the tutorial)
Four (4) - 3 inch squares in your star point color (red and grey print shown in the tutorial) 
Four (4) - 2 1/2 inch background fabric squares
Four (4) - 2 1/2 inch x 4 1/2 inch background fabric rectangles
Four (4) - 3 inch background squares


Using your 2 1/2 inch squares and 2 1/2 inch x 4 1/2 inch rectangles to make the corner units as shown below. Make four.


Cut each of your 3 inch squares in half diagonally once. Arrange four triangles around each 3 3/8 inch square as shown below and sew together to make four square in a square units. Pay attention to the arrangement of your outer triangles -- these will form your star points! If necessary, trim your blocks to 4 1/2 inch square.


Arrange your corner units, square-in-a-square units, and center square as shown below. Sew together in rows, then sew your rows together.


Make three total Star of Wonder blocks.

From your background also cut:
Four (4) strips 1 1/2 inches x 12 1/2 inches
Two (2) strips 1 1/2 inches x WOF

Lay out your blocks and background strips as shown below and sew together for your table runner top.


Quilt and bind as desired. Enjoy your festive table runner!


You can use this basic table runner pattern with any 12 inch finished blocks (12.5 inches unfinished), so if you have your own favorite blocks, you can switch them up!


For a chance to win a bundle of one of our holiday collections, head over to Alison's blog.  

Make sure to catch all of the tutorials on our Deck The Halls Blog Hop!
Tuesday 12/6: Paula Nadelstern
Wednesday 12/7:  Debby from Debby Kratovil Quilts
Thursday 12/8: Alison from Little Bunny Quilts
Friday 12/9: Benartex blog design team

p.s. Looking for more holiday inspiration? Click here to check out the tutorials featured in our Christmas in July blog hop. 
p.p.s. See another Sparkle table runner on Fons & Porter's website.
Love It? Share It! Facebook Twitter Google Pinterest Email

Wednesday, November 16, 2016

Dreamscape Block Blog Hop: Day 2

Hello, fabric lovers! We're continuing to share our Dreamscape Block Blog Hop today. This is day two of seven different block tutorials for you featuring our luscious Dreamscape prints; we'll be featuring a tutorial each day through next Wednesday (we're taking the weekend off!). For this blog hop, we selected a six-color palette to play with: Navy, Cloud, Lime, Grape, Daffodil and Lead. You'll love the variety of blocks our designers have created! And make sure you enter each day's giveaway for a chance to win fat quarters of these six Dreamscape prints! Enjoy! 


Alison from Little Bunny Quilts is here today with a variation on the traditional Rail Fence block. Imagine what you could do with this design and these colors! Head over to her blog to enter to win Dreamscape fabric. 

Hello! I'm Alison from 
Little Bunny Quilts and I am excited to be back today at Sew In Love With Fabric as a part of their Dreamscape Blog Hop!

For this hop, I have put together a super simple block that is a twist on your standard rail fence or Roman Square. Say hello to Roman Ribbons!

Cutting:
Two (2) colored strips 3.5 inches wide by at least 13 inches long (I used one green and one blue)
Four (4) background strips 2 inches wide by at least 13 inches long


To the sides of each background strip, sew on your 2 inch background strips. Press towards the center strips.


Sub-cut strips into 6.5 inch widths. You will need two of each color for your block. Arrange as shown below.


Sew together and press. Your block should measure 12.5 inches unfinished.


Here's a mock up of a quilt you could make with nine of these blocks:


Come visit me at Little Bunny Quilts to have a chance at winning a bundle of Dreamscape fat Quarters!

Follow along each day of the hop!
Tuesday 11/15: Chris from made by ChrissieD
Friday 11/18: Kristen from KD-Quilts
Monday 11/21: Benartex blog design team
Wednesday 11/23: Wendy from Ivory Spring
Love It? Share It! Facebook Twitter Google Pinterest Email

Friday, October 21, 2016

Mug Rug Blog Hop: Day 4

This week we're hosting the Mug Rug Blog Hop!
In celebration of fall, a season filled with mugs of apple cider, tea, and even hot cocoa, we have four different bloggers sharing a mug rug design they've created with one of our new fabric lines. 

BYOM (bring your own mug), but we'll provide the mug rug inspiration, as well as fabric giveaways! 


Today Alison from Little Bunny Quilts is sharing a cute mug rug made using Cherry Guidry's Kitchen Love collection. If you haven't seen these prints, you'll love them! Alison drew inspiration from the fabric and her kitchen, even using a common utensil as her applique template. Have fun with this mug rug, and then head over to Alison's blog to enter for a chance to win a bundle of Kitchen Love!


Hello! I'm Alison from Little Bunny Quilts, and I am happy to be back here at Sew In Love With Fabric sharing a quick and easy tutorial for a mug rug today!


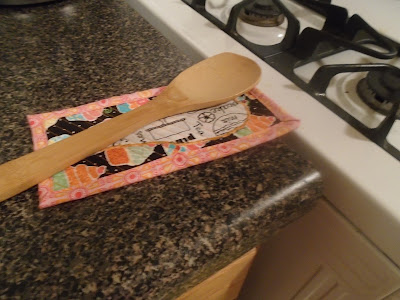
I decided to use the Kitchen Love line, because I love to cook and bake. The prints are just darling in this collection! And as a little twist, this mug rug could also be used as a washable spoon rest!

You will need:

Some sort of fusible web -- I use Wonder Under
Fat quarters of your fabrics -- I used four different fabrics


Using your favorite kitchen utensil, lay on your fusible web and trace. I used a wooden spoon.


Iron your fusible web template to your chosen fabric and trim to the correct shape.

Cut a rectangle for the front 4" x 8", cut a backing rectangle 5" x 9".


Remove the backing paper from the fusible web and iron onto your 4" x 8" rectangle.


Use a satin stitch to sew around the edges of your utensil. I used orange!


Layer your backing rectangle, a batting scrap (mine was 4.5" x 8.5") and quilt as desired. I did diagonal lines across my piece.


Trim your mug rug and bind as desired. I cut my binding strips at 2.25" wide.


Enjoy your new spoon rest/mug rug!


Perfect with a muffin and a mug too! 

Head over to Alison's blog to be entered for a chance to win a fat quarter bundle of Kitchen Love. 

Make sure to catch all of the tutorials in our Mug Rug Blog Hop!
Tuesday: Chris from made by ChrissieD featuring Sewing Room
Wednesday: Debby from Debby Kratovil Quilts featuring Wings
Friday: Alison from Little Bunny Quilts featuring Kitchen Love
Love It? Share It! Facebook Twitter Google Pinterest Email