
The Warp & Weft collection is calling your name--what will you make? Today we're sharing two pillow tutorials to brighten up your couch. The pillow patterns lean traditional, but the palette and prints of Warp & Weft give these pillows a modern feel.

Pillow #1

Materials:
1/4 yard red plaid
1/3 yard each gold check and green stripe
1/4 yard off-white solid
3/4 yard navy check
18" square pillow form
Cutting
From the red plaid:
(8) 3-1/2" squares
From the gold check:
(2) 7" squares
From the green stripe:
(2) 7" squares
From the navy check:
(2) 15" x 18-1/2" pieces for backing
(1) 3-1/2" square
(2) 2" x 18-1/2" strips
(2) 2" x 15-1/2" strips
From the off-white solid:
(32) 2" squares
Make the Pillow:
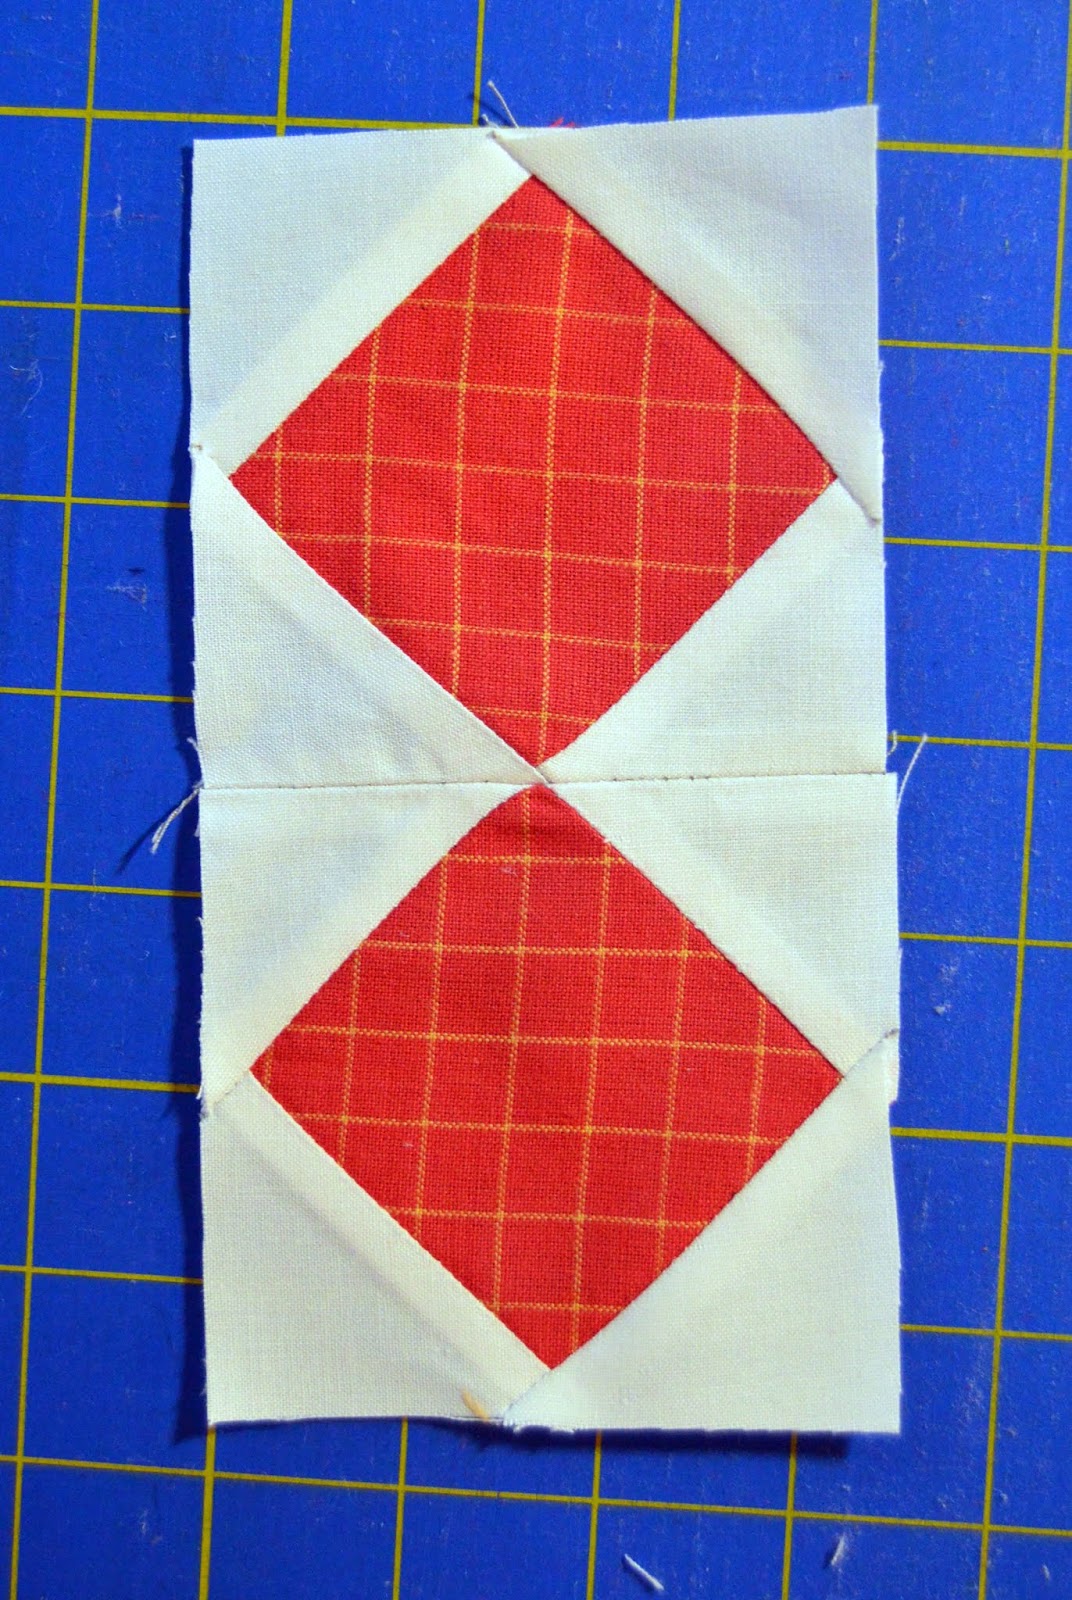
Step 1: Draw a diagonal line on the wrong side of (4) 2" off-white squares. Position (2) marked squares on (1) 3-1/2" red plaid square as shown.

Step 2: Stitch on the drawn lines.

Step 3: Trim seam allowances to 1/4" and press open.

Step 4: Position the remaining (2) marked squares as shown, stitch on the lines, trim seam allowance to 1/4", and press open.

Step 5: Trim to measure 3-1/2" square. Make a total of (8) units.

Step 6: Sew the units together in pairs. Make (4) pairs.
Step 7: Draw a diagonal line on the wrong side of (1) 7" gold check square. Layer right sides together with (1) 7" green stripe square.

Step 8: Stitch 1/4" on either side of the drawn line. Cut apart on the line and press units open. Trim each HST unit to measure 6-1/2" square.


Step 11: Layer the pillow top on (1) 20" square of batting. Quilt as desired and trim to measure 18-1/2" square.
Step 12: Fold a long edge of (1) 15" x 18-1/2" navy check piece over 1/2" and press. Fold over another 1/2" and press. Topstitch to secure the finished edge of the backing piece. Make (2).
Step 13: Layer a backing piece right sides together with the quilted pillow top. layer the second backing piece on top, overlapping the first piece in the middle. Pin in place and stitch around the edges using a 1/4" seam allowance.

Pillow #2

Materials:
1/4 yard from each of (9) yarn dye fabrics*
1/3 yard off-white solid*
5/8 yard green plaid
18" square pillow form
Cutting:
From each of (9) yarn dye fabrics:
(2) 4" squares
From the off-white solid:
(18) 4" squares
From the green plaid:
(2) 15" x 18-1/2" pieces for backing
*Note: We used the leftover triangles from the roof units of the Around the Block topper. They're already paired with off-white triangles, so they're ready to go! If you use these 16 pairs of triangles, you only need (10) 4" woven squares --(2) each of (5) different fabrics--and (10) 4" off-white squares.
Make the Pillow:
Step 1: If you're using the leftover triangle pairs from yesterday's tutorial, stitch each pair along the long edge, using a 1/4" seam allowance. Press open and trim to 3-1/2" square.

Step 2: Draw a diagonal line on the wrong side of each 4" off-white square. Pair it with a 4" yarn dye square and create half-square triangles like in step 8 above. Trim to measure 3-1/2" square.


Step 3: Make a total of (36) 3-1/2" white/plaid HST units.
Step 4: Lay out the HSTs into (6) rows of (6) units each.

Step 5: Sew the units into rows and join the rows to complete the pillow top.

Step 6: Finish the pillow following steps 11-13 above.

Love the Warp & Weft fabrics? Leave a comment below letting us know if you prefer stripes or plaids for a chance to win a fat quarter bundle of 8-10 of these prints. Giveaway ends January 19th at 11:59 pm EST.
Want to see more Warp & Weft fun?
Click here to read an interview with Weeks and Bill about their new collection.
Click here to read Debby Kratovil's Technique Tuesday post.
Click here to see the Around the Block topper tutorial.
Love It? Share It!


I really like the plaids! You can do a lot with them.
ReplyDeleteI really like the plaids! You can do a lot with them.
ReplyDeleteIt's so hard to decide. When I look at the fabric swatches, I love the stripes. When I look at the pillow, I love the plaids. Maybe I need both!!
ReplyDeleteLove the plaids. They're homey feeling and would make something great for a guy.
ReplyDeleteI like stripes. But if I win, I'd be happy with whatever I receive.
ReplyDeletekakingsbury at verizon dot net
Oh, that's a tough choice as they are all lovely! I typically use more stripes, so I'll pick that.
ReplyDeletei LOVE STRIPES! Especially love them for bindings! mumbird3atgmaildotcom
ReplyDeleteIt depends on what they are used for. They are both favorites.
ReplyDeleteI like the stripes. Thanks for a detailed tutorial.
ReplyDeleteI love the stripes, they make everything more interesting. Especially if use in the binding. Thanks for the giveaway.
ReplyDeleteLove them both, but plaids are my favorite!
ReplyDeleteIt’s difficult to choose...all these fabrics are so versatile. Let’s go with the stripes - especially the one with blues!
ReplyDeleteI love plaids! thank you!
ReplyDeleteI like the strips better, but the plaids are cool too. These pillows are really cute!! odiane 79 @ yahoo.com
ReplyDeleteI like both but maybe plaids a little more. Great pillow.
ReplyDeleteI love the hst pillow. I like the plaids better.
ReplyDeleteI need to. make the hst pillow! I love both and right now those stripes are my favourite.
ReplyDeleteI'm definitely a plaid girl! Both pillows are great!
ReplyDeletebasaran.family (at) rogers (dot) com