
Christmas in July continues with a week of holiday-themed tutorials! Stop by each day this week to see the featured tutorial and find out how you can enter to win the fabric line being used!

Alison from Little Bunny Quilts chose the Sparkle collection by Amanda Murphy and stitched a festive tree skirt ringed with star blocks.
Here's Alison:
Hello! I'm Alison from Little Bunny Quilts and I'm sharing a fun tutorial for a tree skirt using Amanda Murphy's Sparkle line! Let's get started!

You will need:
2 yards of a background fabric
Various print fabrics (I used parts of fat quarters, but you could use scraps!)
2.5 yards backing fabric
0.5 yards for binding
It is also helpful to have a larger 30 degree ruler. I own and used this ruler, which I highly recommend (NOT an affiliate link!).
From your background cut:
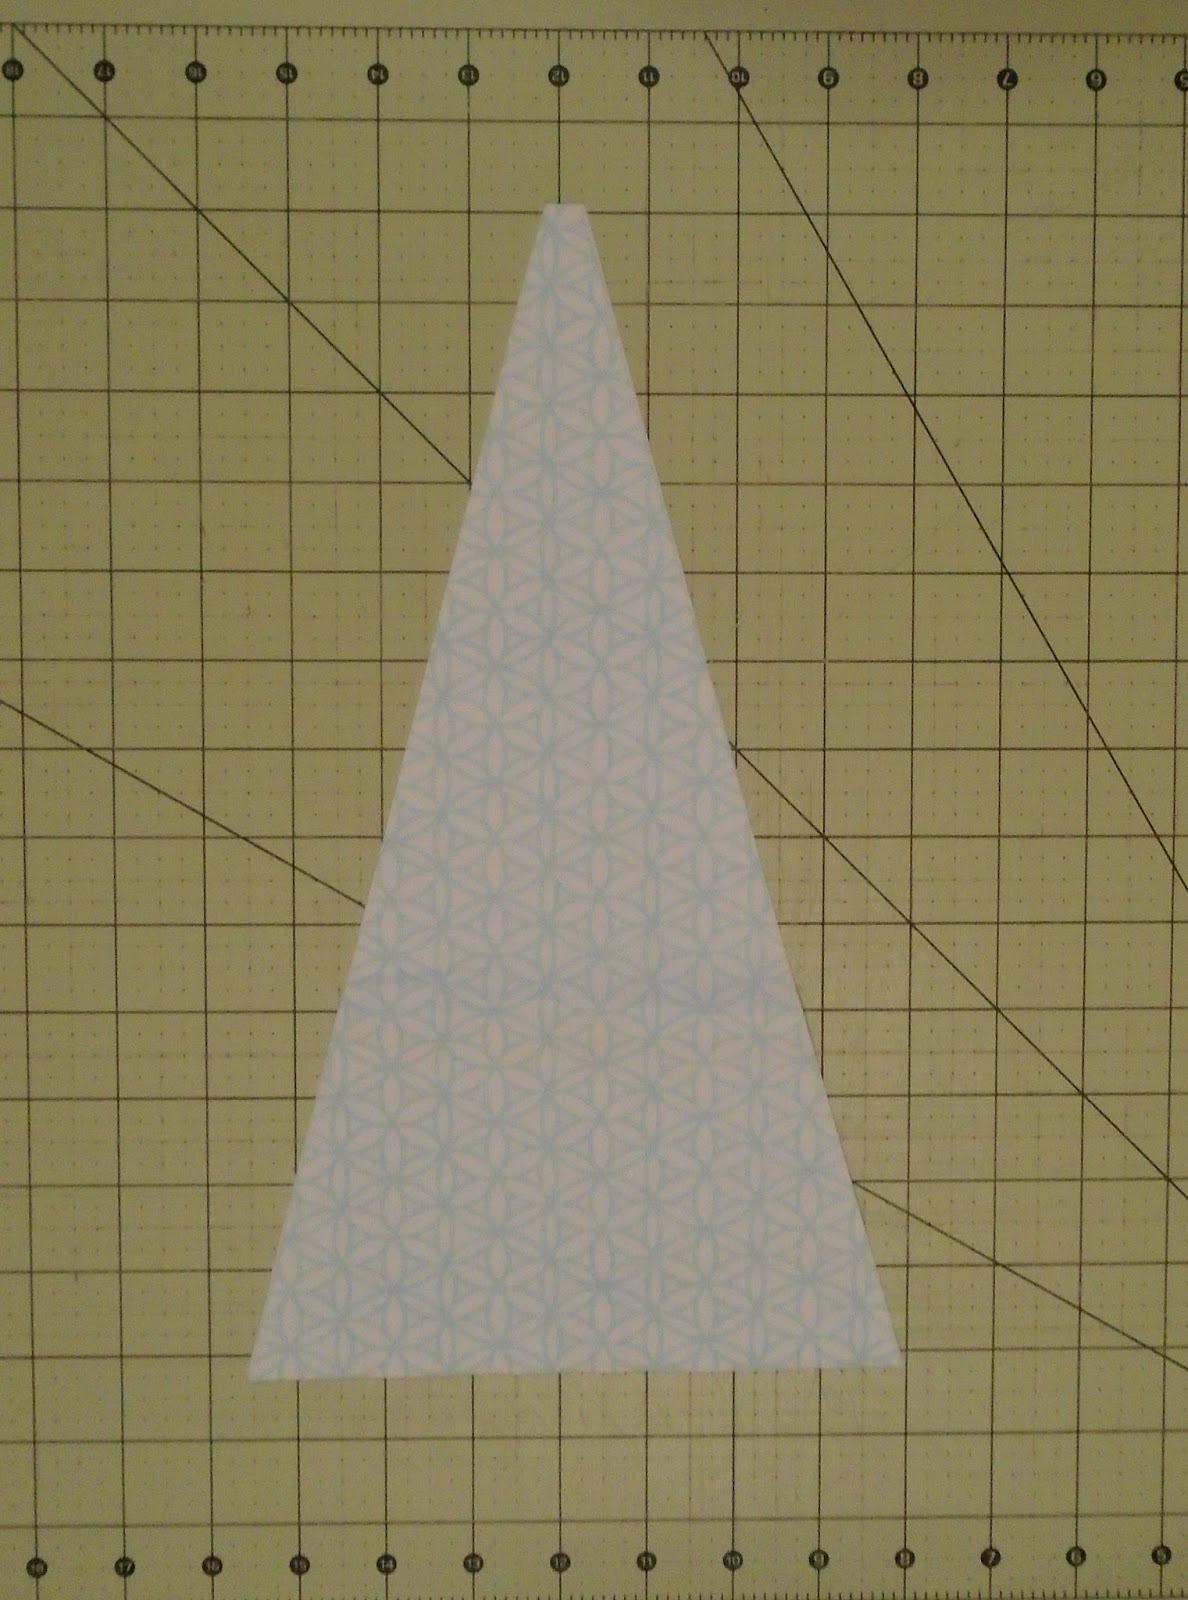
Twelve (12) 30 degree wedges 13 inches long
Three (3) 12 inch squares -- cut each in half diagonally twice for twelve (12) triangles
Twenty four (24) 3 inch by 6.5 inch rectangles
Forty Eight (48) 2.5 inch squares
Twelve (12) 3.5 inch squares
From your print fabrics cut:
Twelve (12) 2.5 inch squares total (can be all different fabrics!)
Thirty six (36) 3.5 inch squares total -- you will need twelve pairs of matching squares (see below)
Making your Ohio Star blocks (Make 12 Ohio star blocks)
For each star you will need:
Four (4) 2.5 inch background squares
One (1) 3.5 inch background square
Two (2) matching 3.5 inch print squares
One (1) contrasting 3.5 inch print square
One (1) 2.5 inch print square

Draw a diagonal line on each of your matching 3.5 inch squares.

Pair one with a background fabric square, pair the other with your contrasting 3.5 inch square. Sew on each side of the line, cut apart on the line, and press towards your matching square fabric.

Cut each HST unit in half diagonally perpendicular to the seam you just sewed.

Pair half units together so that each QST unit has two matching side triangle, one background triangle, and one contrasting triangle. Trim each unit to 2.5 inch squares.

Lay out your star as shown below, sew into an Ohio star block -- make sure that your points are all pointing in the correct directions.


Making your wedges
Now that your stars are completed, sew the following to each star:
-- sew a 3 x 6.5 inch rectangle to the right and left of the star block
-- sew a 30 degree wedge piece to the top of the star block
-- sew a 12 inch triangle piece to the bottom of the star block
Using the lines of your 30 degree wedge piece, trim the sides of your wedge unit so that the entire unit is a large 30 degree wedge with a point at the outer edge as shown below.

Putting it all together
Lay out your twelve wedges in the order that you desire them. Sew wedges together in sets of 3 to begin. You now have four "quadrants" to easily sew into pairs, and then finally sew two halves together.

NOTE: You do not need to worry about all of your points lining up in the center since we will be cutting a hole in this area! Whew!

Once your top is all together, quilt as desired. I quilted mine with loops in each wedge. At this point, you can choose to trim your tree skirt into a circle as I have or you can choose to leave your wedges with points. Trace around a circular object (I used a can of vegetables) to define your inner circle opening for your tree trunk. Choose one of your wedge seams and cut up the length of the seam to your drawn circle and cut the circle out. If trimming into a circle, make marks 20 inches from your center around the edge of your quilt and cut along those marks.

Now you are ready to bind and add your choice of ribbons, buttons, or hooks-and-eyes to keep the opening of your tree skirt shut during the Christmas season!

Thanks for letting me share this tutorial with you today and don't forget to stop by Little Bunny Quilts for your chance to win!
Thanks, Alison! Head over to Alison's blog to enter for a chance to win a FQ bundle of Sparkle fabric!
Don't miss our Christmas in July tutorials all this week!
Monday: Chris from made by ChrissieD, featuring Jolly Penguin and Friends
Tuesday: Debby from Debby Kratovil Quilts, featuring My Little Chickadee
Wednesday: Alison from Little Bunny Quilts, featuring Sparkle
Thursday: Cynthia from Quilting is more fun than Housework, featuring Holiday Cheer
Friday: Benartex blog design team featuring Joyful
Love It? Share It!


this is so pretty
ReplyDeleteVery cute!!
ReplyDeleteThank you for this tutorial. I am still using a white sheet for my tree skirt. I have been sewing for Christmas since June, place mats, mug rugs, runners, and quilts. I think I need to make a tree skirt for myself.
ReplyDeleteAbsolutely gorgeous. Thank you for the tutorial. Total #CreativeGoodness.
ReplyDeleteQuiltShopGal
www.quiltshopgal.com
Love the tree skirt. Have made some for others. its time I make one for me
ReplyDeleteKaren
fkmsc@comcast.net
This comment has been removed by the author.
ReplyDeleteThis is just fantastic.Great tutorial!!
ReplyDeleteI love the fabrics, I'm a fan of the Ohio Star block, and the tutorial is great. I have a skirt for my large cut tree but minus the slit and cutout this smaller skirt would be a perfect topper for the round side table that holds an iron tree and blown glass ornaments too heavy for the cut tree. Thanks for the info!
ReplyDeleteThis is a beautiful tree skirt and with a fabulous tutorial! I believe my store bought tree skirt will be replaced this year with this new one. Thank you for sharing and have a fantastic creative day!
ReplyDeleteLove this tree skirt! I will definitely have to make one of these!
ReplyDeleteDefinitely would make a nice table topper, or with a smaller hole, a table top tree skirt/table topper.
ReplyDeleteThe tree skirt is so beautiful with that red binding. Thanks for a great idea.
ReplyDeleteLove the tree skirt. Who would like this around their tree!
ReplyDeleteLove it! Sew pretty and sew easy!!
ReplyDeleteI have a pre-quilted panel that I bound for our tree skirt many many years ago. I've made others as gifts, maybe it is time to update.
ReplyDeleteI follow Little Bunny on bloglovin.
ReplyDeleteFOr thirty years, I have been pulling an old sheet out of the closet and putting it around the base of the tree. Every year I say "I really need to make something for ME. Like a tree skirt!" This is so quick and easy! Love it!
ReplyDeleteI follow on Bloglovin.
ReplyDeleteThank you for the tutorial!
ReplyDeleteLove the tree skirt tutorial. Great choice of fabrics. Sure would love to win the fabric.
ReplyDeleteThanks for writing this excellent blog for us. I have gained good stuff fromhis website. I am looking forward to your next blog.
ReplyDeleteIf you searching for a legit financial service .Check it out. Link below.
Buy a card
Unclaimed Mystery Box
legit PayPal transfer dark web
dark web financial services .
Not only that, but I am happy to share this post with my friends.
Loving the festive vibes in this post Christmas in July always brings a smile! It’s amazing how a touch of creativity can make any season feel special. Kind of like how beautifully designed Flats in Noida can turn everyday living into something to celebrate. Can’t wait to see what’s coming next in the hop
ReplyDelete