
Welcome back! It's the last day of our Feels Like Fall Blog Hop. We hope you've enjoyed the tutorials! Today, Erin from Why Not Sew is here with a beautiful leaf quilt--she used the entire spectrum of color in the Indian Summer collection, paired with the Burlap solids, to create this simple fall design. Erin chose the same Maple Leaf block as Kelly did on Day 1, yet the scale, layout, and fabric choices create a totally different quilt. We think you'll love them both! Enjoy Erin's tutorial and then scroll down to the bottom to find out how to win a fat quarter bundle of Indian Summer fabrics for yourself!


from background fabric,
1 rectangle, 4 7/8" x 9 3/4"
2 squares, 4 1/2" x 4 1/2"
from printed fabric,
1 rectangle, 4 7/8" x 9 3/4"
1 rectangle, 1 3/4" x 7"
3 squares, 4 1/2" x 4 1/2"
For the quilt with a 4 x 5 block layout you need (20 blocks):
from background fabric,
20 rectangle, 4 7/8" x 9 3/4"
40 squares, 4 1/2" x 4 1/2"
from printed fabric,
20 rectangle, 4 7/8" x 9 3/4"
20 rectangle, 1 3/4" x 7"
60 squares, 4 1/2" x 4 1/2"


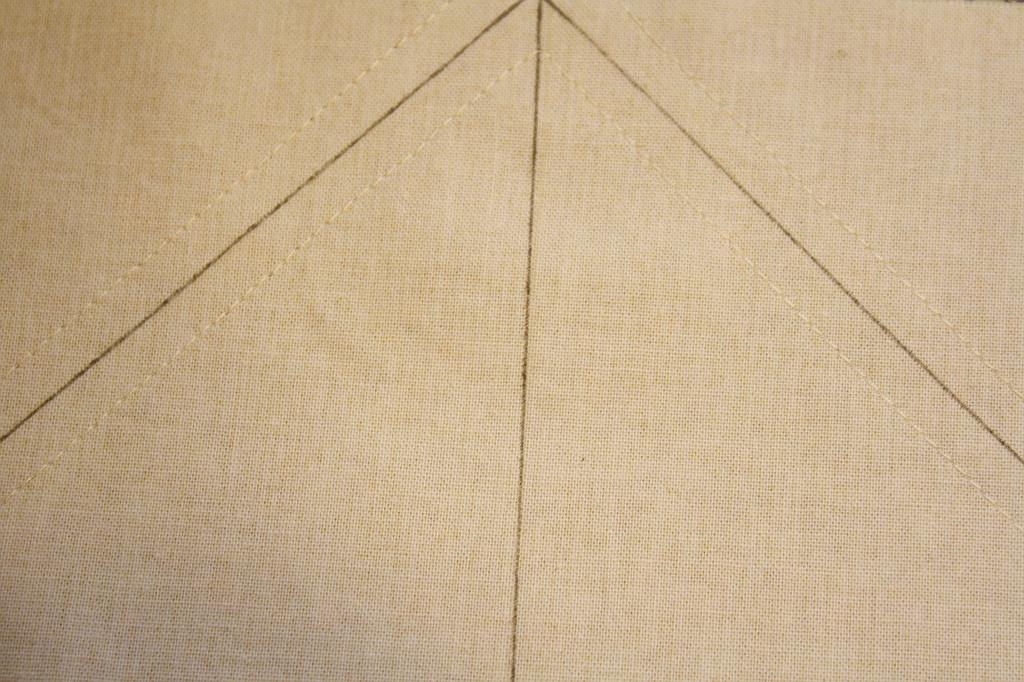


**For the whole quilt cut your fabric, make the half square triangles for each block, make the stem units for each block, then layout all of the squares arranged like above and stacked on top of each other. Then you can chain piece the blocks. This makes the process so much faster and you'll have a quilt top in no time at all!


Thanks so much to Benartex for asking me to participate in the blog hop! I love this quilt! It's such a simple and quick project I hope you make one too.
Thanks Erin! Head over to Erin's blog to enter to win a fat quarter bundle of Indian Summer fabrics!
This is the sixth of six autumn and/or Halloween themed tutorials coming your way, from Wednesday, October 1 through Wednesday, October 8. Be sure to check out all six and enter for a chance to win a fun fall fabric bundle!
Here's the line-up:
Day 1: Kelly from My Quilt Infatuation featuring the Harvest Song collection
Day 2: Christina from Sometimes Crafter featuring the Spooktacular collection
Day 3: Melissa from My Fabric Relish featuring the Daily Zen collection
Day 4: Benartex blog design team featuring the Fall Festival collection
Day 5: Debby from Debby Kratovil Quilts featuring the Spooktacular collection
Day 6: Erin from Why Not Sew featuring the Indian Summer collection
Love It? Share It!


Your quilt is so lovely in it's seasonal design and colour way!
ReplyDeleteWhat a great tutorial! Makes it look so simple and doable for a novice.
ReplyDeleteyour quilt is so pretty. thanks for the wonderful tutorial.
ReplyDeleteLove the Fall colors in this quilt. Beautiful.
ReplyDeleteExcellent tut. Thank's
ReplyDeleteBeautiful!!!
ReplyDeleteI love this pattern and your quilt is gorgeous (I am not biased because I am Canadian either!!) I love the variety of colours and textures too! Thanks for the tutorial, it is perfect!
ReplyDeleteI love the nostalgia of the calicoes with the Maples, and I love how you did just some of the backgrounds darker. Thanks for the tutorial!
ReplyDeleteSpectacular and sure I`ll try the tuto!
ReplyDeleteBeautiful! Thank you for sharing!!!
ReplyDeleteWhat is it about the Maple leaf? I just love it, ... in autumn, in spring, in red and white :) thanks for sharing
ReplyDeleteGood tutorial, and I have a yard filling with maple leaves. Wish they looked this good.
ReplyDeleteSuch a pretty fall quilt! I love the colors and can't wait to get some of that burlap for myself.
ReplyDeleteBeautiful quilt. I must make one of these. Thanks for the tutorial.
ReplyDeleteOh yes this is a must make quilt! Love love love the fabric!
ReplyDeleteThank you for the tut?
April
Oh my goodness I can do this!! I love leaves and keep admiring this block.
ReplyDeleteThe tutorial is spot on,,thankyou so much
How do you keep from losing your points once blocks are sewn?
ReplyDelete