Showing posts with label drawstring bag. Show all posts

Thursday, January 22, 2015

Novelty Prints Blog Hop: Day 3

Welcome back for day 3! This blog hop is all about novelty prints from Kanvas--fun designs that make you smile--and our talented designing friends are offering up great ideas for using them! Be sure to stop back each day for a new tutorial.


Today the Benartex design team is sharing a drawstring camera bag tutorial using That's Hollywood. Enjoy the tutorial, and then scroll to the bottom of the post to see how you can win a fat quarter bundle of the That's Hollywood prints.


Today we'll be using the camera print from the That's Hollywood collection to make a padded drawstring camera bag. If you own more than a simple point-and-shoot camera, chances are you also have a heavy-duty camera bag to lug around. Which is great to have. But sometimes you just want to toss your camera in a tote bag or larger purse so you're not walking around with a bag (or two!) on each shoulder. Here's where this drawstring bag comes in. A layer of fusible fleece offers a little protection for your precious camera, but the the design is still small enough to be tucked inside a larger bag. And on top of all that, it's cute! 

 Here are the three colors of camera prints from the That's Hollywood collection. Aren't they fun?!?!

And a peek at some of the remaining prints in the collection--film spools, popcorn, pin-up girls, stars...

Let's get started.

Here's what you'll need:
1/2 yard of the camera print
2/3 yard black solid
Two 15" squares fusible fleece
Chalk or fabric marking pen
Walking foot for your sewing machine (helpful, but not required)

Cutting:
Camera print:
Cut two 15" squares

Black solid:
Cut one 15" x 42" strip then cut into two 5" x 15" strips and two 14" squares 
Cut three 2" x 42" strip then cut one strip into two 2" x 14" strips


Step 1: Following manufacturer's directions, fuse a fleece square to the wrong side of each 15" camera print square. Quilt each piece as desired. We did horizontal straight line quilting on the squares. Tip: Concentrate the majority of your quilting in the center 5" of the squares, as the bottom will be covered by the black base and the top by the casing. Trim quilted squares to measure 14".

Step 2: Draw a horizontal line 4-1/4" up from the bottom of the quilted square. Lay a 5" x 15" black strip on the quilted square with the bottom edge touching the marked line as shown. Stitch 1/4" in from the marked line.

Step 3: Press the black strip down over the bottom of the square and topstitch 1/4" from the seam line. Trim excess black fabric as needed. Repeat on the second quilted square.

Step 4: To make the casing strip, fold the long edges of a 2" x 14" black strip in 1/4" and press. On each short end, fold the fabric in 3/4" and press. Stitch both short ends to secure the folds and create a finished edge. Make a second casing strip.

Step 5: Measure 2" down from the top edge of the quilted square and draw a horizontal line. Position the top edge of the casing strip on that line, centered from left to right. Stitch the top and bottom long edges of the casing in place with a scant 1/4" seam. This creates the casing for the drawstring. Repeat on the second quilted square.

Step 6: Position the two quilted squares right sides together, matching up raw edges. Stitch along the sides and bottom using a 1/4" seam. Cut a 2-1/2" square out of each bottom corner. 

Step 7: To box the corner, fold the bag so the bottom seam and side seam meet. Stitch across the opening created with a 1/4" seam. Repeat on the opposite side of the bag. 

Step 8: Use the two 14" black squares to make the lining. Position them together and sew around three sides, leaving an opening on the bottom for turning. Cut 2-1/2" squares out of the corners and box them out in the same manner.

Step 9: Turn the outer bag right side out and slide inside the lining (which is still wrong side out). The bag and lining should have right sides facing. Match the side seams and sew around the top edge using a 1/4" seam allowance.

Step 10: Turn the bag right side out through the opening. Slipstitch the opening closed and stuff the lining into the bag. Topstitch around the top edge of the bag. Note: On our bag, the black lining shows slightly on the outer bag--that's just personal preference--you can tuck it all inside as well. The topstitching will secure the outer bag and lining together either way.

Step 11: Fold and press a 2" x 42" black strip in half, lengthwise. Unfold and press each long edge in to the middle fold line. Trim to measure 36". Fold the short raw ends in on both ends and refold on the center line to make a long, skinny strip. Topstitch the length of the strip to secure. Make two.
Step 12: Using a safety pin, feed one strip through both sets of casing, starting and ending on the left side. Knot strip ends to secure. Feed the second strip through both sets of casing, starting and ending on the right. Knot strip ends to secure.

Insert the camera for easy toting, and you're done! 

For a chance to win a fat quarter bundle of That's Hollywood, sign up to follow our blog either by email or through a blog reader (see both options in the right hand sidebar) or follow us on Facebook. Leave a comment letting us know that you follow, and telling us which print in the collection is your favorite. The giveaway is open through Tuesday, January 27 at 11:59 pm EST.


Don't miss our other novelty print tutorials!
Day 1: Reverse applique pillow by Lisa from Stubbornly Crafty
Day 2: Boxy make-up bags by Jennie from Clover & Violet
Day 4: Pillow organizer by Wendy Sheppard from Ivory Spring
Day 5: Children's vests by Debby from Debby Kratovil Quilts

p.s. Check out these clowns wearing pants made from this fabric! They were at the Macy's Thanksgiving Day Parade, taking photos for the Daily News.

Love It? Share It! Facebook Twitter Google Pinterest Email

Wednesday, December 4, 2013

Holiday Gift Blog Hop: Day 1


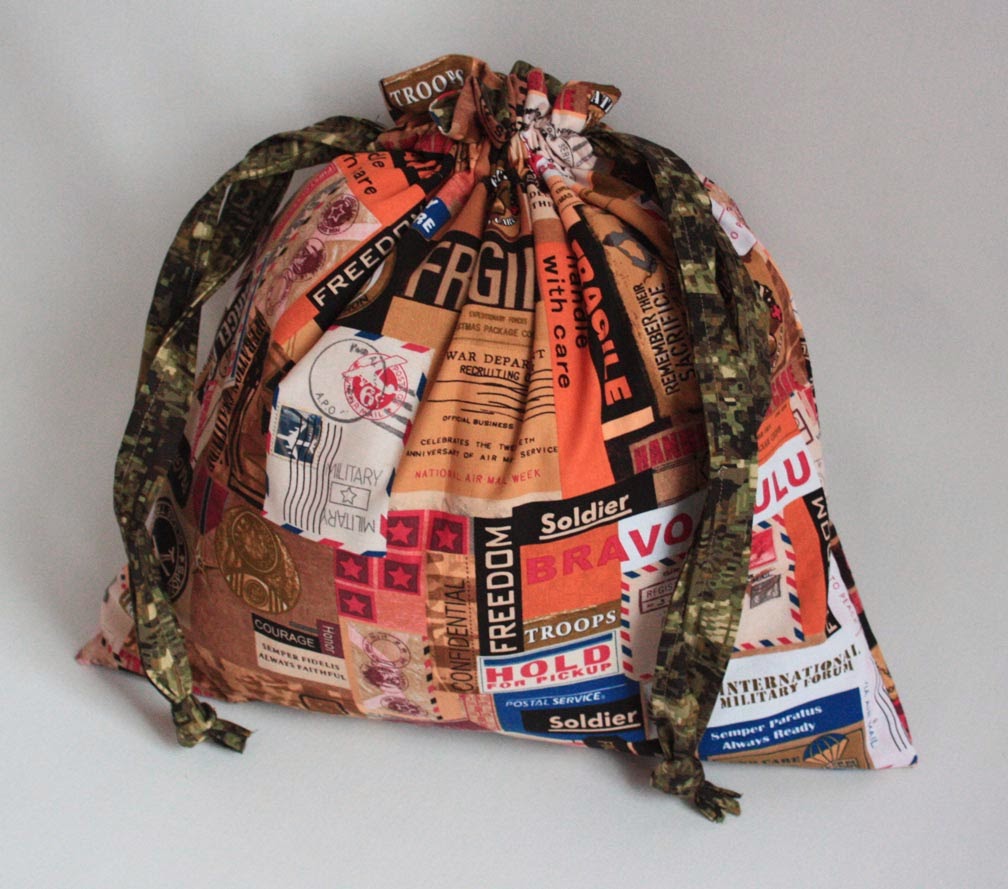
Hello! It's Day 1 of the Holiday Gift Blog Hop, and the Benartex blog team is sharing a tutorial for making easy fabric gift bags. You can use these bags instead of gift wrap and use them again and again! (And no tape or ribbons necessary--added bonus!)


We chose to make these bags up using the brand new United We Stand collection from Kanvas. Small swatches don't do these designs justice--take a look at them in larger pieces.

These military-themed prints would also make great gift bags for soldiers (and it's not too late to do something for this holiday season!). Put together a care package and fill a handmade drawstring bag and send it to troops away from home or drop it off at a local veteran's center. You can find a variety of links to opportunities for making/sending care packages here.

Now let's make the bag! 

You'll Need:
2/3 yard outer print
1 yard lining print (includes handles)
Fabric marking pen
Safety pin

Cutting:
From the outer print:
(2) 18-1/2" squares

From the inner print:
(2) 18-1/2" squares
(3) 4-1/2" x 42" strips for handles

On both side edges of an outer print square, measure and mark 1-1/2" down from the top and 4" down from the top. Layer the 2 outer squares right sides together and sew around 3 sides using a 1/4" seam allowance, leaving the 2-1/2" between marks unstitched. Make sure you backstitch at both marks. Do the same with the 2 inner squares, but leave a 4" opening along the bottom edge for turning.

Press seam open around each casing opening.


Turn the outer bag right side out. Insert inside the lining with right sides together, matching seams and raw edges. Pin. Stitch around the top edge with a 1/4" seam allowance. 

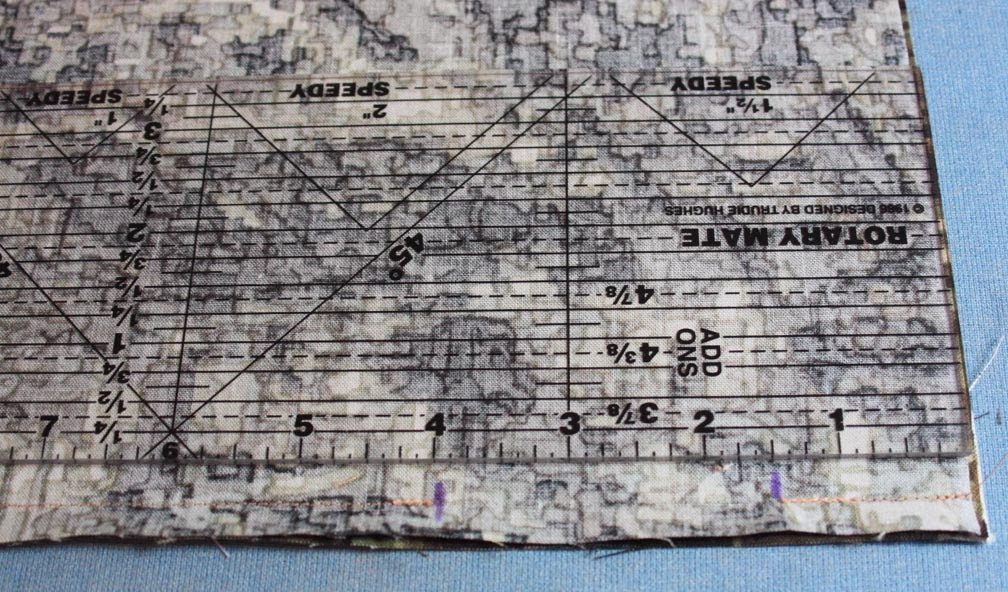
Turn the bag right side out, handstitch the opening in the lining, and stuff the lining inside. The casing holes should line up. Use a ruler and fabric marking pen to mark the top and bottom of the casing holes.

Stitch on the 2 marked casing lines, making sure not to stitch through both sides of the bag.

See how the casing holes line up? This means your bag can be reversible. (If you don't care about a reversible bag, you only need to make the casing holes on the outer bag.)

Sew the (3) 4" x 42" strips short ends together to make a long strip. Fold the strip in half, wrong sides together, and press. Open the folds and fold and press long edges in to the center fold. 

Fold the long strip in half again and topstitch. Cut stitched strip in half to create 2 pieces.

Attach a safety pin to 1 end of 1 handle. Starting on the left side of the bag, feed through the casing, past the casing hole on the right, and back through so the end comes out on the left side. Feed the other strap in from the right side, passing the left casing hole, and back out the right side. 

Trim strips to desired length and knot on each side. 

Your bag is done! 

Here's the bag with the original lining on the outside as well. 
When you've got 2 fabrics you love, having a reversible option is the best solution!

We couldn't stop with just one bag, so we used these prints and the drawstring pillowcase tutorial featured on the blog last summer (find it here) to make a larger bag/pillowcase option.

From drawstring bag to pillowcase!

The two bags together:

Would you like to win a fat quarter bundle of Benartex or Kanvas fabric? Sign up to follow our blog (via email or Bloglovin'--both in the right hand sidebar) and leave a comment letting us know you did so (or are already following!). For a second entry, like us on Facebook and leave another comment. In your comment, also tell us the most challenging gift you ever wrapped. The giveaway will be open through Thursday, December 12th at 11:59 EST, at which point we'll use a random number generator to select a winner.


See the other Holiday Gift Blog Hop tutorials here:
Day 2: Toddler Purse and Doll Blanket by Jennie from Clover & Violet
Day 3: Beer Coozies and Coasters from the Benartex blog team
Day 4: Mae's Daisy Quilt by Melissa from My Quilt Relish
Day 5: Honey Bee Quilt by Erin from Why Not Sew? 

Looking for more holiday gift ideas? Check out the projects from our Holiday Headstart blog hop back in October:

Day 1: Take Me to Class Tote by Tessa from The Sewing Chick
Day 2: Window Zip Pouch by Emily from Mommy's Nap Time
Day 3: Squared Stripe Pincushion from the Benartex blog design team
Day 4: Bold Braid Quilt by Kelly from My Quilt Infatuation
Love It? Share It! Facebook Twitter Google Pinterest Email
Thursday, September 26, 2013

September Blog Hop Day 2: Quilt As You Go Drawstring Backpack


It's Day 2 of the September Blog Hop and the Benartex Blog Team is here, sharing a tutorial for a Quilt As You Go Drawstring Tote. We chose the All Stars collection from Kanvas--these black and pink sports-themed prints make a perfect bag for a girl on the go, and the the bag's style adds a fun, modern touch. What we love about the bag, besides the cool, quilted front: Just one drawstring strap serves as both the way to cinch the backpack and as the straps to wear it!

The fabrics we used:

You'll Need:

  • 2/3 yard black with text and soccer balls
  • 3/4 yard pink star print
  • 1/2 yard stripe
  • Fat quarters of 3 additional black/pink prints
  • Two 21" squares of batting

Cutting:
Black with text and soccer balls:
(1) 20" square


Pink star:
(2) 18" squares
(1) 3" x 42" strip


Stripe:
(2) 5-1/2" x 42" strips

Reserve the remaining fabrics for making the quilt as you go bag front.

Batting:
(2) 21" squares

Let's make the bag!
The front of the bag is created through the quilt as you go method. No need to measure or cut pieces in advance! Start with a 21" batting square. Cut your first piece of fabric--on our bag it is about 4" x 6", but yours can be any size. Quilt it onto the center of the batting square using straight lines, approximately 1/2" apart. 

Continue adding pieces around the first piece, log cabin style. Measure the height of the first quilted piece and cut a piece from another fabric to roughly that same measurement. Lay it right sides together on the quilted piece and stitch with a 1/4" seam allowance. If it's a little too long, no problem. The edges will be covered up as you add more pieces.

Press open and quilt straight stitches down the new piece, 1/4" to 1/2" apart. Always quilt lines parallel to the seam you just sewed. 

Continue adding pieces in the same way, quilting as you go.

Add fabric until the quilted square measures more than 18". Square up to measure 18".

Baste the 20" fabric square to the second piece of batting and quilt it however you like for the backpack backing. We used straight lines 1/2" apart.

Square up to measure 18". Place the quilted front and back right sides together and stitch down the two sides only (creating a tube). 


To make the casing, fold and press the long edges of the 3" x 42" pink star strip in 1/4".

Fold one short edge of the casing in 1/2", press, and stitch. Measure 1-1/4" down from the top edge of the tote and pin the casing in place, all the way around. Trim the casing strip where it touches the starting point and press, fold, and stitch so there's a 1/2" opening between casing ends. 

Topstitch the top edge of the casing. Then topstitch the bottom edge. 


Sew the two 5-1/2" x 42" stripe strips short ends together to make a long strip. Fold and press the strip in half lengthwise, wrong sides together. Open the fold and press both raw edges in to the center fold. Fold on the center line and topstitch along both long sides to create the drawstring strap.

Using a safety pin, feed the drawstring strap through the casing. 

Pull the ends of the straps even and then cinch the bag shut. Decide on a length for the shoulder straps. (It's important to do this while the top of the bag is cinched shut because that's how the bag will be worn.) Trim the straps to the desired length and pin to the bottom edge of the bag back, about 3" in from each corner. 

Turn bag wrong side out and sew along the bottom edge, catching the straps as you stitch. To box the corners, turn the outer tote wrong side out and cut a 1-1/2" square out of each bottom corner. 

Match the seams and stitch across using a 1/4" seam allowance. Repeat on the other corner. 

Use the two 18" pink star squares to make the lining. Stitch around three sides, leaving an opening along the bottom for turning. Box the corners just like for the outer bag. 

Turn the outer bag right side out. Leave the lining wrong side out. Slide the lining around the outer bag, matching raw edges. Pin in place. 


Stitch along the top edge using a 1/4" seam allowance. Turn bag right side out through the opening in the lining. Stitch the opening in the lining closed and tuck the lining inside the bag. Topstitch the top edge of the bag. And here's a hint: When you're sewing the lining and bag together or topstitching, start and end along one of the side seams. That way, if things don't line up perfectly, you can hide it along the seam.


The giveaway: For a chance to win a fat quarter bundle of the All Stars collection, sign up to follow the Benartex blog using either Bloglovin’ or the email feature (both in the right sidebar). Then leave a comment below this post telling us that you are a follower and letting us know if you've ever made a bag before (and if you have...how many?). This giveaway will be open through Wednesday, October 2 at 11:59 pm EST.

Don't miss the other tutorials featured in our September blog hop:
Day 1: Urban Oasis Table Runner from Kristen of KD-Quilts


Love It? Share It! Facebook Twitter Google Pinterest Email