 |
| Front Porch by Cherry Guidry for Benartex |
I was asked to make something with the main panel. Ooohh! I love a challenge. As you can see, it has various squares and rectangles. The center was calling to me: Make me a pillow! The four little squares are a perfect size for mug rugs; I saw journals with real paper on the inside. And I even thought that I could make two good sized bookmarks with those tall, skinny rectangles.
 |
| Front Porch panel: 23" x 42" |
Now, let's see how I did it.
BOOKMARKS were made by cutting out the flower panels. I left a little bit of the white background fabric on to give me some trimming room. I then transferred fusible webbing to the wrong side and then ironed each one to card stock. I used my Fiscar specialty scissors with a curved blade to cut around the outside, as you can see. Easy. Quick. Not too big for most books
Next, I pulled out my Tri-Recs tool and cut half-rectangles to tilt those four little squares. It's good to audition the triangles to make sure they are in the right position (ask me why I say that . . .)
 |
| Added 1/4" to small flower square and cut slightly oversized half-rectangles |
As you can see, sometimes you sew the wrong triangles to the wrong side! Time to rip out!
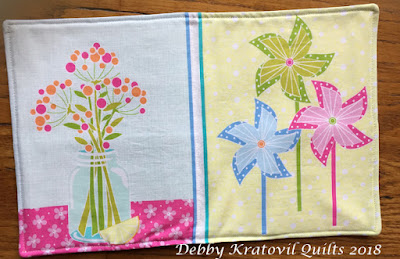
Here are my set of four mug rugs. Of course, I added batting and backing. Left an opening for turning and then top stitched it closed. Very cute, don't you think?!
 |
| 4 Mug Rugs using Front Porch |
I didn't have the time to make a pillow with that center design with those inviting chairs under that awning, but let me show you how I made my two art journals!
I cut out two adjoining rectangles, planning on the pinwheels print to be my front cover (the book is finished in this shot).
 |
| Two adjoining rectangles will be the front and back covers for my journal |
I cut a piece of contrasting fruit salad print for the inside pocket. It is the same size as the two panel piece above (with seams, of course). Fold in half, wrong sides together. This is now pocket height.
Now, align it with the inside green honeycomb print (the same size as the journal cover) with a piece of batting wedged between. Pin.
 |
| I cut the pocket fabric the same size as the rectangles and folded it in half |
Now, align it with the inside green honeycomb print (the same size as the journal cover) with a piece of batting wedged between. Pin.
 |
| Align folded pocket fabric with inside lining |
Place journal front piece right side down on the pocket and pin.
 |
| Align parts and pin |
Stitch 1/4" seam around, leaving about 6" open for turning. You can see my opening right under the "s" in "Quilts" below.
 |
| Stitched with opening for turning |
Trim the four corners to reduce bulk:
 |
| Trimming four corners |
I turned the journal right side out and stitched around the outside about 1/8" from edge. I took 7 sheets of 8.5" x 14" paper, trimmed it to fit the inside (took 1" off both horizontal and vertical), centered it and stitched right down the middle!
 |
| Paper added to inside! |
And let's see the pocket!
 |
| Journal with pocket for a pen |
Here is a picture of two rectangles joined by a small piece of that blue floral print from the top and bottom of the panel. The book is finished.
 |
| Two rectangles joined by the blue floral print. I wanted the Lemonade stand to be the front |
And the inside of this journal with one of those bookmarks!
 |
| Inside of 2nd journal with a handy bookmark! |


Adorable projects. What are the dimensions of the various blocks on this panel?
ReplyDeleteHi Debby,
ReplyDeleteWhat adorable projects! Love this from an easy panel - too, TOO cute.
~smile~ Roseanne
These projects are fantastic! Thank you for sharing your wonderful talents with us Debby, you are great at designing fun and delightful projects to sew.
ReplyDeleteWonderful projects! The whole fabric collection is awesome!! Have a great day! angielovesgary2 atgmail dotcom
ReplyDeleteSuch cute projects! Great ideas for the blocks from a panel.
ReplyDeleteSo clever !!! Thank You. Happy Happy Fabric.
ReplyDelete