
Welcome to Benartex's Christmas in July Blog Hop here at Sew in Love with Fabric! We'll be sharing holiday-themed tutorials this week and beyond, so be sure to stop by each day to see a new tutorial and have a chance to win some fabric to get your own holiday sewing started!

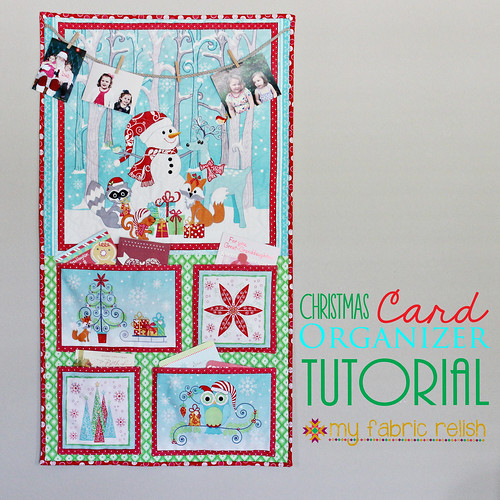
Today Melissa over from my fabric relish is here with an adorable Christmas Card Organizer made using the Frosty Forest panel and a few coordinates. Check out Melissa's tutorial and then head over to her blog to find out how you can win a fat quarter bundle of Frosty Forest plus two of Cherry Guidry's Frosty Forest patterns.
Hey fabric lovers! I'm Melissa over from my fabric relish and you know know what I like about doing blog hops? It's making the time to finally make something that has been on my "to do" list for some time. This is one of those examples....
When Benartex asked me if I was interested in doing a blog hop, I almost declined. Not because I didn't want to, but because I am solo-parenting for the most part this summer and with teaching kids camp and longarming customer quilts, I didn't want to stretch myself too thin. But I gave all the adorable Christmas fabrics a glance and once I spotted Frosty Forest, I couldn't resist. I knew exactly what I would make with it....
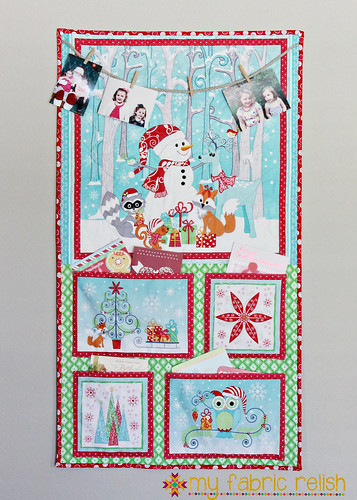
A Christmas card organizer!
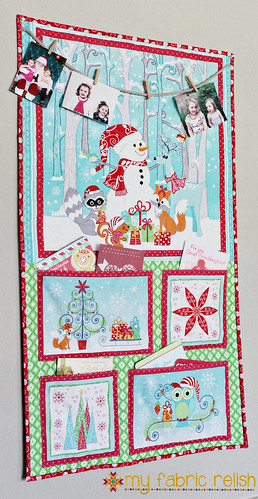
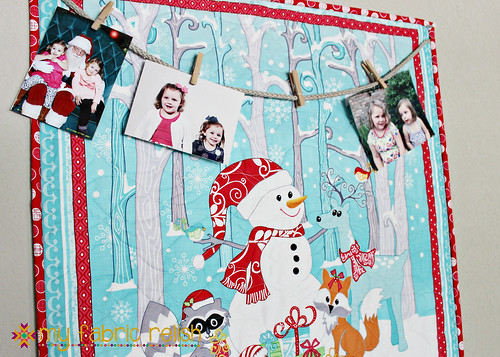
I love getting Christmas cards during the holidays and like to be able to look at them and have them out on display, but they can become quite cluttered just sitting on counters or mantles. At my old house, we had this great spot that I would hang some twine and hang them with clothes pins. I really don't have a great spot for them at the new house but since I'm not lacking in wall-space why not a wall hanging?
This wall organizer goes together very quickly with very little fabric!
Here's what you need:
Finished Size: 23" x 41"
- (1) Frosty Forest Panel
- 1 yard coordinating fabric - this will be for the bottom pocket panel (sub-cut a 24" x 20" piece) and pocket lining (use the remaining fabric to cut pocket lining from Step 2 below). If you would like to use a different print for the pocket lining, you only need (1) fat quarter for those.
- 1 3/4 yards - backing
- 1/3 yard - binding
- 3/4 yard of twill tape, ribbon, or burlap rope (optional)
- Baby size batting or a piece of scrap batting measuring more than 25" x 43"
Now lets get started!
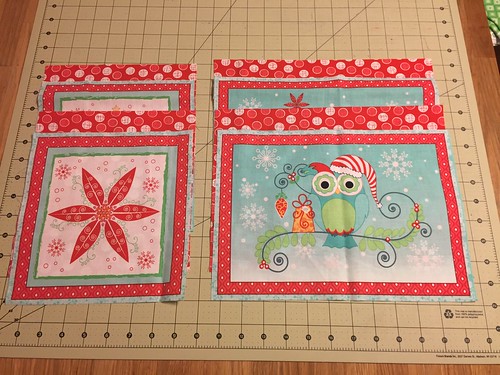
1. Cut the top and bottom portions of the panel (future pocket pieces) from the panel and trim off the excess on the side of the main panel (trim on the dashed black line). Make sure you keep at least an additional 1/4" seam allowance. Next, trim the pocket panel pieces also keeping a 1/4" seam allowance.
2. Cut your pocket lining pieces the exact size of your front pocket pieces using the remaining fabric from your bottom pocket panel fabric of from an additional fat quarter if you like.
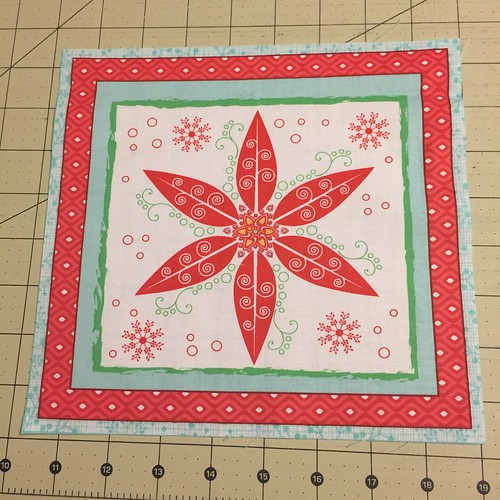
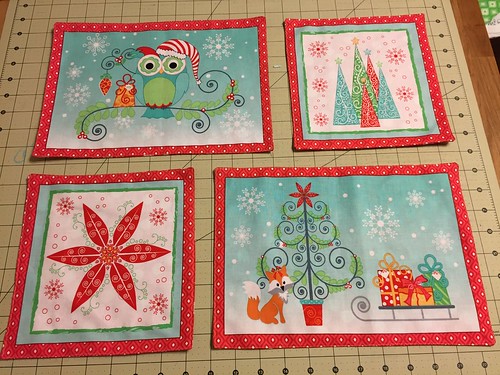
3. To make the pockets, take one pocket front piece and one lining piece and place them right-sides-together (RSTs) and sew a box around the perimeter using a 1/4" seam allowance and leaving a 2" opening along the bottom side of the pocket. Clip the corners between the stitched line and the raw edge to remove some of the bulk. Turn right-side-out through the hole you left, poke your corners, and carefully press. Topstitch around the perimeter of the pocket whole stitching the opening closed. Do this for all four pocket pieces. Set the pockets aside.
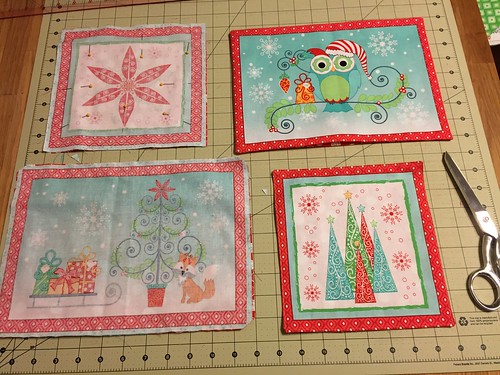
{Progression of making the pocket panel pieces}
4. Take the bottom pocket panel piece (24" x 20") and sew it to the bottom side of the panel using a 1/4" seam allowance along the 24" side. It's okay if the sides are a bit longer; you can trim those off. Sorry I forgot to take a picture of this part.
5. You will want to quilt your panel before attaching the pockets; therefore, make a quilt sandwich and quilt as desired. Once you finish quilting, you can now square up your quilt.

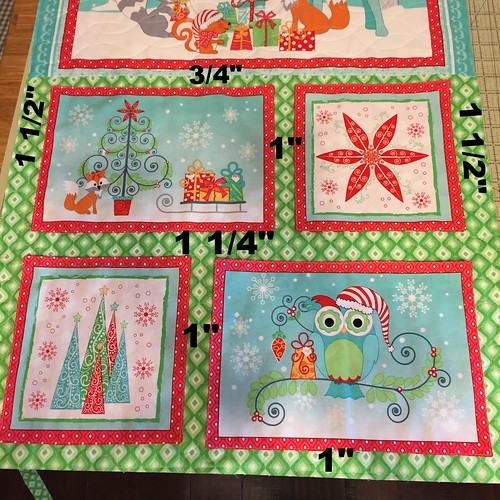
6. To attach the pockets, you will simply sew them to the quilt along the sides and bottom of the pocket (NOT THE TOP). Be sure to backstitch! My pockets are spaced as shown below.

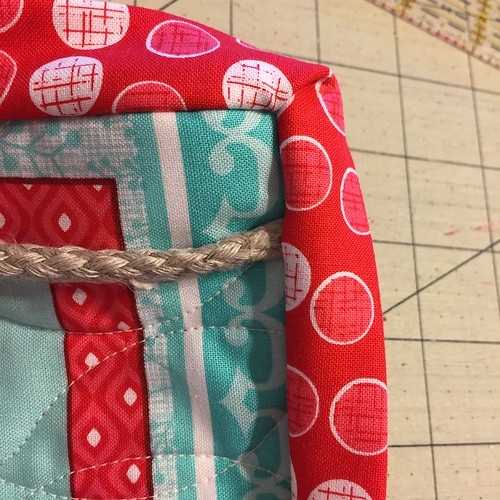
7. Baste your twill tape/ribbon/burlap rope along the top about 1" down from the top of the quilt using a 1/8" seam allowance. Make sure you are happy with the swag length before sewing in place. You might want yours to hang lower or higher than mine.
8. Attach your binding and you are finished! If you have a preferred method of hanging wall hangings (for example: corner pockets, hanging sleeves), you will want to attach that at this time as well. I'm quite lazy and just use thumb tacks.
I hope you get a chance to make a Christmas card organizer before Christmas. You only have 5 months! If you would like to win a bundle of Frosty Forest, plus two patterns from Frosty Forest designer Cherry Guidry, head over to my blog and find out how to enter to win!

And be sure to stop back each day of our blog hop for a different Christmas in July tutorial featuring our holiday fabrics!
Here's our schedule:
Monday: Santa Sack by Chris from Made by Chrissie D using Happy Holidays Snowmen
Tuesday: Tree Skirt by Debby from Debby Kratovil Quilts using Homespun Holiday
Wednesday: Throw Pillow by Kelly from My Quilt Infatuation using Ornamental Splendor
Thursday: Wonky Star Placemats by Kristen from KD Quilts using Santa's Here
Friday: Christmas Card Organizer by Melissa from My Fabric Relish using Frosty Forest
Tuesday: Wintry Wall Banner by Wendy from Ivory Spring using Shades of Winter
Love It? Share It!


That is very cute and will be such a nice place to display your cards at Christmas.
ReplyDeleteThis is so adorable! I love the fabrics that were used. They make the cutest card holder.
ReplyDeleteLove the colors and the layout. Great idea.
ReplyDeleteThis is a great idea. Love it!
ReplyDeleteSo cute - I love it!
ReplyDeleteMelissa, I like the layout and your use of the fabrics! Thanks for sharing! A family friend did something similar years ago (not as well done!) to hold coupons for special activities that her kids could draw when they were helpful "above and beyond" during the holidays. It worked so well she made another one for year-round use.
ReplyDeleteStunning and love your fabric combo!
ReplyDeleteI am in love with is fabric line and am going to have to add it to my stash.
ReplyDeletei follow you by email.
ReplyDeletei follow sew in love with fabric on blog lovin'.
ReplyDelete