

Today we are thrilled to have Svetlana from s.o.t.ak. handmade sharing a tutorial on our blog for her Big Apple Shoulder Bag. Have you visited Svetlana's blog before? She's got a wonderfully fresh, modern look--some great scrappy projects (an improv log cabin quilt, bright coasters, and a wonderful liberated basket quilt, Gwen Marston-style, to name a few). Check out her tutorial below, and then head over to her blog for some eye candy as well as a chance to win a fat quarter bundle of Kanvas' The Big Apple collection. Here's Svetlana!

THE BIG APPLE SHOULDER BAG
I made this shoulder bag for my teen daughter. It's a perfect size to keep all her "essentials" in while she's out and about with her friends.
Materials needed:
1/2 yard exterior fabric
1/2 yard lining fabric
1/2 yard coordinating fabric for the strap, ties, and tie casing
1/2 yard fusible fleece
Finished size of the bag is approximately 11" x 13".

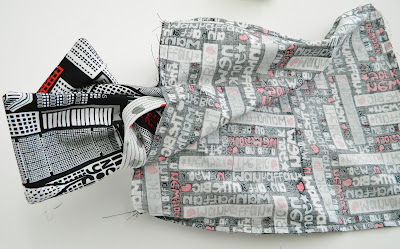
All the fabric I used is from the Big Apple collection by Benartex.
1. cutting
exterior fabric: cut two 12" x 14" rectangles
lining fabric: cut two 12" x 14" rectangles
coordinating fabric for the strap and ties: cut one 4" x 30" strip for the strap
cut two 3" x 10 1/2" strips for the casing
cut two 2" x 34" strips for the ties
fusible fleece: cut two 12" x 14" rectangles
cut one 4" x 30" strip for the strap
2. attaching casing for the ties to exterior panels
Following manufacturer's direction, attach fusible fleece to the wrong side of both exterior panels, set aside for now.
Fold the 3" x 10 1/2" casing strip in half along the 10 1/2" side, right sides together, pin to keep layers from shifting, and sew along all 3 raw edges, leaving 3" opening in the middle of the long side.

Trim the corners, turn right side out, press. (note, you still have a 3" hole where you turned the casing right side out, you'll stitch it closed in the next step while attaching the casing to the exterior panel of your bag)

Place the casing on the right side of the exterior panel 2" from the top, 1" from each side of the panel. Pin.

Stitch along both long sides of the casing, using 1/8 seam allowance. Backstitch at the beginning and end. Make sure not to stitch along the short sides of the casing !!!!
Following the same directions, make the second casing and attach it to the second exterior panel.
3. assembling the exterior of the bag

Place both exterior panels on top of each other, right sides together, making sure your tie casings are on top. Pin, stitch around the 2 long and a bottom side. Backstitch at the beginning and end.
Clip the corners, press the seams open, and turn right side out. Set aside for now.
4. assembling the lining
Place both lining panels on top of each other, right sides together. Pin, stitch around the 2 long
and a bottom side. Backstitch at the beginning and end.
Clip the corners and set aside for now.

This is what your exterior and lining of the bag will look like at this point.
5. making the strap
Attach fusible fleece to the wrong side of your 4" x 30" strip of fabric for the strap.
Attach fusible fleece to the wrong side of your 4" x 30" strip of fabric for the strap.

Fold the strip in half along the 30" side, press. Now open the strap, fold both long ends over to meet in the middle, press. Bring the ironed under ends together and pin.


Topstitch along both long edges and then fill in more stitching about 1/4" apart to give your strap a nice texture.
6. attaching the strap to your bag

Line up the short edge of your strap with the top of the exterior of your bag ( the seam where the front and bag exterior panels meet is where the middle of your strap is). Pin in place.

Using 1/8" seam allowance, stitch in place.

Repeat on the other side to attach both sides of the strap. The picture shows what your bag should look like at this stage.
7. attaching lining to your exterior

Now place the exterior of your bag (right side out) inside the lining (right side in). Make sure the tops of both lining and the exterior are lined up. Pin all the way around the top raw edge.

Stitch all the way around, leaving about 5" opening in the middle for turning the bag right side out.

Turn the bag right side out through the hole in the opening. Push the corners out and adjust the lining inside the bag.

Pin the opening closed, topstitch around the top of the bag, removing the pins as you go. (you can do a double topstitch as I did)


Pin the opening closed, topstitch around the top of the bag, removing the pins as you go. (you can do a double topstitch as I did)

8. making ties
Using the same method as for making the strap in step 5, press the 2" x 34" strip of fabric in half, bringing the edges in the middle and folding them in.

Using the same method as for making the strap in step 5, press the 2" x 34" strip of fabric in half, bringing the edges in the middle and folding them in.

Pin if you like, and topstitch along the folded edge as shown in the picture.

Make two ties using this method.
9. finishing up the bag

Thread one fabric tie through the casing on the exterior of the bag, thread the other tie on the other side. Make a tight knot on each raw edge of the tie. Pull the ties together and make a loose knot on both sides.

Make two ties using this method.
9. finishing up the bag

Thread one fabric tie through the casing on the exterior of the bag, thread the other tie on the other side. Make a tight knot on each raw edge of the tie. Pull the ties together and make a loose knot on both sides.
Congratulations, you're finished! Now, wasn't that fun?
Hope you enjoyed the tutorial. Svetlana
p.s. Don't forget to head over to Svetlana's blog to enter a giveaway for a chance to win a fat quarter bundle of The Big Apple!
See the schedule for the entire April blog hop here.
p.s. Don't forget to head over to Svetlana's blog to enter a giveaway for a chance to win a fat quarter bundle of The Big Apple!
See the schedule for the entire April blog hop here.
Love It? Share It!


Sweet!
ReplyDeleteWhat a great tutorial - thank you Svetlana!
ReplyDeletePerfect for some teens I know! Thanks!
ReplyDeleteCute bag! Nice tutorial, thanks!
ReplyDeletePlease enter me in the drawing - I have subscribed to my tmerkling@gmail.com account and also added you to my FB follows rizamerk@cox.net
ReplyDeleteNow that I have a grandchild, I want to get back to sewing for her.
Great tutorial, thanks! This line The Bog Apple is a fun collection of prints. I jsut started following you via google reader. Jane
ReplyDeleteThis is really a cute bag. The fabric is nice too
ReplyDeleteThank you for this fun...and waaaay cool!...Tutorial!! :) Awesome fabrics too!
ReplyDeleteCute bag and fabric. Thanks for the tutorial.
ReplyDeleteThank you for the great tutorial. Love the fabrics.
ReplyDeletewho won the bag?
ReplyDeleteLoved the blog hop. I plan on making at least two of the projects. Thanks for hosting. I liked Benartex FB page and subscribed to the posts. Please enter me in the fabric giveaway! My email is tealdragonquilter@gmail.com. thanks again, mary
ReplyDeleteCute! I never thought of an inset casing; great idea!
ReplyDeletethanks for share....
ReplyDeleteOur company is one of the best web design companies in India. With us, you can get any type of website design, including custom websites, PHP websites, Laravel websites, and more.
ReplyDeleteIf you are looking for an SEO Agency Delhi, CyberWorx Technologies is the leading provider of top-notch SEO services that helps brands shine in the online arena. Collaborate with CyberWorx to get your business web pages' search engine optimized.
ReplyDeleteAcademy of Applied Arts one of the leading Top Interior Design Institute offers the best One Year Course in Interior Design after 12th and conducts courses.
ReplyDeleteYour blog is a treasure trove of valuable information!! Keep it up
ReplyDeleteQuality chasing by excellence, Maven Technology has been named the Best IoT App Development Company and designs cutting-edge applications that harness the power of connected devices.
Let's transform your IoT idea into a seamless and remarkable reality.
Many Thanks..
Really enjoyed following along with April Blog Hop Day 2 — so many fresh ideas and creative vibes! It reminded me of the vibrant energy you find in some of the newer Flats in Noida — stylish, full of life, and perfect for anyone looking to mix comfort with inspiration.
ReplyDelete