Wednesday, August 9, 2017

Bree Blog Hop: Day 2

Welcome to our Bree blog hop! We're excited to show you what four different designers have created with the Nancy Halvorsen's gorgeous new fabric collection! If you missed our introduction to Bree, find it here.


Here's Stephanie:
Nancy Halvorsen has been one of my favorite fabric designers for a very long time! I’ve made several projects using her amazing fabrics and proudly display them in my home. I even have a Nancy UFO (un-finished object) … a king sized quilt for my bed completely made from fabrics that she designed! I really need to get that finished, but back to the subject at hand … BREE!

This is such a bright and fun collection – it just makes me smile. We are in the process of revamping our laundry room, and while cleaning it out I found my “Bags of Bags” … oh so many plastic grocery store bags. These “Grocery Bag Holders” will be a great solution to that problem! I love projects that are pretty and functional.


Here is your supply list (this will make 3 bags):
(5) coordinating FQs (I went with Grey, Aqua, Blue and Orange)
(3) 7” pieces of ¼” elastic
Coordinating thread for top-stitching

Cutting Instructions:
From each of (3) FQs cut: (1) 8-1/2” X 18” strip, (2) 3-1/2” X 18” strips and (2) 2-1/2” X 18-1/2” strips

From each of (2) FQs cut: (6) 2” X 18” strips and (2) 2-1/2” X 7” strips


Step 1:
Arrange your 18” strips, then sew together. I like to flip my stitching direction on each strip when I sew longish strips together, it helps to keep the whole project square. Press all the seam allowances in one direction, then square up to 17” X 24-1/2”.


Step 2:
Fold top edge down ¼” and press, then fold again to create a clean edge on the top. Top-stitch 1/8” from top edge.


Step 3:
Fold rectangle in half, lining up seams and pin. You are going to stop sewing 1” from the bottom edge, so I mark this with a different pin. Sew – making sure to back stitch at the beginning and end. Press the seam allowance open, and don’t worry too much if your seams don’t line up perfectly – this will be the back!


Step 4:
Fold bottom edge in ½” and press, then fold and press again. Top-stitch 1/8” from edge all the way around (backstitch at beginning and end) to create casing for elastic. Run elastic through the casing (I like to use a safety pin). Tip: pin loose end of elastic to project so you don’t pull it through and have to start over! Sew ends of elastic together, then tuck ends into the casing.


Step 5:

Fold your 2-1/2” X 7” strip in half and press to mark center. Fold the sides into the center and press, then fold the whole strip in half and press – it should be about 5/8” wide by 7” long. Topstitch close to both edges. Fold in half to find center, then flip one end down at a 45-degree angle – repeat on other side and press. Sew to tack down. Line up inside of center back seam and pin in place – then sew down (Don’t forget to backstitch!)

Finished bag:

Thanks, Stephanie! 

For a chance to win a fat quarter bundle of select Bree fabrics, leave a comment below letting us know what colors you'd choose from the Bree collection to make these bags. Giveaway is open through Saturday, August 12th at 11:59 pm EDT. 

Make sure to follow along on all four days of our Bree hop!
Thursday: Kristen from KD Quilts
FridayBenartex blog design team
Love It? Share It! Facebook Twitter Google Pinterest Email

Tuesday, August 8, 2017

Bree Blog Hop: Day 1

Welcome to our Bree blog hop! We're excited to show you what four different designers have created with the Nancy Halvorsen's gorgeous new fabric collection! If you missed our introduction to Bree, find it here.


Starting out the hop is Alison from Little Bunny Quilts. She's used a 30-degree ruler to create a three-block table runner in corals, aquas and oranges. Enjoy her tutorial and then head over to her blog to enter for a chance to win a selection of Bree fat quarters.

Here's Alison:


Check out this gorgeous fabric line!


For my stop on the hop, I decided to make a table runner that uses my 30 degree ruler from Creative Grids (not an affiliate link!) to make flower blocks!


To make this runner, you will need:

1 yard navy paisley print for backing and binding
1/4 yard grey dot print for background
1/4 yard coral swirl print
1/4 yard coral paisley print
1/4 yard orange swirl print
1/4 yard orange circle dot print
1/4 yard aqua swirl print
1/4 yard aqua/navy check print


For each pair of flower prints (aqua/aqua, orange/orange, and coral/coral) decide which will be your "accent color" (center of the petal block) and which will be your "main color" (sides of the petal block). Trim each 1/4 yard cut to 9 inches wide, or if using fat quarters, cut 9 inch strips.

From each of your "accent color" strips, cut four (4) 30 degree wedges from your 9 inch wide strip. Also cut four (4) 2.5 inch squares from each "accent color". Set these squares aside for now.


From each of your "main color" strips, cut eight (8) 30 degree wedges from your 9 inch wide strip.


Sew a "main color" wedge to each side of your "accent color" wedges. Don't get too worried if your points aren't perfect! Make four (4) petal units in each color, for a total of twelve (12) petal units.


From your background fabric, cut six (6) 4 inch squares. Cut each square in half diagonally once for a total of twelve (12) background triangles. Sew each triangle along the long edge (hypotenuse, for you mathematicians out there!) to the beveled edge of your petal units.


Trim each of your petal units to 8 inches square. Use the stitch and flip technique to attach the 2.5 inch squares to the center of each petal block with a contrasting color.


Sew your four petal units into one block, making three total blocks. Sew your blocks in a row.


Quilt and bind as desired. Enjoy your summery table runner!


Thanks Alison!

Head over to her blog for a chance to win some Bree fat quarters!


Make sure to follow along on all four days of our Bree hop!
Thursday: Kristen from KD Quilts
FridayBenartex blog design team
Love It? Share It! Facebook Twitter Google Pinterest Email

Monday, August 7, 2017

Introducing Nancy Halvorsen's new line, Bree

You saw a sneak peek in our Spring Quilt Market wrap-up post, but today we're here to show you all of it! That's right--Nancy Halvorsen's first collection in quite a while, Bree! And let us tell you, it was worth the wait! Fresh, cheery colors, a variety of gorgeous prints all coming from a whimsical paisley...38 prints to play with! Read all about the collection today, as well as Nancy's coordinating book, and stop by the rest of the week for a blog hop featuring Bree.


Where did the inspiration for your new fabric collection, Bree, come from?
It’s named after my 10-year-old granddaughter. This is my first fabric collection after a break from designing, and I thought it needed to be fresh and bright and happy. I started out with that in mind. When I finished, I was in love with it and the colors. My daughter-in-law said, “Bree is going to love this.” I realized the fabrics reminded me of Bree, who is so sweet and bright and fresh and happy, so I named it after her.


What print did you begin with?
I started off with the paisley. It’s the anchor for the group. Basically it’s just one little motif at a time. I knew I wanted to use flowers in each paisley, and I started with the tulip. I also love dots, and you see a lot of dots in there. This print definitely took the longest to design.


After I finished it, I realized it would be cute in just two colors as well, so I created that version.


Can you tell us about some of the coordinates?
From sewing and quilting for so many years, I knew that I needed a variety of colors and scales. I wanted some kind of dot in every print. There are tiny polka dots and bigger polka dots with circles around them. I like stripes and plaids, too, so I included those.


Do you have a favorite print?
That’s like asking which is my favorite child! I love them all. They all play their role and I feel like they all need to be there.

How did you develop the palette?
When I was designing the fabrics, I already had the quilt for the book in mind. I knew the fabrics needed to be useable year-round—not seasonal. I needed colors that worked for Christmas, but also Halloween, Valentine’s Day, and the 4th of July. So you’ll see a wide variety of colors.

Tell us about the Imagine book that coordinates with the fabric line.
I always put a lot of messages and words on my projects because I love to do things that are uplifting and motivational. I’ve done a lot of month quilts, so I wanted to come up with a block of the month that isn’t specific to the name of the month. I came up with using an inspirational word for each month. The block ideas were born one at a time.


What might readers not realize by looking at the quilt photo?
I love to get dimension and texture in the quilt and I do that a lot with buttons. There are many fun buttons on the main quilt that I think add a lot to it. I want you to look at the quilt and smile.


How did you decide which words to use?
I put together a huge list of words and narrowed it down to my favorites—words that would be fun to show, to design with. People always want a Christmas something or Halloween something, so I wanted it to go along those lines too with the block themes.

The banners are so adorable as well!
The book also includes the banners. That was really fun too. I always try to give sewers lots of ideas for things they can do if they don’t want to take on the full quilt project. Blocks can be made individually into wall hangings or pillows. On the banners, I went a little bit more holiday themed. Usually when you’re putting up a banner it’s to celebrate something. They’re quick, fun easy projects.


Click here to find Nancy's Imagine book.

If you've fallen in love with Nancy's collection, check out the two free quilt patterns available on our website: 

"Puzzle Box" quilt designed by Heidi Pridemore
Click here to download the free quilt pattern.

"Perfect Harmony" quilt designed by Heidi Pridemore
Click here to download the free quilt pattern.

Click here to see the entire Bree collection (38 prints!).
Click here to find the free quilt patterns.
Click here to visit Nancy's website.
Love It? Share It! Facebook Twitter Google Pinterest Email

Friday, August 4, 2017

Quiz: What do these two quilts have in common?

The two quilts shown below, made using our fabric, are both featured in the September/October 2017 issue of McCall's Quilting magazine. Beautiful, aren't they? Our question for you--what do they have in common? 
(Scroll down for the answer.)


Keep scrolling....


They're both made from the same fabric collection, Zentastic

"Dreamcatcher" is a large one-block quilt design using a more muted cool color palette of Zentastic prints.
"Dreamcatcher" quilt designed by Denise Russart;
sewn by Diane Merritt; machine quilted by Ruthie Wasmuth

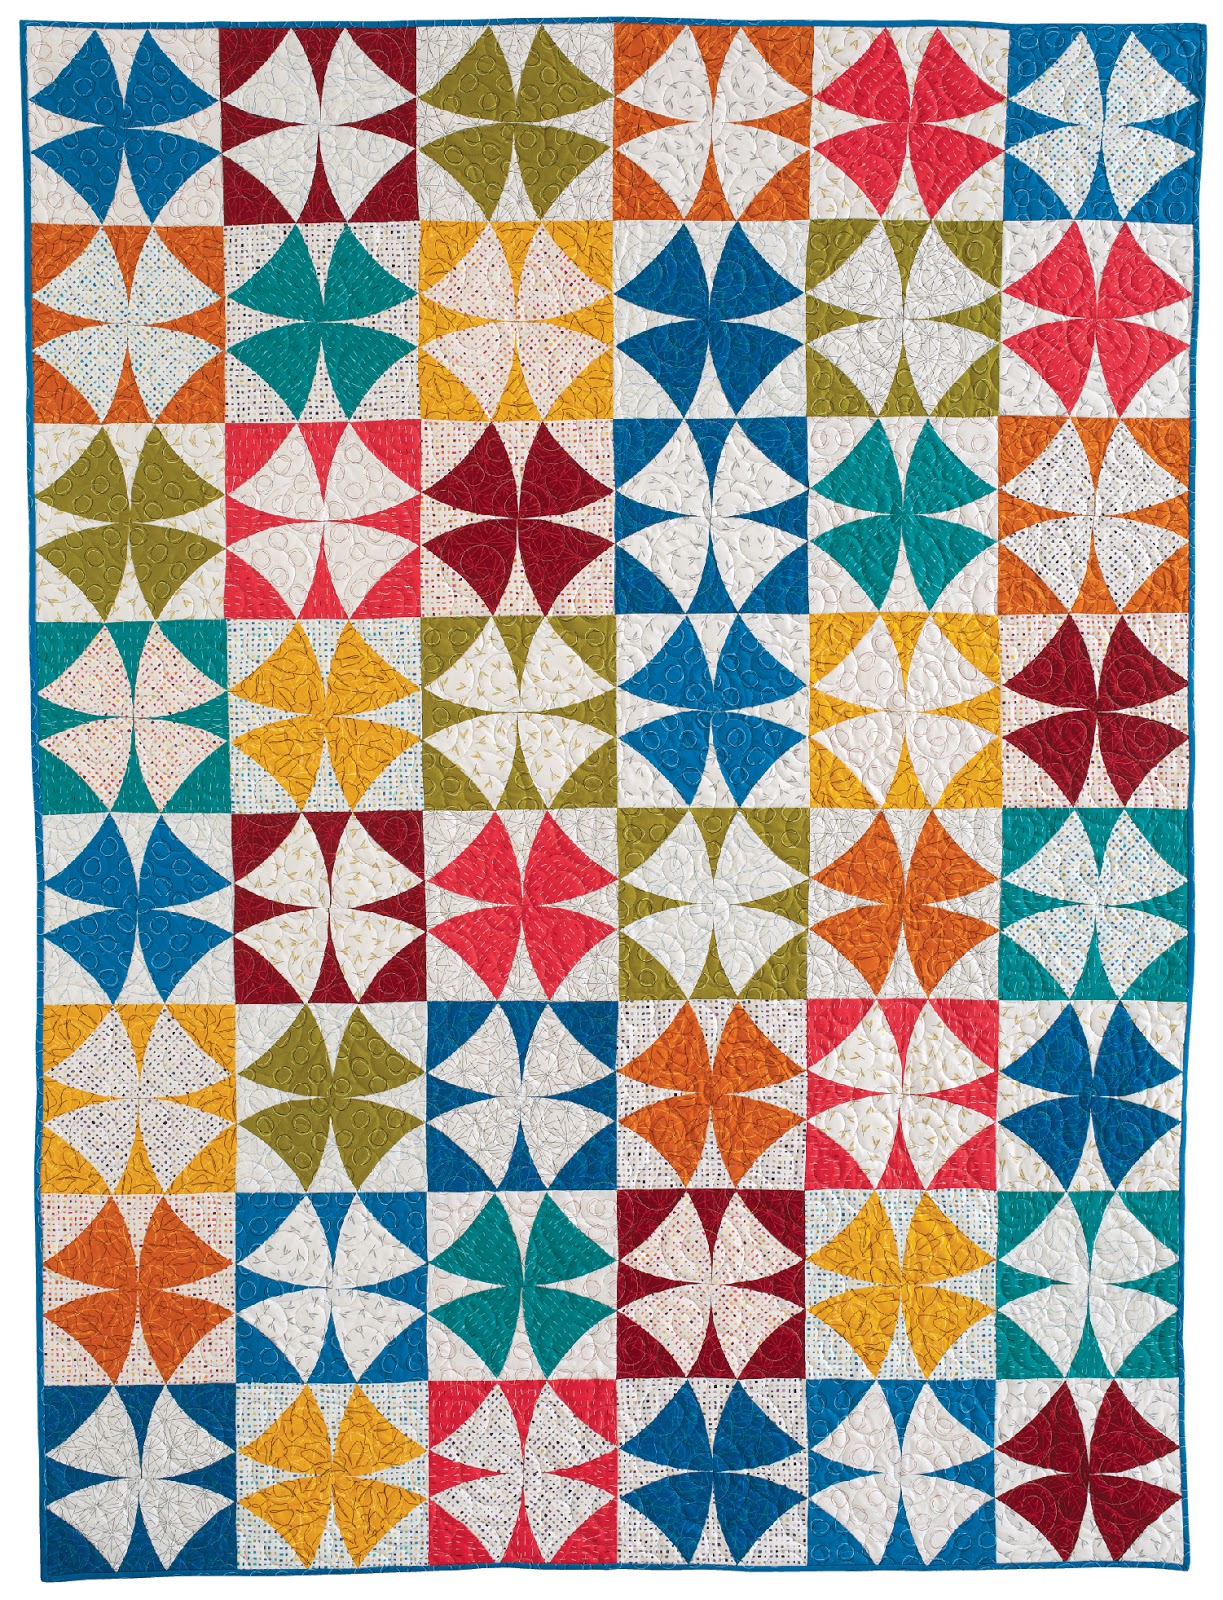
"Zentabulous" uses a bolder selection of Zentastic prints and features the classic Winding Ways block with the colors reversed in half the blocks. 
"Zentabulous" quilt designed and made by Jean Nolte

Click here to see the Zentastic collection.

Click here to find McCall's Quilting.

Love It? Share It! Facebook Twitter Google Pinterest Email

Thursday, August 3, 2017

Color Flow

Caryl Bryer Fallert-Gentry's newest collection, Color Flow, is lush with vibrant hues! These textured prints have so much depth, and they work beautifully together or as coordinates for your favorite prints. We asked Caryl to tell us more about her Color Flow collection. Keep reading!


How did you come up with the design of this fabric?
All of my designs are based on fabric that I hand painted with dye. The wet fabric was scrunched, which lets the colors flow together to form organic patterns.


What do you like best about the fabric?
I like the effect of dappled light in this fabric. It will be fun to work it into landscapes and floral designs.

Do you design fabrics like these to use in your own style of quilting?
I use gradations of color and value in all of my work. This collection includes a full spectrum (color wheel) of hues as well as light to dark neutrals. I can wait to start working with these in my newest quilts.

Can you tell us about choosing the colors?
The colors form a full color wheel that graduates from light to dark as well as color to color. You can use them all together to add the “ooh wow“ factor to any quilt, whether traditional or contemporary. The neutrals, used together form a light-to-dark gradation.


What’s your favorite color in the collection?
I love all of them… can’t pick a favorite.

Melanie Greseth and Joanie Holton of Tailormade by Design used Caryl's fabrics to design the Color Sweep quilt--a log cabin variation that plays with the different values in the line. 
Click here to download the free quilt pattern.


Click here to see the entire Color Flow collection.
Click here to find the free quilt pattern.

*****************************************************
Next week we'll be featuring Nancy Halvorsen's new collection, Bree. Get ready for next week by entering Nancy's giveaway for a fat quarter bundle of Bree and a copy of her new book, Imagine. Find the giveaway on Facebook and on Instagram
Love It? Share It! Facebook Twitter Google Pinterest Email