Wednesday, July 22, 2015

Don't Miss This!


Our friends over at Quilting Deals - Missouri Star Quilt Company have teamed up with Vanessa Vargas Wilson and launched a new YouTube channel called Crafty Gemini Creates!  This week's tutorial features Michele D'Amore's Butterfly Effect collection as Vanessa teaches you how to make some super cute wrapped fabric bowls!  Click here to check it out.


And here's another quick look at Michele's Butterfly Effect fabrics in the blues Vanessa used in the bowl and in the bright colorway as well:


Love It? Share It! Facebook Twitter Google Pinterest Email

Christmas in July: Throw Pillow

Welcome to Benartex's Christmas in July Blog Hop here at Sew in Love with Fabric! We'll be sharing holiday-themed tutorials this week and beyond, so be sure to stop by each day to see a new tutorial and have a chance to win some fabric to get your own holiday sewing started!


Today Kelly from My Quilt Infatuation is here with an easy throw pillow design using Allison Hayward's Ornamental Splendor collection. Check out Kelly's tutorial and then head over to her blog to find out how you can win a fat quarter bundle of Ornamental Splendor.

Hey there, friends!  I'm Kelly from My Quilt Infatuation, and I'm delighted to be a part of the Christmas in July blog hop!  Holiday sewing is much less daunting to me when the season is far away.  With no deadlines looming, I really get to take time to enjoy my Christmas projects.

This 18 inch pillow is made with the beautiful Ornamental Splendor line, and I love that the design gives the impression of a big Christmas gift, without looking exactly like it.  The larger pieces in this pillow really let the fabrics shine, and of course it also makes this a super quick project (and who doesn't love those when gift-giving season is upon us)!


For this project, you will need-

*four contrasting prints, one fat quarter each (three prints for the block, and one print to bind the pillow)
*background fabric, 1 fat quarter or quarter yard (I used Kona White)
*1/2 yard backing fabric
*1/2 yard muslin (for pillow lining)
*18 inch pillow form

Cutting Instructions-

*from background fabric, cut two 7 inch squares
*from print 1 (red "gift box"), cut (1) 7 inch square plus (8) 4.5 inch squares
*from print 2 (green "bow"), cut (1) 2.5 inch square plus (1) 7 inch square
*from print 3 (white print "ribbon"), cut (4) 2.5 x 8.5 inch strips

Begin by making your half square triangles for the pillow.  Align one 7 inch print square with one 7 inch white square, and sew with a quarter inch seam all the way around.  Then cut diagonally as shown.


Open them up and give them a quick press, and voila!  All eight of your HST's are ready to go!


Next, piece the corner units for the block.  Each corner unit will require one green HST, one red HST, and two red squares.  You'll need to make four corner units.  Lay out and piece your corner units like this.


Once you have the corner units all pieced together, it's time to add the "ribbon" and "bow" to your gift box.  Just use the sashing strips to join the block together.


Once your block is done, you can turn it into a pillow in a number of different ways.  I like to back my block with muslin, which becomes the pillow liner, and essentially treat it like a mini quilt.  I also add binding to my pillows to give them a little extra flair.  You can check out my detailed pillow construction method HERE, complete with tons of photos.


I'm so excited to be able to give away a bundle of the Ornamental Splendor fabrics I used in this quilt!  Hop over to my blog home, My Quilt Infatuation to find out how to win this gorgeous fabric!  Happy Christmas in July!

And be sure to stop back each day of our blog hop for a different Christmas in July tutorial featuring our holiday fabrics!

Here's our schedule:
Monday: Santa Sack by Chris from Made by Chrissie D using Happy Holidays Snowmen
Tuesday: Tree Skirt by Debby from Debby Kratovil Quilts using Homespun Holiday
Wednesday: Throw Pillow by Kelly from My Quilt Infatuation using Ornamental Splendor
Thursday: Wonky Star Placemats by Kristen from KD Quilts using Santa's Here
Friday: Christmas Card Organizer by Melissa from My Fabric Relish using Frosty Forest
MondayTable Runner and Napkins by Nikki from The Girl Who Quilts using Frosty Forest
TuesdayWintry Wall Banner by Wendy from Ivory Spring using Shades of Winter
Love It? Share It! Facebook Twitter Google Pinterest Email

Tuesday, July 21, 2015

Christmas in July: Tree Skirt

Welcome to Benartex's Christmas in July Blog Hop here at Sew in Love with Fabric! We'll be sharing holiday-themed tutorials this week and beyond, so be sure to stop by each day to see a new tutorial and have a chance to win some fabric to get your own holiday sewing started!


Today Debby from Debby Kratovil Quilts is here sharing a tree skirt she made using the Homespun Holiday collection by Bristol Bay Studios (with a few blenders mixed in!). Check out Debby's tutorial and then head over to her blog to find out how you can win a fat quarter bundle of Homespun Holiday.


Here's Debby!

I love all things traditional about Christmas. I've been married for 37 years and have been gathering holiday trimmings, decorations, textiles, lights, etc all that time. Throw in 3 daughters and now 3 grandchildren, you know I'm swimming in all things Christmas. I have a little secret: in my last move or two I've misplaced my tree skirt. Gone!

I chose the Homespun Holiday Collection from Benartex for the purpose of making a traditional tree skirt using one of my new templates. It's a super-sized Dresden Plate ruler (I call it the "Vortex") which is multi-sized. You won't need my ruler to make our tree skirt (I offer the pdf of the template at the end of this post), so don't worry.

Well, let me first show you the fabrics, right? I didn't ask for all of them and I also asked for some of the Burlap Fabrics (blenders) which will work with Homespun Holiday.
Homespun Holiday Collection by Benartex
I also pulled out a few Fossil Ferns to see if they could fill in should I need them:
Fossil Ferns, still faithful after 15+ years
I was working with fat quarters, so this is perfect for those wonderful bundles you buy with no idea for a project in mind!

From each of the prints and the blenders I cut the following:
-- One 3-1/2" x 22" strip
-- One 9-1/2" x 22" strip
Pair one 3-1/2" strip and one 9-1/2" strip as you wish, taking care to have good contrast. Don't agonize over this step or get all "matchey-matchey." Sew with 1/4" seam. Press. Make 10 sets.


Ten sets of narrow and wide strips sewn and pressed
Now it's time to cut. Notice my template can flip-flop back and forth with no waste. Cut two wedges from each two-strip set. 
Cut two wedges from each set
Cut 10 wedges with the short strip at the widest end:


10 wedges with narrow strip unit at the widest
 Cut 10 wedges with the wide strip at the widest end of the shape:
10 wedges with the wide strip at the widest end of the shape
Now to sew and join the wedges in groups of fives. Notice that two sets begin and end with the wide fabric at the narrow end of the wedge; two sets begin and end with the short fabric strip on the narrow end of the wedge. Press seams open between the wedges as shown in one section below.


Four sections with 5 wedges in each
Decide where you want the opening and leave that edge unseamed. Select fabric for your lining (I found a Benartex Christmas print from a few years ago, about a yard), place tree skirt right sides together with lining and pin in place.


Pinning to lining
Now trim around entire skirt:
Tree skirt and lining pinned
First sew the two straight sides of the opening and trim excess wedge fabric:


Sew straight sides of skirt opening
Now we sew all around the outer curved edge and turn right side out. Press well
Tree skirt with lining, turned and pressed
Time for binding that center opening. It looked too small for me and so I trimmed away 1" from the curved edge:
Trim away 1" to enlarge opening
Trimmed:
Enlarged opening
I cut BIAS binding from a wonderful stripe from last year, Season's Greetings by Benartex - just enough to surround the opening and give me a tie. I cut 2" wide strips.
Bias strips for binding
And, the final tree skirt!
Holiday Tree Skirt: 27" diameter
Here is the pattern for that wedge. Just print and transfer to template material. I suggest freezer paper. Since you will have more than enough fabric in your pieced units (from the first step), you might be inspired to make one or two more tree skirts!

Free Pattern: Tree Skirt Wedge Template

Thanks Debby!

Head over to Debby's blog to find out how you can win a fat quarter bundle of Homespun Holiday to play with!

And be sure to stop back each day of our blog hop for a different Christmas in July tutorial featuring our holiday fabrics!

Here's our schedule:

Monday: Santa Sack by Chris from Made by Chrissie D using Happy Holidays Snowmen
Tuesday: Tree Skirt by Debby from Debby Kratovil Quilts using Homespun Holiday
Wednesday: Throw Pillow by Kelly from My Quilt Infatuation using Ornamental Splendor
Thursday: Wonky Star Placemats by Kristen from KD Quilts using Santa's Here
Friday: Christmas Card Organizer by Melissa from My Fabric Relish using Frosty Forest
MondayTable Runner and Napkins by Nikki from The Girl Who Quilts using Frosty Forest
TuesdayWintry Wall Banner by Wendy from Ivory Spring using Shades of Winter
Love It? Share It! Facebook Twitter Google Pinterest Email

Monday, July 20, 2015

Christmas in July: Santa Sack


Welcome to Benartex's Christmas in July Blog Hop here at Sew in Love with Fabric! We'll be sharing holiday-themed tutorials this week and beyond, so be sure to stop by each day to see a new tutorial and have a chance to win some fabric to get your own holiday sewing started!

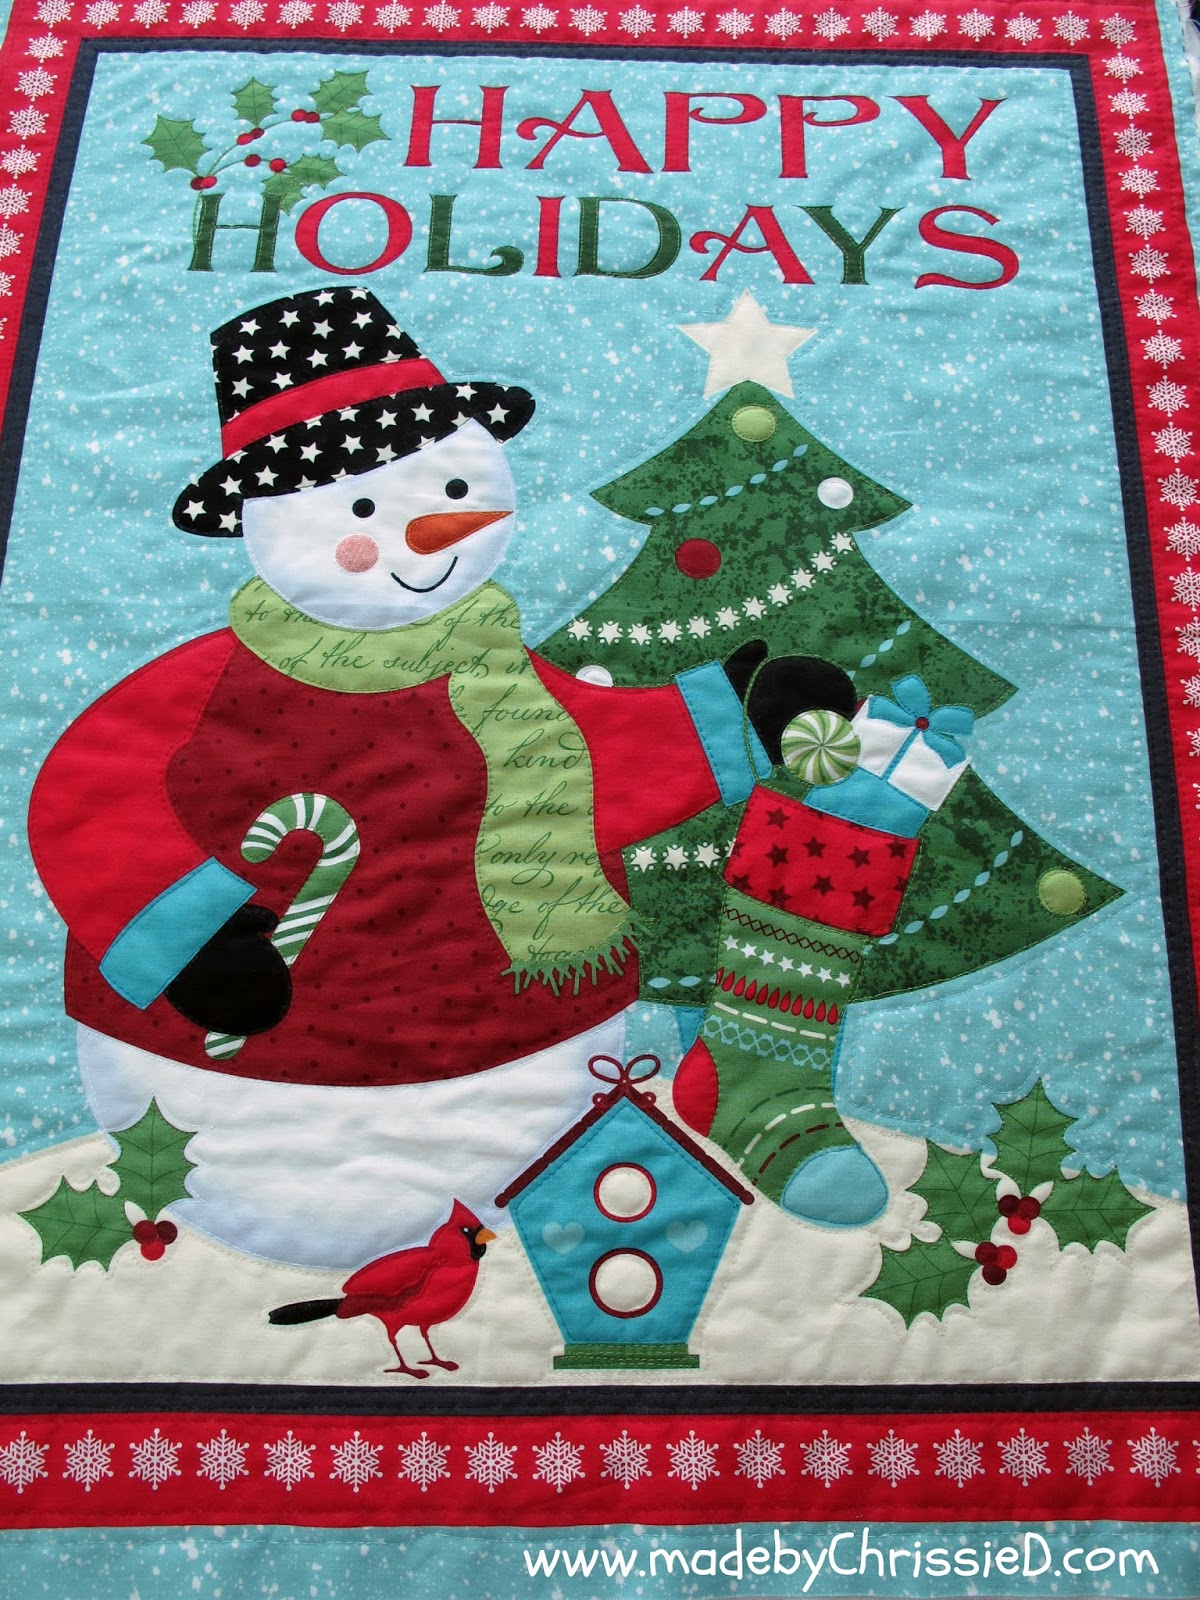
Today Chris from Made by Chrissie D is here using Michele D'Amore's Happy Holidays Snowmen panel to make a Santa Sack. The panel from this collection is perfect for this larger-than-a-stocking Christmas tradition! Check out Chris' tutorial and then head over to her blog to find out how you can win a fat quarter bundle of Happy Holidays Snowmen.
---
Hi I'm Chris of made by ChrissieD.  I'm a Textile Craft Artist originally from England now teaching quilting and sewing in and around Manhattan, New York. ---
---
I love to share my projects and tutorials on my made by ChrissieD blog and various social media sites including FacebookInstagramPinterestTwitter and Flickr
--- ---
Can you believe we're already heading towards the end of July?  Have you started thinking about Christmas gifts yet?  If you celebrate Christmas I wonder what Santa leaves your family's presents in?  In England we have Christmas stockings but we also have Santa sacks.  Over the years these have been filled with treasured gifts my children still cherish or have long since cast aside, though they're all adults now still our Santa sacks continue to be a huge part of our family's Christmas traditions. ---

Today I'm sharing my Santa sack tutorial with you here on the Benartex Sew in Love {with Fabric} blog as part of the Christmas in July blog hop so you can make them for your family and start your own Santa sack tradition full of happy memories. There are lots of steps but don't be put off, it's very easy and fast too, depending how much quilting/embellishing you choose to do.
--- ---
Santa Sack Tute 
finished size approx 31-1/2" tall and 22-3/4" wide ---

Tools:
cutting mat / rotary cutter / small scissors or clippers
cutting ruler / pins / Clover Clips (optional) / basting spray or pins
---
Materials:
2 x Happy Holidays Snowmen panels - Light Teal 1/2 yard border fabric - Happy Holidays Coordinates - Texture Stripe Red 1-1/3 yard non-directional lining fabric - Happy Holidays Ivy Leaves - Light Teal NB: if you're using a directional lining fabric you'll need min 1-2/3 yards
neutral thread for piecing 1-1/2 yards batting matching and contrasting threads for quilting and decorative stitching embellishments of your choice (optional)
--- ---
Here's how the fabric looks.
---
---
TIP: As we're using three different fabrics for this project if you water spray/steam your fabrics when pressing it's best to water spray and press the fabric before cutting to avoid later piecing problems caused by possible shrinkage.  Ask me how I know - the panels didn't shrink but the red stripe did and I had to sew an extra piece to each of four borders!!!
---
When they arrived my panels were still attached.
---
---
There's sometimes a divide line indicated between panels - if not create your own line half way between the two panel designs.  Open fabric out fully to cut and separate.  This panel has a cut line marked for us. 
---
---
The cut line is pretty much 1/2" betwen the two panels.
---
---
Once panels are separated cut away Christmas scene squares. Cut 1/2" below top set of squares and 1/2" above bottom set of squares as shown in pic below. ---
---
TIP: Wondering what to do with those four left over strips of square Christmas scenes?  No problem, I have a tute planned for next week here on my blog showing how to turn these sixteen squares into four sets of four drink coasters - perfect teacher Christmas gifts.  
There's absolutely no wastage from these two panels!
---
---
Measure your cut down panel - mine measured approx 30" x 23-1/2" 
---
---
From border fabric cut (4) border pieces 6-1/2" x 23-1/2" (check panel width - long border measurement needs to be same as that).  
---
If using directional fabric take note of direction you want each piece on inside and outside of sack and think how this top edge will look finished when folded down.
---
---
From lining fabric cut (2) pieces exactly same size as panel (30" x 23-1/2"). For directional lining cut two panels length wise (30" + 30") down length of fabric (this requires exactly 1-2/3 yard length). For non-directional lining cut two panels width ways (23-1/2" + 23-1/2") down length of fabric (this requires 1-1/3 yard length of fabric). --- TIP: I used my cut down panel as a template rather than measuring lining fabric.
---
Sew bottom edge of border to top edge of panel using a 1/4" seam.  Repeat for second panel and two lining pieces.  Remember earlier notes on using directional pieces for border and be sure to sew correct edges together.
---
Press seams open.
---
---
Sew two lining pieces right sides together together down two long sides and along outer 1/3 edges of bottom - leave top edge open to form top of lining. --- --- 
Take special care to line up seams where border sections join lining pieces. Press seams open.
---
--- Cut two pieces of batting approx 1" larger than panel with attached border. TIP: Use your panel/border as a template. ---
---
Place panel on top of batting, peel back half of panel and spray with basting spray.
---
---
Place panel back smoothly on batting - ensure pressed open seam lies flat against batting.
---
--- Repeat for other half of panel/batting. Then baste second panel to other batting piece. You can baste with pins if you prefer. ---
--- Using threads of your choice machine, free motion or hand quilt both of your panels.  You can add other embellishments, buttons, ribbons, bells, etc, go mad!  You might want to applique or use fabric paint or pens to add a name, year or special message. --- I've free motion quilted my panels about 1/8" inside and outside the image detail using matching colour thread - I've detailed my thread choices here on my blog and there's more detailed photos of my quilting there too. ---
This is my finished quilted panel.
---
--- You can see what I've done better on the reverse batting side. ---
---
When all the quilting is done I like to add a decorative stitch along the bottom edge of the top border to hold the border fabric firmly in place.
---
---
--- When you've finished quilting and embellishing trim excess batting back down to original panel edges.
---
---
Place two outer panels right sides together, batting outermost, and sew around three sides using a 1/4" seam - leave top edge open. --- 
Match border seams perfectly and top edge of border too.
---
--- I prefer to use pins to get a perfect seam match, I can be more accurate with pins, but I switch to Clover Clips for other areas.  If you don't have Clover Clips you can use pins throughout. ---
---
---
Clip bottom two corners to reduce bulk when sack is turned out.
---
--- I like to snip a tiny clip towards the stitched corner too to give more flexibility to that corner - be sure not to clip any threads. ---
---
Press seams open - take care not to scorch batting.
---
---
Turn lining right side out - so main side of fabric is outermost ---
--- and place lining inside the 'inside out' sack so right sides are together and all borders are at same end. ---
--- Pin together side seams of lining and sack - these should line up perfectly.  
---
--- Once two side seams are pinned hold sack up along top open edge and sack and lining should lie flat one inside the other.  Continue to pin or Clover Clip around full top edge. ---
--- Sew around edge using a 1/4" seam. ---
--- It'll now look like this! ---
---
Put hand into opening in bottom of lining and pull quilted sack through it.
---
--- Put hand inside the two bags again and make sure all four corners are properly pushed outwards. ---
--- Keeping both bags pulled out from each other press joining seam.
---
--- If you did those start and end stitches on and off the fabric earlier see how nicely the fabric turns in for you without even trying. ---
--- Pin together open edge at bottom of lining and sew a closing straight stitch along opening at approx 1/8".
---
--- TIP: Take a moment to clean your sewing machine, under the foot plate and inside the bobbin case. Quilting with bare batting as backing doesn't damage your machine but can leave a lot of fluff down there!  You might want to clean your needle too, if you've used spray baste you can get fluff stuck on the needle too. --- 
Put lining inside sack and press two bags into correct final position. ---
--- Add a row of top stitch 1/8" around top edge of sack. ---
---
Repeat decorative stitch sewn along bottom edge of  border along top edge of sack - this gives additional hold to keep sack and lining correctly in place.
---
--- Straighten outer sack and lining and press. ---
--- Turn down border. ---
--- Admire your finished Santa Sack! ---
--- Leave by the tree ready for Santa to fill with fabulous pressies. ---
---
---
---
--- Have the very best Christmas ever!!! --- ---
I hope you've enjoyed my day on the Christmas in July Blog Hop with Benartex Sew in Love [with Fabric} and if you do use my tutorial I'd love to see what you make - Chris :D
---
--- --- ---

Thanks Chris! 

Head over to Chris' blog to find out how you can win a fat quarter bundle of Happy Holidays Snowmen to play with!


And be sure to stop back each day of our blog hop for a different Christmas in July tutorial featuring our holiday fabrics!


Here's our schedule:
Monday: Santa Sack by Chris from Made by Chrissie D using Happy Holidays Snowmen
Tuesday: Tree Skirt by Debby from Debby Kratovil Quilts using Homespun Holiday
Wednesday: Throw Pillow by Kelly from My Quilt Infatuation using Ornamental Splendor
Thursday: Wonky Star Placemats by Kristen from KD Quilts using Santa's Here
Friday: Christmas Card Organizer by Melissa from My Fabric Relish using Frosty Forest
MondayTable Runner and Napkins by Nikki from The Girl Who Quilts using Frosty Forest
TuesdayWintry Wall Banner by Wendy from Ivory Spring using Shades of Winter


Love It? Share It! Facebook Twitter Google Pinterest Email